
PRE-REQUISITES
- This plugin requires the Nop-Station Core plugin to be installed and enabled.
- An active MyParcel merchant account with an API key generated from the MyParcel Backoffice.
INSTALLATION
- Download the MyParcel Shipping Plugin from our store.
- Go to Administration → Configuration → Local plugins.
- Click Upload plugin or theme and upload the NopStation.Plugin.Shipping.MyParcel.zip file.
- In the list of plugins, locate MyParcel Shipping and click Install.
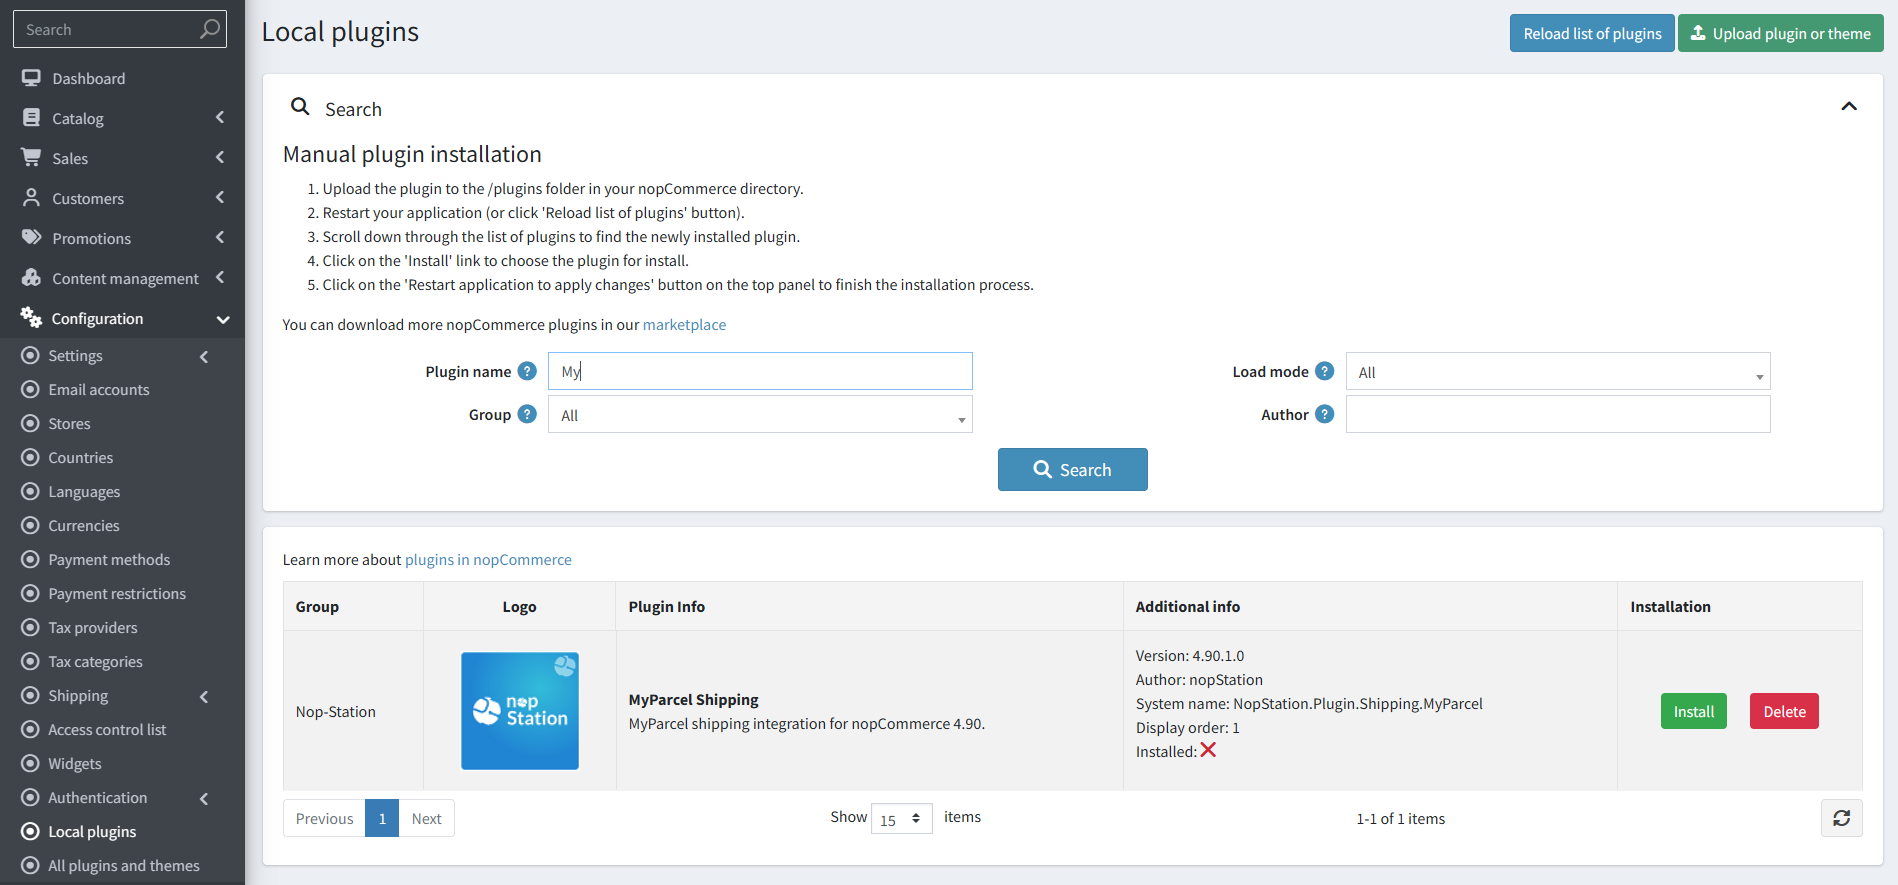
- To make the plugin functional, restart the application.
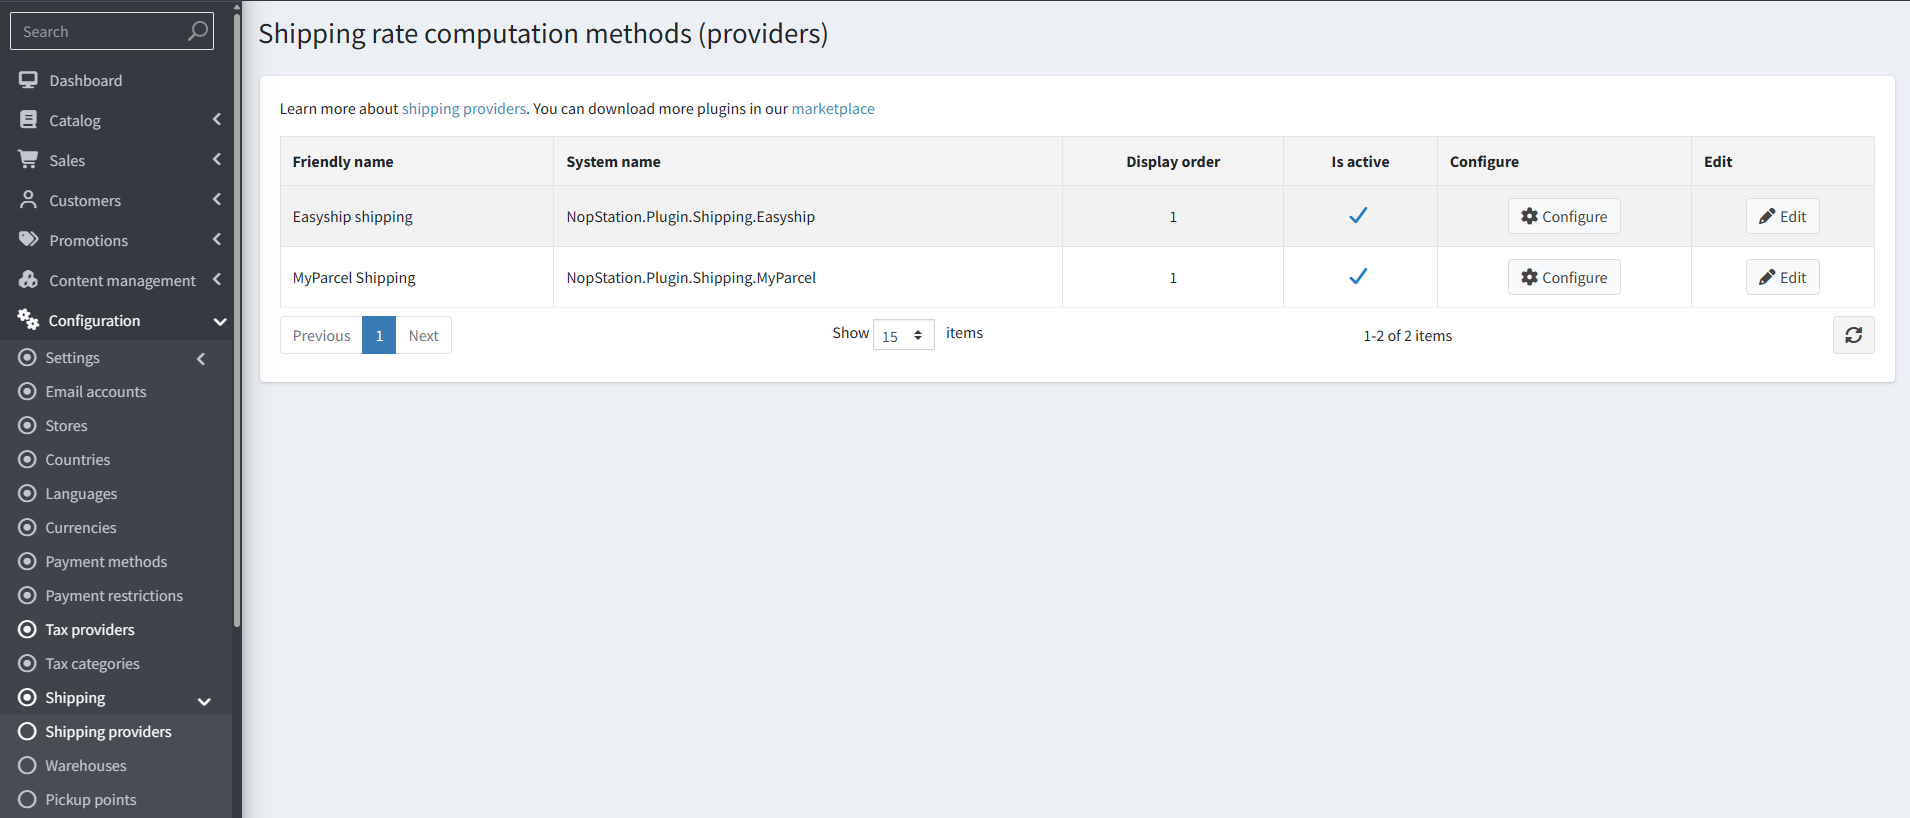
- After restarting, go to Administration → Configuration → Shipping → Shipping Providers.
- Locate MyParcel Shipping, make sure it is Active, and click Configure.
Admin Panel Operations
CONFIGURATION
- Go to Administration → Configuration → Shipping → Shipping Providers → MyParcel Shipping and click Configure to open the plugin configuration page. You can also open it from Nop Station → Plugins → MyParcel Netherlands.
The configuration page contains five sections.
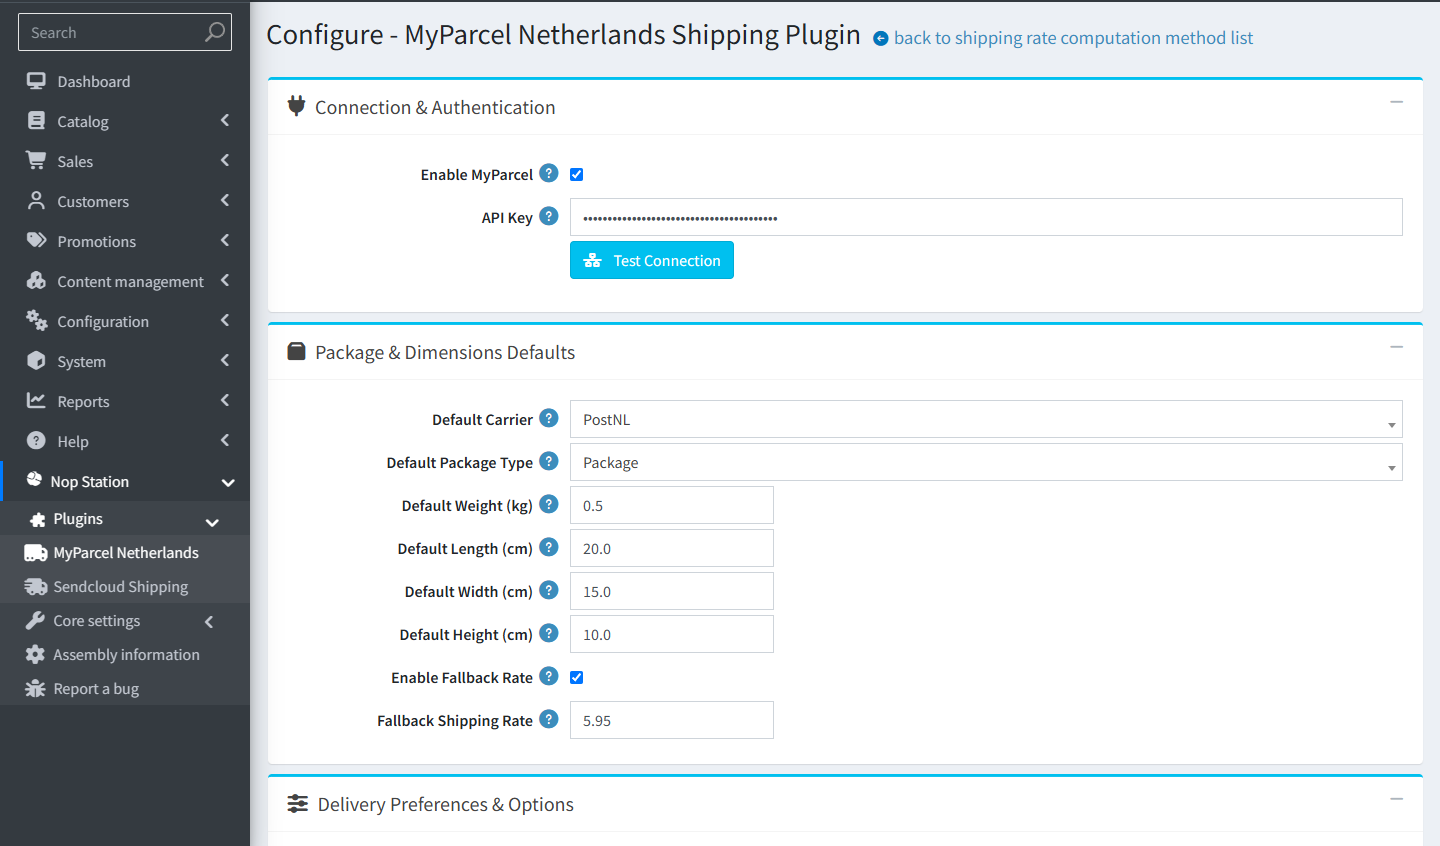
1: Connection & Authentication
- Enable MyParcel: Enable or disable the MyParcel plugin for the store.
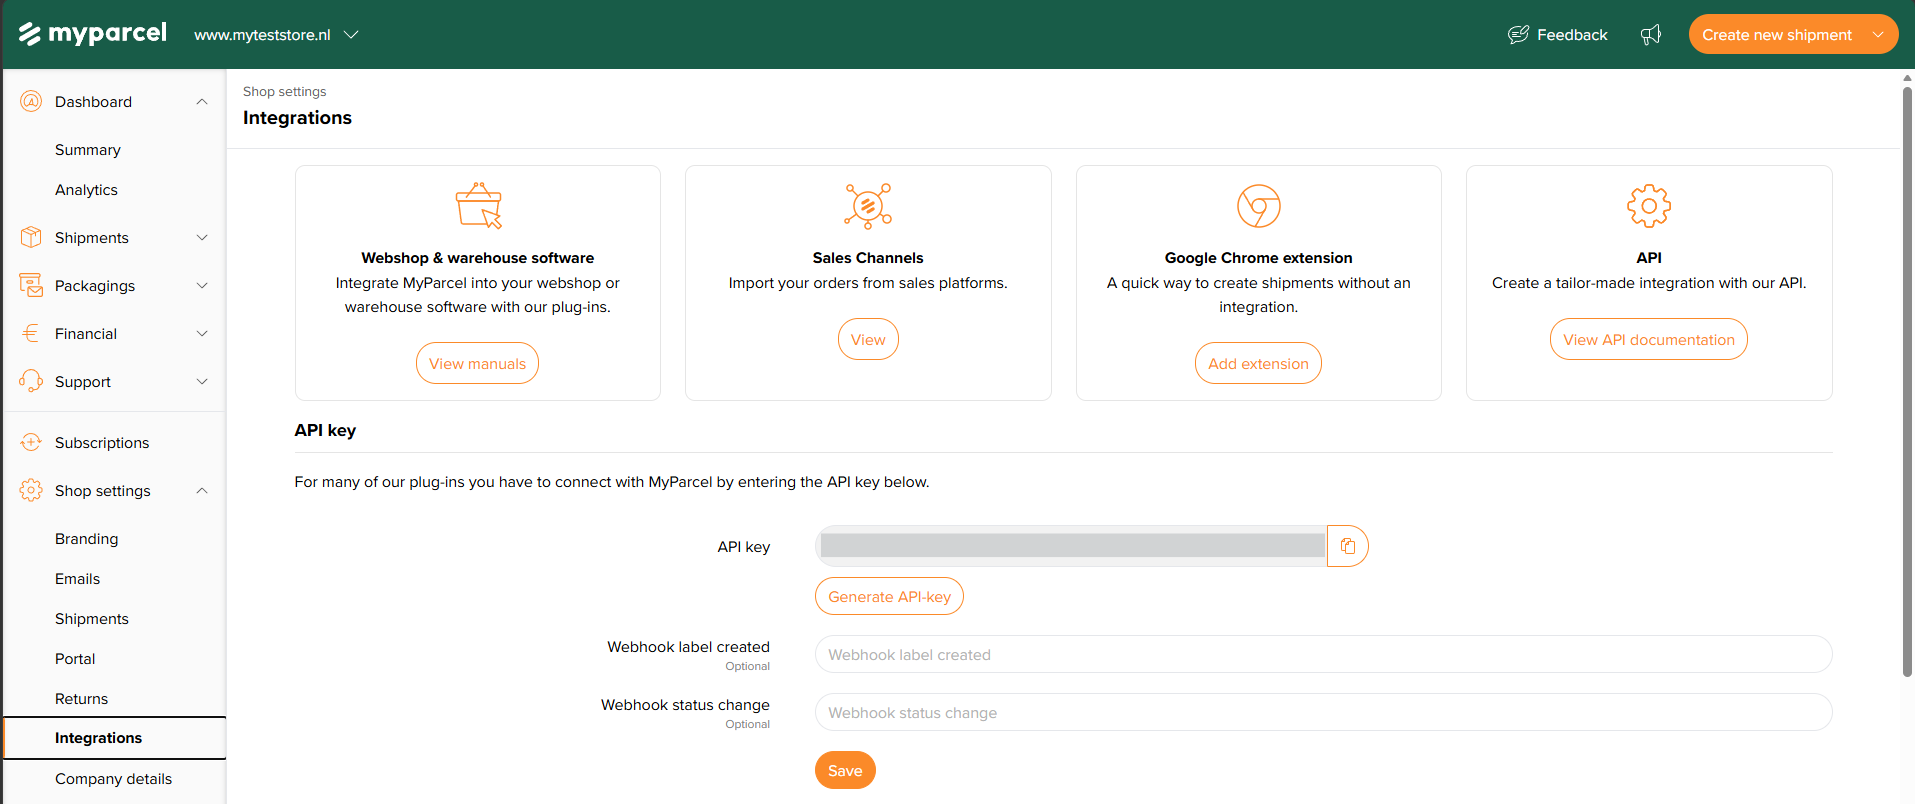
- API Key: Enter your MyParcel API key. You can generate it in your MyParcel Backoffice under Shop settings → Integrations → API key. The key is encrypted in the database and masked in the admin panel.
- Test Connection: Click Test Connection to verify the connection with the MyParcel API.
2: Package & Dimensions Defaults
- Default Carrier: Select the default delivery carrier (PostNL, DPD, DHL For You, DHL Parcel Connect, DHL Europlus).
- Default Package Type: Select Standard Package or Mailbox Package.
- Default Weight (kg): Set the default parcel weight.
- Default Length (cm): Set the default package length.
- Default Width (cm): Set the default package width.
- Default Height (cm): Set the default package height.
- Enable Fallback Rate: Enable this option to offer a fallback shipping rate when the MyParcel API is unreachable during checkout.
- Fallback Shipping Rate: Set the shipping rate returned to customers when the fallback rate is used.
3: Delivery Preferences & Options
- Enable Morning Delivery: Allow customers in qualifying Dutch postal areas to choose morning delivery.
- Enable Evening Delivery: Offer evening delivery where available.
- Enable Pickup Points: Show the interactive pickup location picker at checkout.
- Signature Required: Request a signature upon delivery.
- Deliver to Recipient Only: Restrict delivery strictly to the recipient's home address.
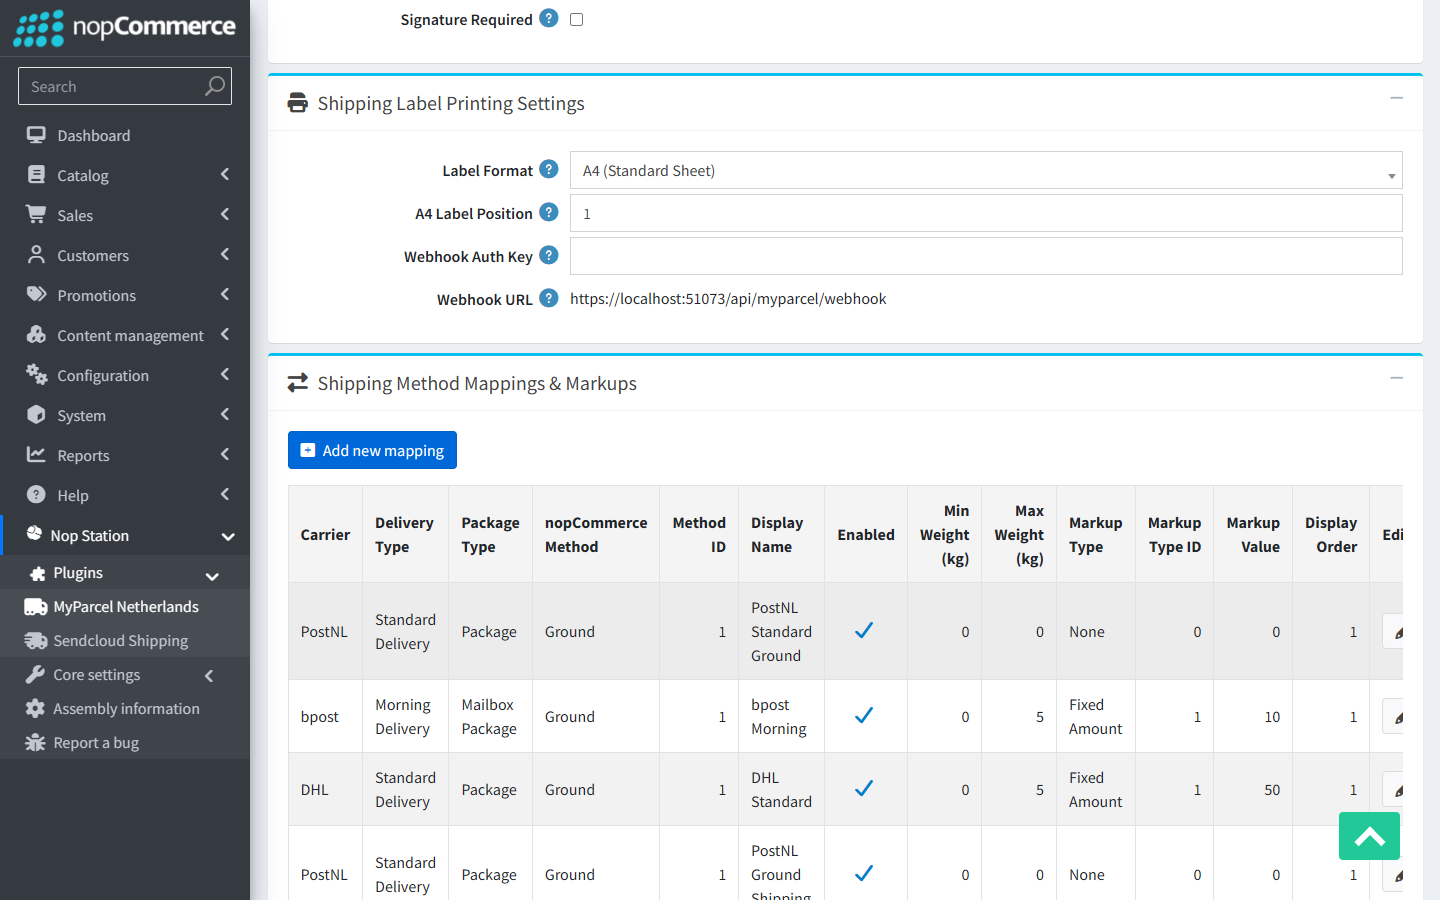
4: Shipping Label Printing Settings
- Label Format: Select the shipping label format, A4 (Standard Sheet) or A6.
- A4 Label Position: Set the position on the A4 sheet where the label is printed.
- Webhook Auth Key: Enter the key used to authenticate incoming MyParcel webhook notifications.
- Webhook URL: Displays the webhook endpoint that should be registered in the MyParcel Backoffice under Shop settings → Integrations (Webhook status change).
5: Shipping Method Mappings & Markups
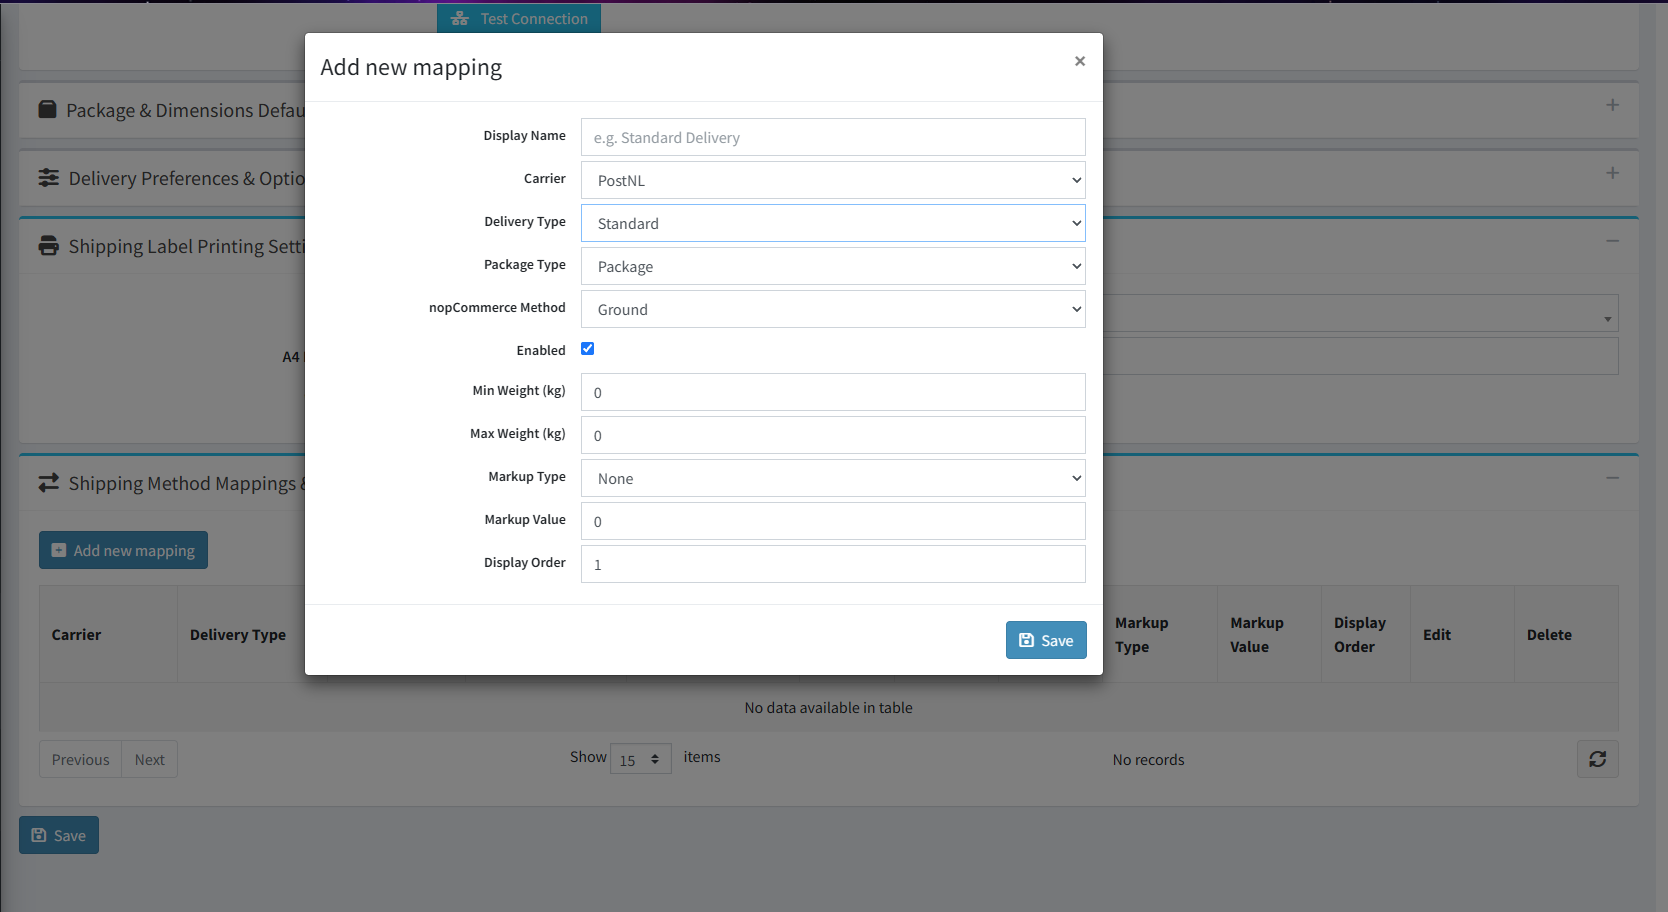
- Click Add new mapping to map a MyParcel delivery service to a nopCommerce shipping method.
- The Shipping Method Mappings & Markups grid lists all mappings, which can be edited or deleted at any time.
Add new mapping fields:
- Display Name: Set the name that will be displayed to customers during checkout.
- Carrier: Select the MyParcel carrier (e.g. PostNL, DHL, bpost).
- Delivery Type: Select the delivery type: Standard, Morning, Evening, or Pickup Point Delivery.
- Package Type: Select Package or Mailbox Package.
- nopCommerce Method: Select the nopCommerce shipping method linked to this MyParcel service.
- Enabled: Enable or disable the shipping method.
- Min / Max Weight (kg): Set the minimum and maximum cart weight allowed for the shipping method.
- Markup Type: Select whether a markup is applied as a fixed amount or a percentage.
- Markup Value: Enter the markup amount or percentage added to the MyParcel delivery rate.
- Display Order: Set the order in which the shipping method appears during checkout.
After completing the configuration, click the Save button.
HOW TO USE MYPARCEL SHIPPING
1. Select Shipping Method
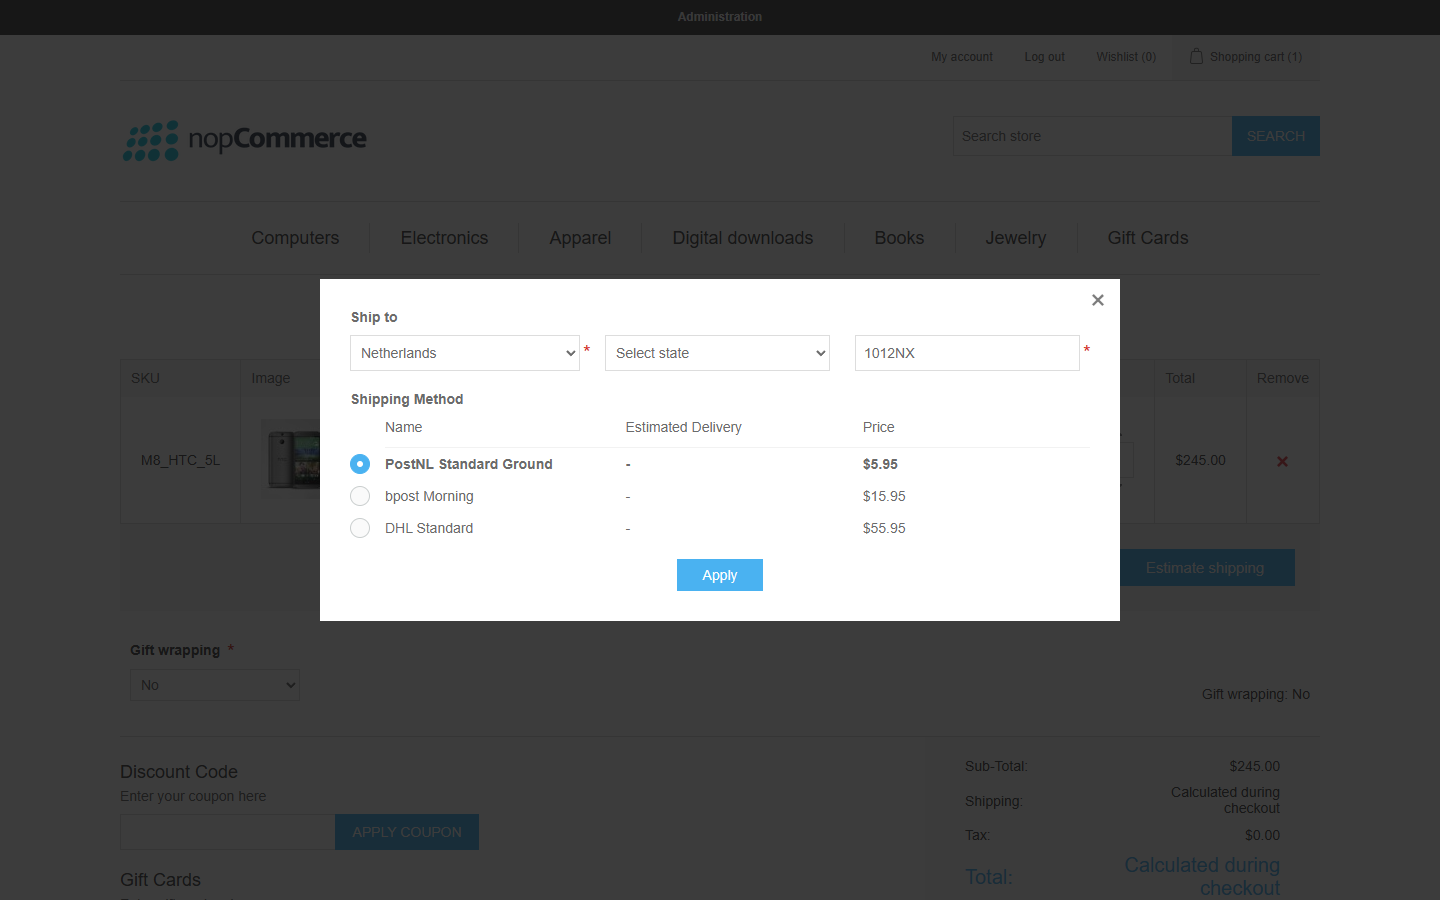
When MyParcel Shipping is enabled, the mapped shipping methods are displayed during checkout and in the cart shipping estimate.
- The plugin requests the available MyParcel delivery options for the customer's Dutch postal code and house number.
- Only enabled mappings are shown, using their display names, weight limits, and configured markup.
- If Enable Pickup Points is enabled, customers can select a pickup location during checkout.
- The customer selects a shipping method and continues with the checkout.
TRACKING & SHIPMENT
1. Create MyParcel Shipment
After an order is ready to ship:
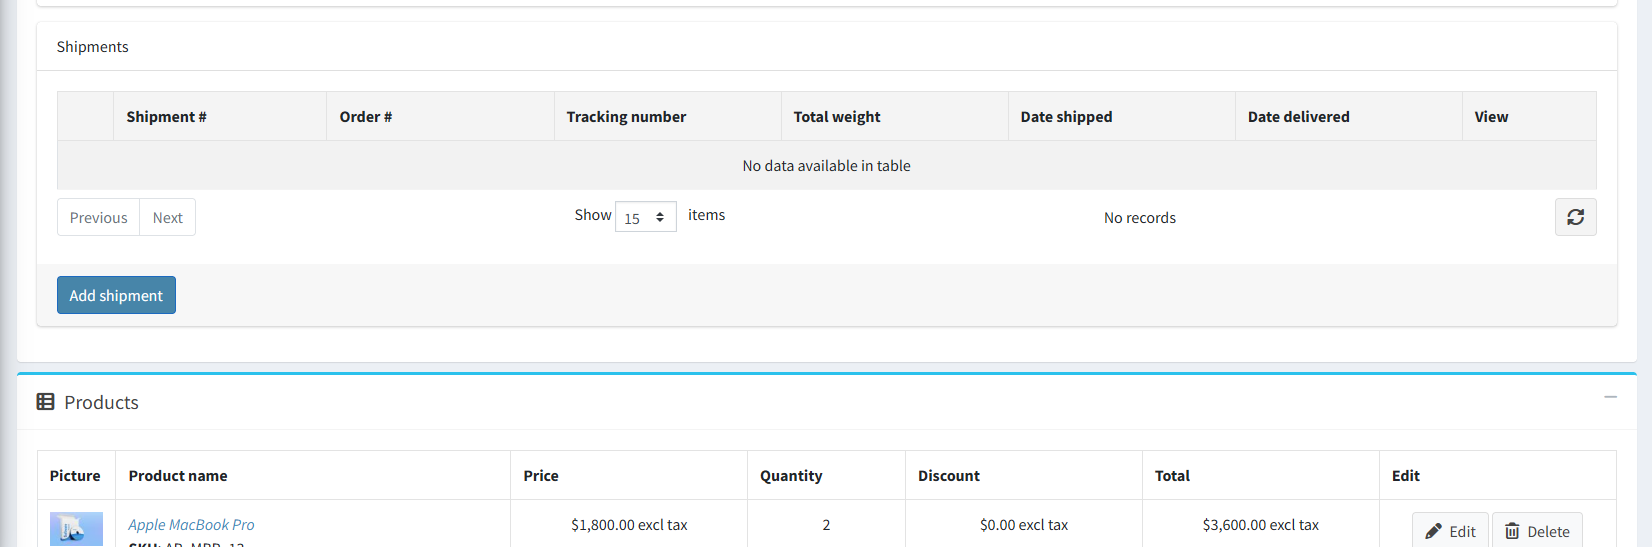
- Go to Administration → Sales → Orders and open the required order.
- In the Shipments section, click Add shipment and create the shipment.
- Open the Shipment Details page.
- Click Create MyParcel Shipment.
- The plugin registers the shipment with MyParcel, and the generated barcode and tracking link are displayed automatically.
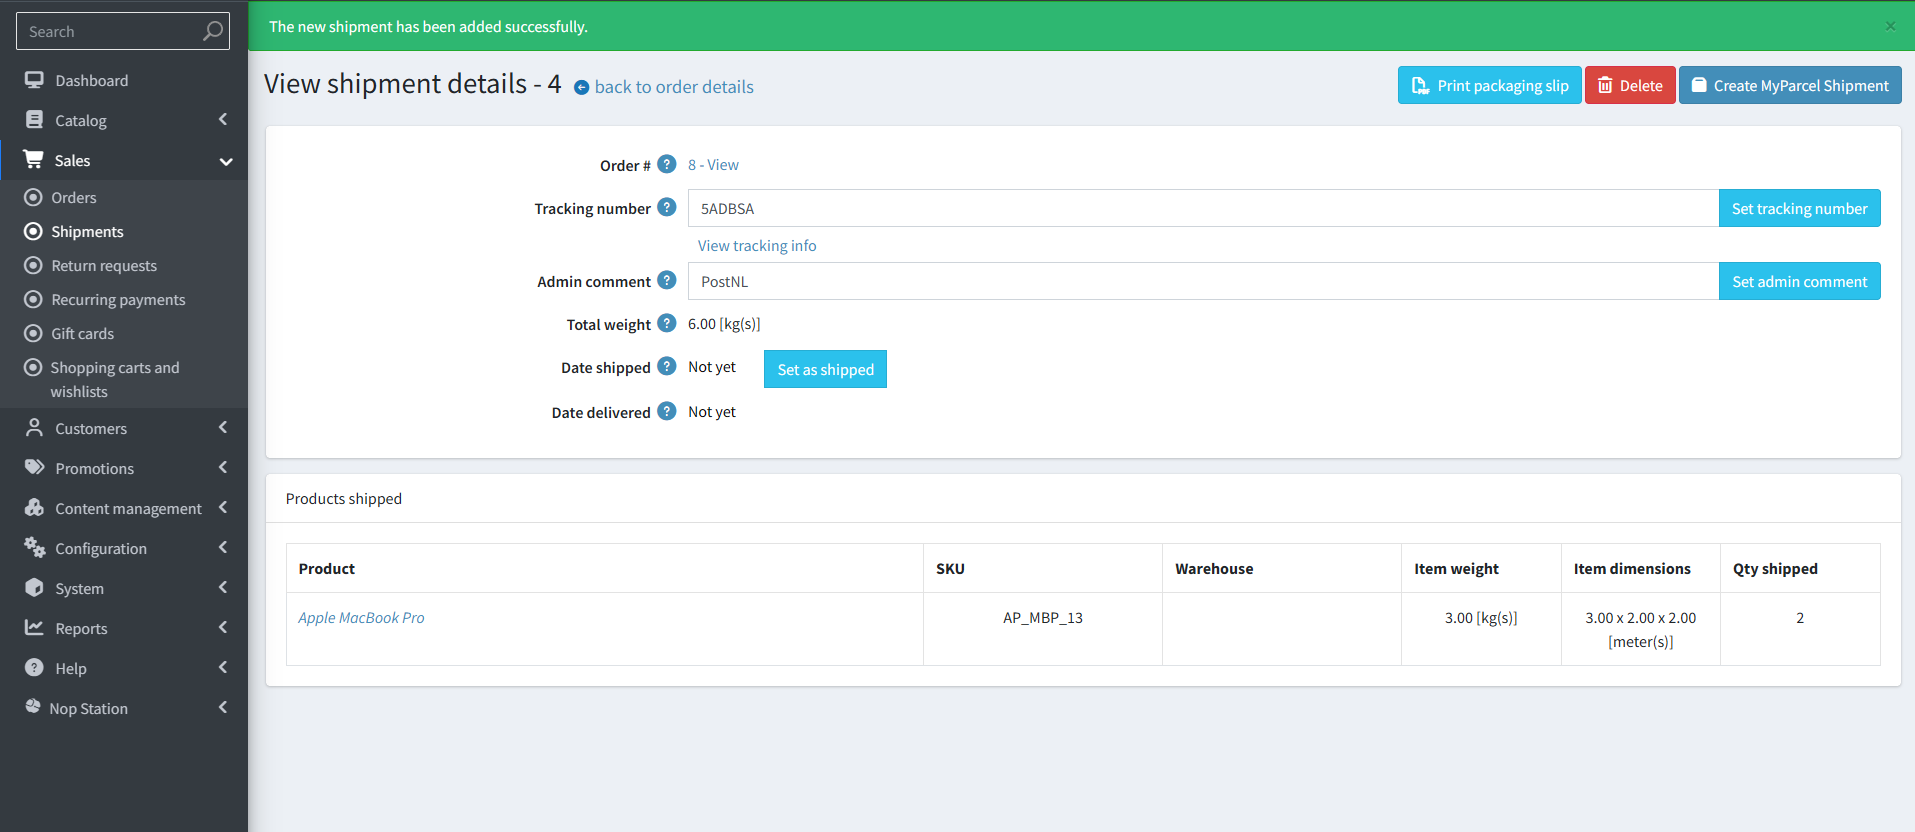
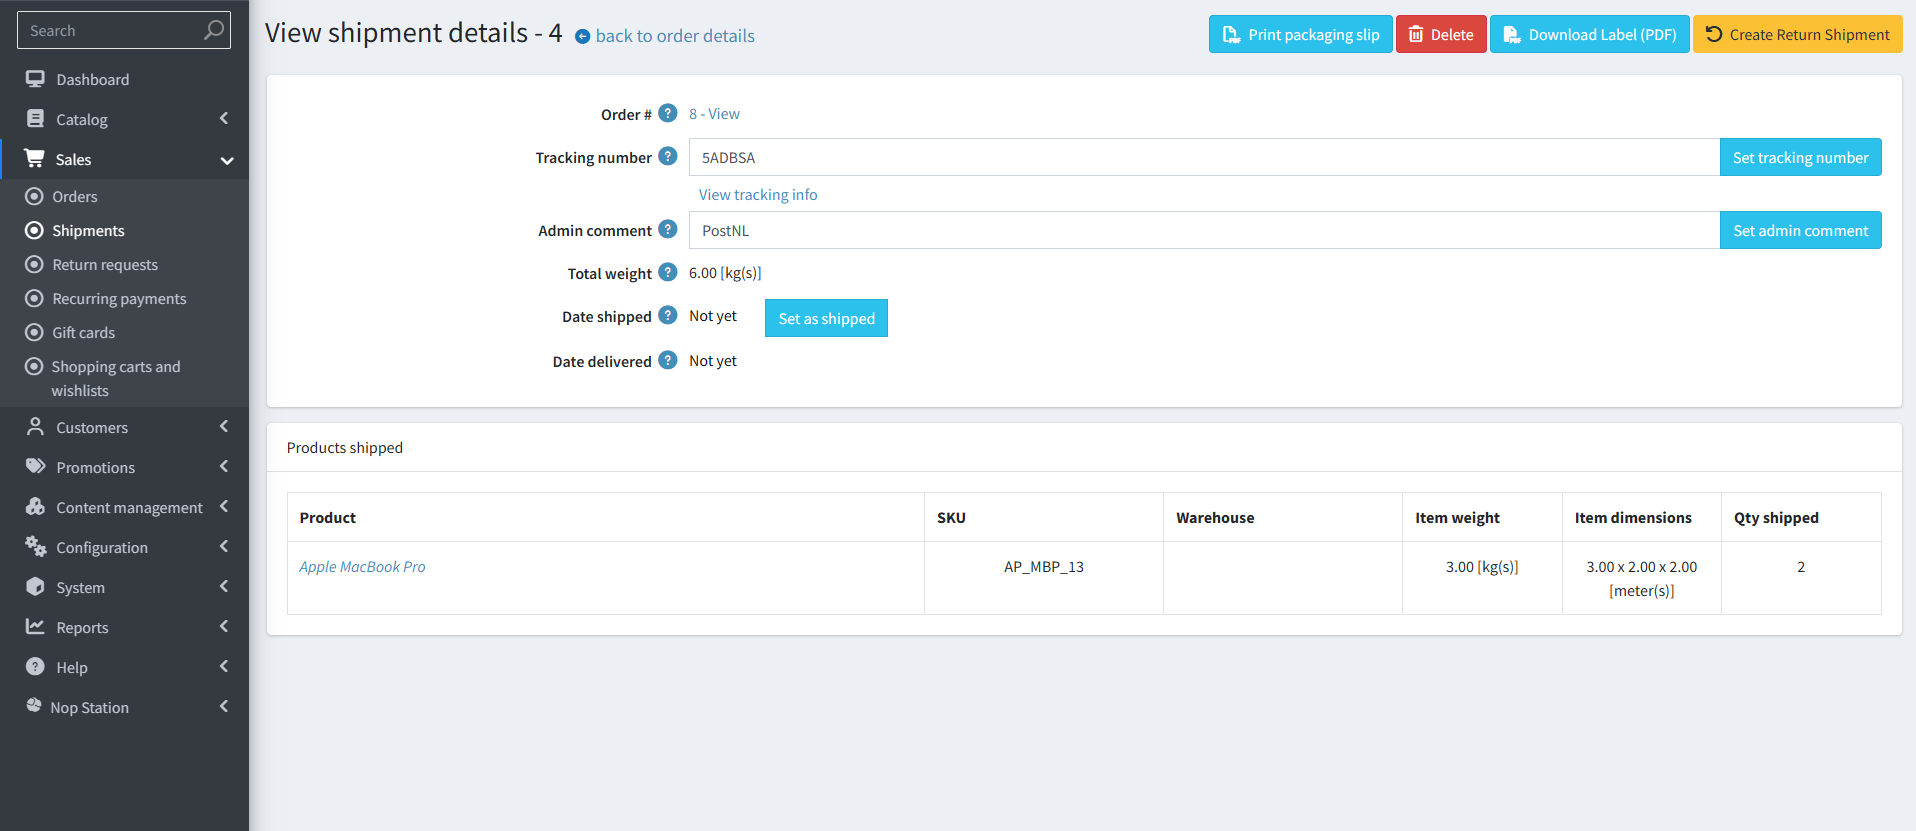
Once the MyParcel shipment is created, the Shipment Details page displays the following options:
- Download Label (PDF): Download the shipping label in A4 or A6 format.
- Create Return Shipment: Create a merchant return shipment and download the return label.
2. Parcel Tracking
- Once the barcode has been assigned, the tracking number is shown on the shipment with a tracking link.
- Click View tracking info to open the MyParcel track & trace page and view the current parcel status.
3. Inbound Webhook
MyParcel can send shipment status updates to nopCommerce through the configured webhook.
- Webhook Endpoint: https://yourstore.com/api/myparcel/webhook
- Supported Event: shipment_status_change
- Security: Incoming webhook notifications are authenticated before the shipment is updated.
- The plugin automatically updates the shipment based on the status received from MyParcel.
- Status 3 (Printed / En route): The nopCommerce shipment is marked as Shipped.
- Status 7 or 8 (Delivered): The nopCommerce shipment is marked as Delivered.