PRE-REQUISITES
- The plugin requires you to install the Nop-Station Core plugin first.
INSTALLATION
- Download the EasyCron Scheduler from our store https://nop-station.com/customer/downloadableproducts
- Go to Administration → Configuration → Local plugins
- Upload the EasyCron Scheduler zip file using the "Upload plugin or theme" button.
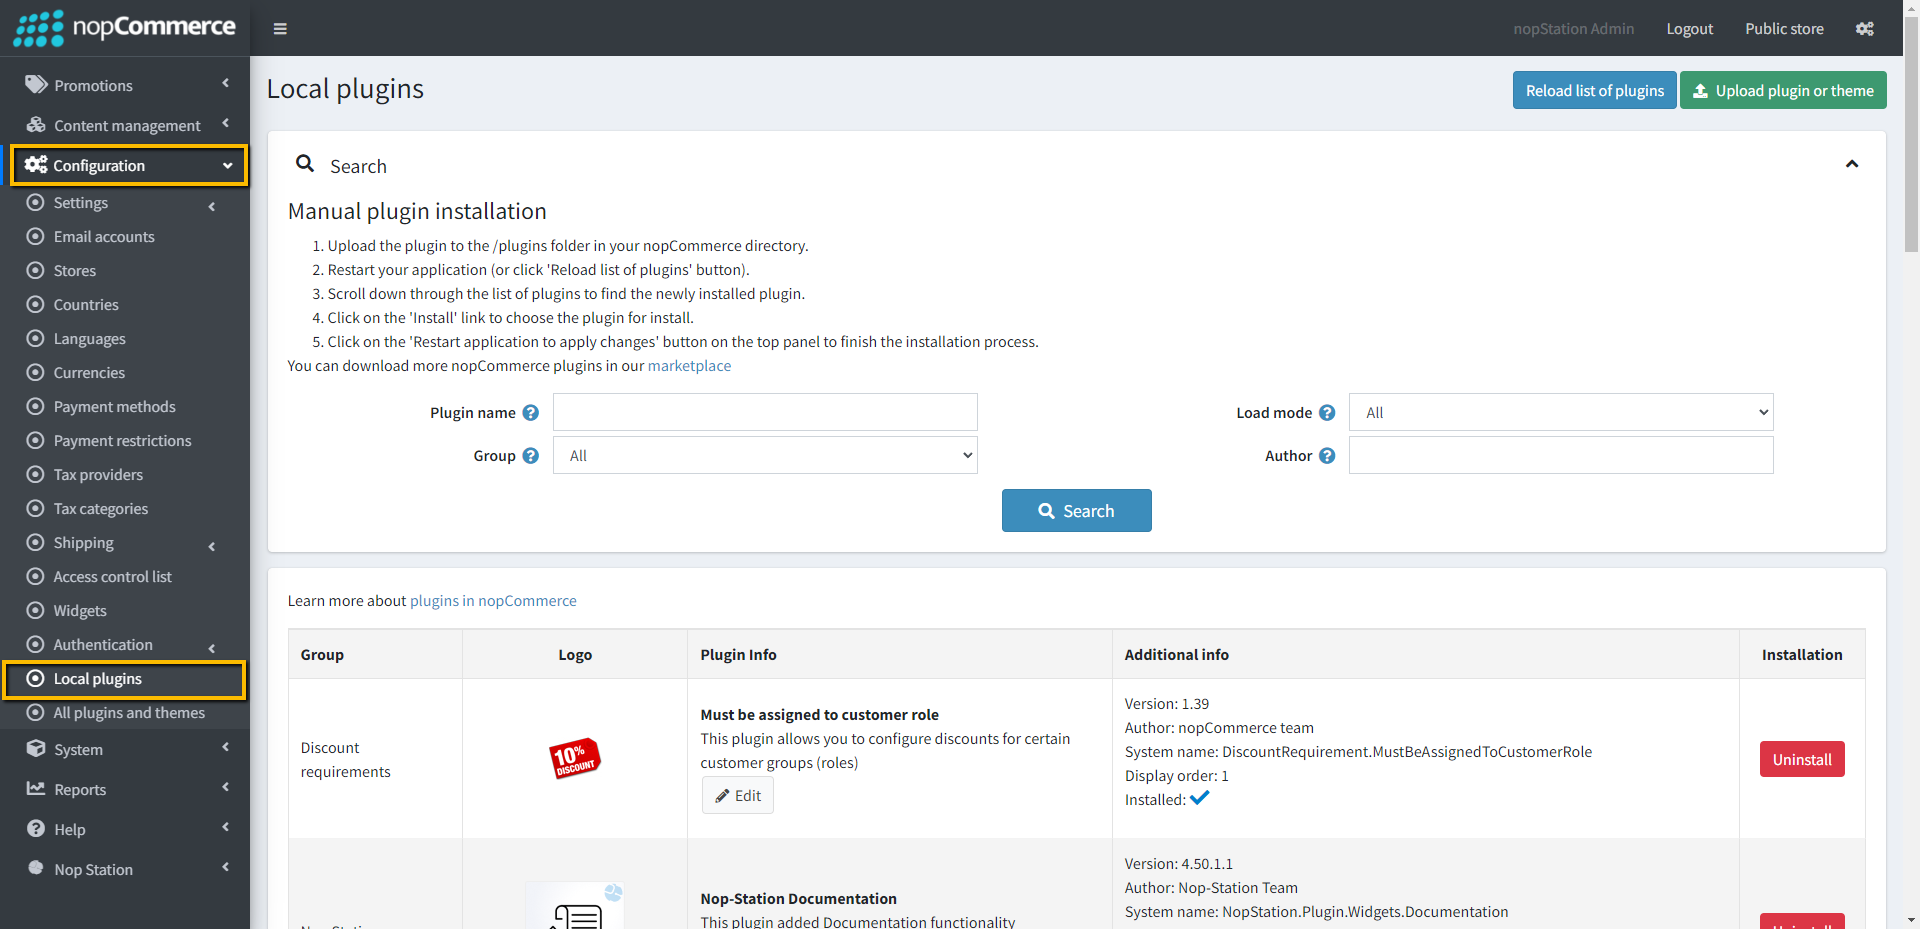
- Click on, the 'Reload list of plugins' button. The EasyCron Scheduler will appear in the plugin list.
- Install the NopStation Core plugin first and then install EasyCron Scheduler Plugin
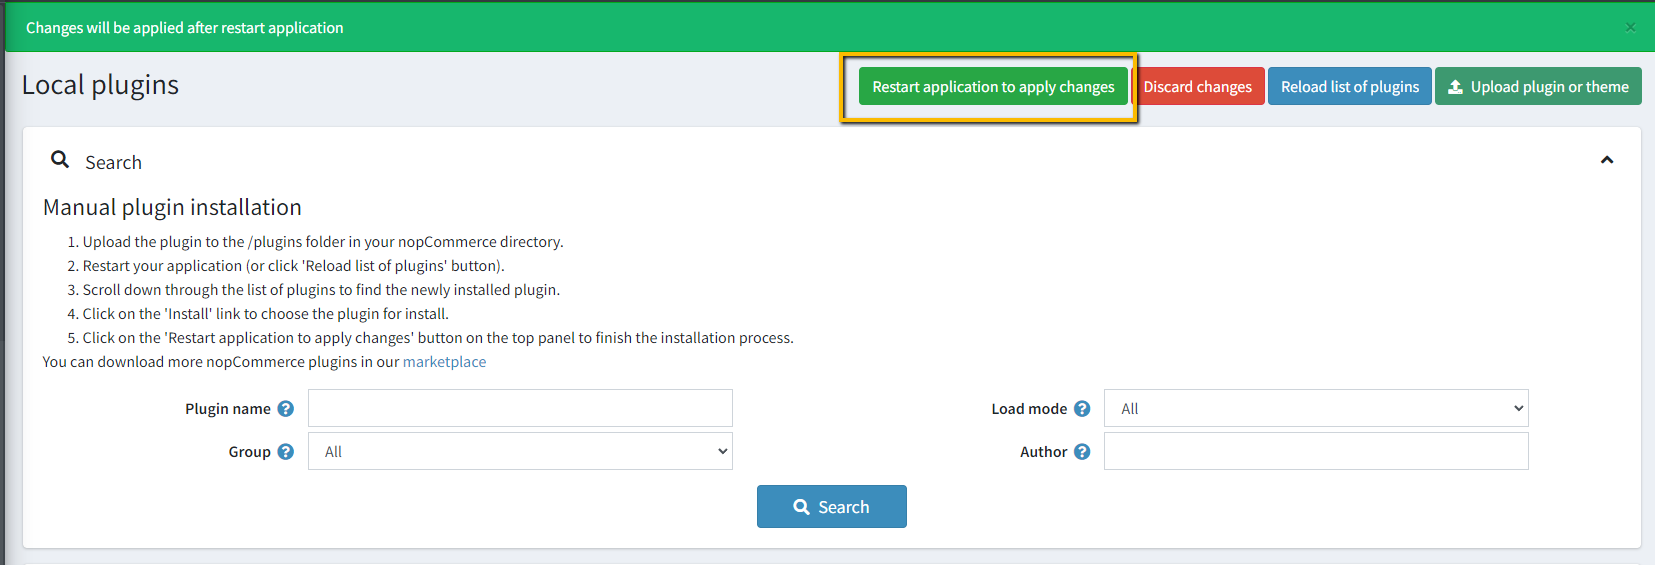
- To make the plugins functional, restart the application.
CONFIGURATION
- Go to https://www.easycron.com/ and log in with your credentials.
- Go to Settings and generate the API key for your account
- Go to Admin → NopStation → Plugins → EasyCron → Configuration at the Administration panel
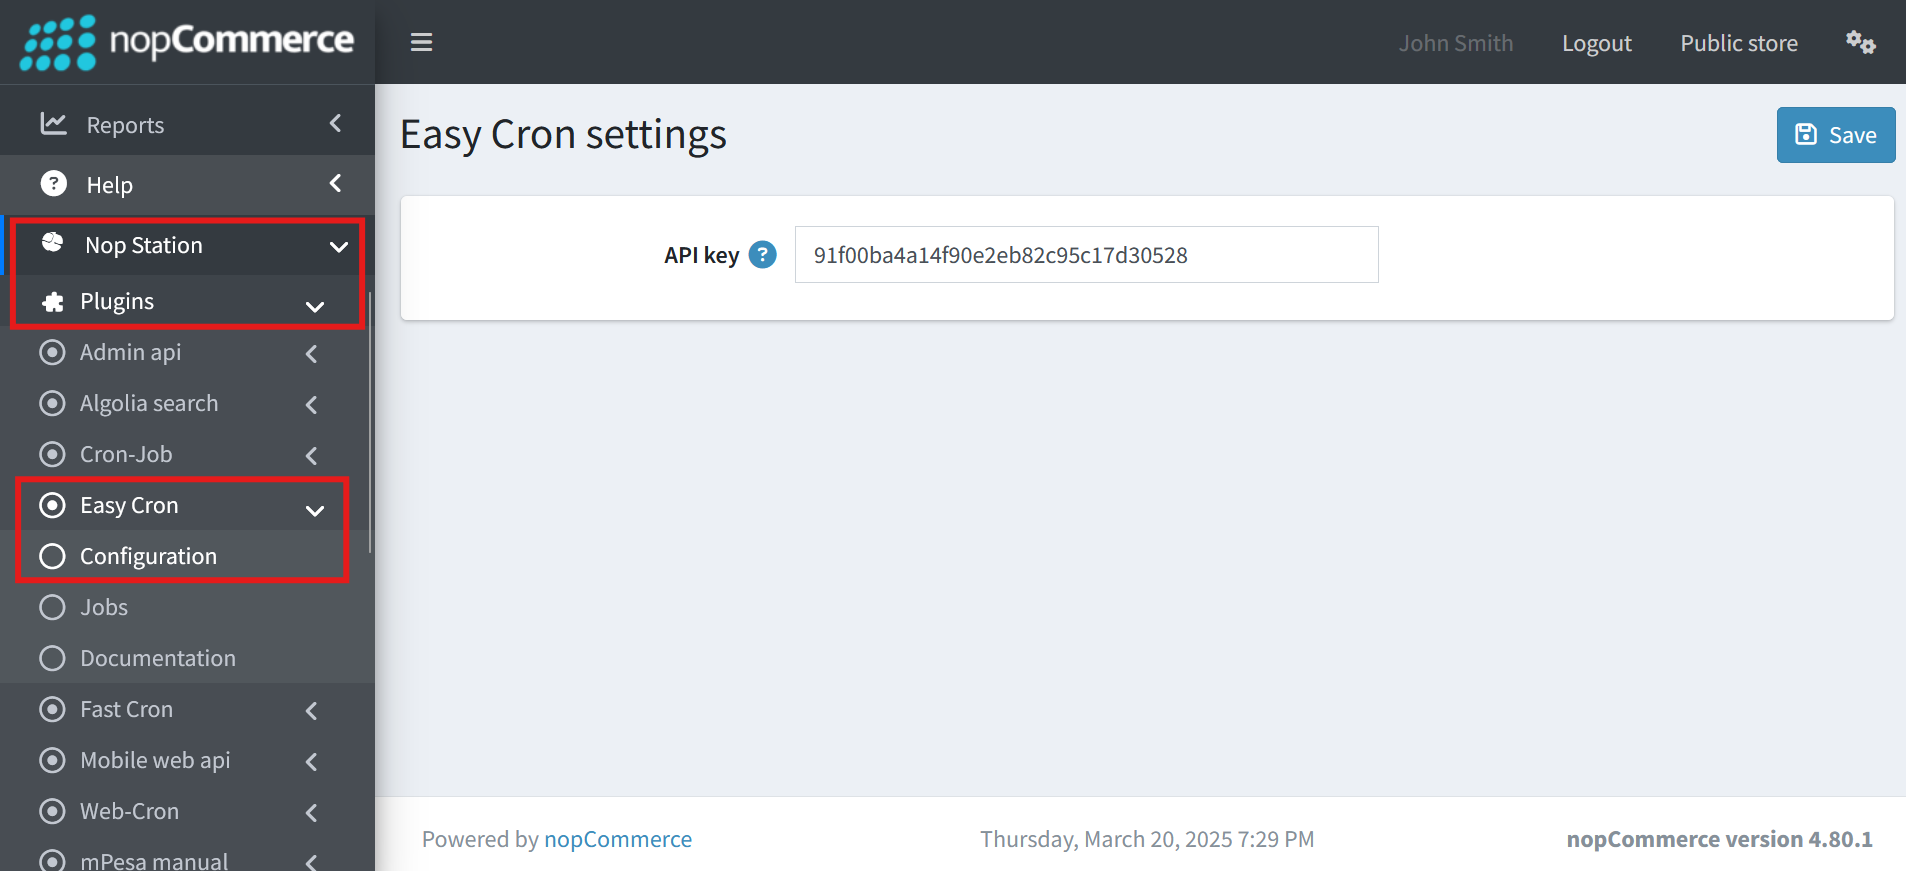
- API key: Enter the API key of the Cron job that you have collected from the settings.
- Expire task in seconds: Define expire task in seconds.
JOB LIST
- Go to Admin → NopStation → Plugins → EasyCron → Jobs at the Administration panel
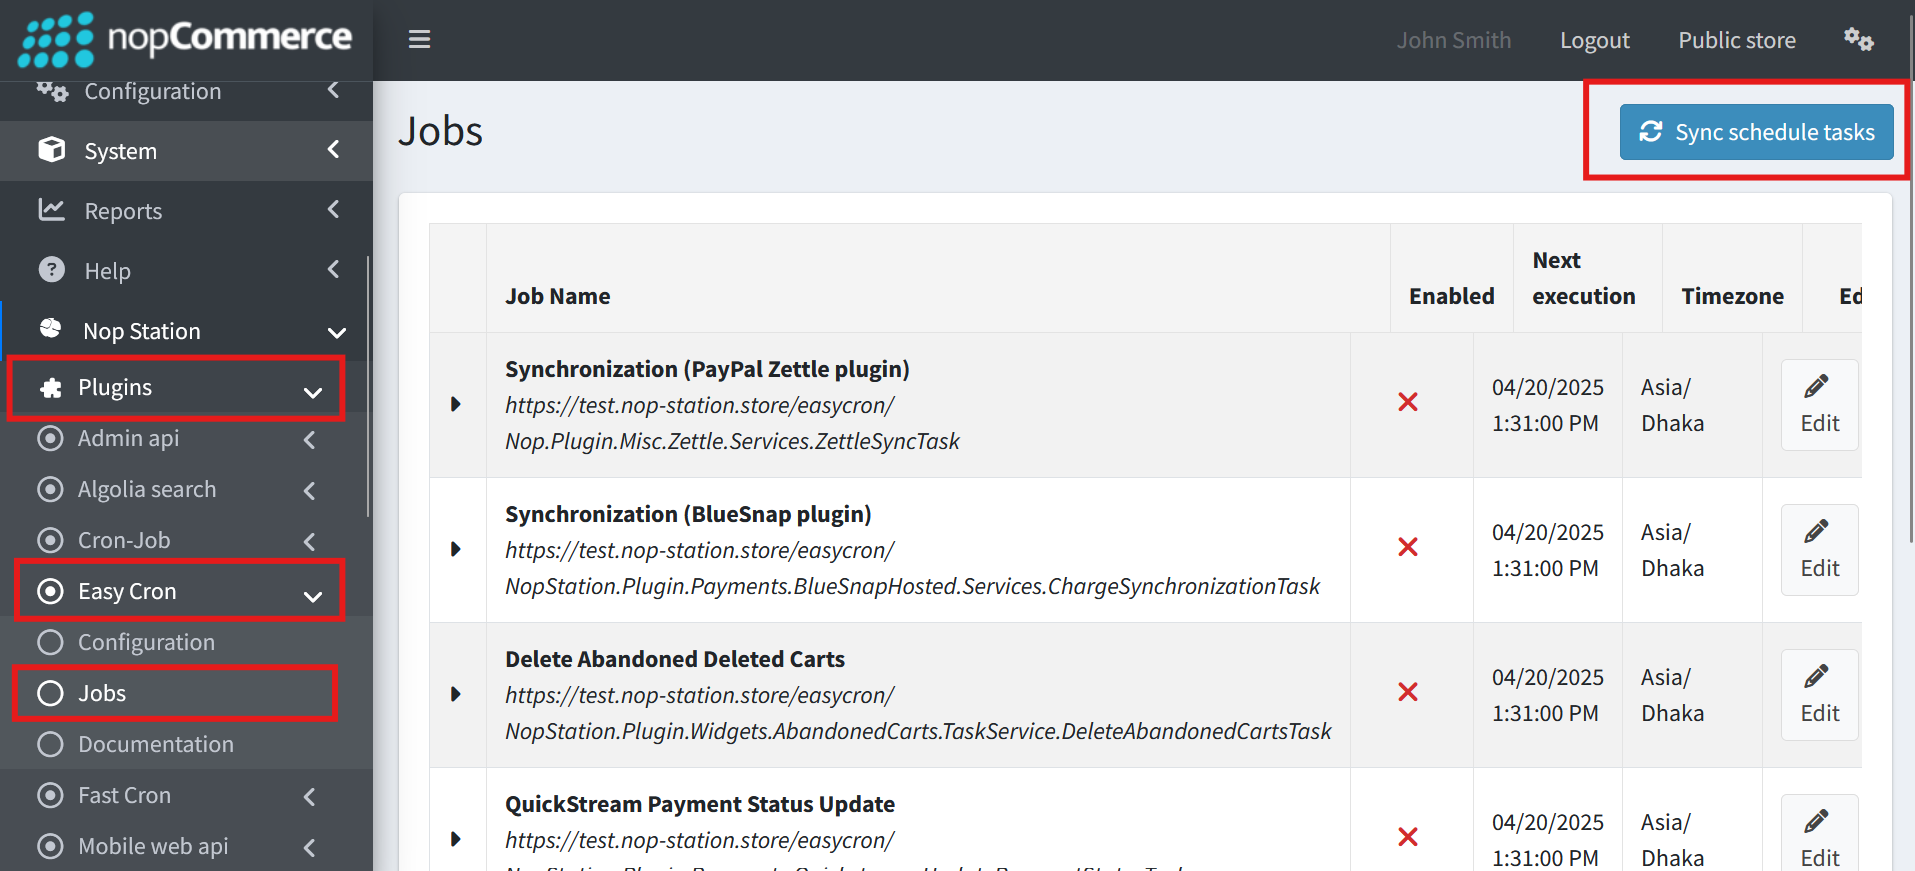
- Click "Sync Scheduled Tasks" to synchronize the current tasks from your nopCommerce store with the cron-job.org platform. Depending on your subscription plan, you may sync multiple times to ensure all tasks are synchronized within a specific interval.
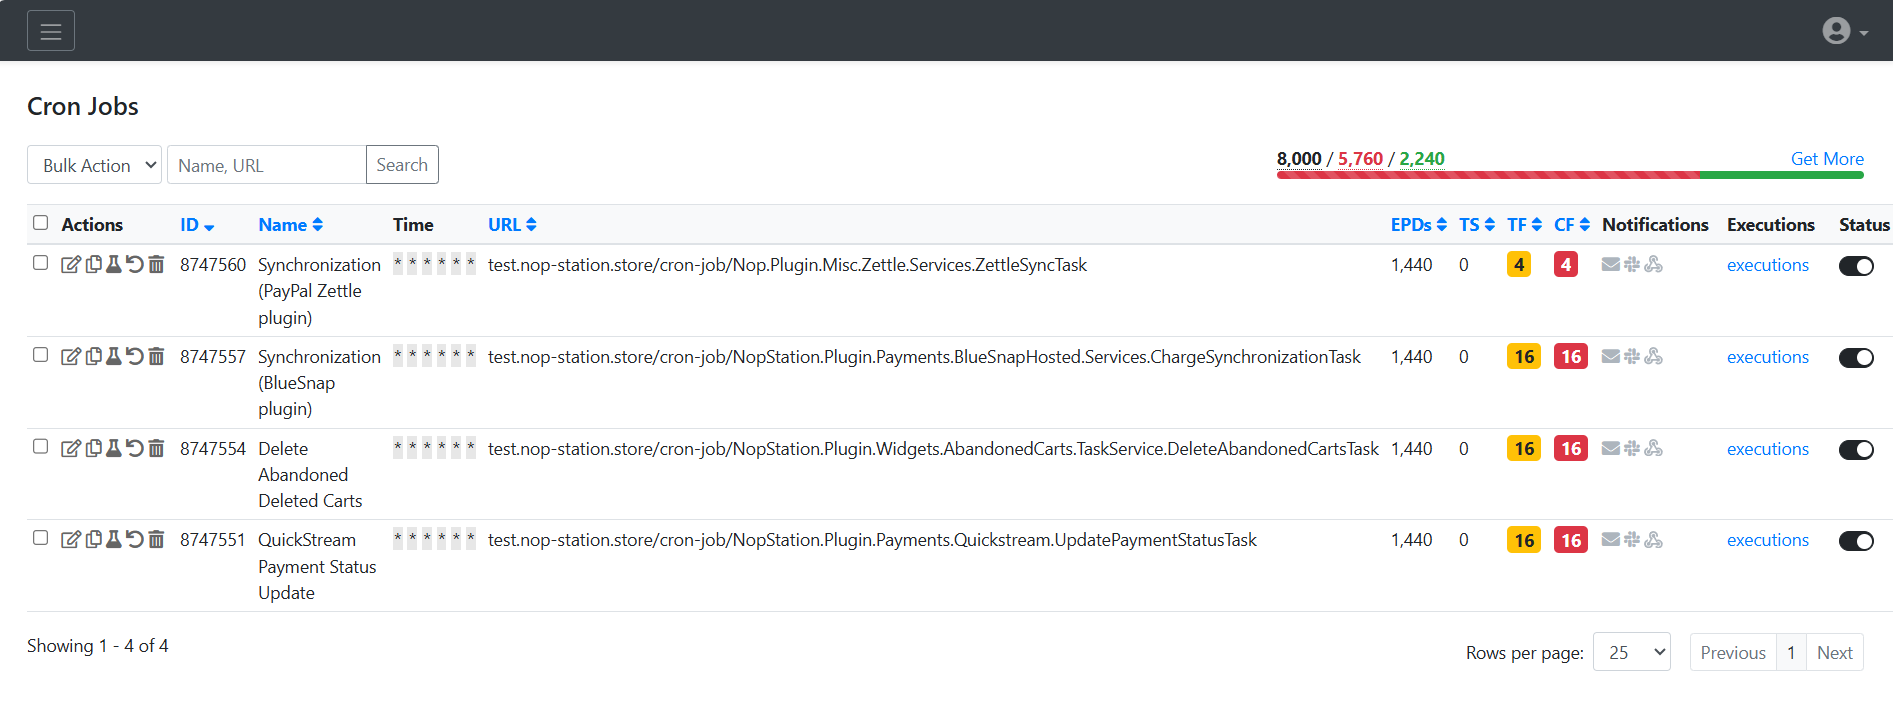
- Here you will find all the store's scheduled tasks.
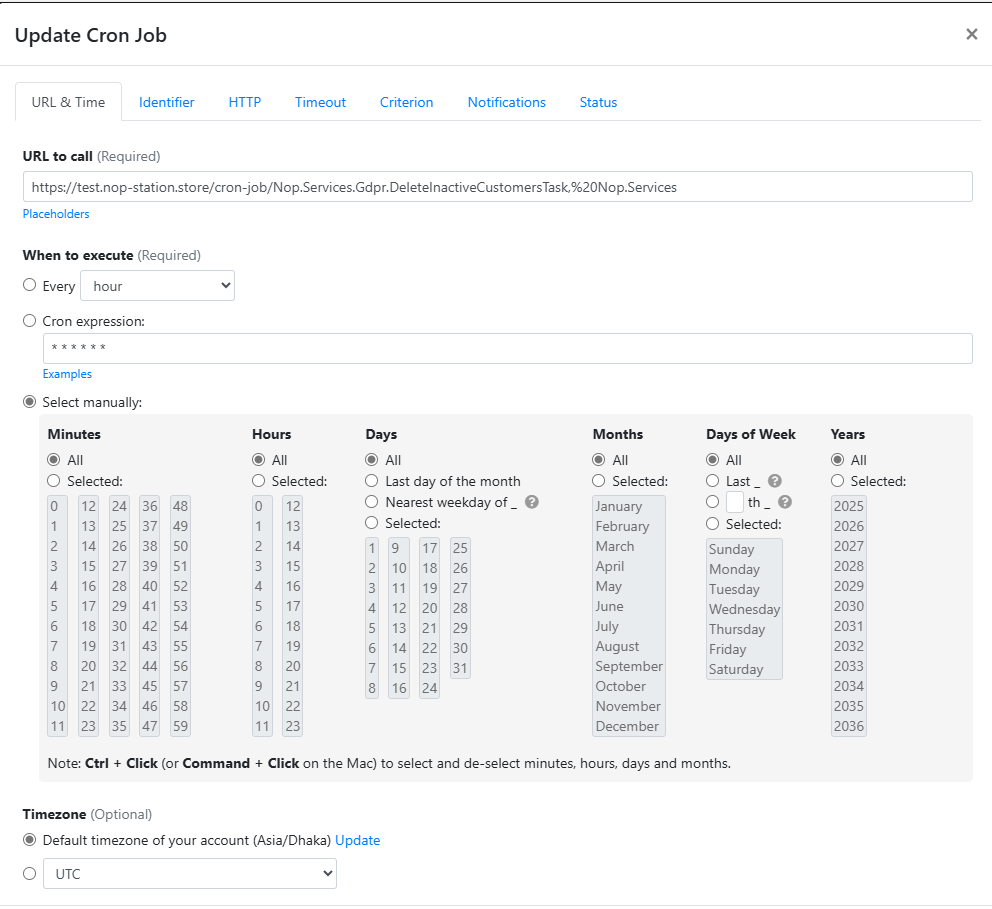
- Select an individual task and click to configure it from the easycron.com dashboard.