
PRE-REQUISITES
- The NopStation Core plugin must be installed and enabled.
- The NopStation Quartz Scheduler plugin must be installed and enabled.
- Ask your Business Central administrator or IT partner for the tenant, environment, company, and application credentials required for the connection.
INSTALLATION
- Download the Nop-Station Business Central Connector from our store.
- Go to Administration > Configuration > Local plugins.
- Click Upload plugin or theme and select the connector package. If the package was placed in the /Plugins folder by a developer, click Reload list of plugins instead.
- Search for Business Central, then click Install on the connector row.
- Click Restart application to finish loading the plugin.
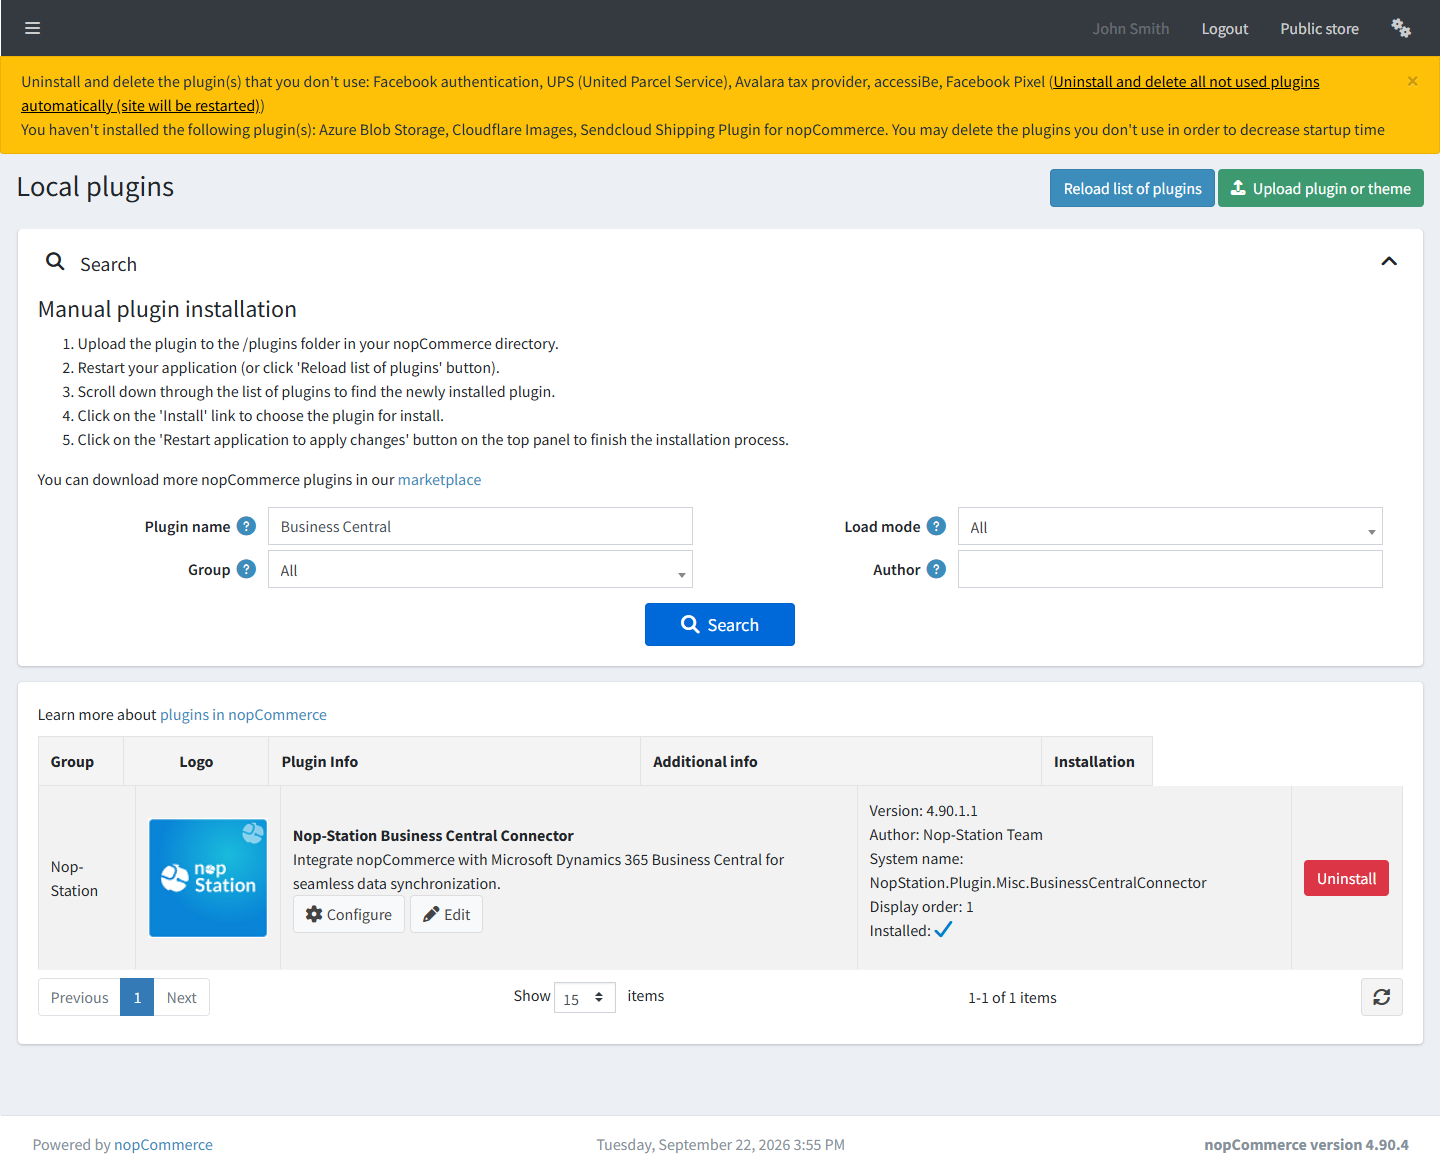
After installation, open Nop Station > Plugins > BC Connector in the administration menu. The connector provides Configuration, Sync Sessions, Product Staging, and Customer Staging pages.
CONFIGURATION
- Go to Nop Station > Plugins > BC Connector > Configuration.
- Under General settings, select Enabled when the connector is ready to run. You may leave it disabled while entering the remaining settings.
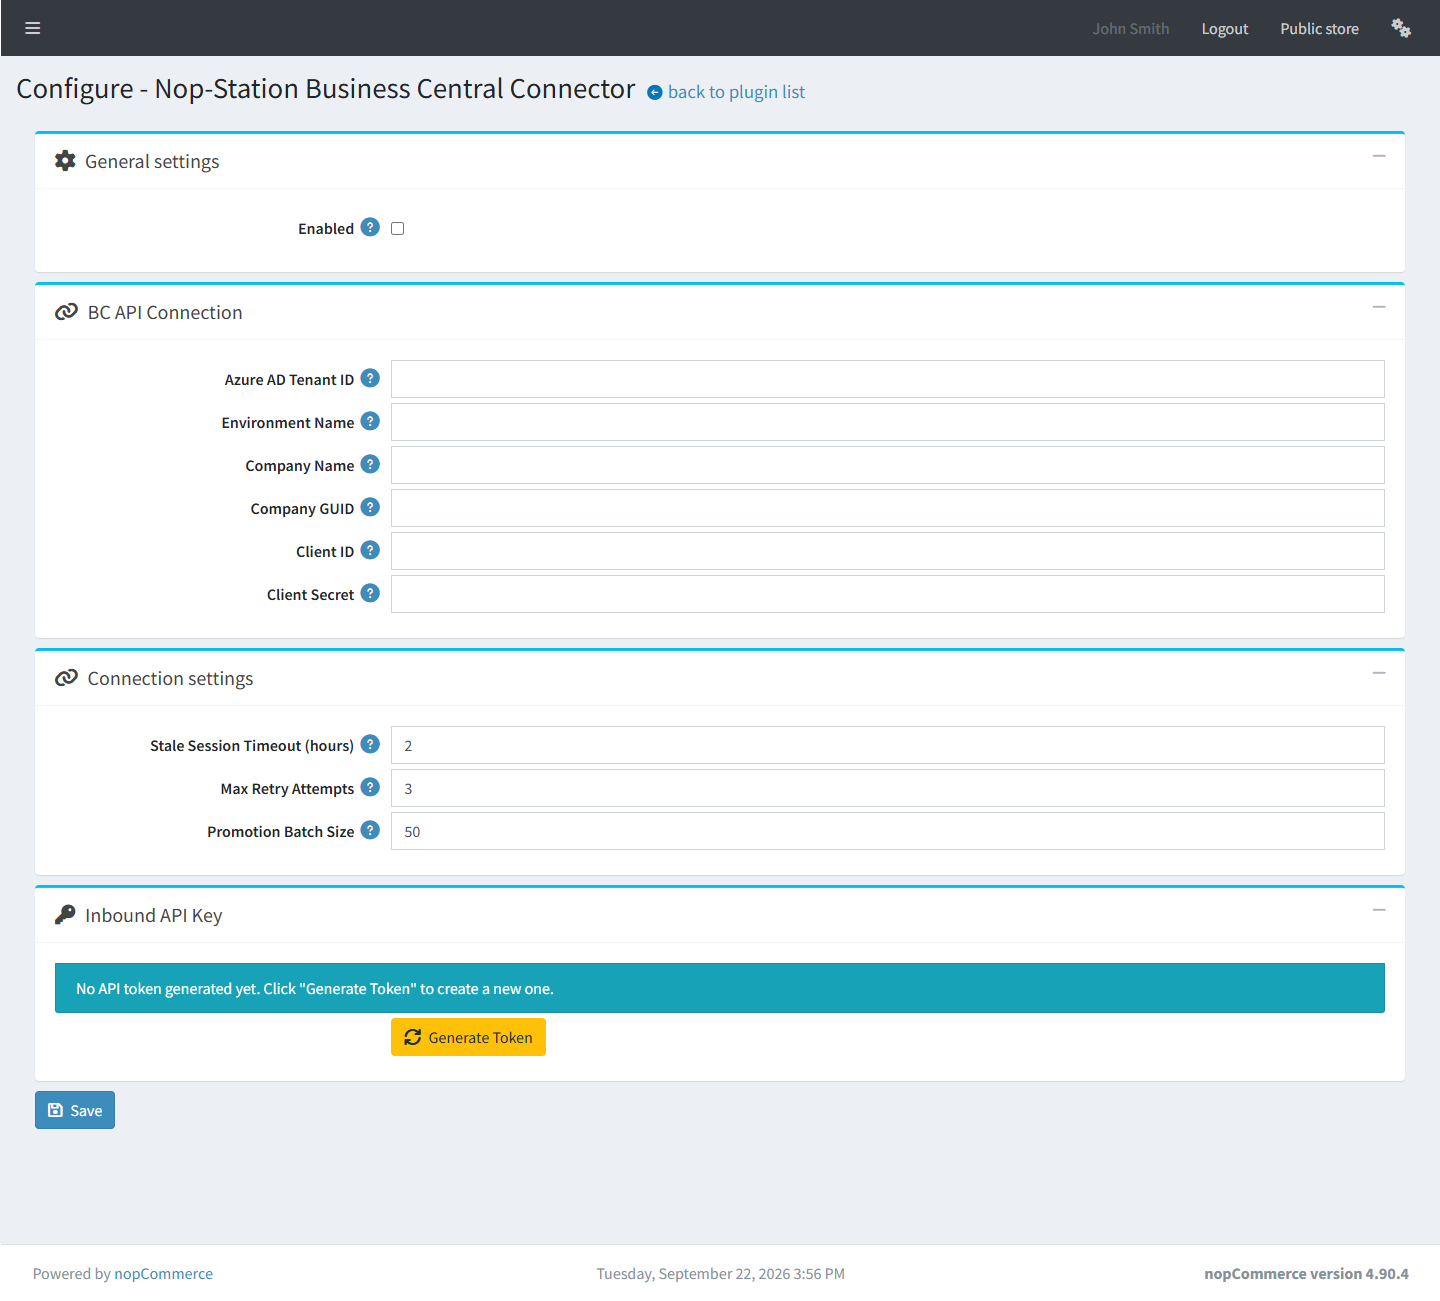
Business Central API Connection
- Azure AD Tenant ID: Identifies the Microsoft 365 tenant used by your organization.
- Environment Name: Enter the Business Central environment, such as a sandbox or production environment.
- Company Name: Enter the Business Central company that supplies data to the store.
- Company GUID: Enter the unique ID of the selected Business Central company.
- Client ID and Client Secret: Enter the application credentials supplied by your administrator. After the client secret is saved, it is displayed as a masked value.
Connection Settings
- Stale Session Timeout (hours): Sets how long a sync may run before it is treated as stalled.
- Max Retry Attempts: Sets how many times a failed record is retried before it is left for review.
- Promotion Batch Size: Sets how many records are processed at a time when synced data is applied to the store. Enter 0 to process all available records together.
Inbound API Key
- Click Generate Token.
- Optionally select an expiry date, then click Generate.
- Copy the generated key immediately and provide it only to the person configuring the Business Central side. The key cannot be displayed again later.
Click Save after completing the configuration.
HOW TO USE THE CONNECTOR
1. Monitor Sync Sessions
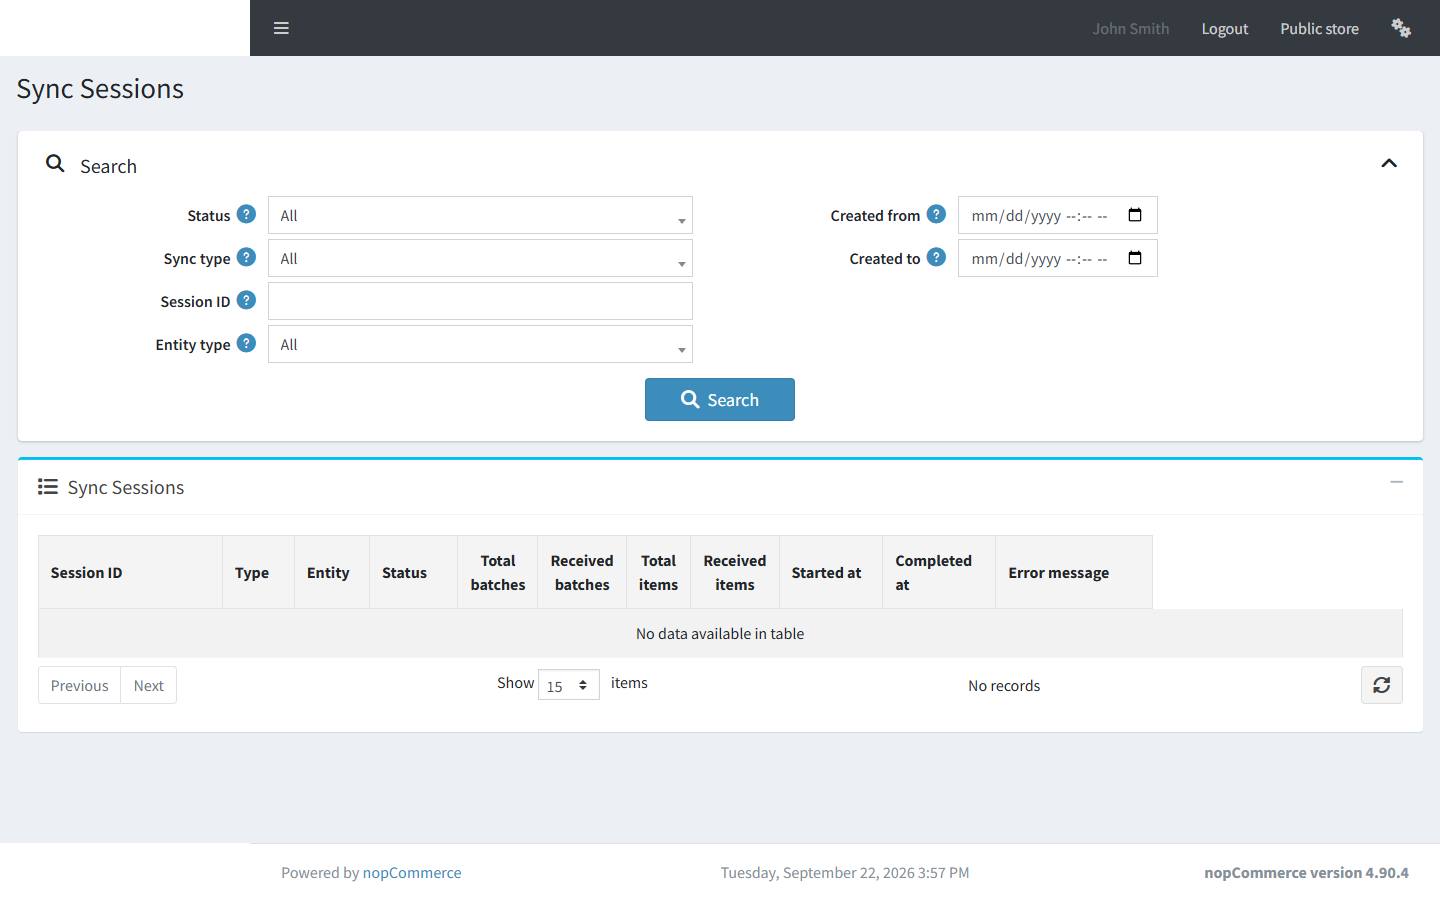
- Go to Nop Station > Plugins > BC Connector > Sync Sessions.
- Use the filters to search by status, sync type, session ID, entity type, or date.
- Each row shows the sync type, entity, status, batch and item totals, start and completion times, and any session-level error message.
- Possible statuses include In Progress, Complete, Partial Fail, and Aborted.
2. Review Product Records
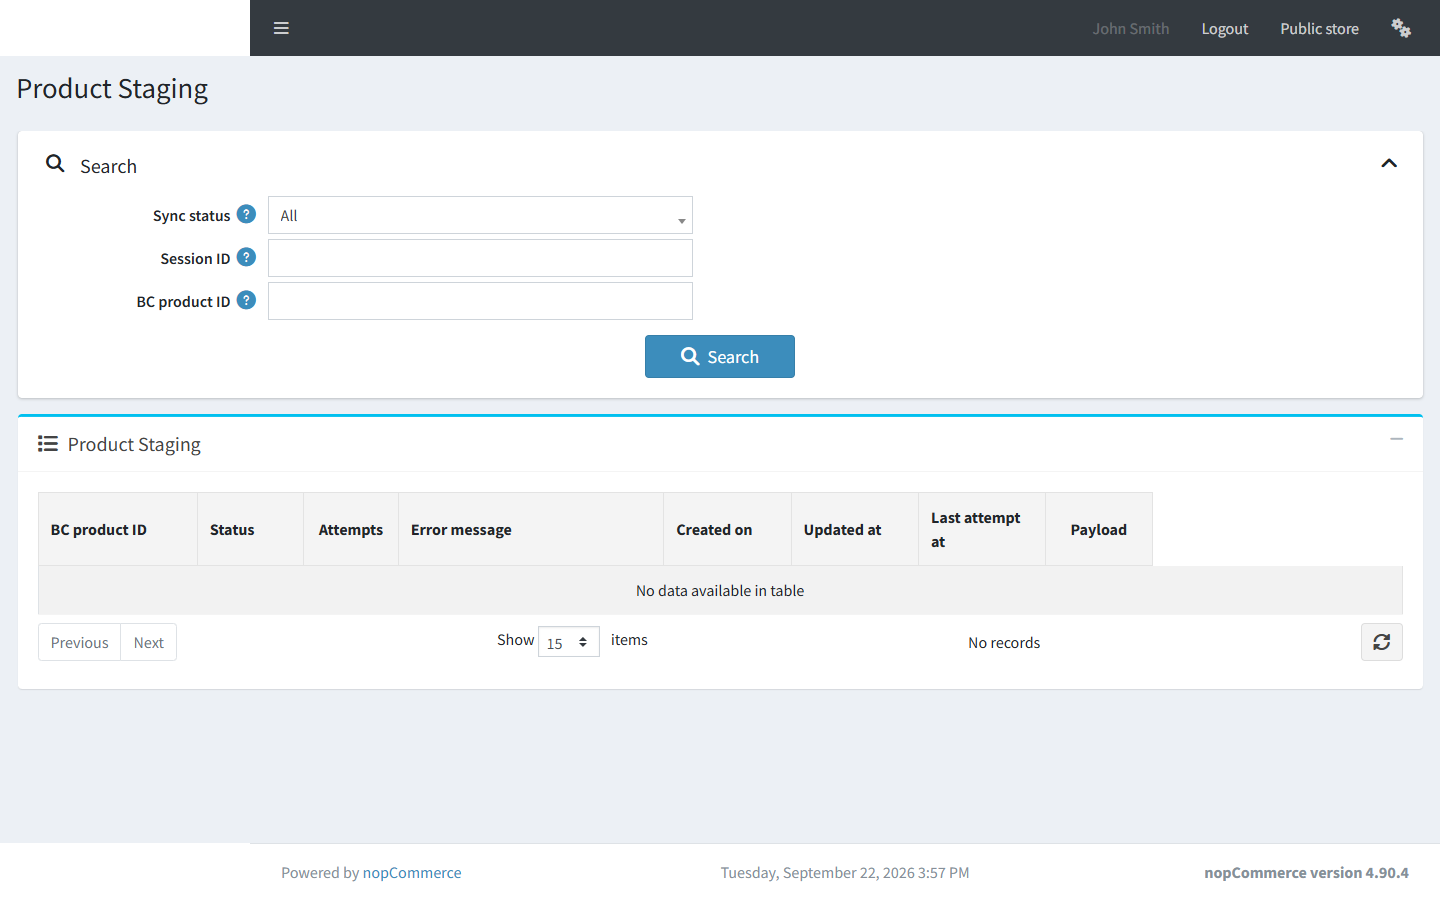
- Go to Nop Station > Plugins > BC Connector > Product Staging.
- Search by sync status, session ID, or Business Central product ID.
- Review each record's status, attempt count, error message, dates, and payload.
- A record may be Pending, Synced, or Failed.
3. Review Customer Records
- Go to Nop Station > Plugins > BC Connector > Customer Staging.
- Review customer sync statuses, attempts, and error details in the same way as product staging records.
4. Handle Failed Records
- Read the error message shown for the failed record and correct the related data or configuration.
- The connector retries failed records automatically up to the configured Max Retry Attempts.
- If syncing must be paused during maintenance, clear Enabled on the Configuration page and save. Select it again and save to resume.