
Advance Payment Rules lets you show, hide, prefer, and reprice payment methods using condition-based rules — without replacing payment plugins or changing nopCommerce core. Target customer roles, guests, cart value, days of the week, products, countries, and more.
Pre-requisites
Install the Nop-Station Core plugin before installing this plugin.
• nopCommerce 4.90 running on .NET 9
• Nop-Station Core
• Advance Payment Rules 4.90
• At least one active payment method under Configuration → Payment methods
Installation
1. Download the Advance Payment Rules plugin from nopStation website
2. Go to Administration → Configuration → Local plugins.
3. If Nop-Station Core is not already installed, upload it using the Upload plugin or theme button.
4. Upload the Advance Payment Rules package the same way.
5. Install Nop-Station Core first, then install Advance Payment Rules.
6. Restart the application when prompted.
7. After an upgrade, click Update so locale strings, permissions, and schema migrations are applied.
8. Grant Manage configuration and Manage rules to the administrator roles that need access.
Local plugins
Filter the Local plugins list by plugin name to find the plugin. From this row you can Configure or Edit it.
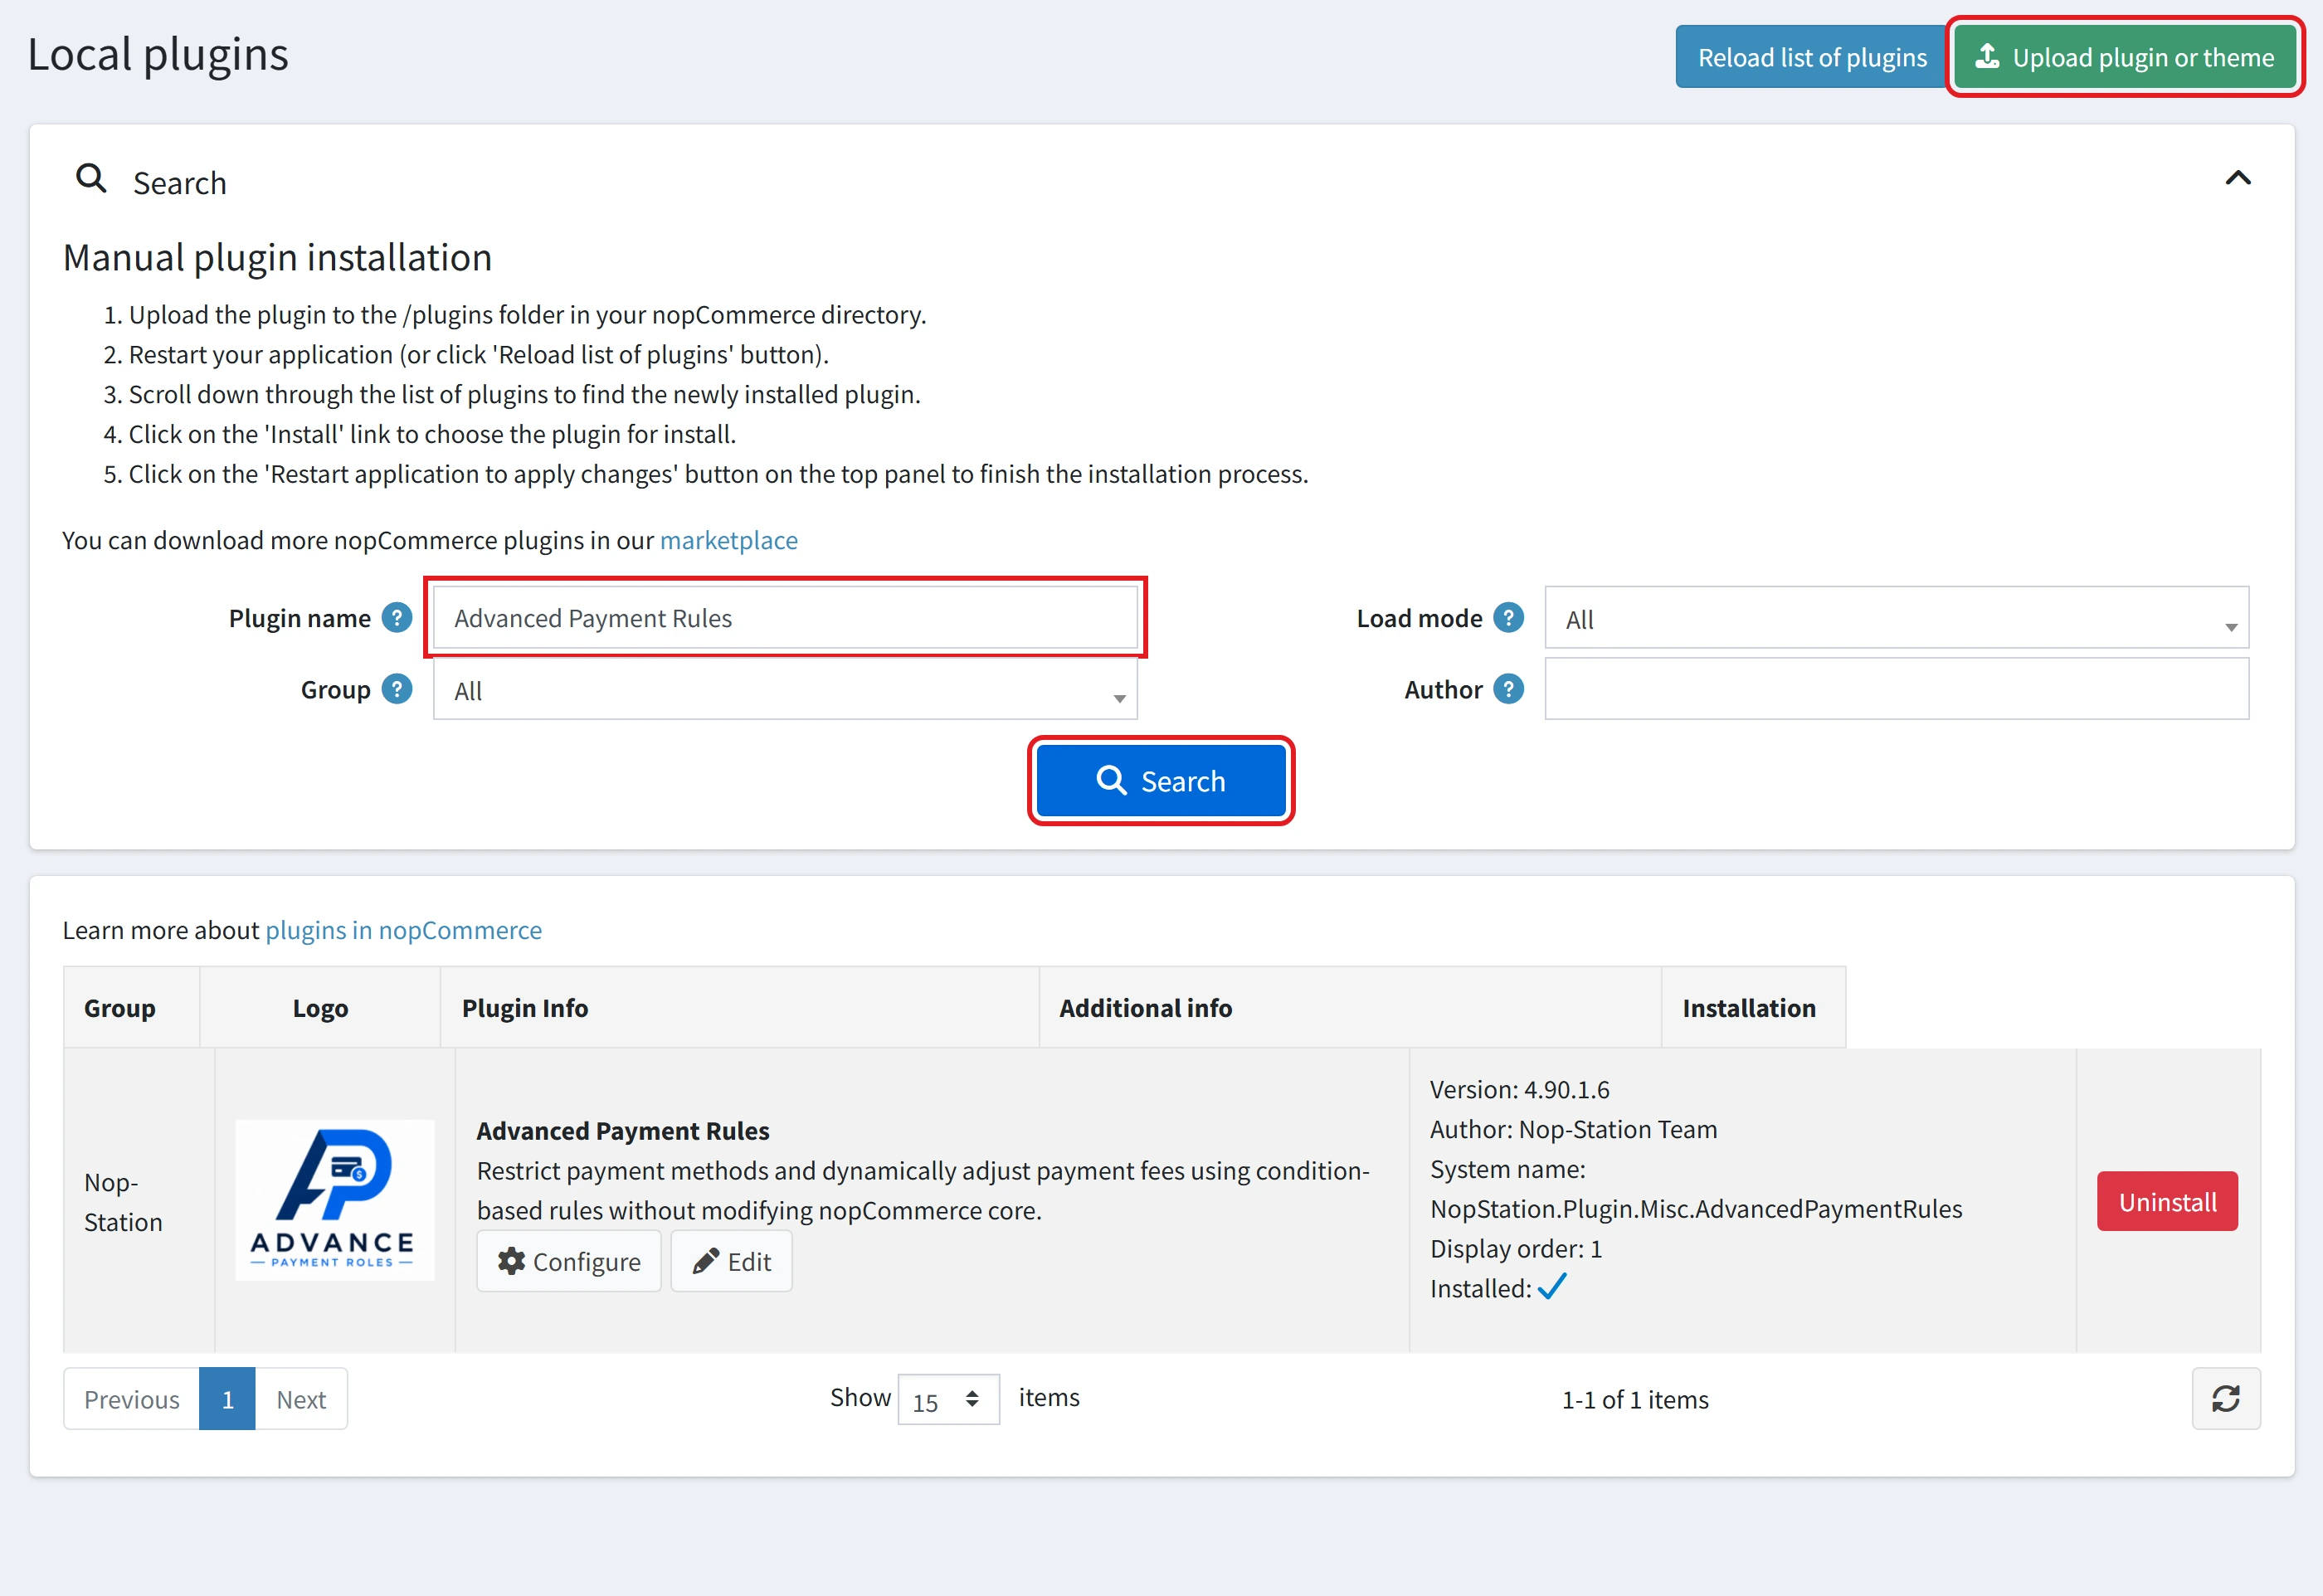
Figure 1. Local plugins — locating the plugin after upload
Naming note The product name is Advance Payment Rules. The compiled plugin currently registers in nopCommerce as "Advanced Payment Rules" — with a "d" — under the system name NopStation.Plugin.Misc.AdvancedPaymentRules. Admin menus, page titles, and the screenshots in this document use that spelling until the build is renamed. |
Configuration
Open the plugin from nopStation → Plugins and choose Configuration. Enable the options you need and click Save. Per-store overrides are available from the "Multi-store configuration for" selector at the top of the page.
Plugin menu
The plugin registers these admin pages under nopStation:
• Configuration — engine and order-audit settings
• Payment rules — create, import, export, and edit rules
• Order audit — which rules ran on placed orders
• Documentation — link to this document
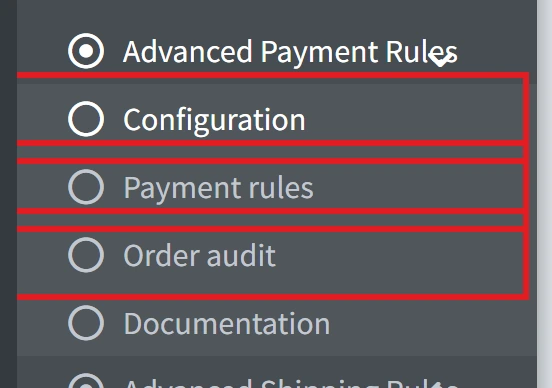
Figure 2. Admin menu — Configuration, Payment rules, Order audit
Configuration page
Settings are grouped into General, Engine, and Order audit cards.
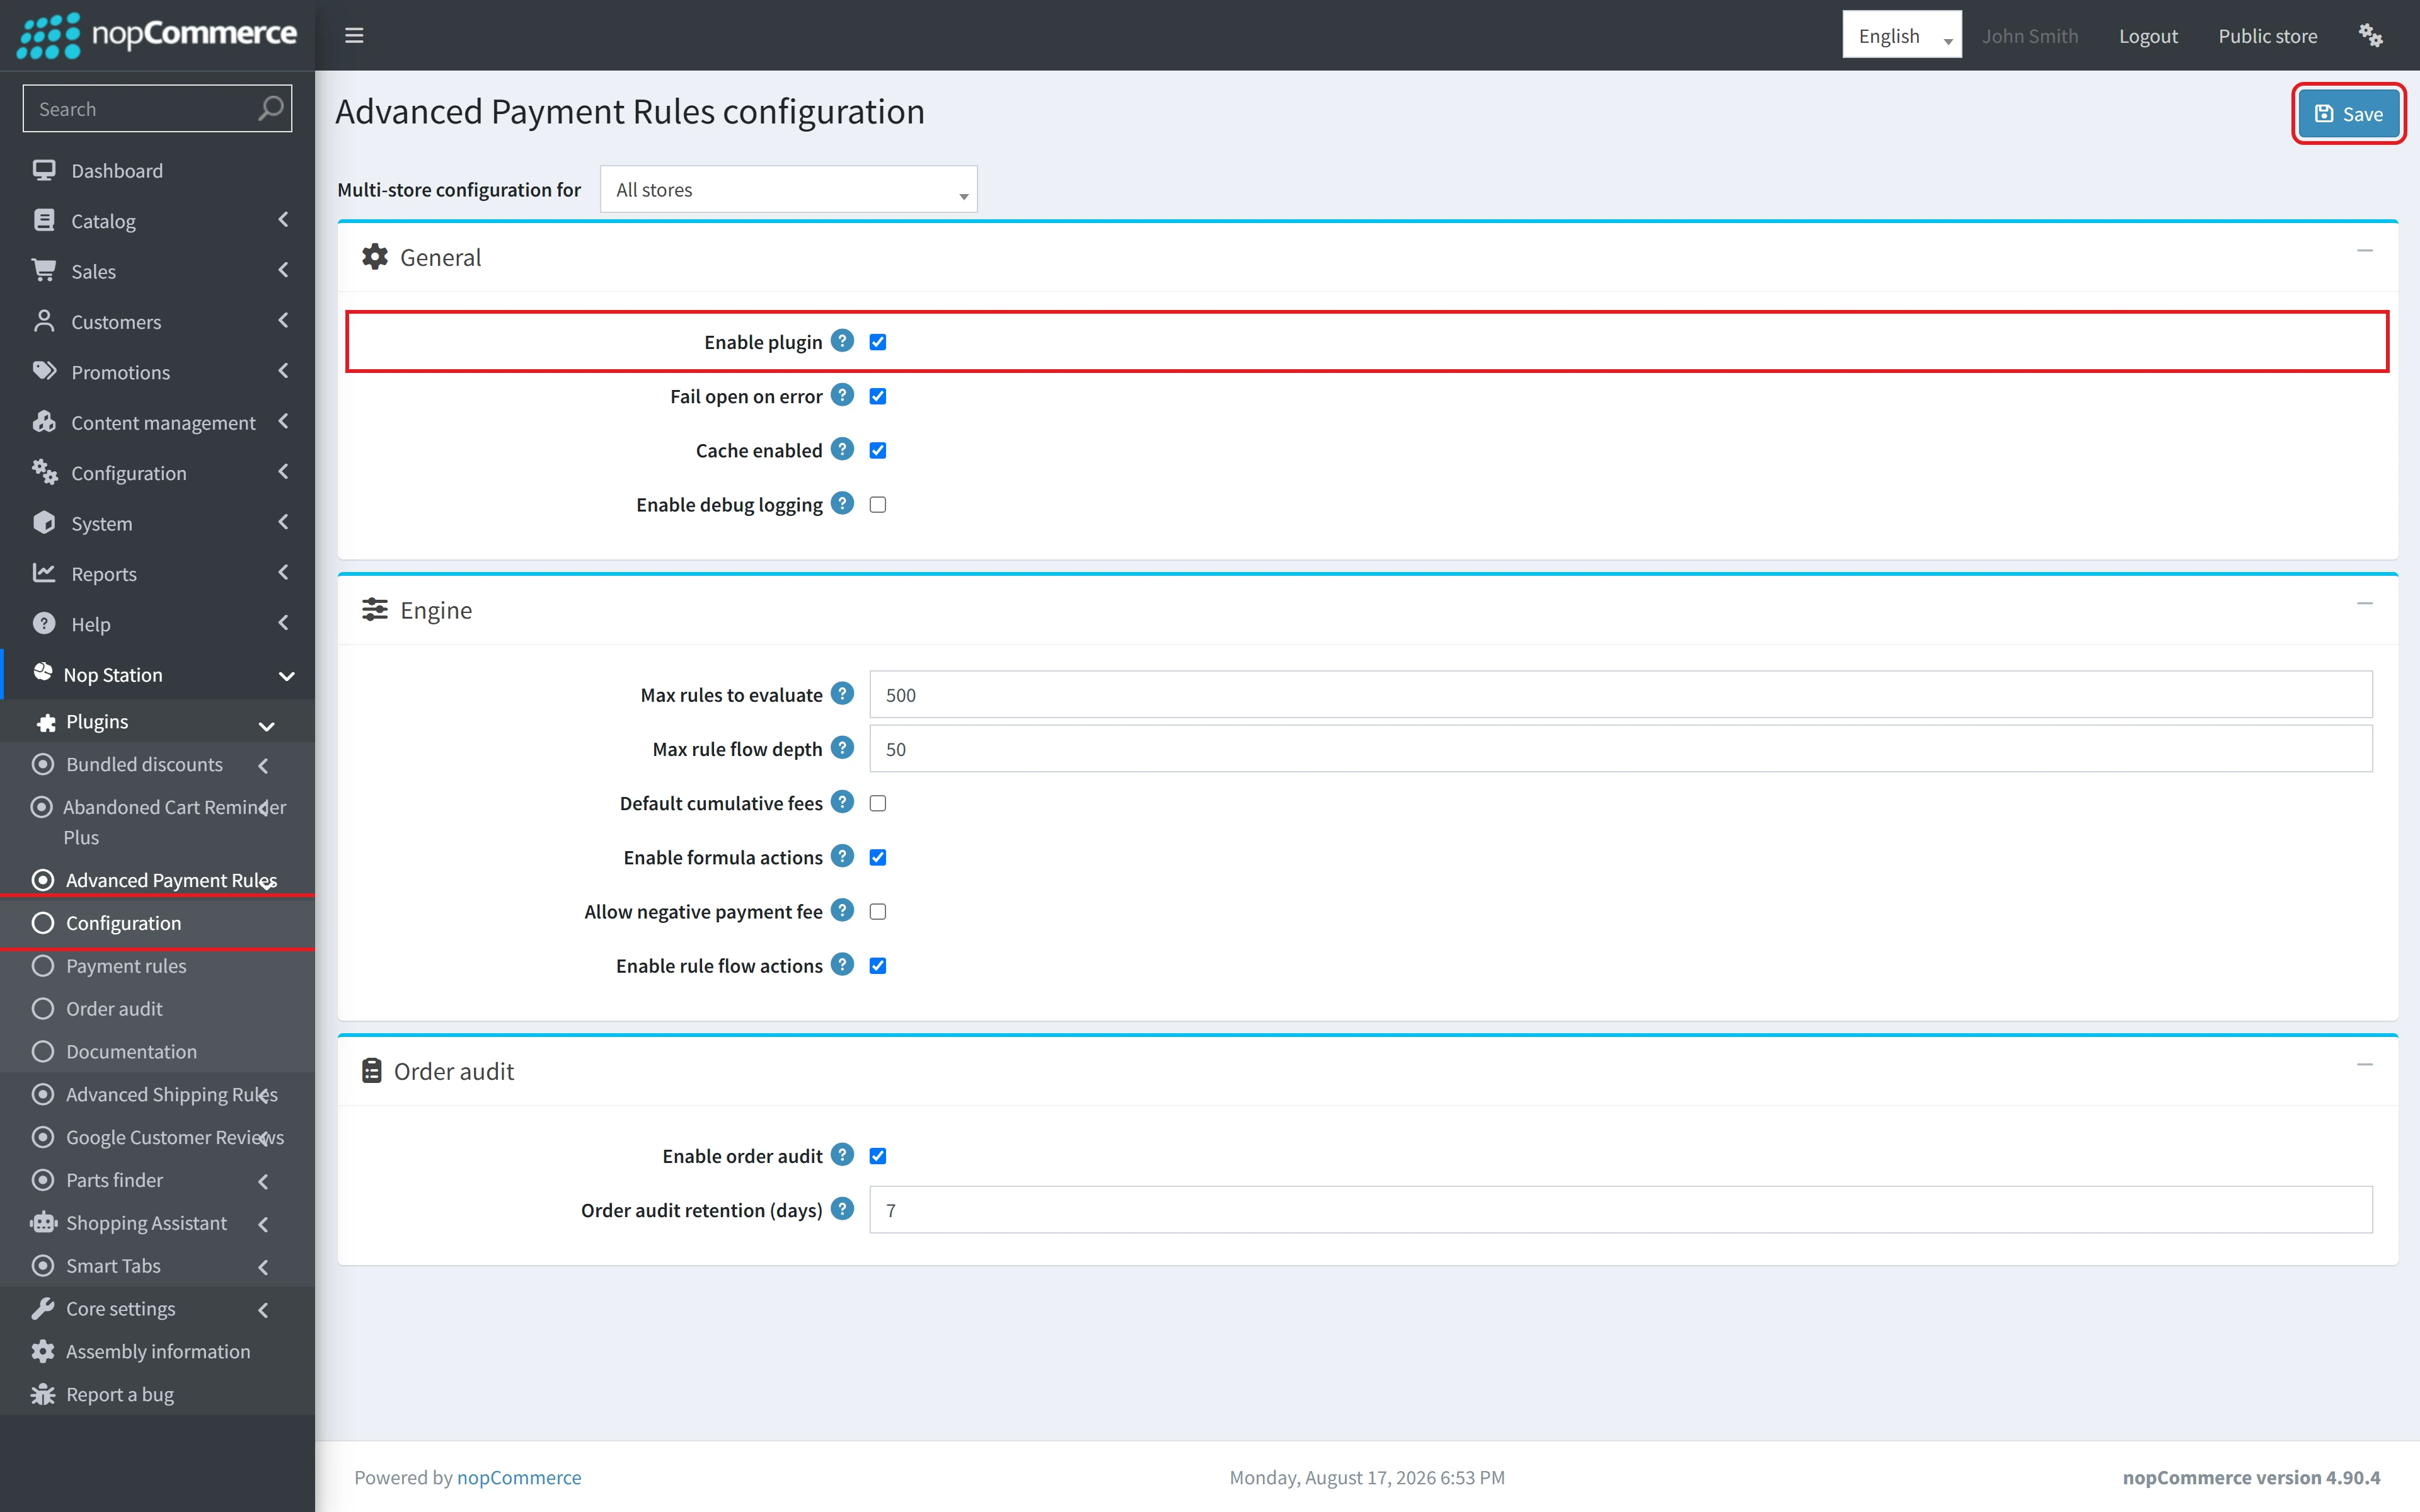
Figure 3. Configuration — General, Engine, and Order audit
General settings
• Enable plugin — turn the checkout engine on or off.
• Fail open on error — return the original payment methods if rule evaluation throws.
• Cache enabled — cache the active rule graph per store.
• Enable debug logging — write detailed evaluation traces for administrators.
Engine settings
• Max rules to evaluate and Max rule flow depth — safety caps that stop runaway rule chains.
• Default cumulative fees — when on, later matching fee rules stack within one evaluation.
• Enable formula actions — allow sandboxed formula-based fees.
• Allow negative payment fee — when off, a calculated fee cannot fall below zero.
• Enable rule flow actions — allow Continue, Exit, and Goto.
Order audit settings
• Enable order audit — record which payment rules ran when an order is placed.
• Order audit retention (days) — used by Delete old records on the audit list.
Fees, currency, and tax Payment additional fees use the customer's working-currency decimal places and nopCommerce's built-in payment-fee tax handling. The plugin does not add its own rounding, currency, or tax-category settings. |
Payment rules
Manage rules from the Payment rules page. Enter a display Name for each rule; the system name used by import and export is generated internally and is not shown in the admin UI.
Payment rules list
The grid shows Name, Priority, Enabled, Updated on, and Edit. Rules are evaluated in priority order.
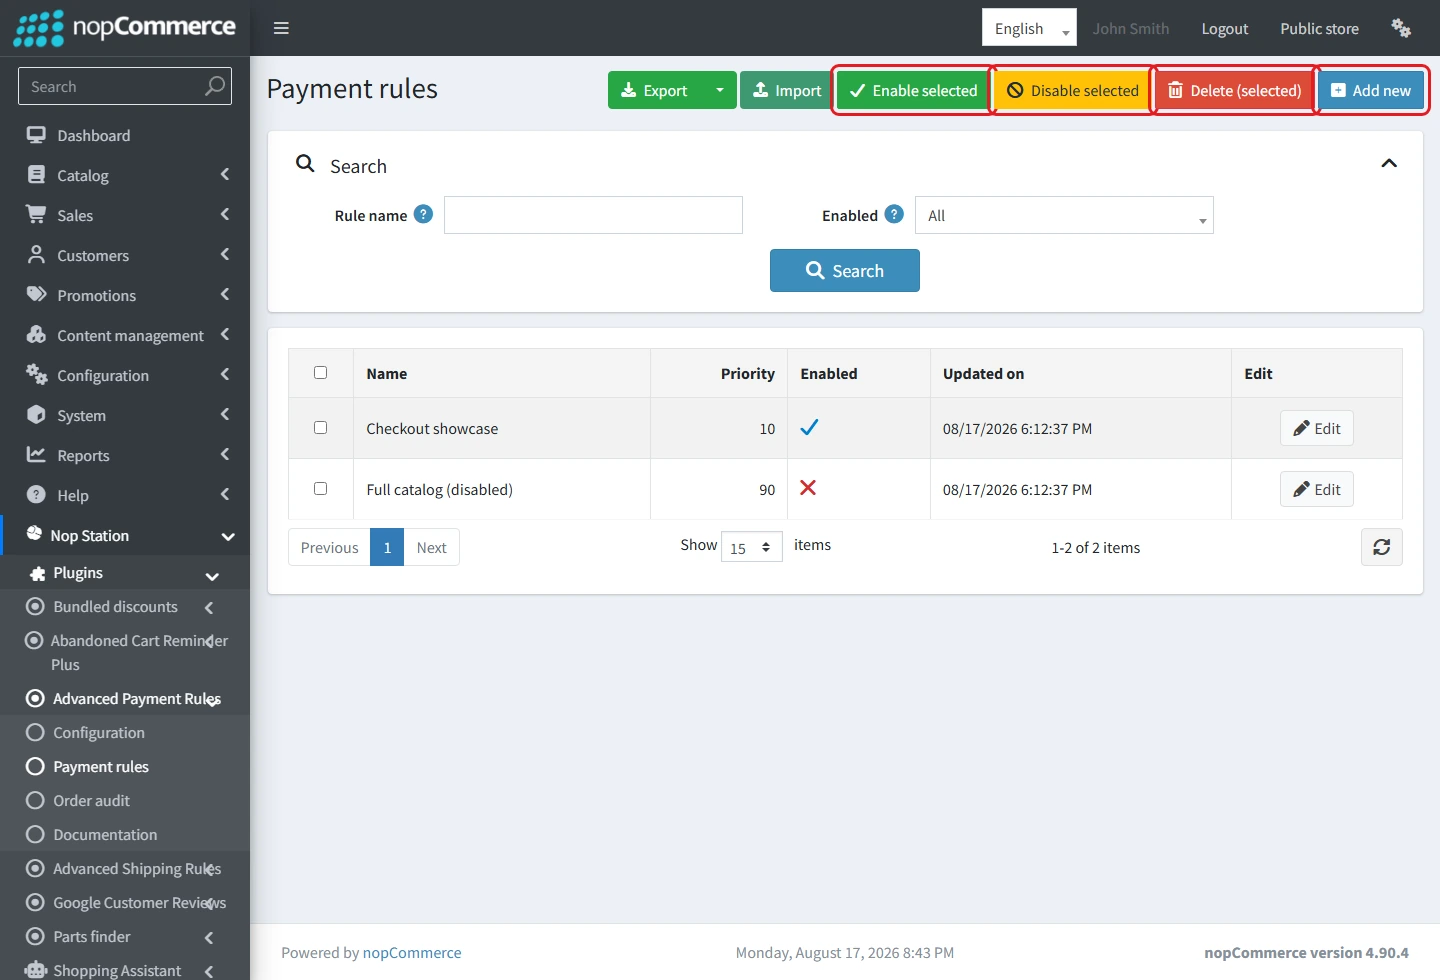
Figure 4. Payment rules list with header actions
Header actions:
• Export — download the rule set as JSON or CSV
• Import — paste a previously exported JSON package
• Enable selected, Disable selected, Delete (selected)
• Add new — create a rule
Export
Use the Export dropdown to download the current rule set as JSON or CSV.
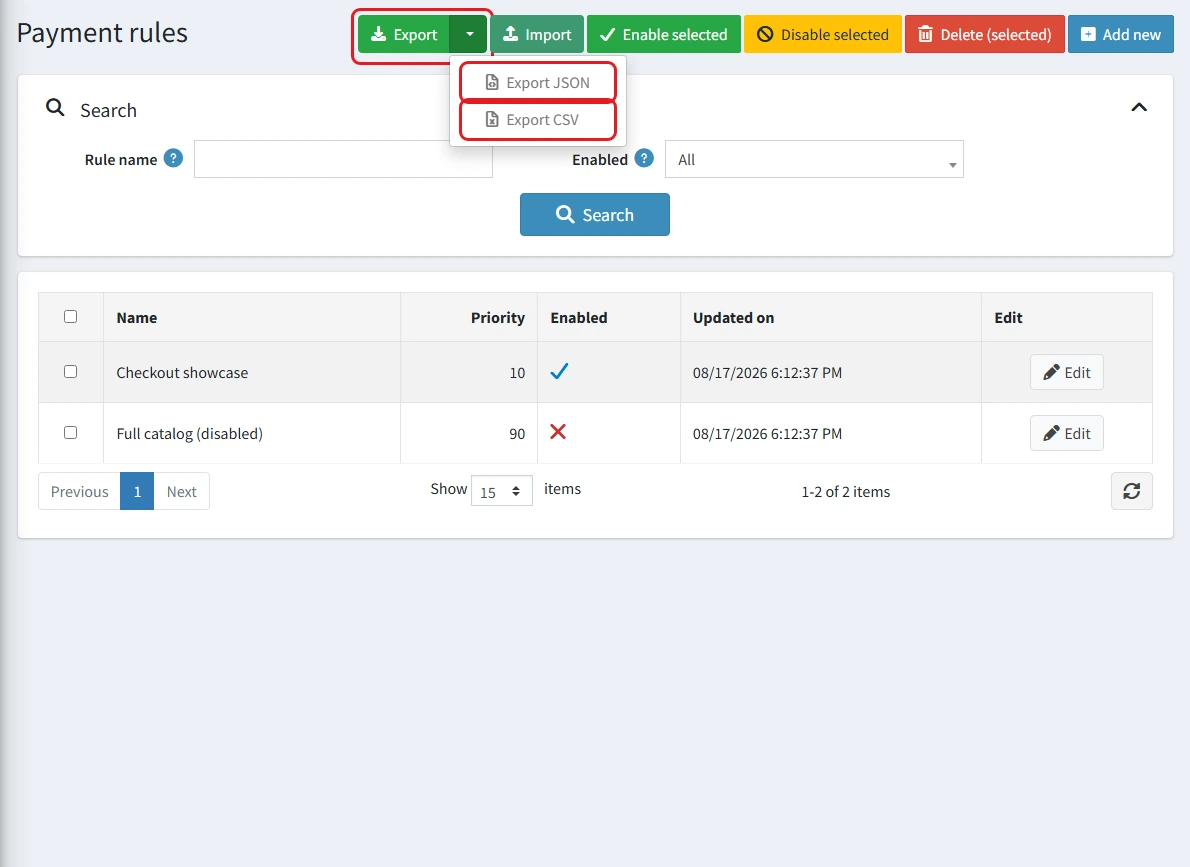
Figure 5. Export — JSON and CSV
Import
Paste an exported JSON package into the Import dialog. Rules are matched by system name, so an import either creates a new rule or updates the matching one. CSV is export-only.
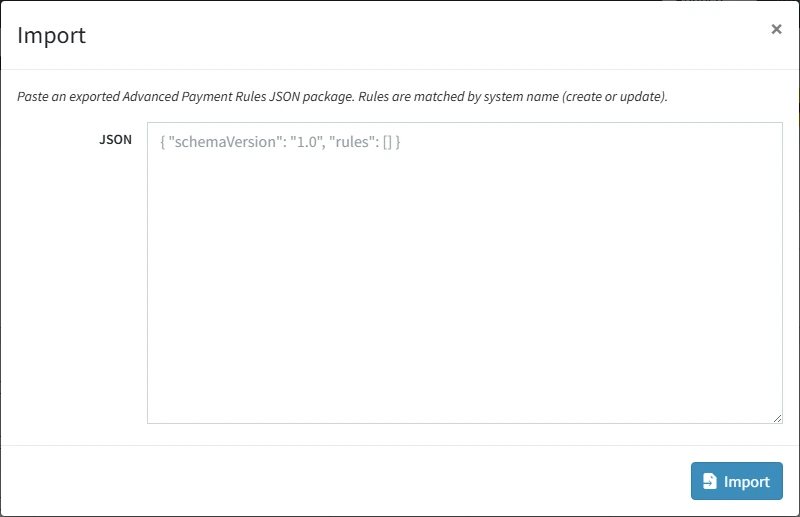
Figure 6. Import JSON package
Moving rules between environments Export from staging, import into production. Because matching is by system name, re-importing an updated package refreshes existing rules instead of duplicating them. |
Edit a payment rule
After you save a new rule, the edit page opens with six cards: Rule info, Targeting, Schedule, Products, Conditions, and Actions.
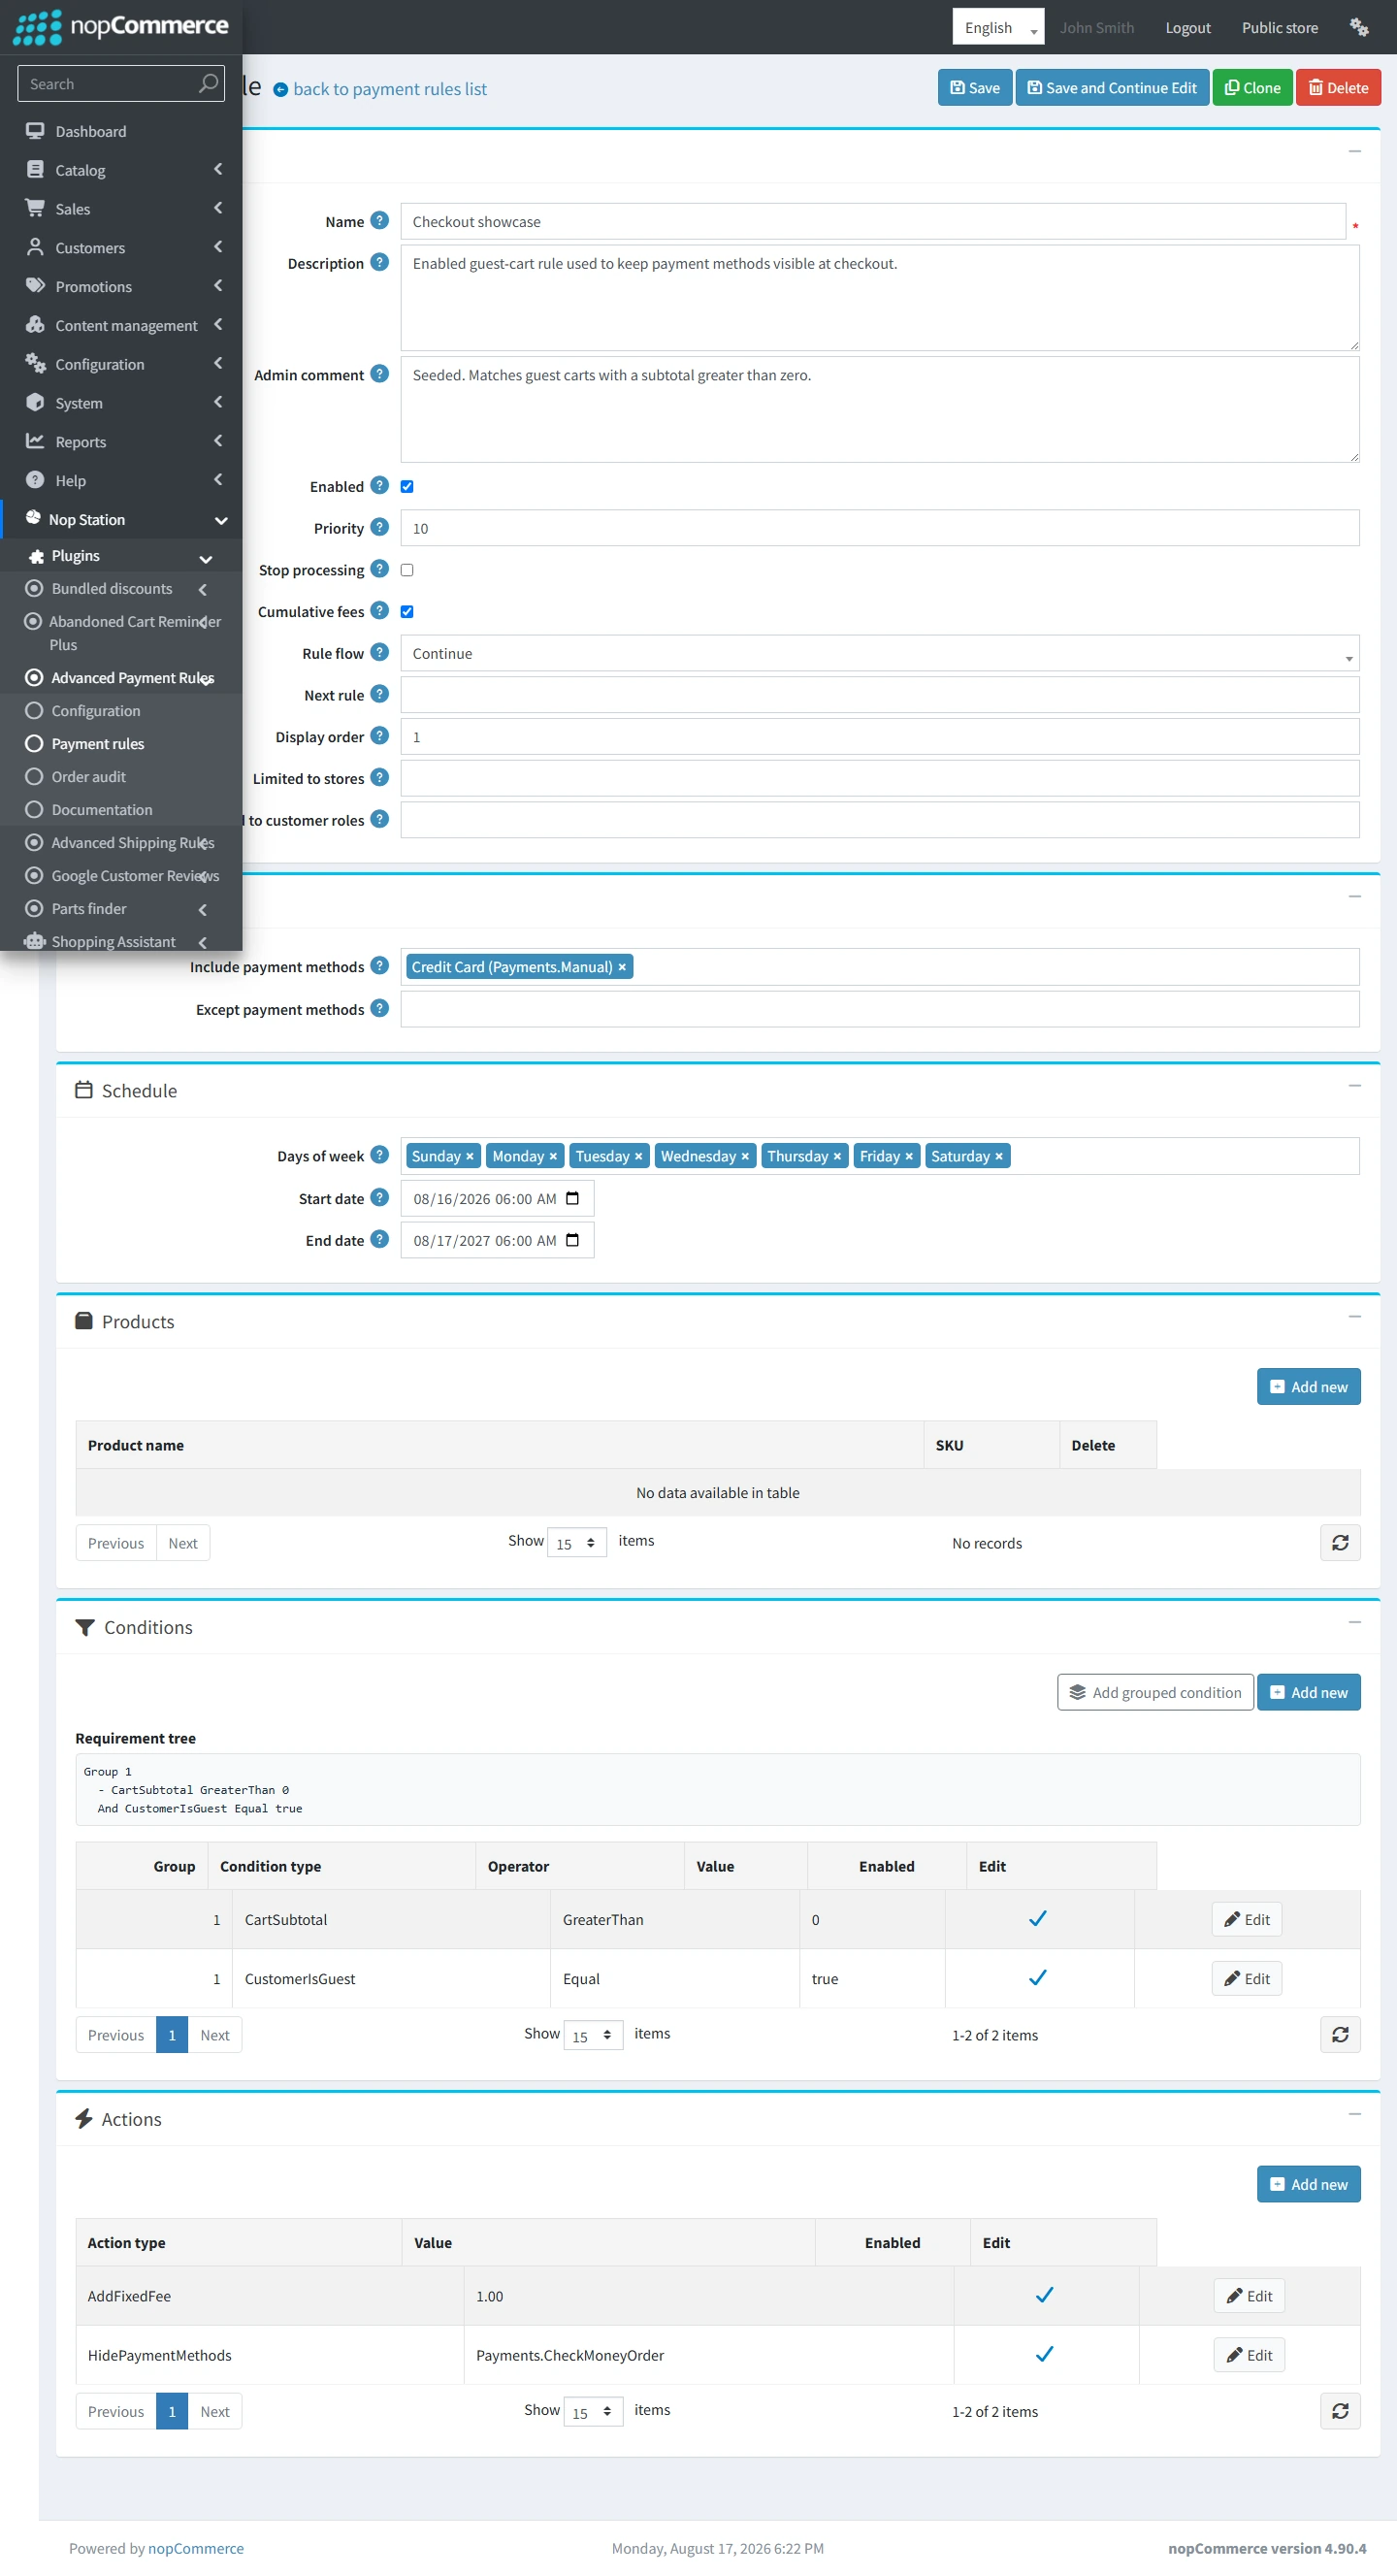
Figure 7. Edit payment rule — all cards
Rule info
Name, Description, Admin comment, Enabled, Priority, Stop processing, Cumulative fees, Rule flow (Continue, Exit, or Goto), Next rule, Display order, Limited to stores, and Limited to customer roles.
Where role eligibility is set "Limited to customer roles" on this card is the field that restricts a rule to approved roles — leave it empty and the rule applies to everyone. You can also express role logic as a condition when you need it combined with other criteria. |
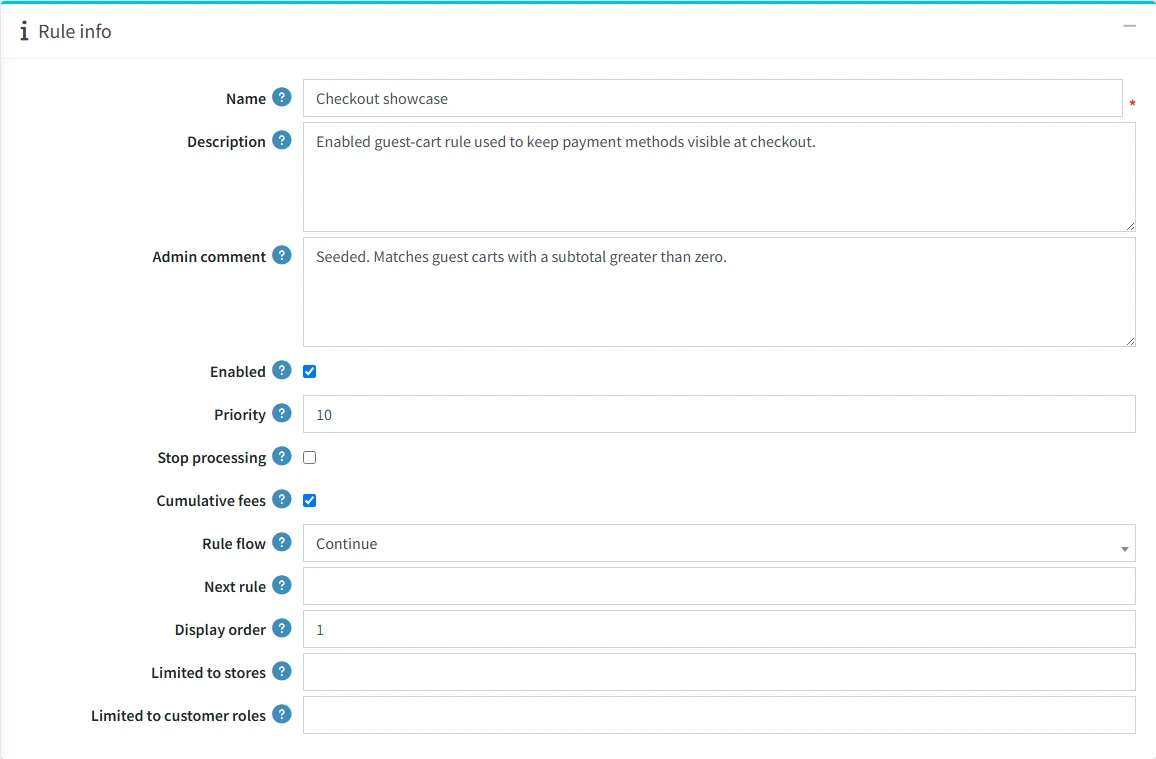
Figure 8. Rule info
Targeting
Include or exclude specific payment methods once the rule matches. For example, include Credit Card (Payments.Manual) so the rule’s actions apply to that method only.

Figure 9. Targeting — include and except payment methods
Schedule
Limit the rule to selected days of the week and an optional start and end date.

Figure 10. Schedule — days of week and date range
Products
Optionally scope the rule to mapped catalog products. Leave this grid empty if the rule should run for any cart.
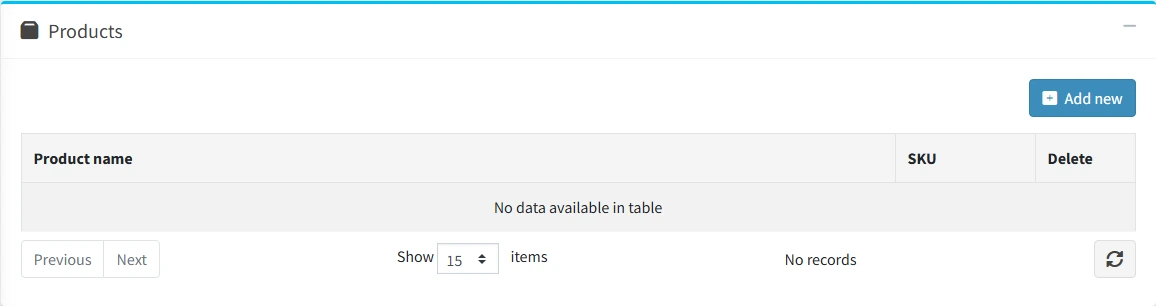
Figure 11. Products — optional catalog scope
Conditions
Conditions are grouped into AND, OR, and NOT trees. Each condition type carries a hint, a sample value, and a "Use example" shortcut. Dropdown pickers are provided for payment methods, shipping and pickup providers, customer roles, stores, countries, and days of the week.
Commonly used condition types include:
• Cart subtotal, cart total, and cart quantity
• Guest versus registered customer
• Customer role
• Billing country and shipping country
• Product category and product SKU
• Payment method and store
• Day of week and time of day
• Discounts and attributes
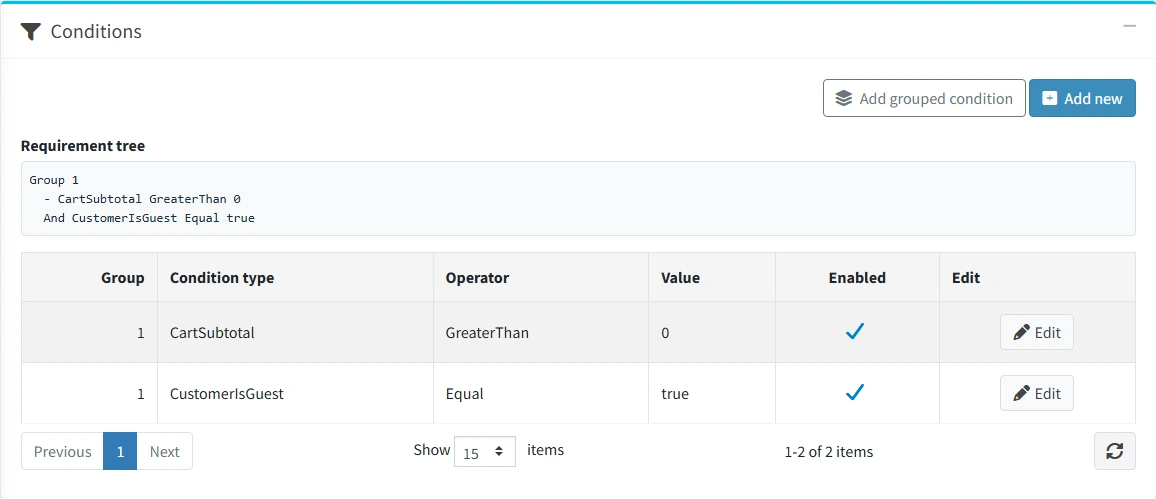
Figure 12. Conditions — requirement tree and grid
Actions
Actions run when the rule’s conditions match. They fall into three groups.
Group | Actions |
Visibility | Hide, Show, Show only, Set preferred payment method |
Fees | Override, add or subtract a fixed amount, add or subtract a percentage, set zero, formula, minimum, maximum, cap |
Flow | Continue, Exit, Goto rule |
Each action popup shows a note for the selected type, an example value, and a payment-method picker.
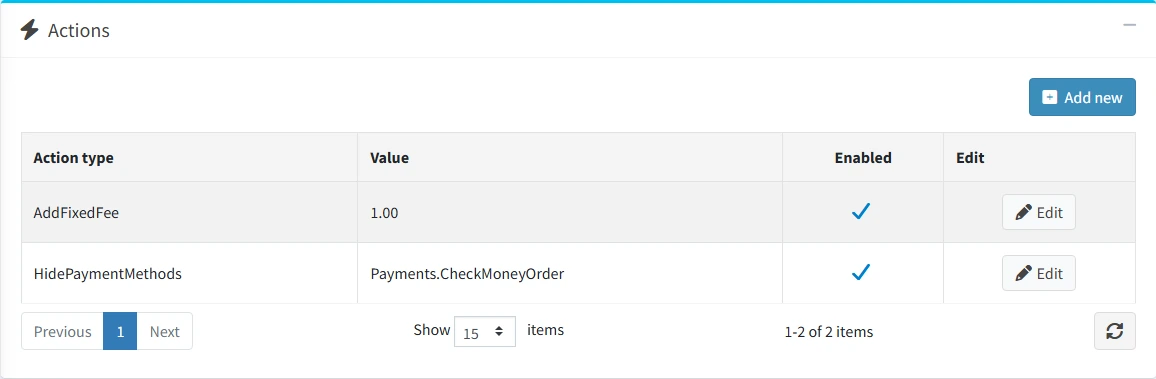
Figure 13. Actions
Order audit
Open the Order audit page to review which rules ran on placed orders.
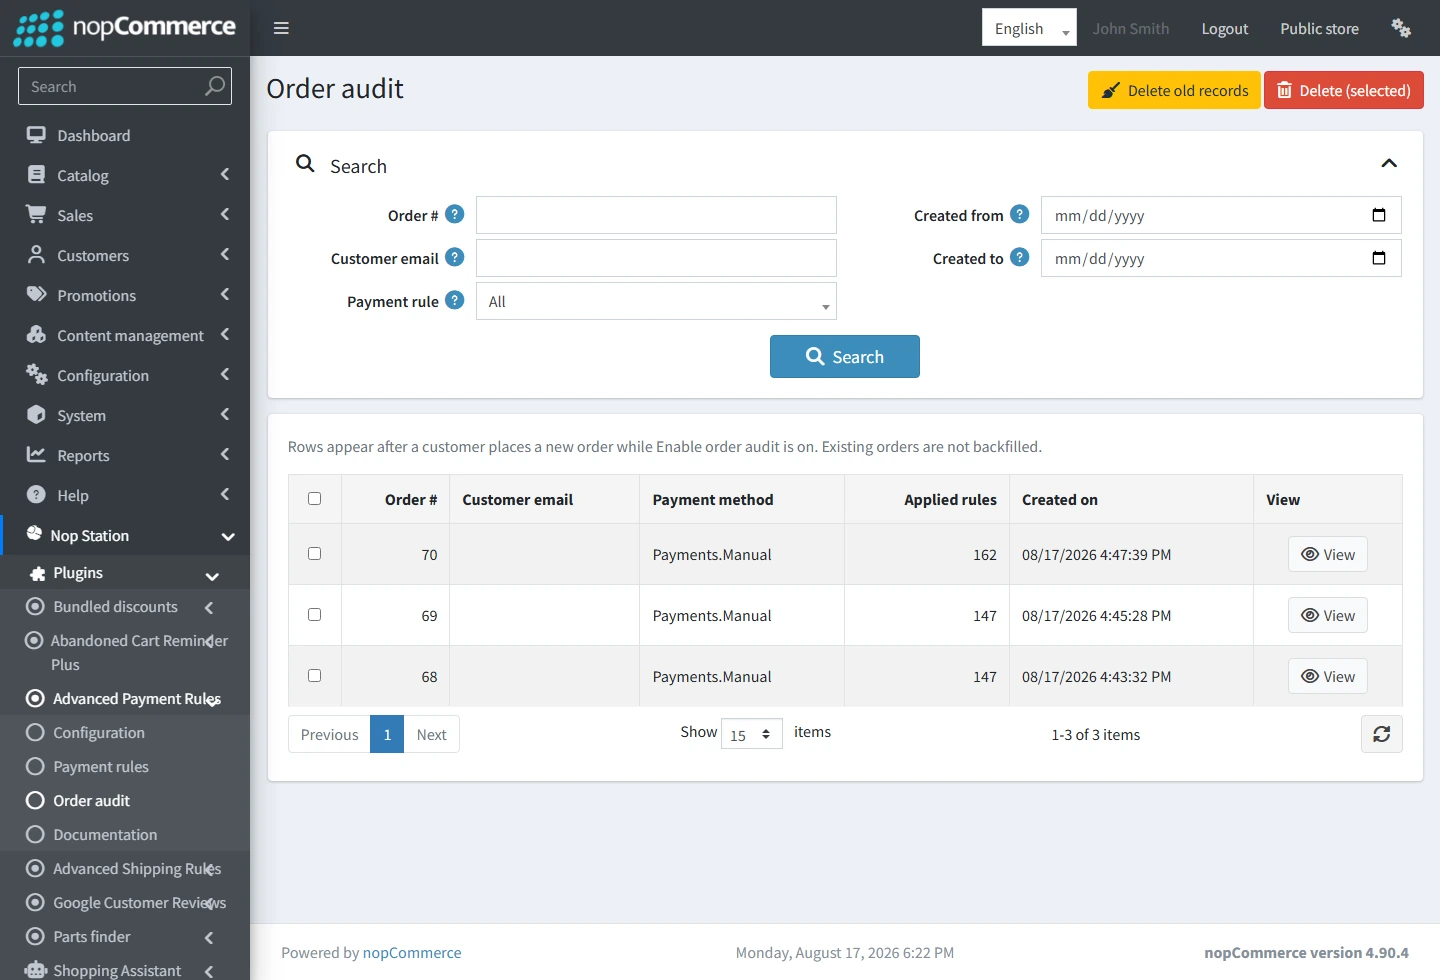
Figure 14. Order audit
• Filter by order number, customer email, applied rule, and a created-from / created-to date range.
• Open a record to see the payment method, the fee applied, and the individual applied-rule rows.
• Delete selected records, or purge records older than the configured retention with Delete old records.
When rows appear Audit rows are written when a customer places a new order while Enable order audit is on. Existing orders are not backfilled. There is no separate Rule Tester or Diagnostics page — use a test checkout together with Order audit to verify behaviour. |
nopCommerce payment settings
The plugin only filters payment methods that nopCommerce has already activated. Review the active list under Configuration → Payment methods.
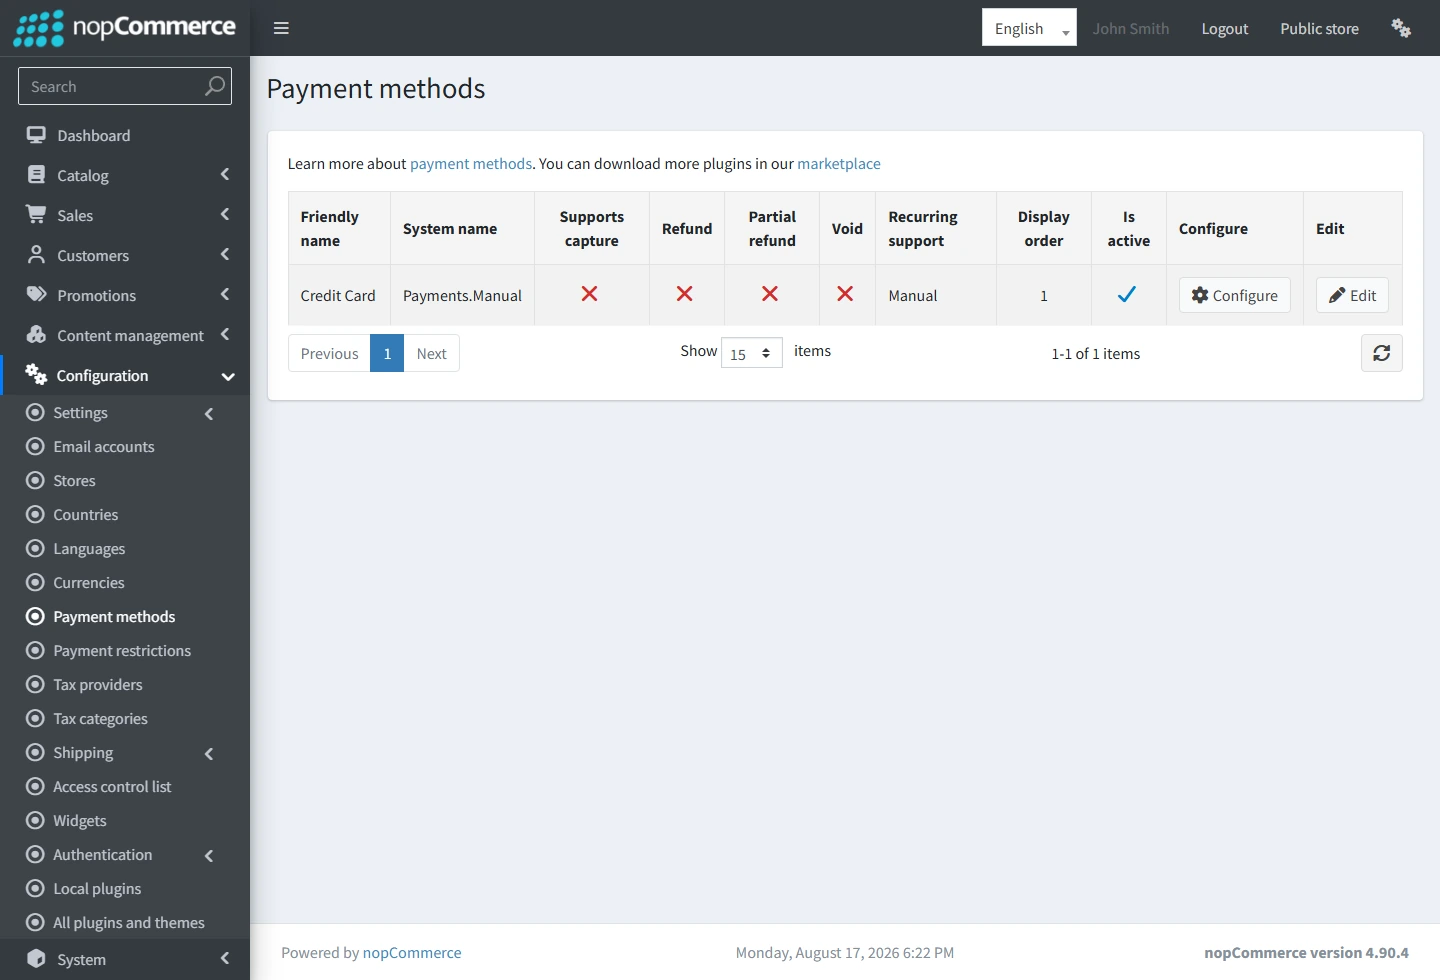
Figure 15. nopCommerce payment methods
How the plugin uses nopCommerce defaults
Setting | Behaviour | Effect with Advance Payment Rules |
Active payment methods | Set per method under Payment methods | Forms the candidate pool before rules run. A deactivated method never appears, whatever the rules say. |
Country restrictions | Set per method | Applied by nopCommerce first, then rules run on what remains. |
BypassPaymentMethodSelectionIfOnlyOne | Enabled by default | If exactly one method remains, checkout skips the method list and opens payment information directly. |
Anonymous checkout allowed | Enabled by default | Guests can reach the payment step, which is required for guest-based conditions to be meaningful. |
Payment fee rounding and tax | nopCommerce currency and tax settings | Rule fees apply after the payment method's own additional fee. |
About the bypass setting BypassPaymentMethodSelectionIfOnlyOne is stored on the nopCommerce PaymentSettings record. There is no checkbox for it on the Payment methods grid in 4.90. When a rule leaves only one method available, skipping the method list is expected behaviour. |
Public view
Add a product to the cart and complete the billing and shipping steps. Checkout then shows either Select payment method or, when only one method remains, Payment information.
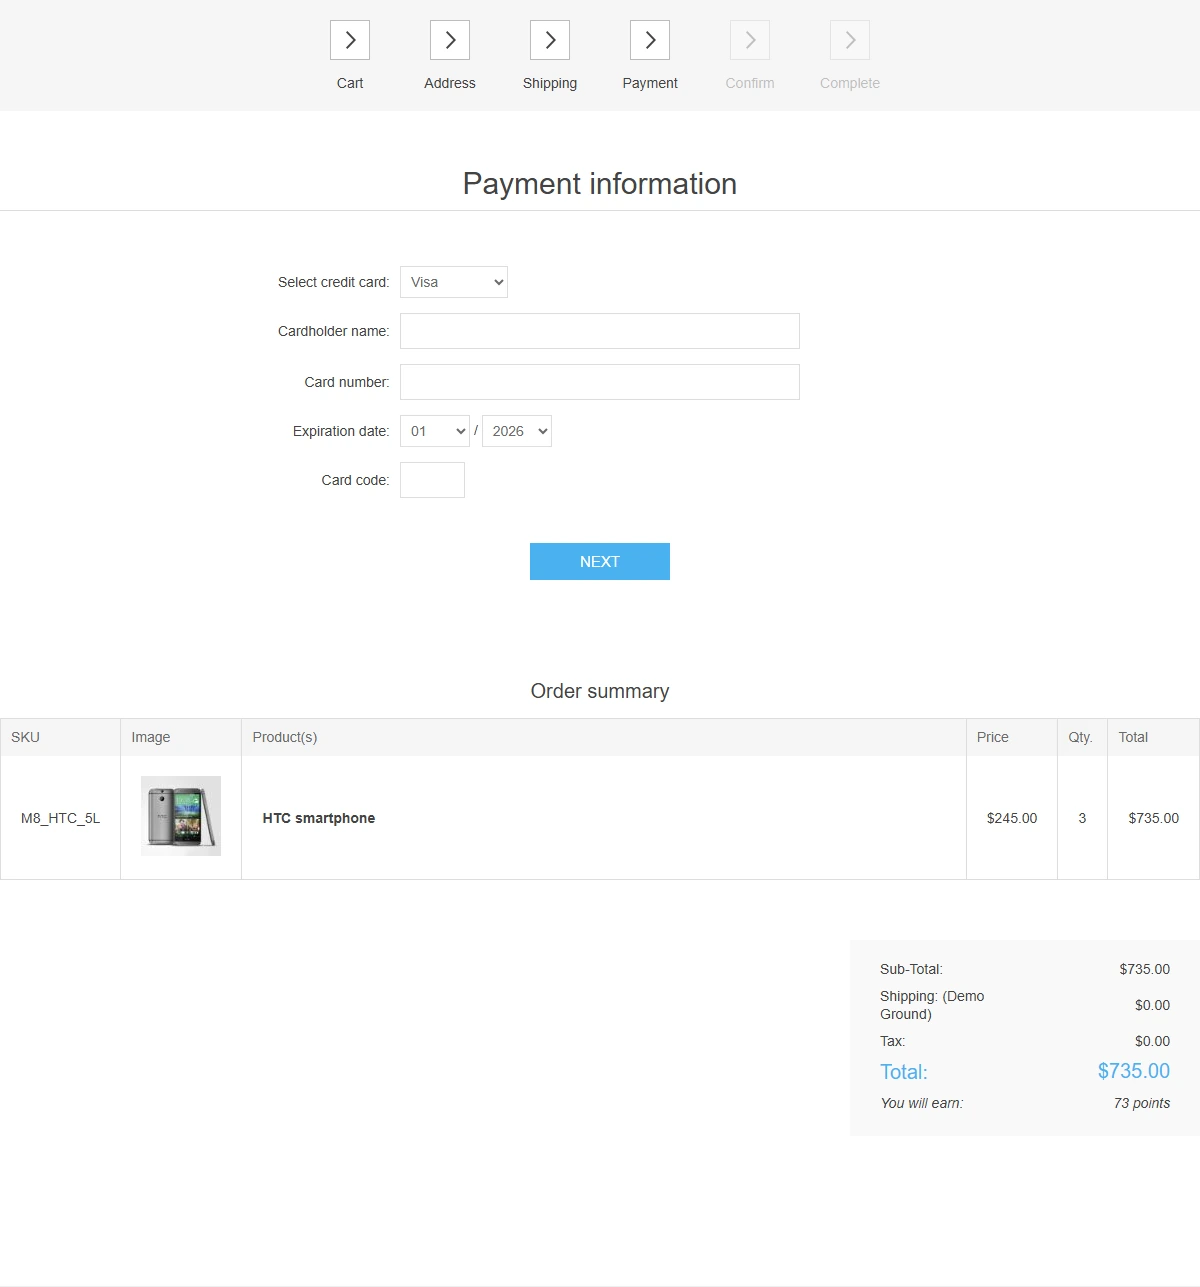
Figure 16. Storefront checkout — payment step
If a matching rule hides every method except one, nopCommerce opens that method’s form directly instead of showing a list. Additional fees from rule actions appear on the confirm step, subject to your tax and rounding configuration.
Troubleshooting
• Methods disappeared unexpectedly. Disable the matching rules or turn off Enable plugin, then confirm the method is still active under Configuration → Payment methods.
• Checkout never shows a payment-method list. This is expected when only one method remains — see the bypass setting above.
• Labels show raw locale keys after an upgrade. Click Update on the plugin in Local plugins.
• Order audit is empty. Confirm Enable order audit is checked and that the orders were placed after the setting was turned on.
• Need evaluation detail. Turn on Enable debug logging on the Configuration page and review the system log.
nopStation — Your Trusted Solution Partner | www.nop-station.com