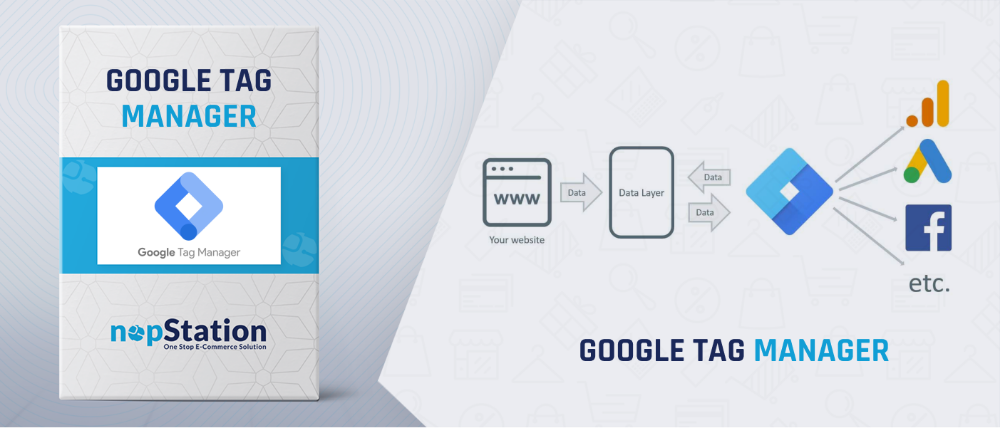
PRE-REQUISITES
- The plugin requires you to install the Nop-Station Core plugin first.
INSTALLATION
- Download the Google Tag Manager Plugin from our store https://nop-station.com/customer/downloadableproducts
- Go to Administration → Configuration → Local plugins
- Upload the .zip file using the "Upload plugin or theme" button
- Go to Administration, and reload the 'list of plugins'. Install 'Nop-Station Core' plugin first and then install 'Nop-Station Google tag Manager plugin'
- To make the plugins functional, restart the application
CONFIGURATION
- Go to Admin → Nop Station → Plugins → Google Tag Manager → Configuration
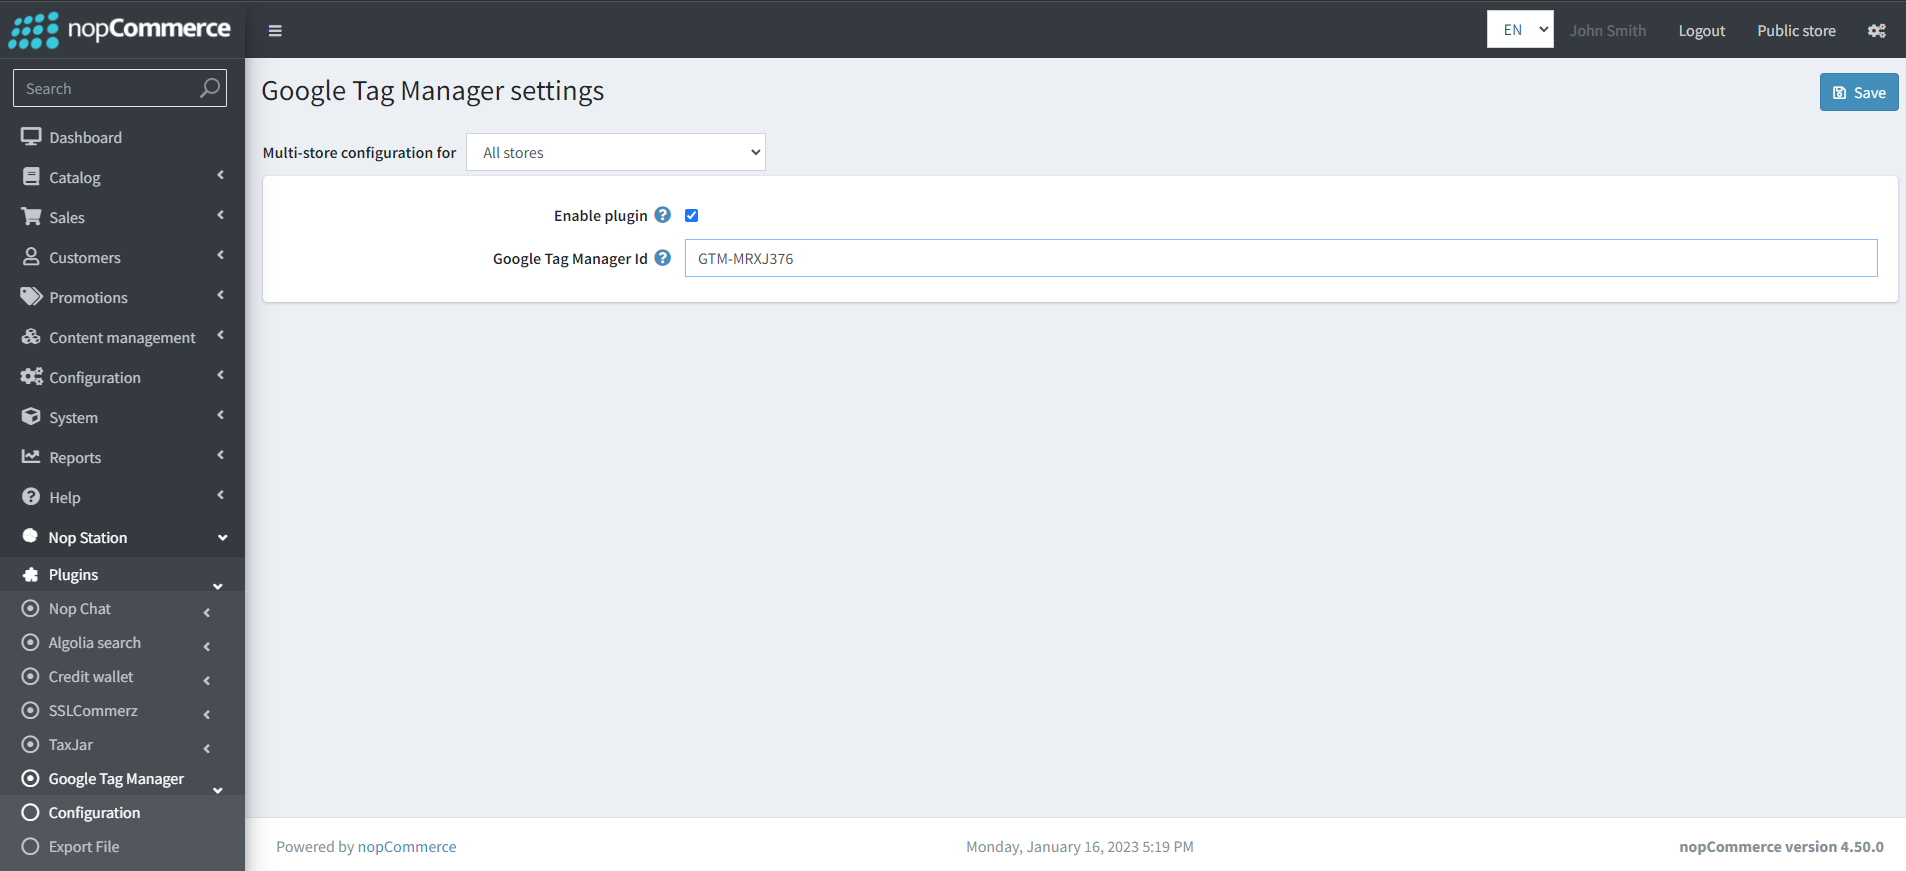
- Enable plugin: By checking this checkbox admins can enable the plugin
- Google Tag Manager Id: Admins will enter the Google Tag Manager ID for their online store here
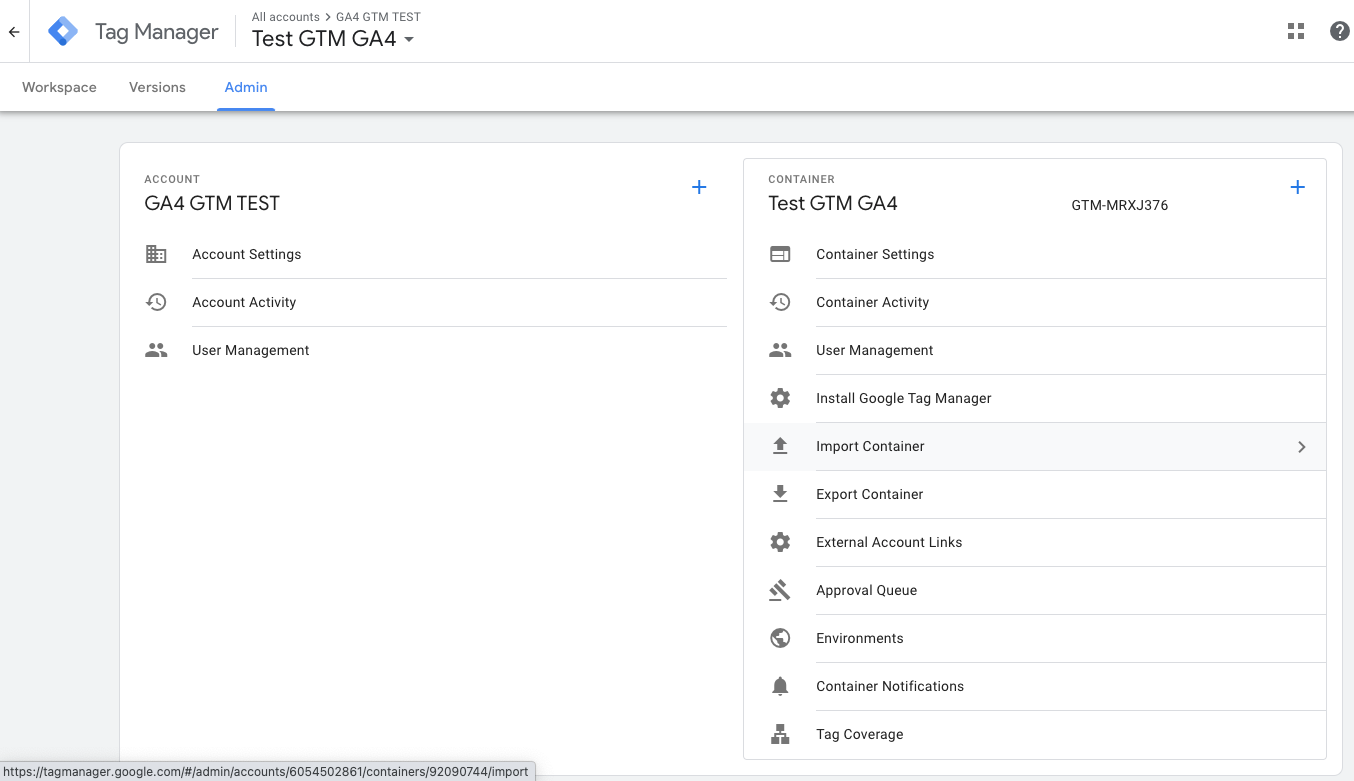
Getting Google Tag Manager Container ID
- Admins can get their Google Tag Manager container ID for their website by logging into their respective Google Tag Manager account and finding the container for their online store as shown here:

Getting Google Tag Manager Export file for Google Analytics
· Admins can generate the Google Tag Manager container file for their Google Analytics by inputting the Google Analytics ID,Google Tag Manager ID, Account ID, Container ID, and Workspace ID and clicking the Export button. This will generate a .json file for their GTM container.
Here is the definition for the input fields below:
· Google Analytics ID: You can find it under Google Analytics → Select your account → Admin (bottom left corner) → Data Streams → Select your stream → Find the Measurement ID.
· Google Tag Manager ID: You can find it in Tag Manager → Select your account (inside both Workspace and Admin sections, e.g., GTM-XXXXXX).
· Account ID: You can find it in Tag Manager → Admin → Account Settings.
· Container ID:You can find it in Tag Manager → Select your account → Admin. In the page URL, you can find the containerId like containerId=123456789 or containers/123456789 .
· Workspace ID: You can find it in Tag Manager → Select your account → Workspaces → Select your workspace. In the page URL, you can find the workspaceId like workspaceId=123456789 or workspaces/123456789 .

For more information about Google Analytics 4 troubleshooting, you can check out our Google Analytics 4 FAQ
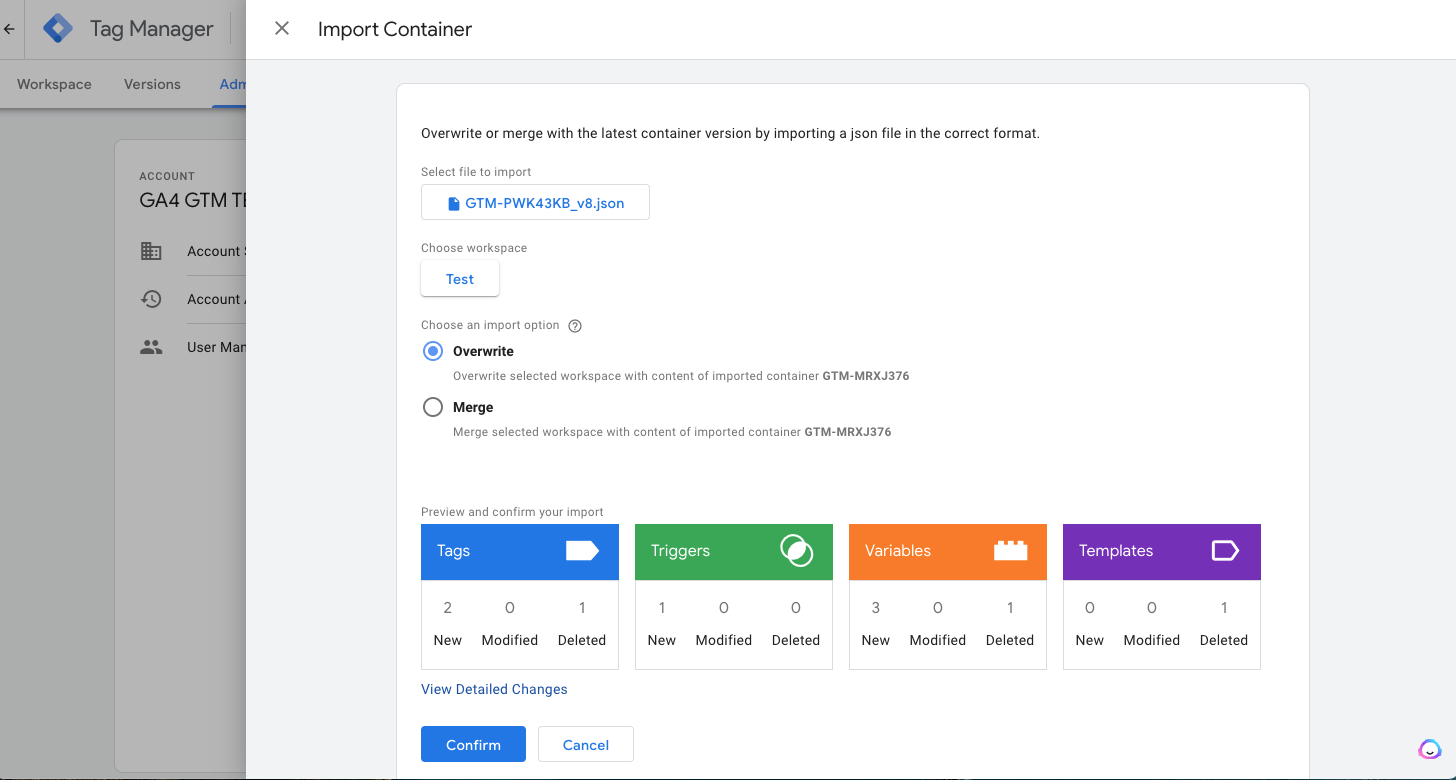
Uploading .json file for Container in Google Tag Manager
- Go to your Google Tag Manager container → Admin → Import container
- On the import Container panel, click Choose container file and select the .json file generated by the plugin.
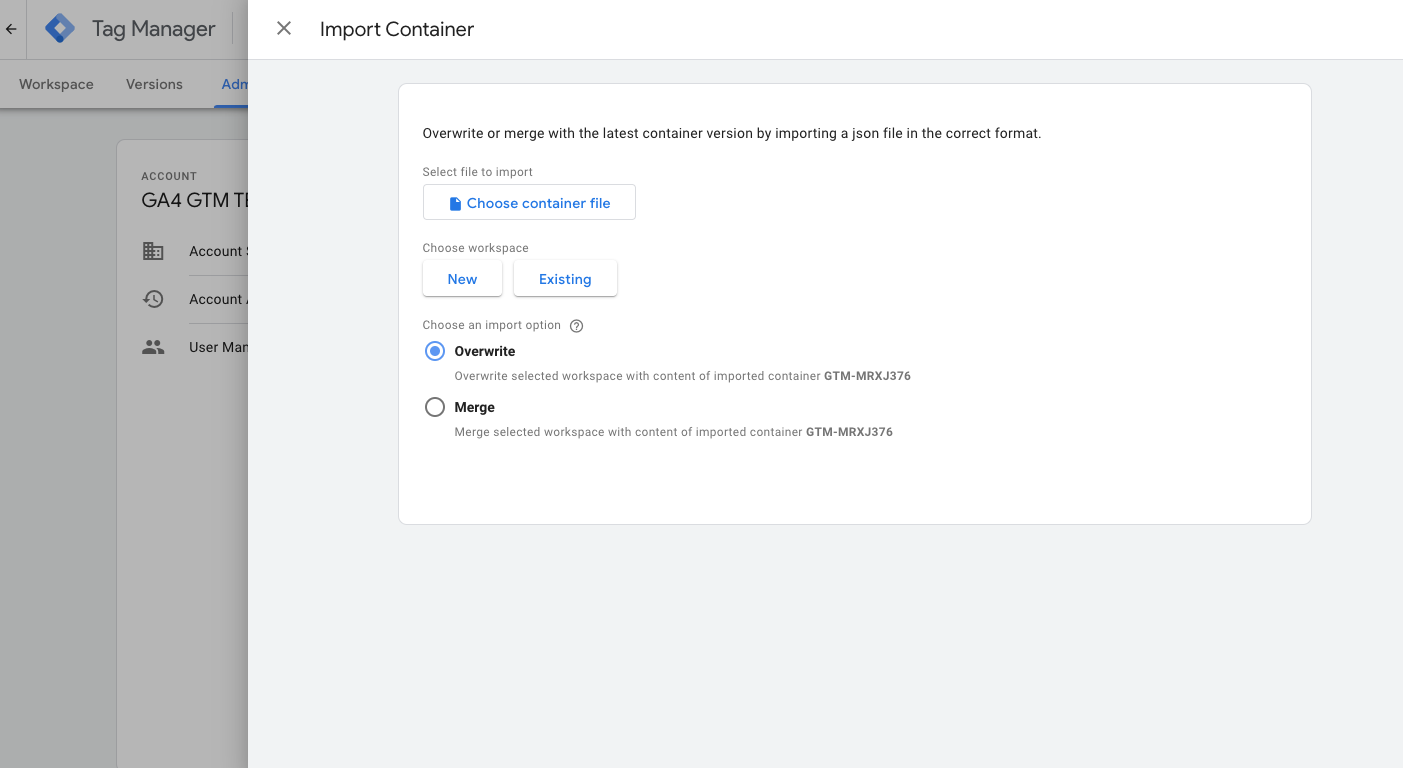
- Create a new or existing workspace
- Then select your import option
- After doing so, your panel should look something like this. Click Confirm to finish
Important Notes Before Importing
· The exported JSON file serves as a template. Importing it into an existing container may cause conflicts with your current tags, triggers, or variables.
It’s strongly recommended to review the import summary carefully or import it into a new workspace first.
· This template includes a core set of GA4 eCommerce tags, triggers, and variables for basic tracking.
You can extend or customize it further by creating additional tags, triggers, and variables based on the same data layer structure.