PRE-REQUISITES
- The plugin requires you to install the Nop-Station Core plugin first.
INSTALLATION
- Download the Smart Mega Menu Plugin from our store https://nop-station.com/customer/downloadableproducts
- Go to Administration → Configuration → Local plugins
- Upload the NopStation.SmartMegaMenu zip file using the "Upload plugin or theme" button
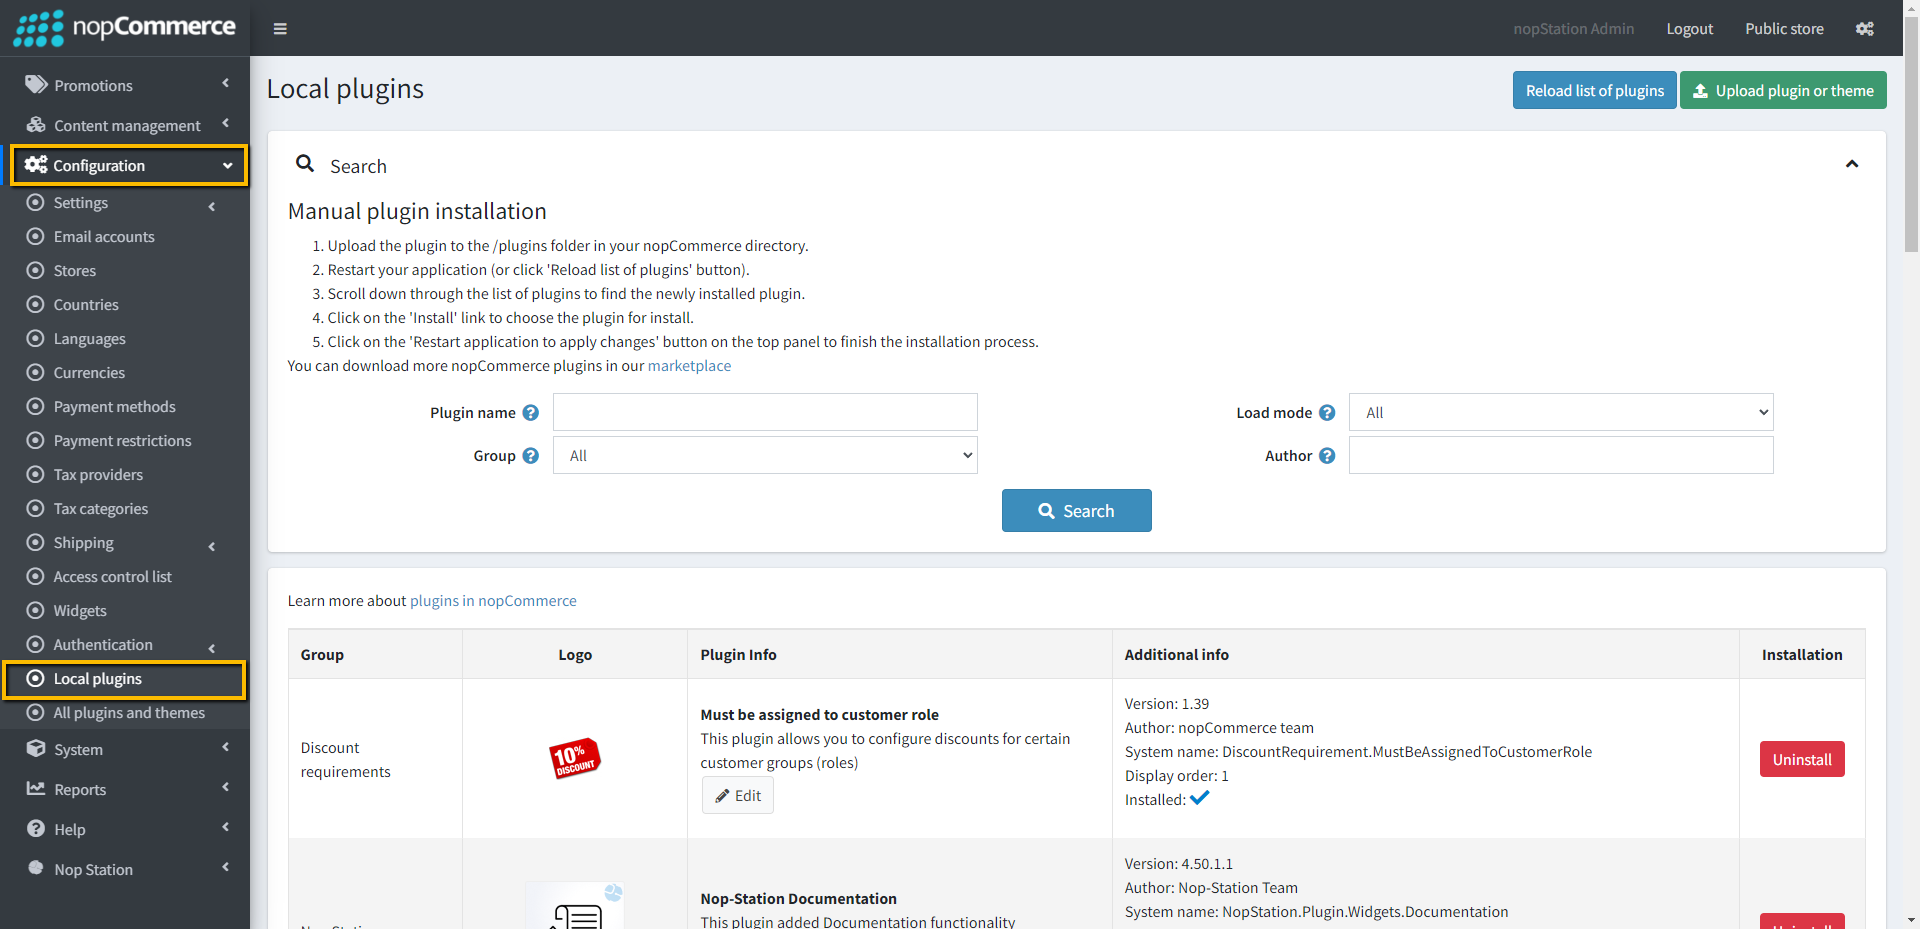
- Go to Administration, reload the 'list of plugins'. Install 'Nop-Station Core' Plugin first and then install 'Smart Mega Menu'
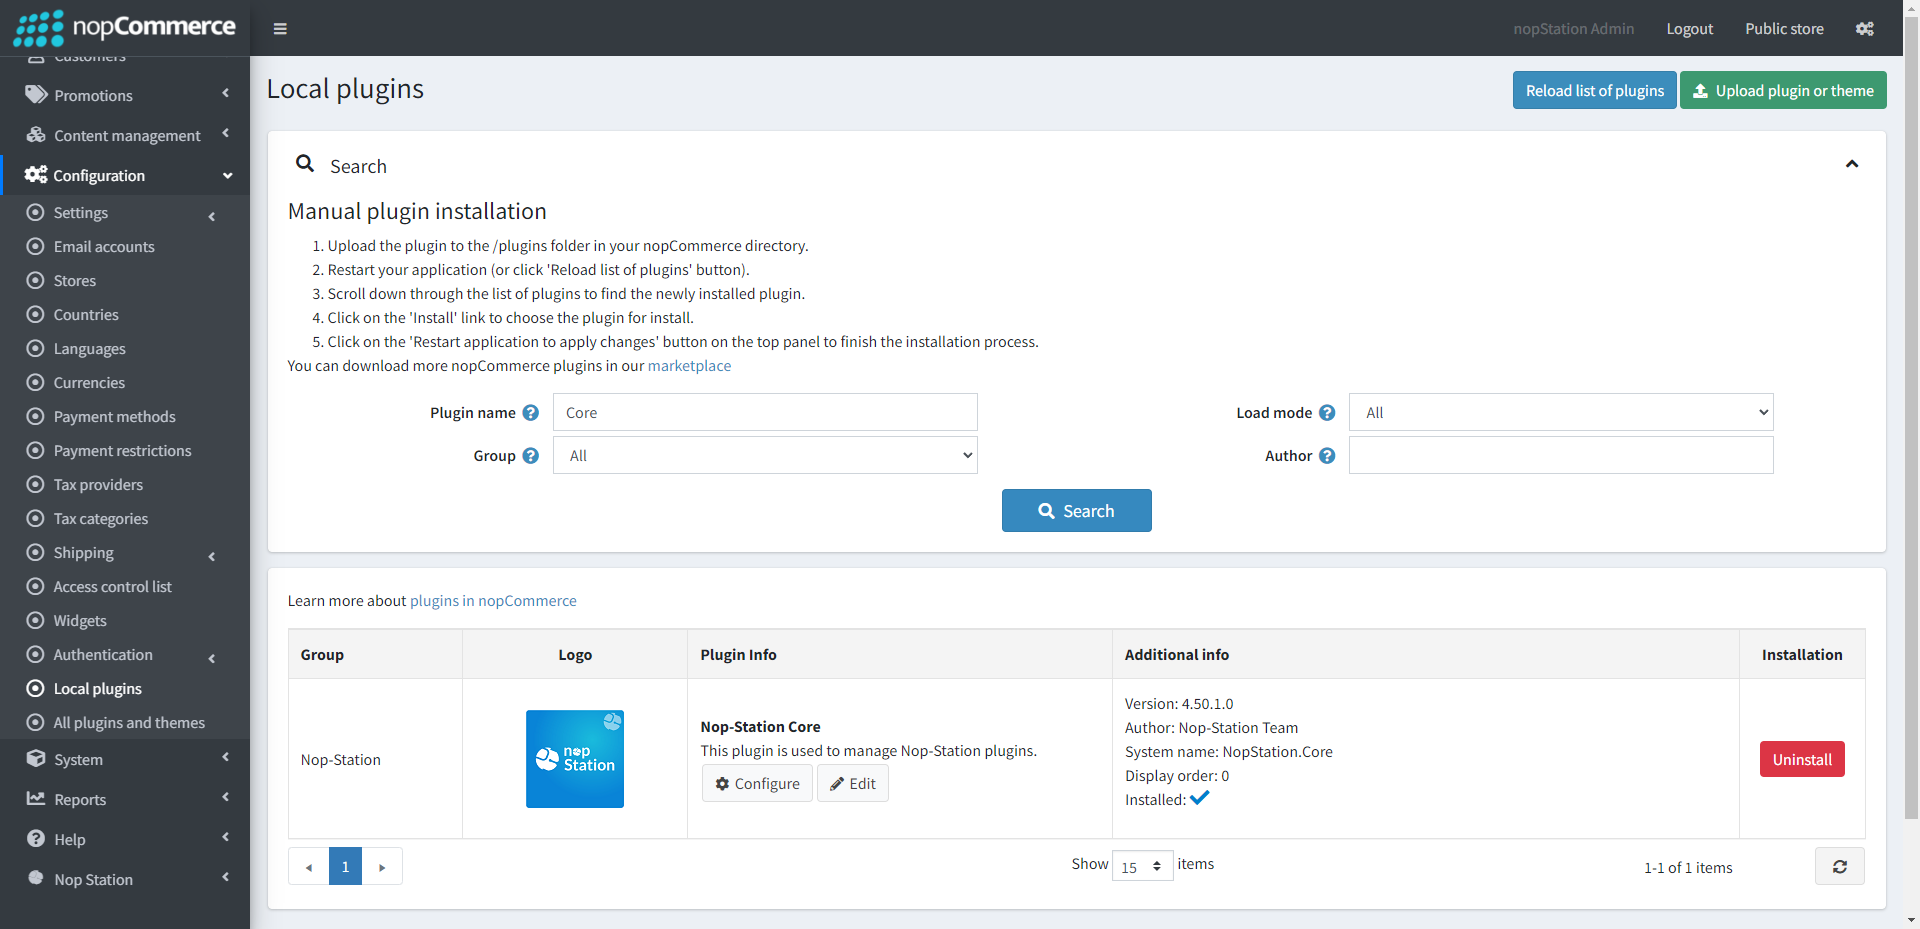
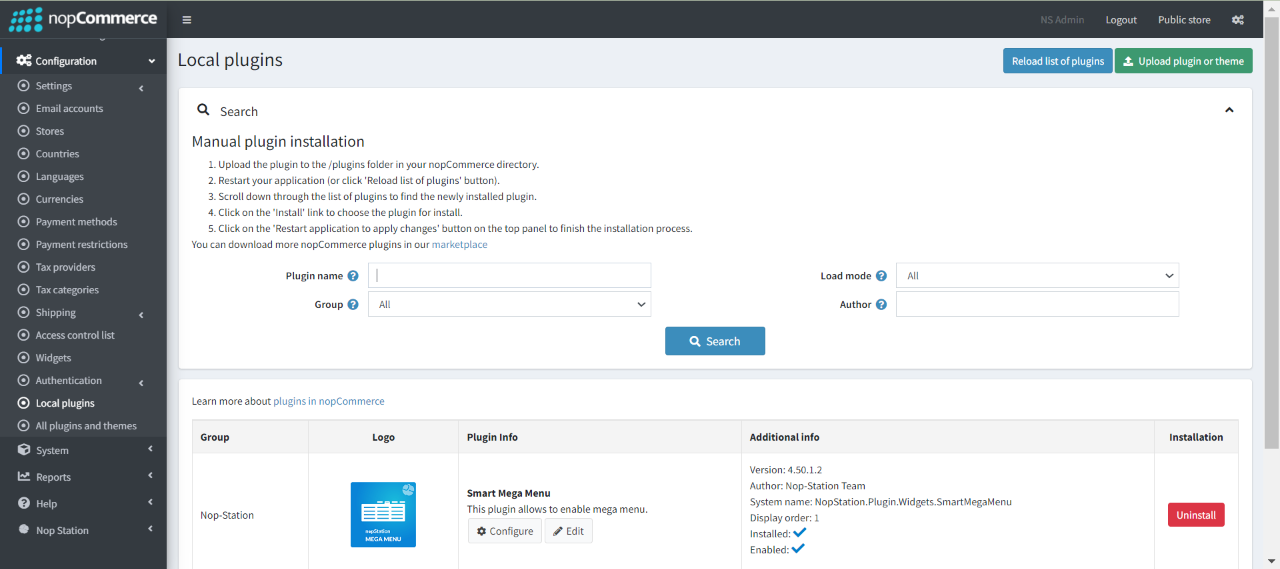
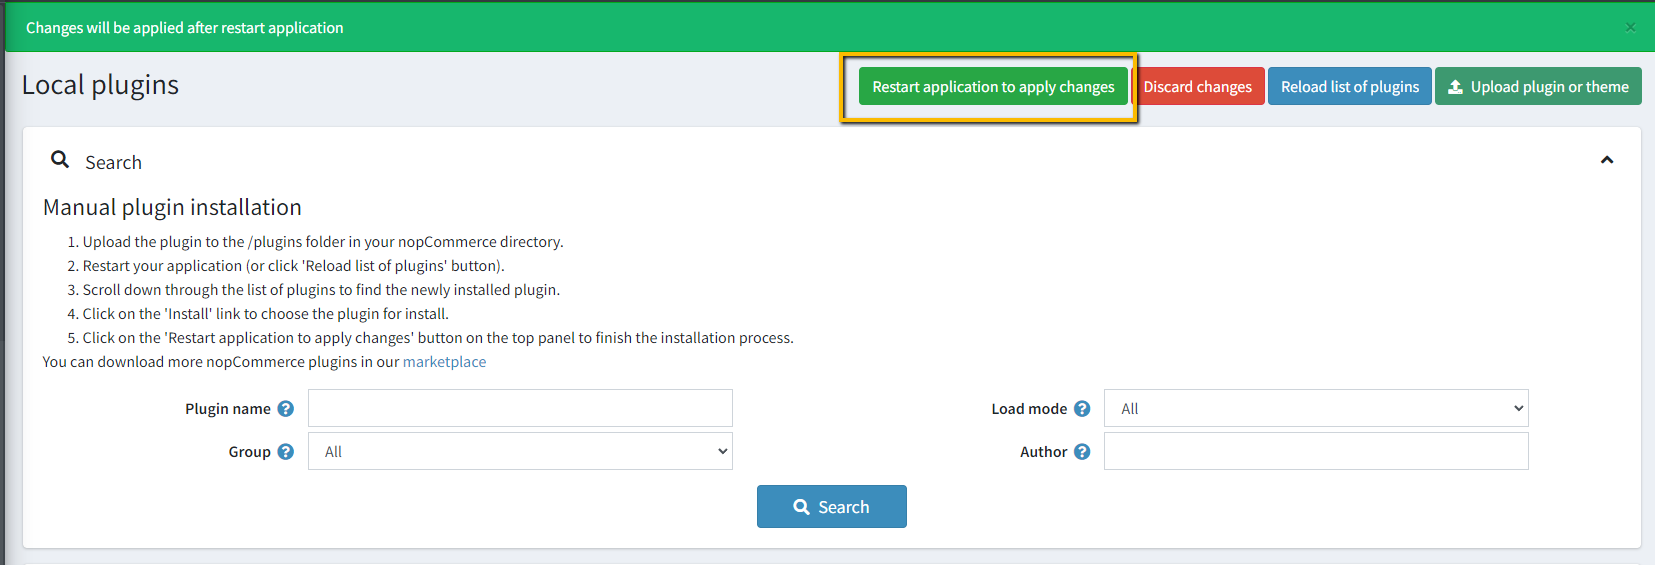
- To make the plugins functional, restart the application
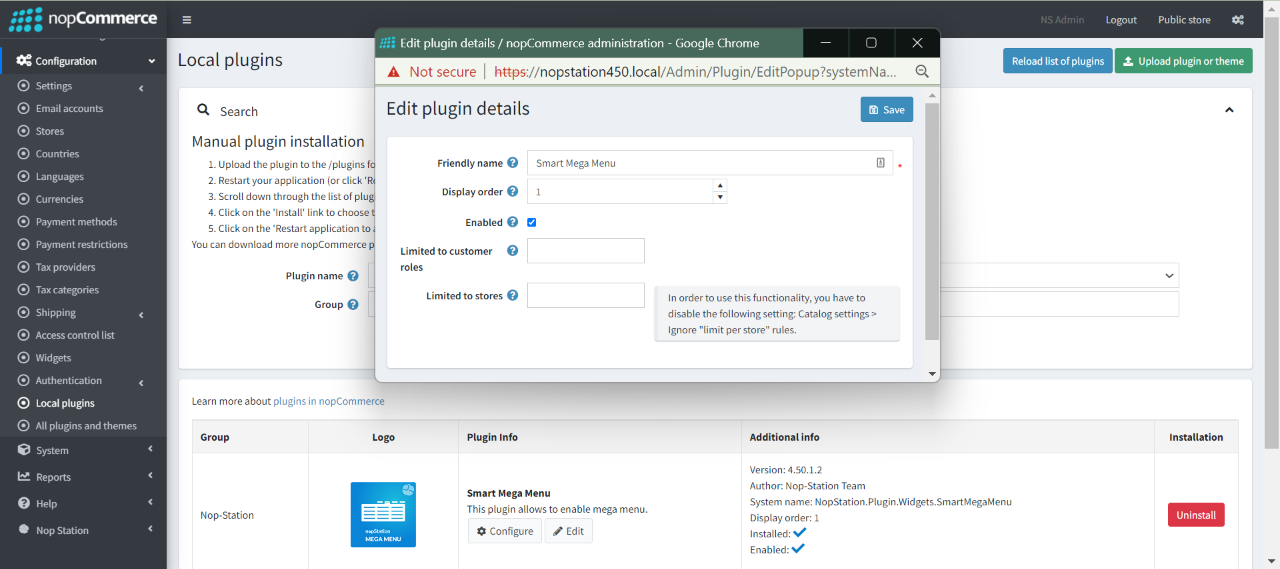
- Enable the plugin with 'Edit' option and Configure it.
- Note: On uninstallation, the default menu will get restored.
How to Configure and Organize the Smart Mega Menu
Configure Smart Mega Menu
- Go to the Admin → Nop Station → Plugins → Smart Mega Menu You will get an Add new button on the top-right corner. Click on Add new button.

- An Add new menu form will open.
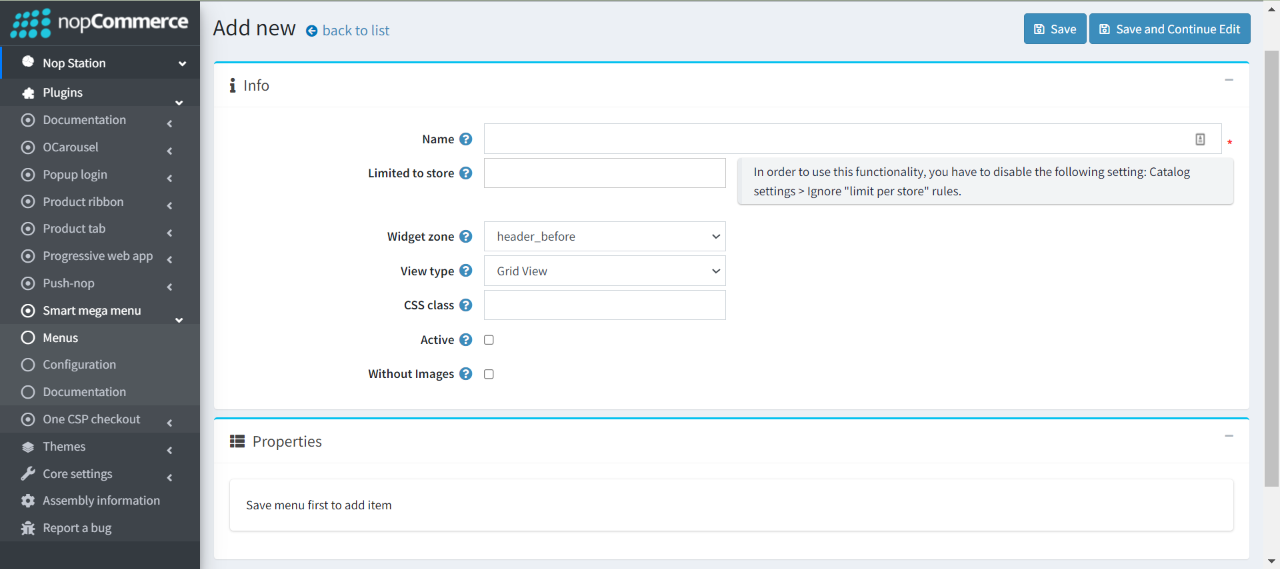
- Enter a menu name of your choice.
- Select the store from the Limited to store field if you have a multi-store setup.
- Select a Widget zone from the Widget zone drop-down menu. The default clean theme supported widgets zones are:
- Header before
- Header middle
- Header after
- You can also set your theme-specific custom Widget Zone to display the Mega Menu in the desired location of your public store.
- Select the View type from the View type drop-down menu. Available view types are:
- Grid View
- List View
- In our case, we are selecting the Grid View here
- Click on Save and Continue button to save the changes
Organize Smart Mega Menu
- Click on the Properties block, menu options will expand on-click.
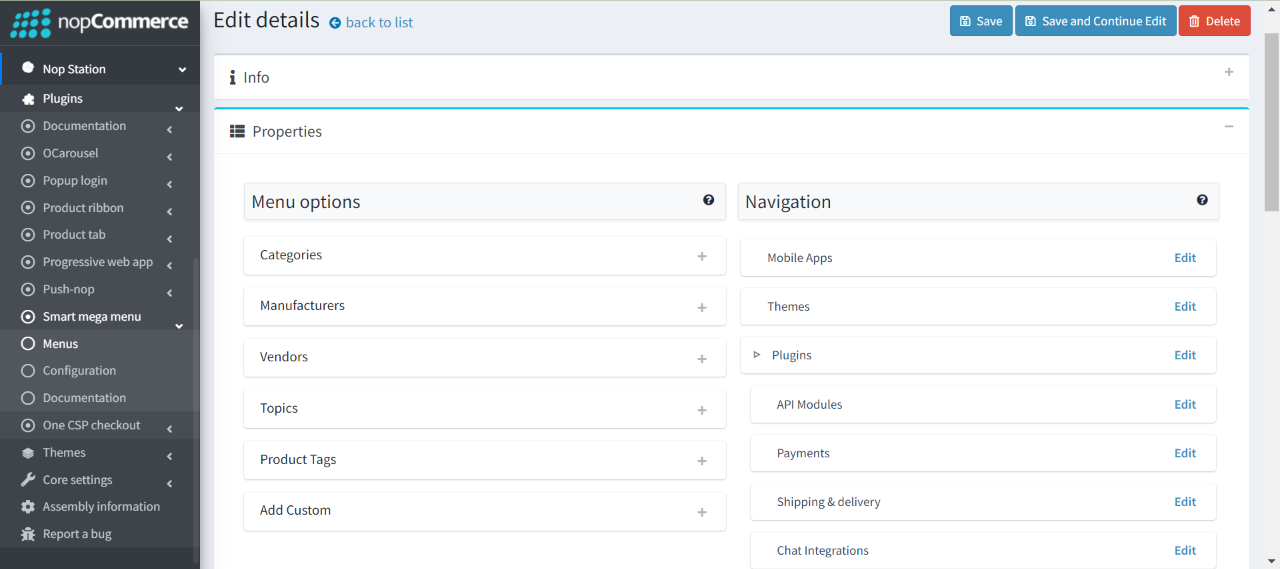
- Under Properties, a total of six types of menu options are available to add as a menu item in the Smart Mega Menu tree:
- Categories
- Manufacturers
- Vendors
- Topics
- Product Tags
- Add Custom
- Add Categories in the Smart Mega Menu
- Click on the +icon right next to the Categories menu option
- This will expand and list down all the categories available in your nopCommerce store
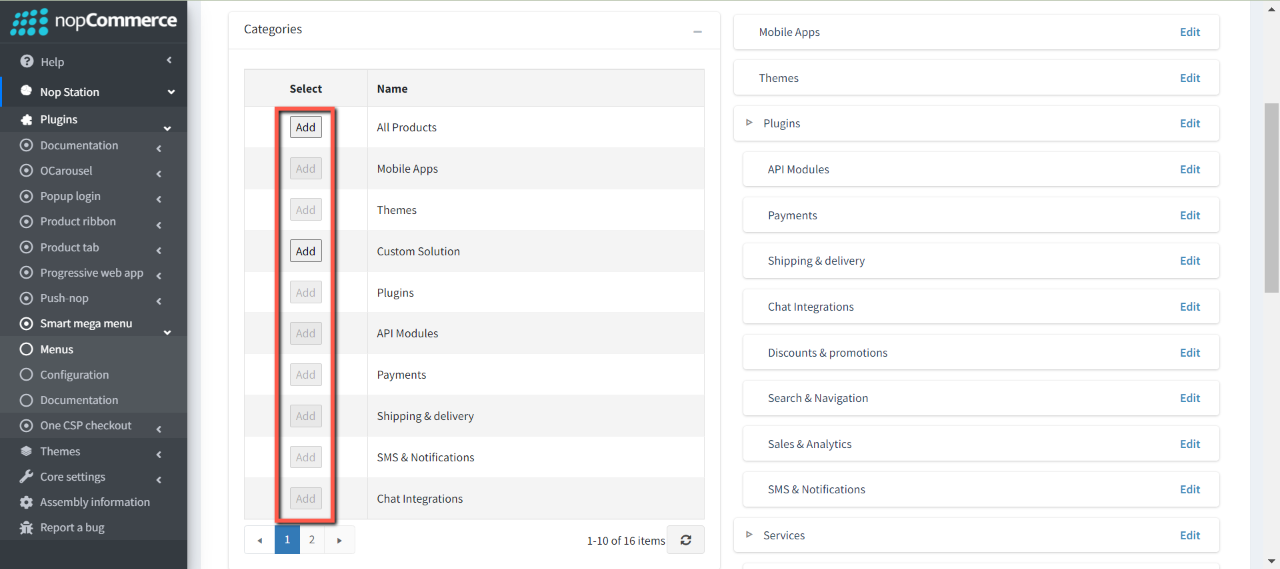
- Now, click on Add button on the categories.
- This will add the categories as navigation item to the right.
- Notes:
- You can add as many categories as you want
- Note that, the default parent-child tree structure of the categories are applied from the existing category tree in category menu
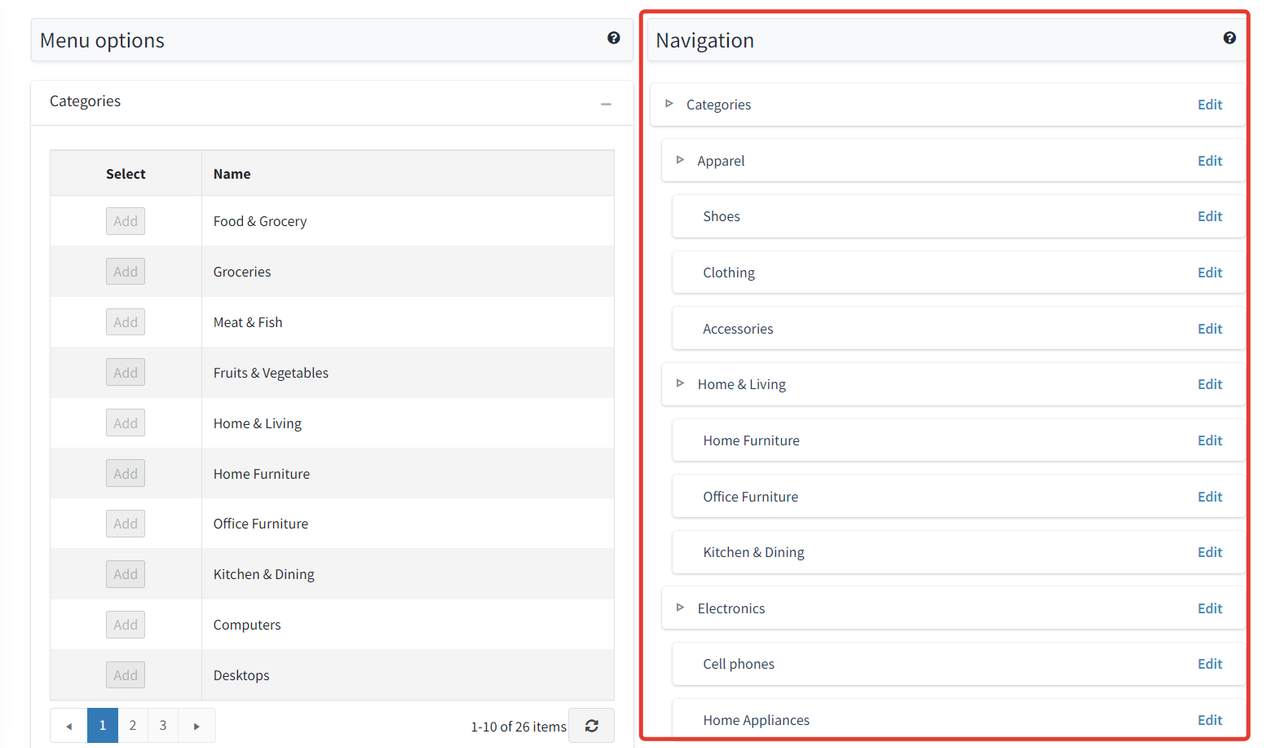
- You can drag and drop the navigation items at/under any level of navigation item.
- You can organize the parent-child tree structure of the categories in the way you want.
- You can add banners to the navigation item
- In the public store, the banners in the mega menu will be shown in the 2nd layer 3rd layer in the Grid View.
- Add a Banner to Category/Naviation Item
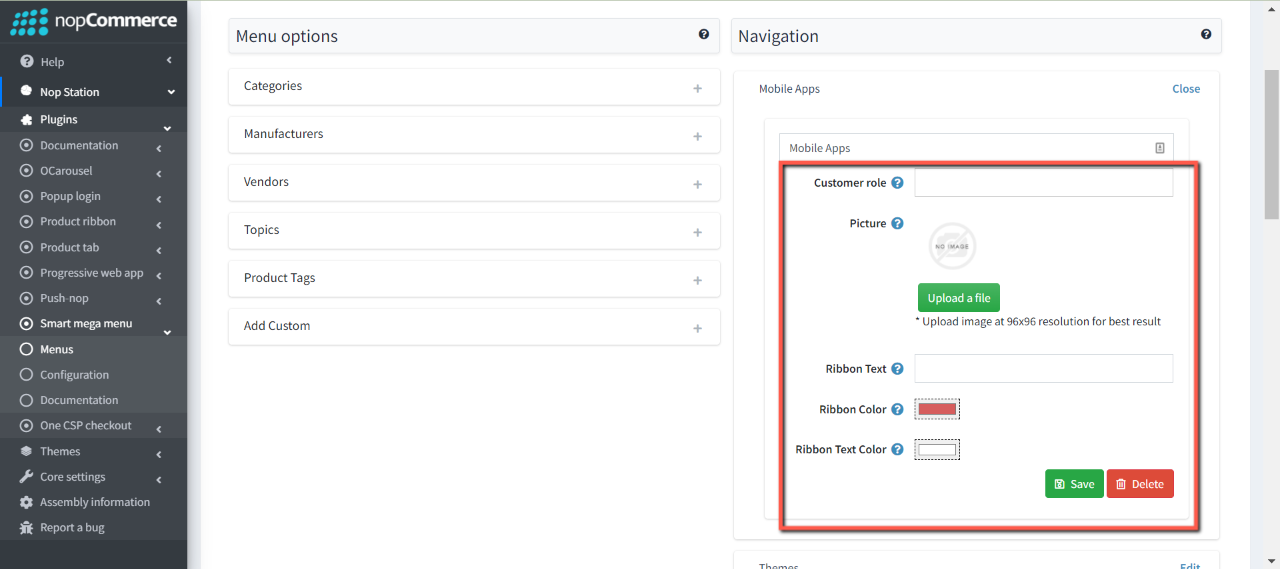
- To add a navigation item banner, click on the Edit button.
- A picture upload menu will open, upload picture and click on the Save button.
- Under the navigation item edit option, you can also add a ribbon text and ribbon background color.
- The added ribbon and ribbon background color will be displayed right beside the navigation item in public store menu.
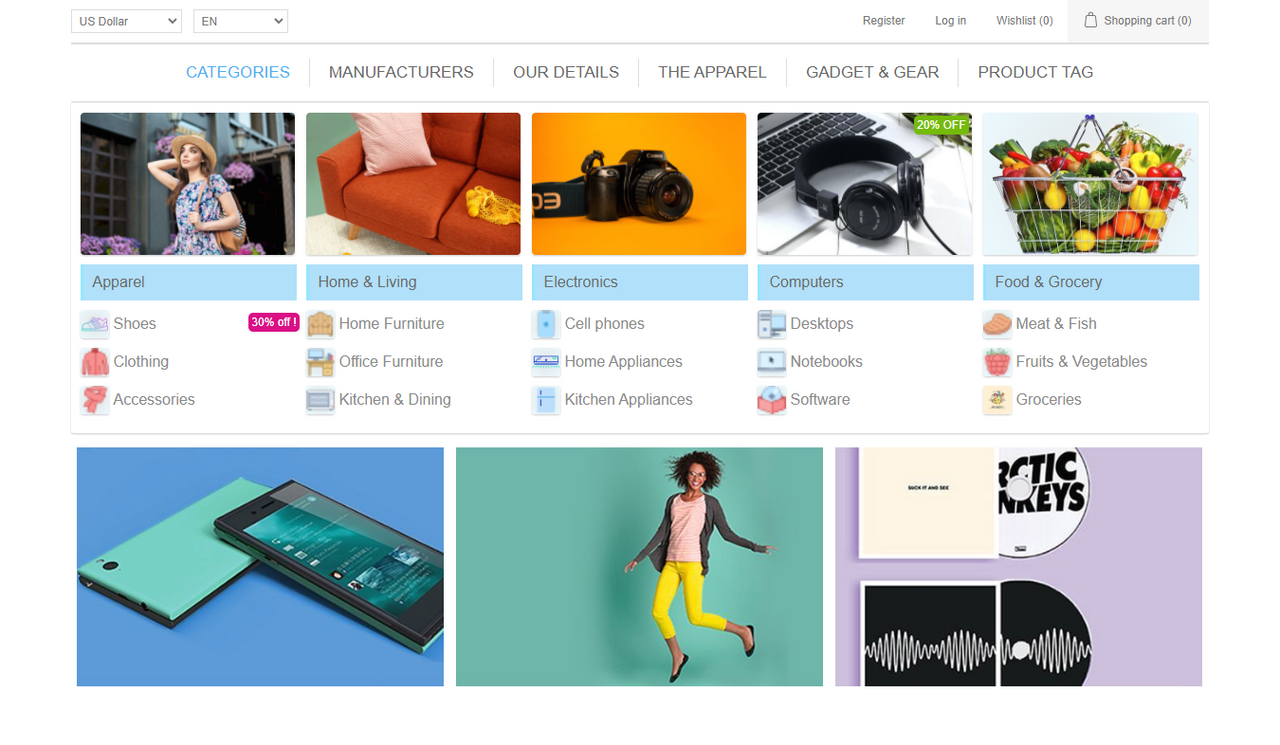
- After adding banners and organising the navigation items, the Categories in Grid View in the public store will look like this:
- Adding Manufacturers, Vendors, Topics, Product Tags, Custom Navigation Item
- Follow the steps mentioned under Add Categories
- You can add the Manufacturers, Vendors, Topics pages, and even add Custom Navigation Items as menu items.
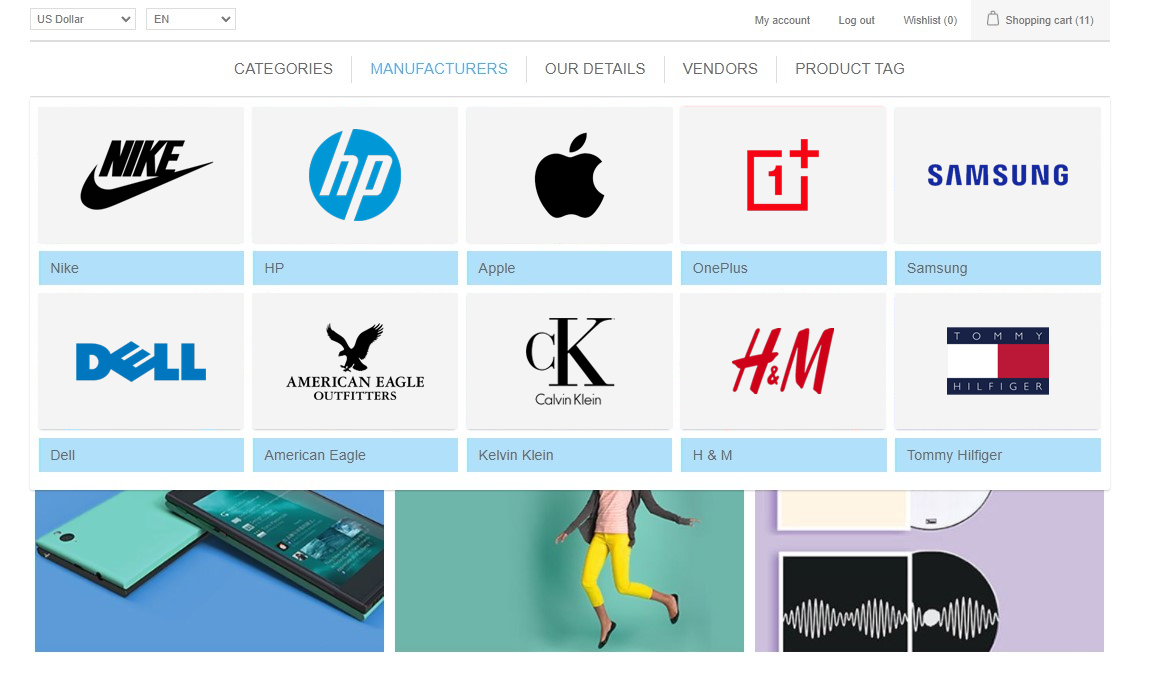
- Here is a view of the Smart Mega Menu Manufacturers menu in the public store:
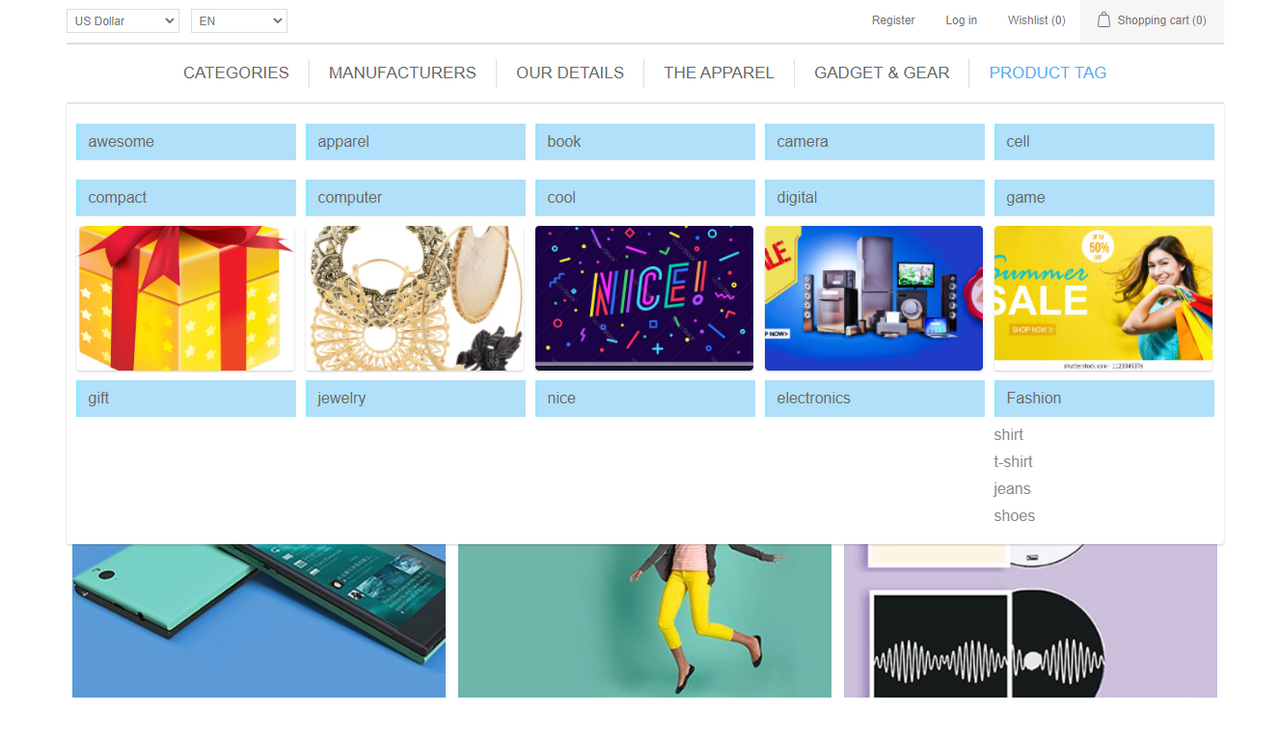
- And here is a view of the Smart Mega Menu Product Tags in the public store: