


PRE-REQUISITES
- The plugin requires you to install the Nop-Station Core plugin first.
INSTALLATION
- Download the Helpdesk Plugin from our store https://nop-station.com/customer/downloadableproducts
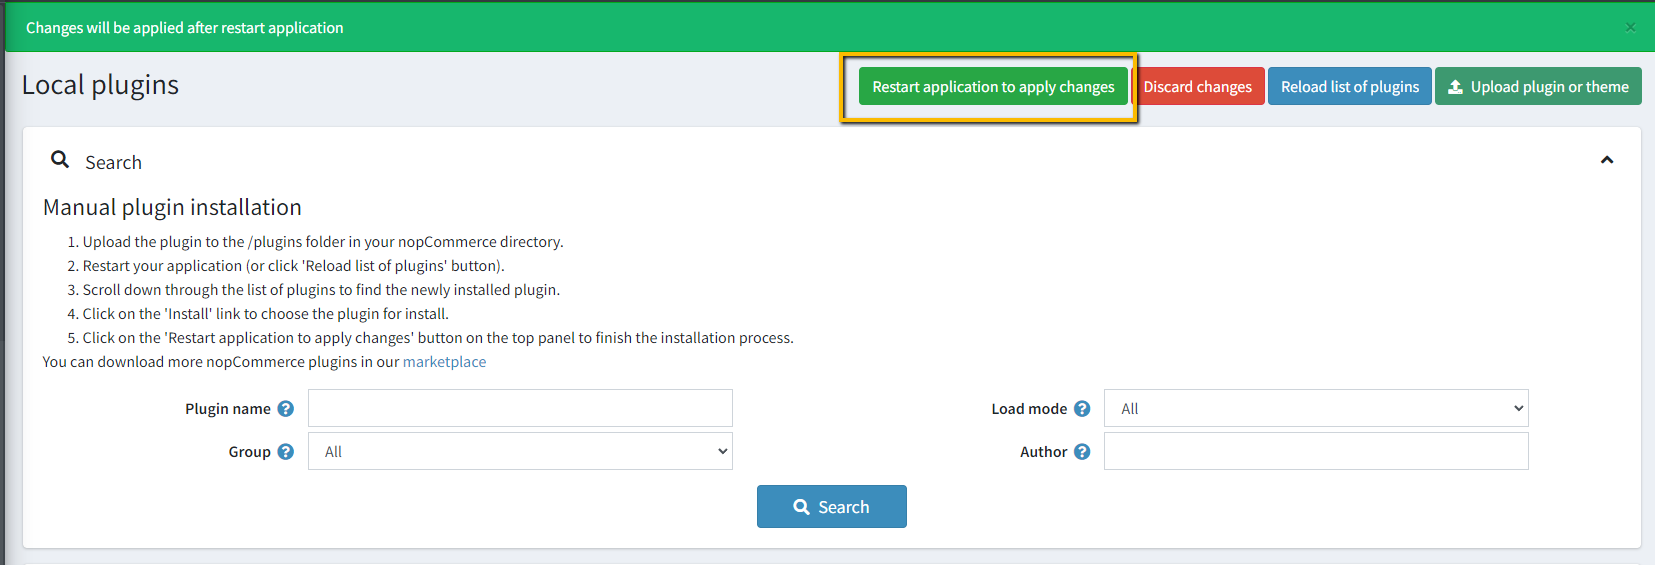
- Go to Administration → Configuration → Local plugins
- Upload the NopStation.HelpDesk zip file using the "Upload plugin or theme" button
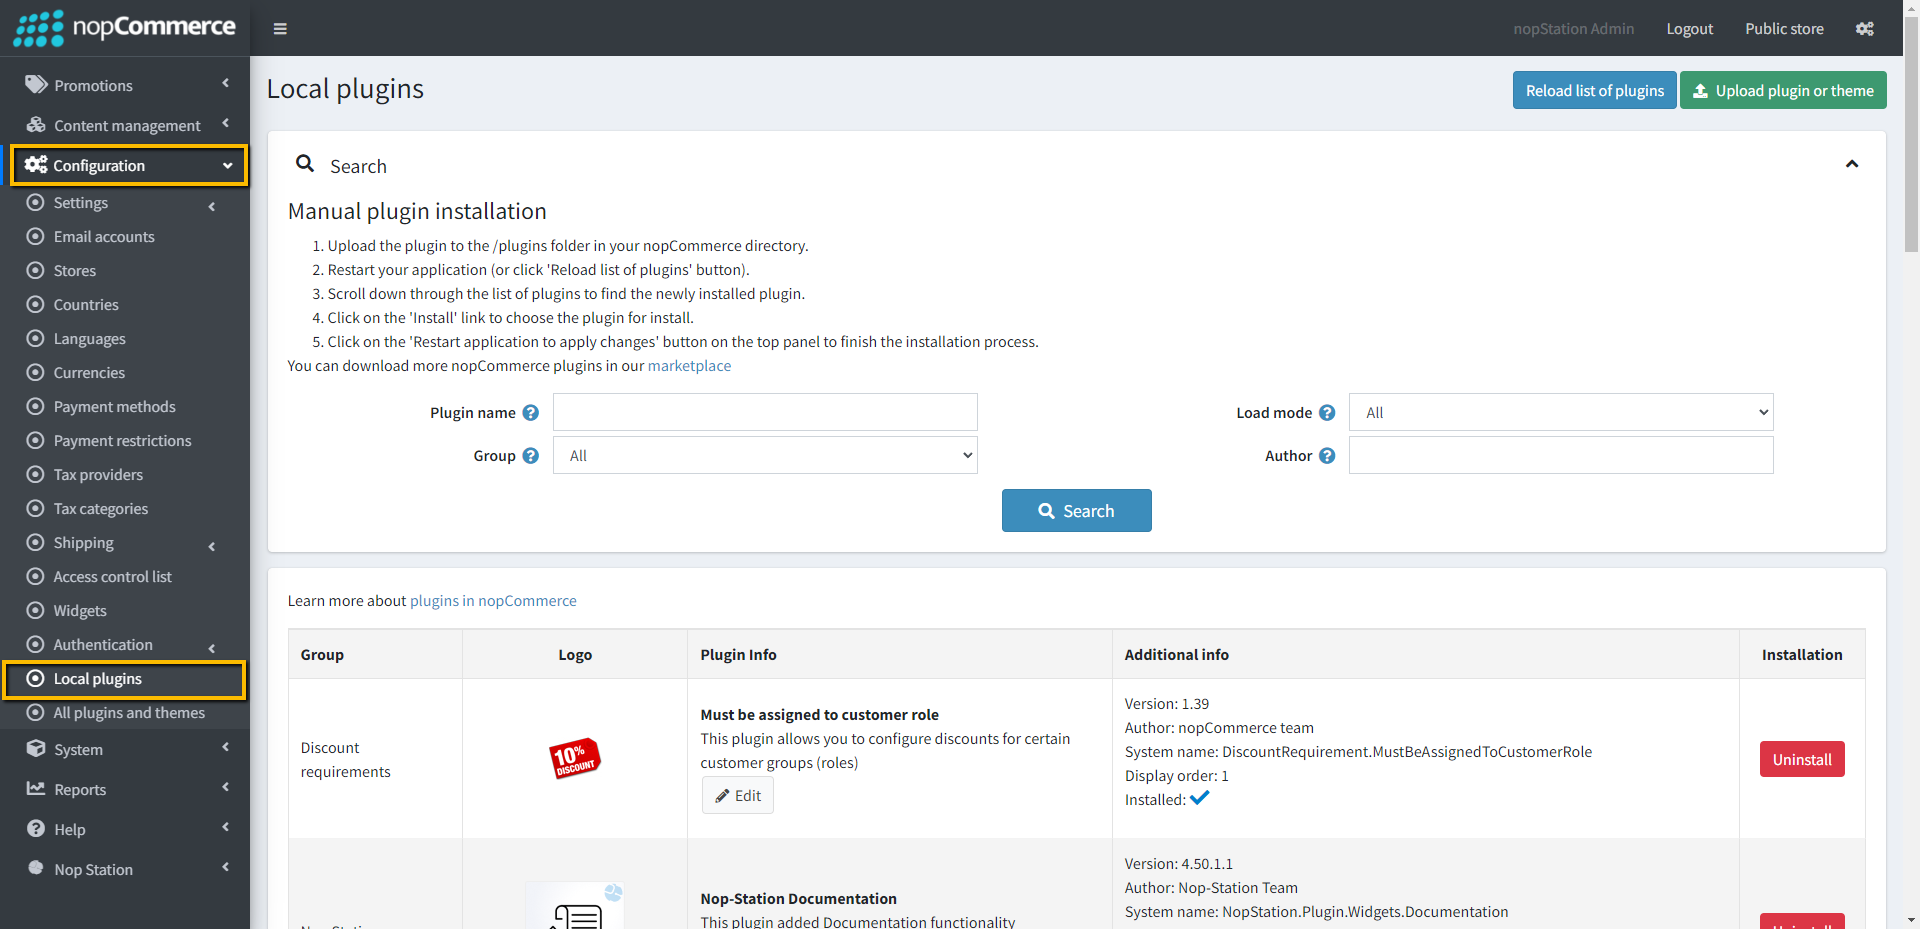
- Go to Administration, reload the 'list of plugins'. Install 'Nop-Station Core' Plugin first and then install 'Nop-Station Helpdesk'
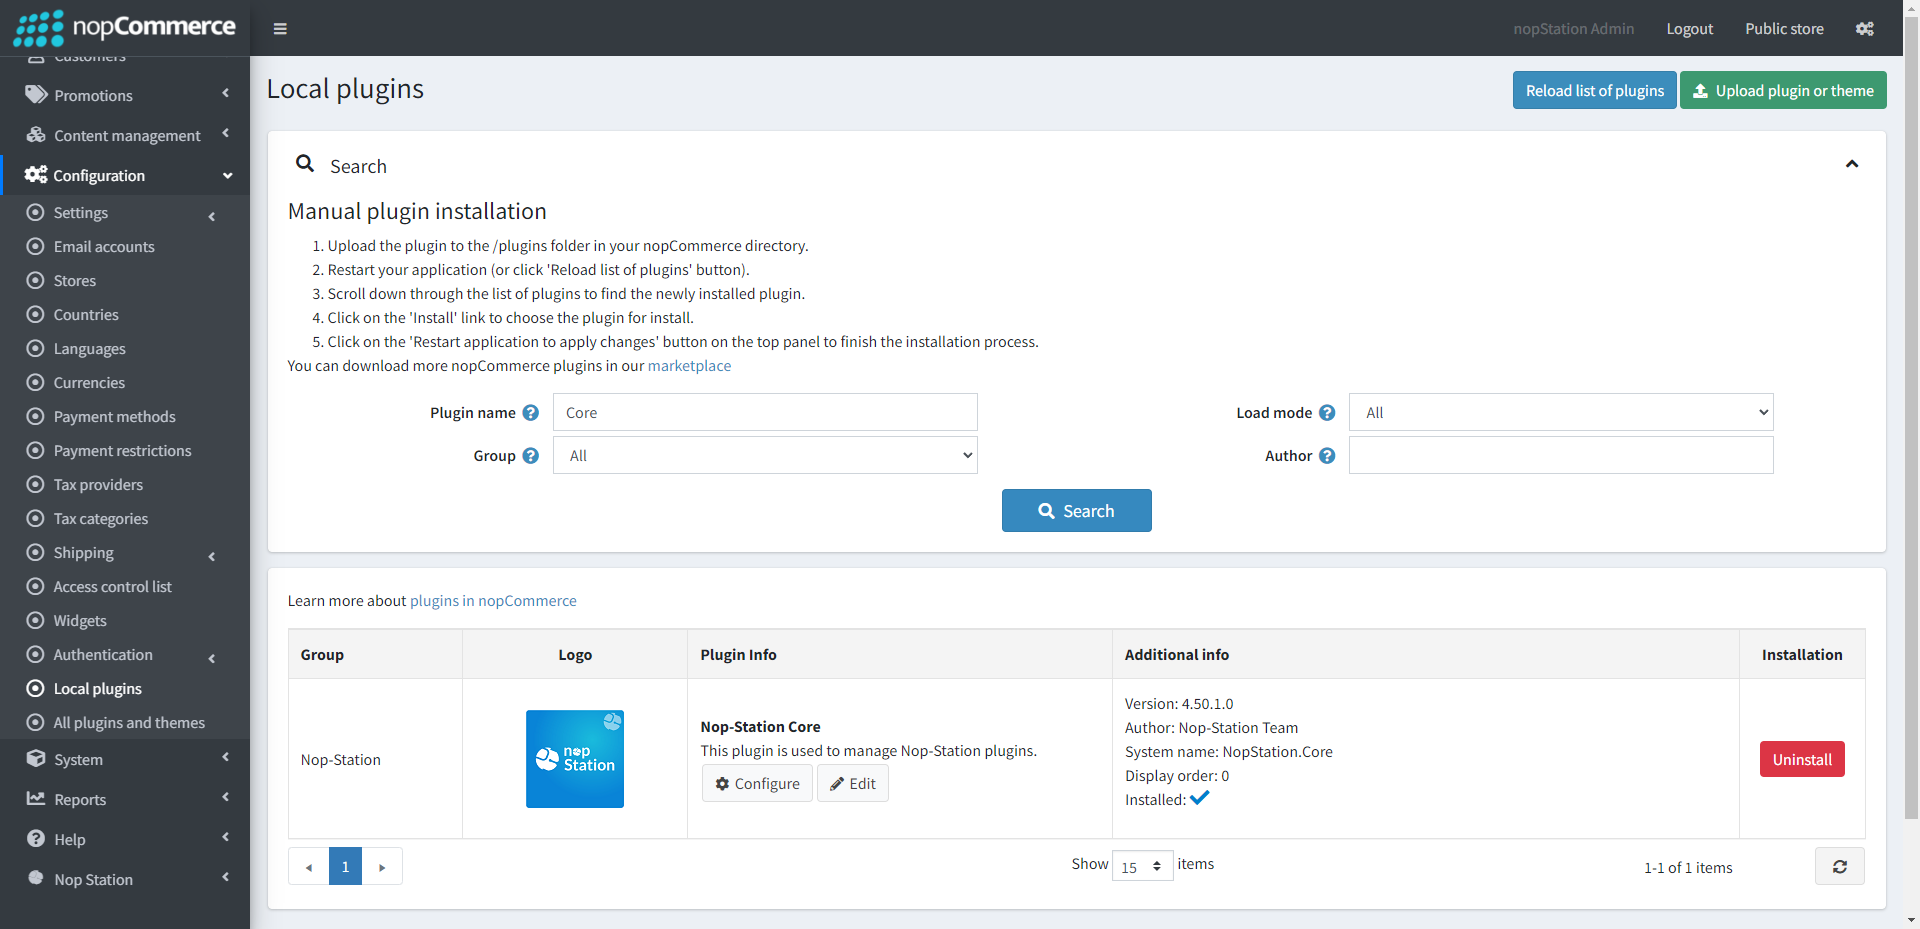
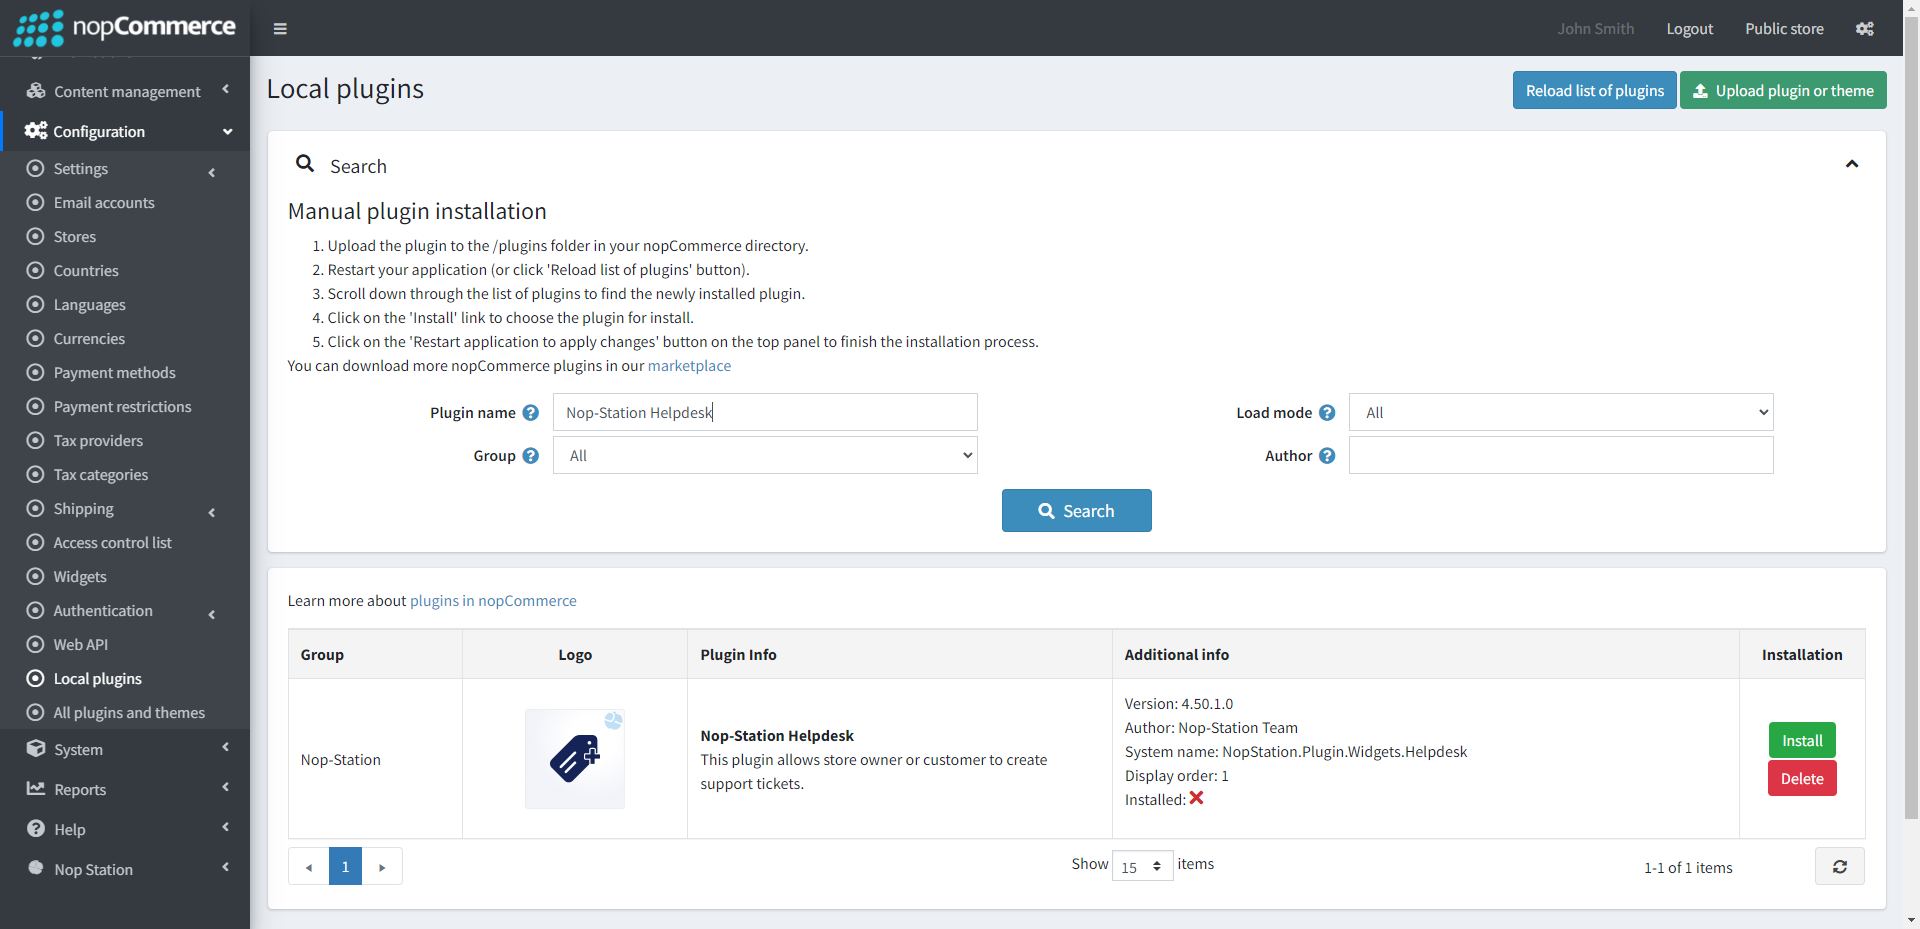
- To make the plugins functional, restart the application
- Enable the plugin with 'Edit' option and Configure

CONFIGURATION
- Go to Admin → Nop Station → Plugins → Help desk → Configuration
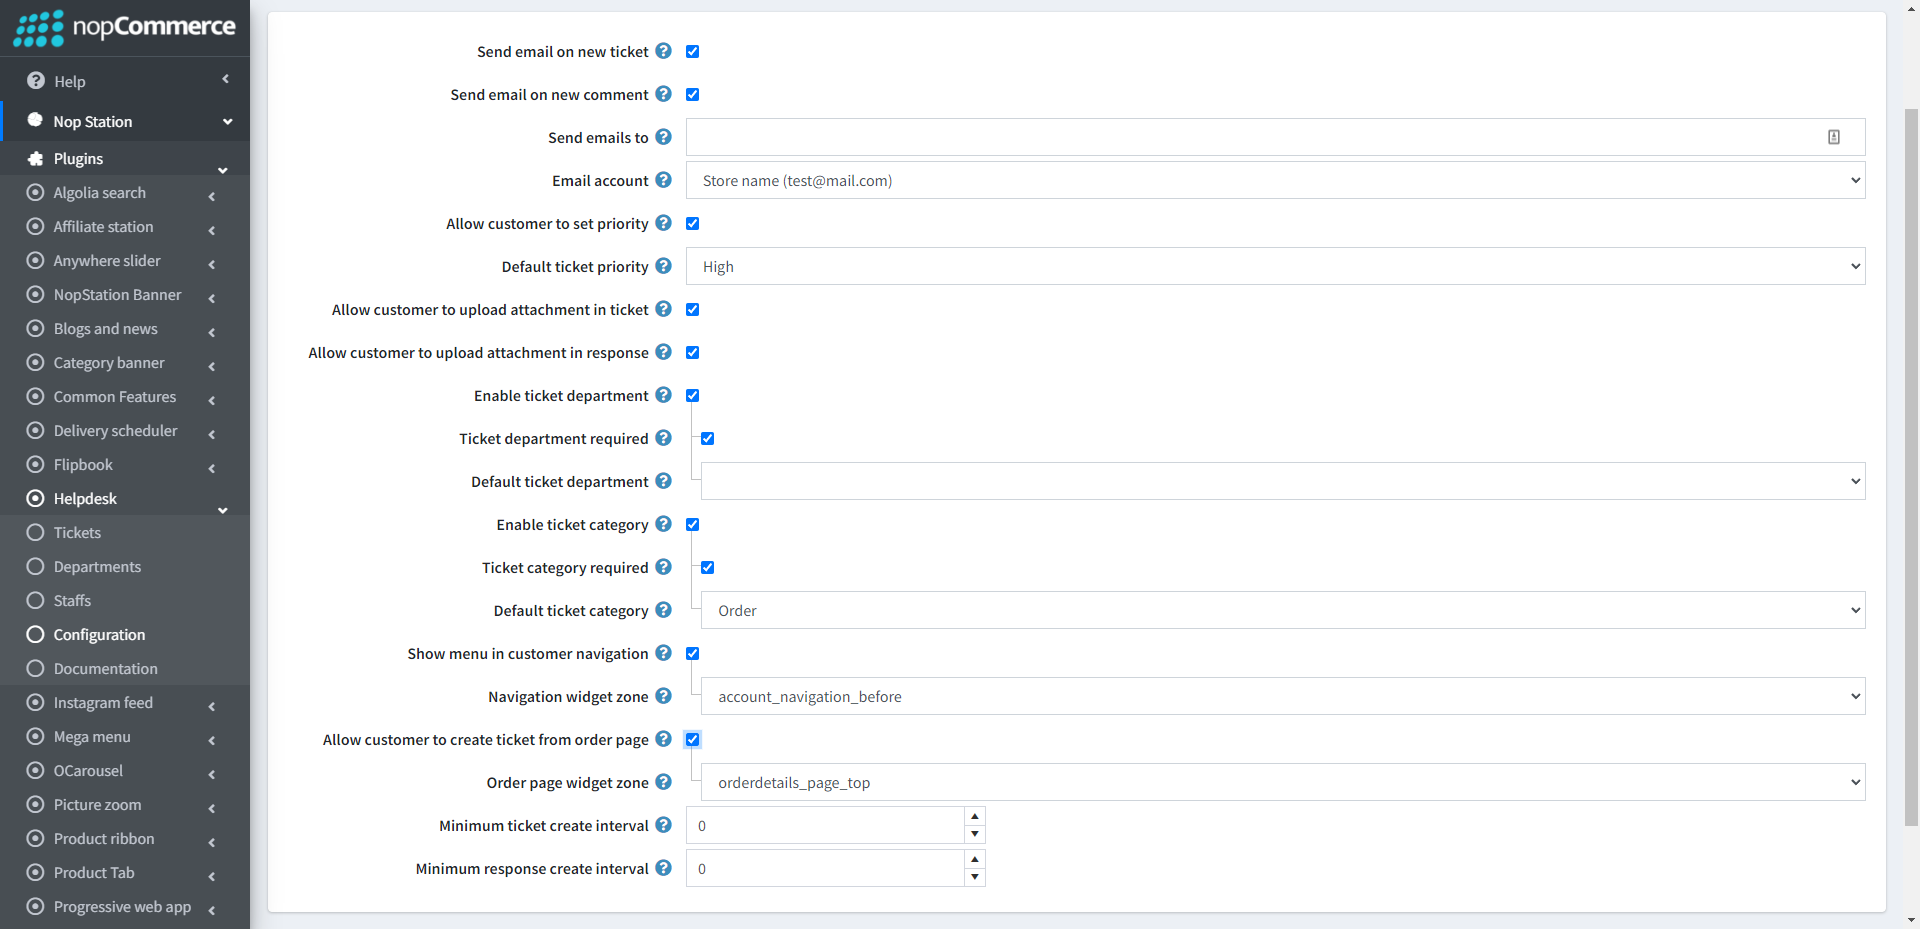
- Allow customer to set priority: This option allows a customer to set priority while creating a ticket
- Default ticket priority: Specifies the default priority of the tickets
- Allow customer to upload attachment in ticket: Enables or disables file attachment while creating a ticket from the customer end
- Allow customer to upload attachment in response: Enables or disables file attachment while replying to a ticket from the customer end
- Enable ticket department: Enabling this option allows a customer to set a department while creating a ticket
- Ticket department required: Make ticket department as required or not-required field while creating a ticket from customer end
- Default ticket department: Specify which department will be assigned for resolving customer tickets
- Enable ticket category: Enabling this option allows a customer to set category of type while creating a ticket
- Ticket category required: Make ticket category as required or not-required field while creating a ticket from customer end
- Default ticket category: Specifies which category will be selected for default ticket category
- Show menu in customer navigation: Enabling this option, customers can access the help desk ticket menu from the public store
- Navigation widget zone: Default area where customers can see the option for accessing their tickets from the public store with help desk plugin
- Allow customer to create ticket from order page: This option allows a customer to create a ticket from the order details page
- Order page widget zone: Specifies default zone where Create ticket option can be seen in order details page
TICKET CREATE
- The Nop Station → Plugins → Help desk → Tickets option, contains list of Tickets. Here tickets are found with category, priority and status
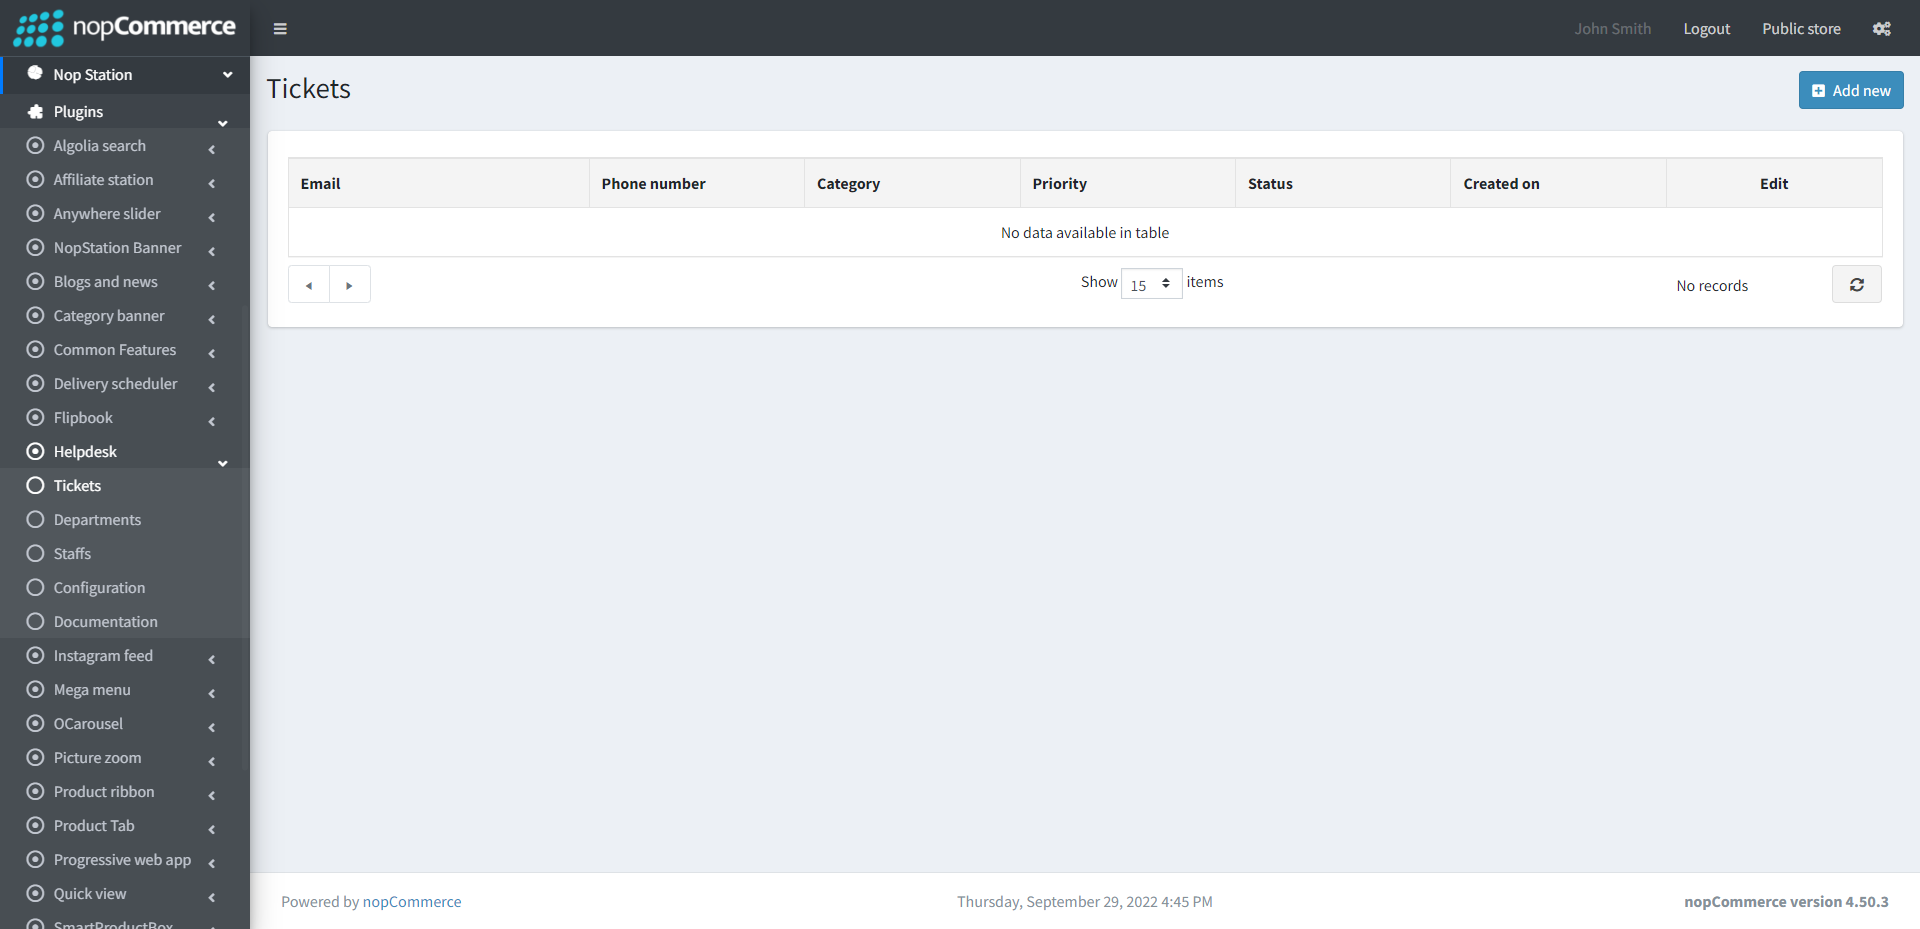
- You can create a ticket on behalf of a customer from the admin area. In order to create a new ticket click on the Add new to create
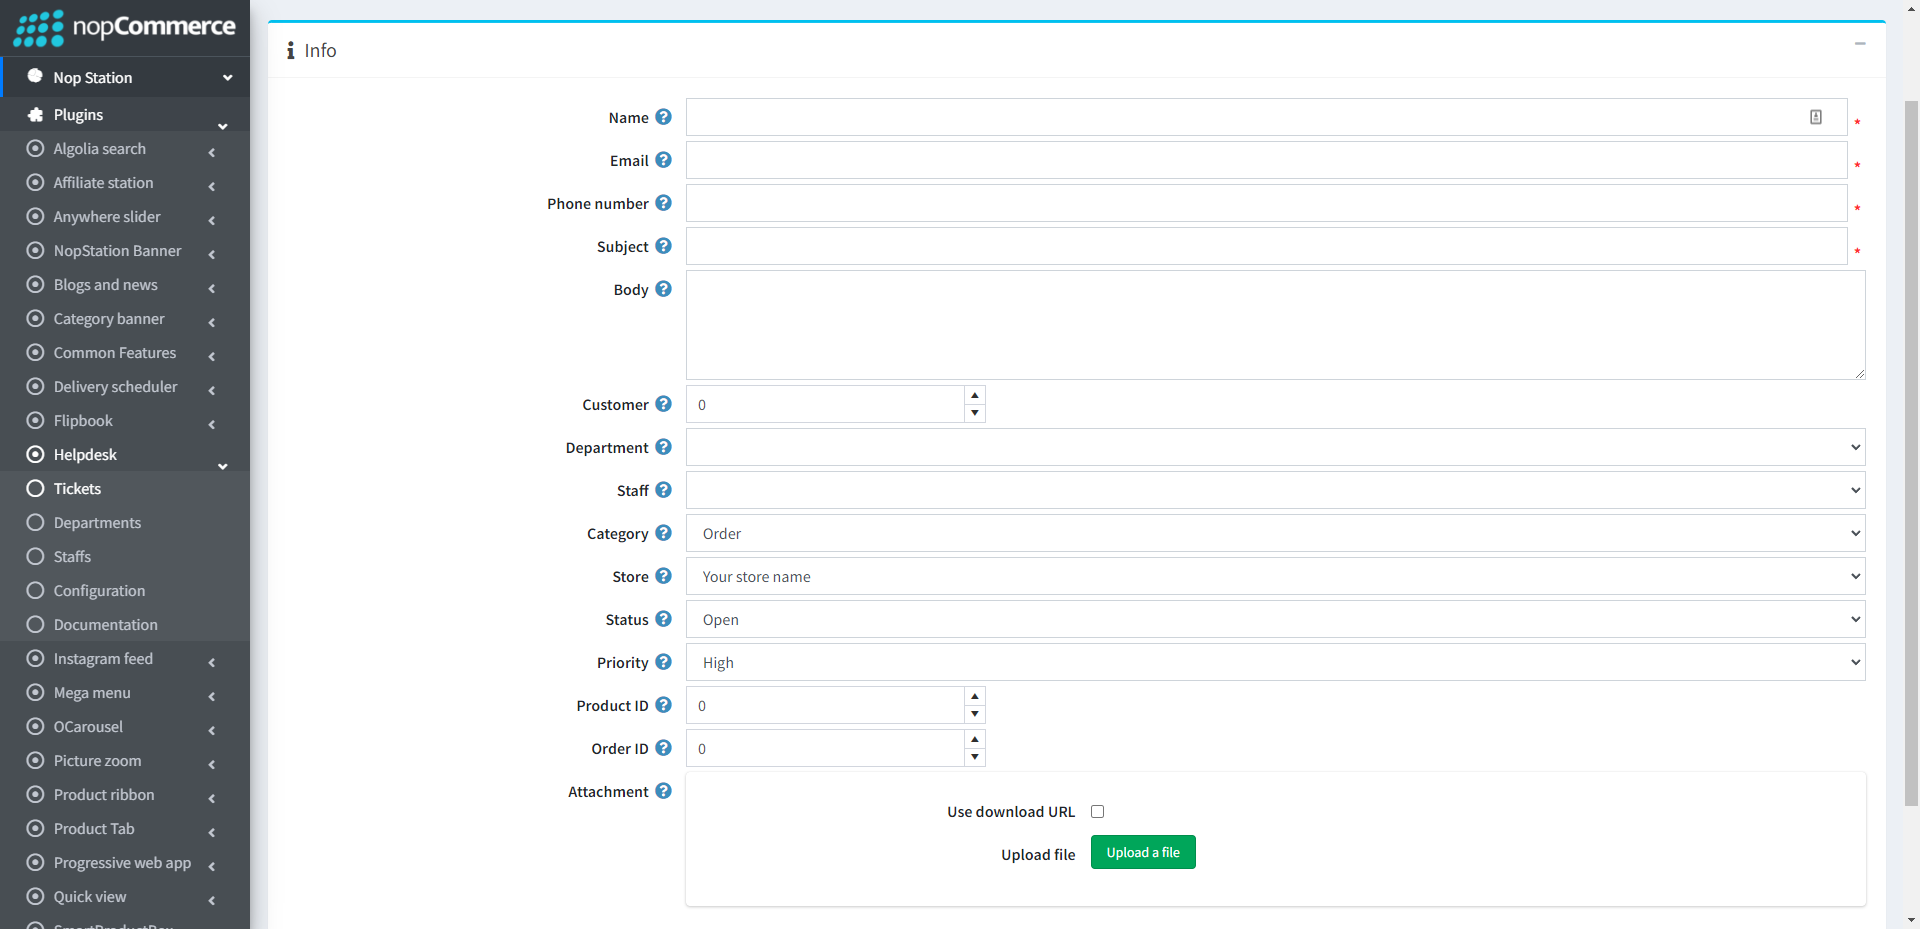
- There are multiple fields for creating tickets with Customer information, Order ID, Product ID as well as different parameters. Also there is an option for attachment both url and direct file upload for the ticket
TICKET DETAILS
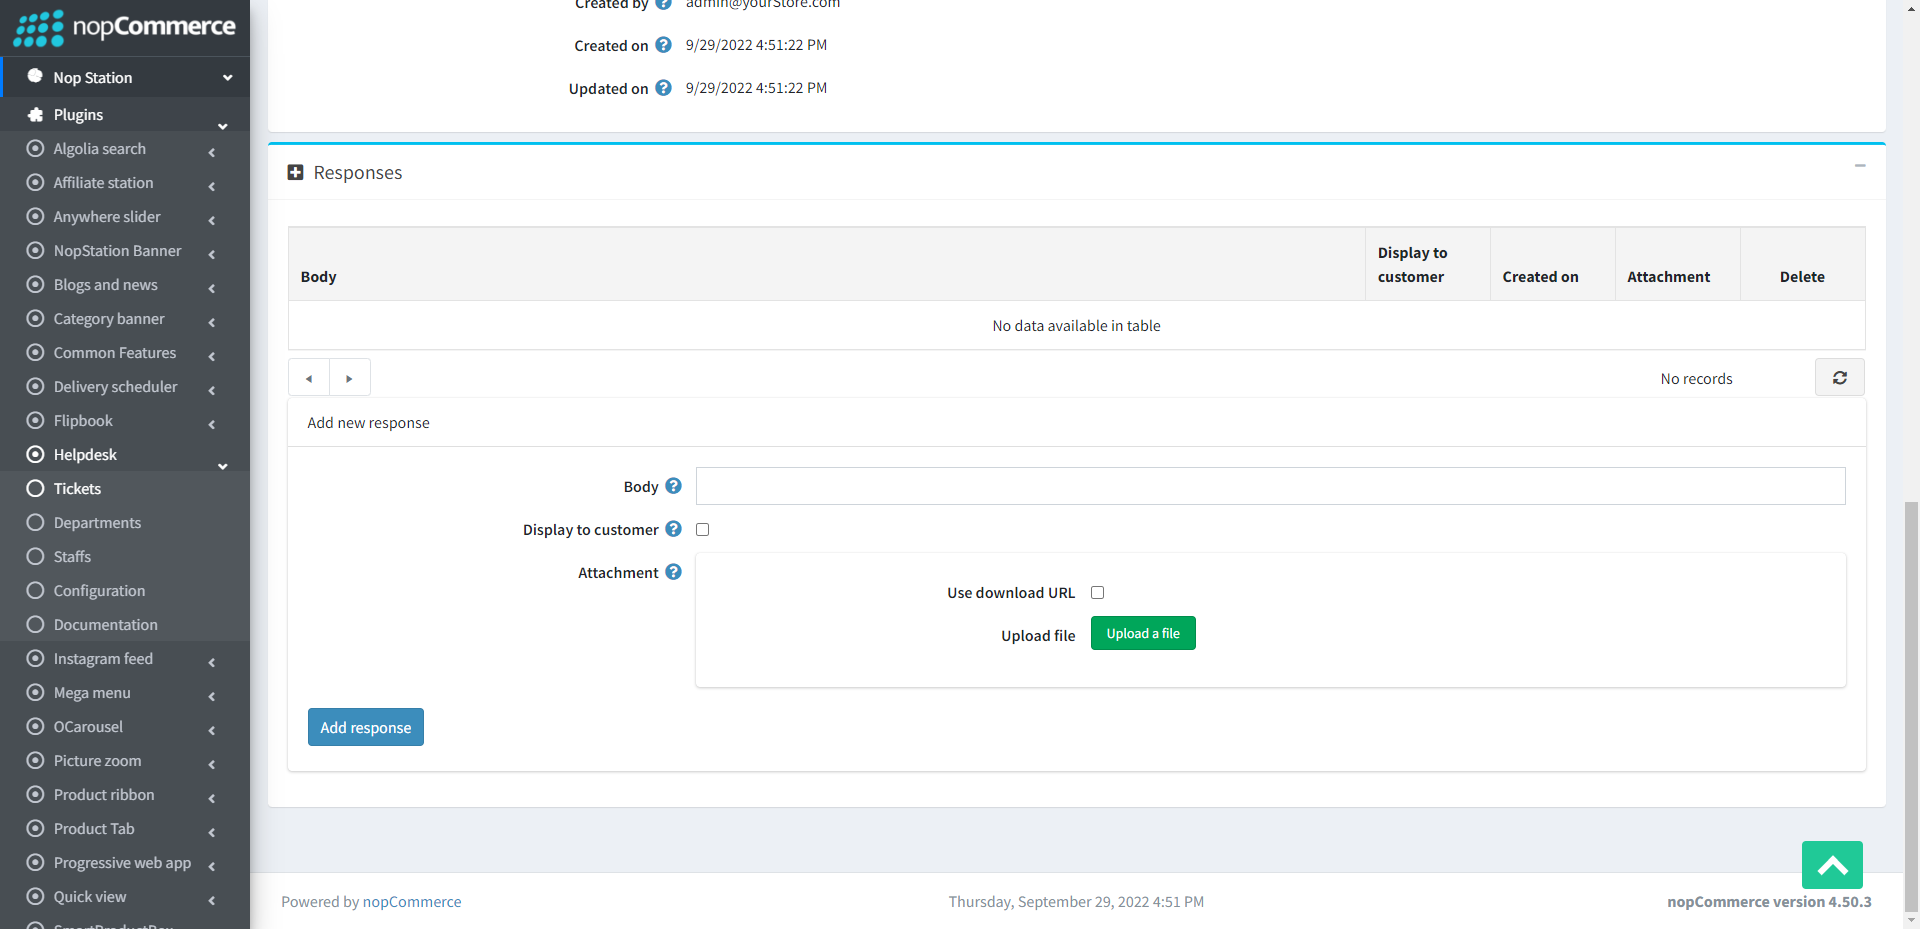
- From the Edit button in the ticket list, you can update the existing tickets with all necessary information
- Also in the response area ticket’s responses have been found and can be created which may or may not be shown on customer end. It comes with a list view
TICKET DEPARTMENT
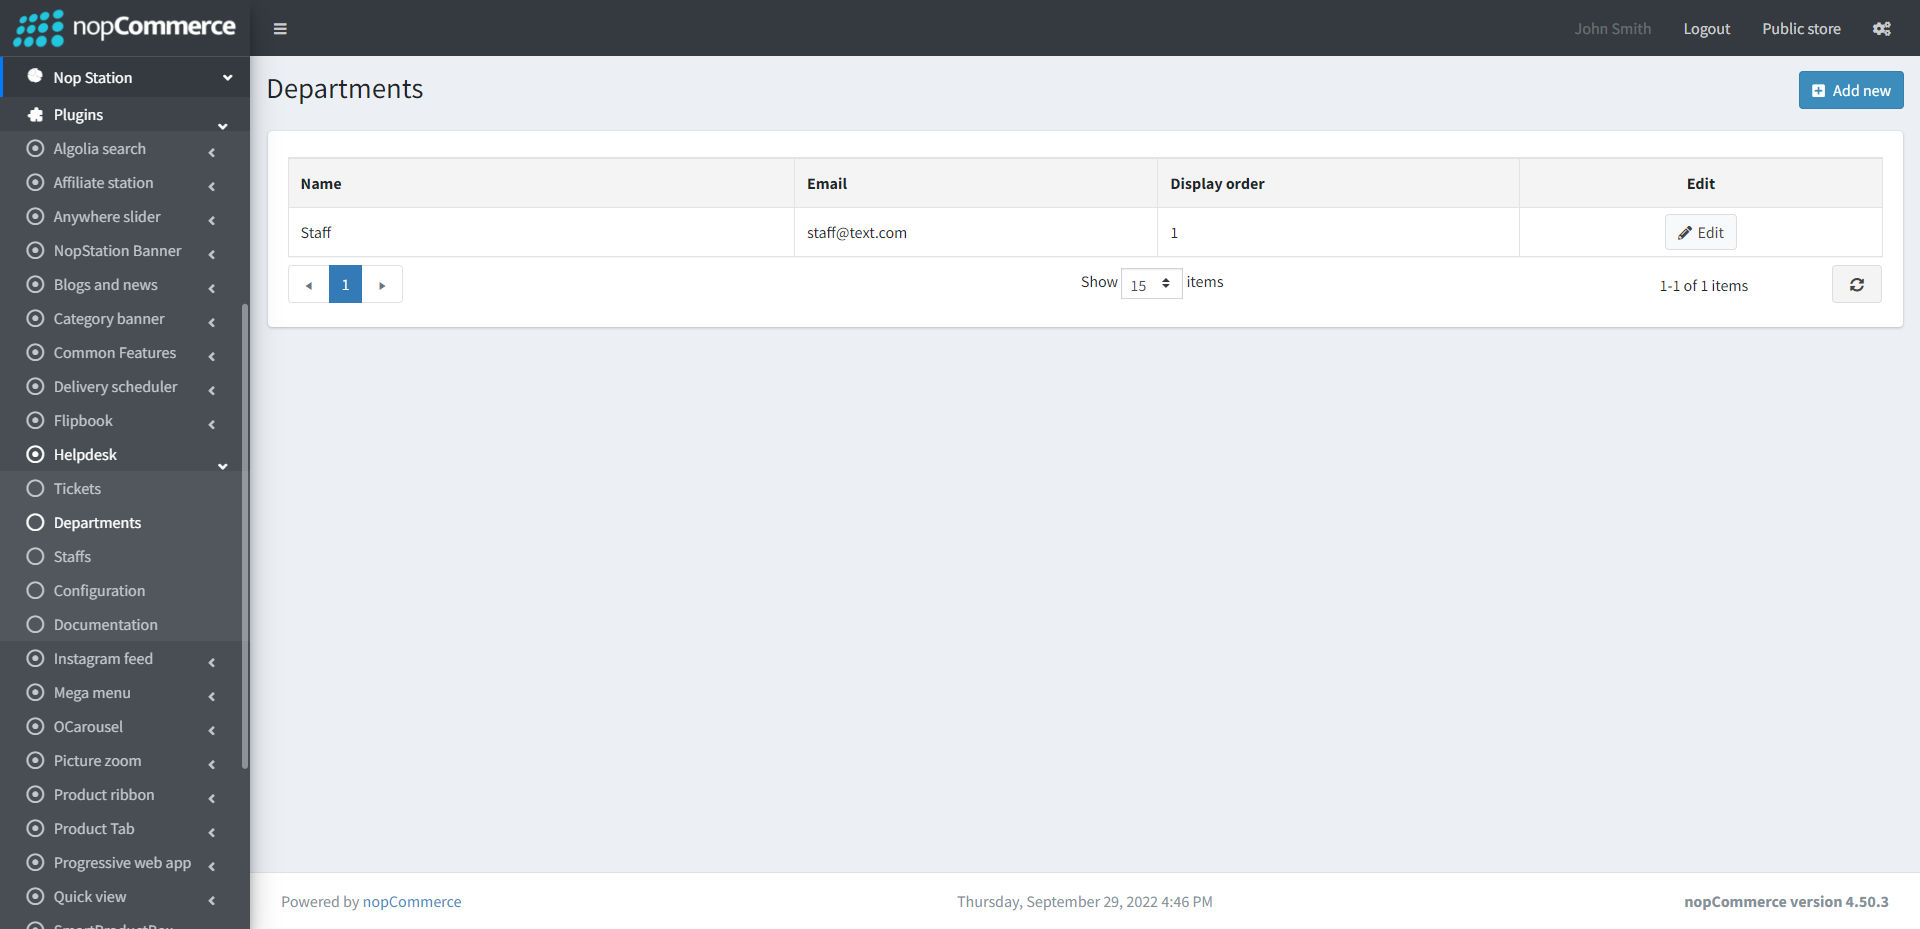
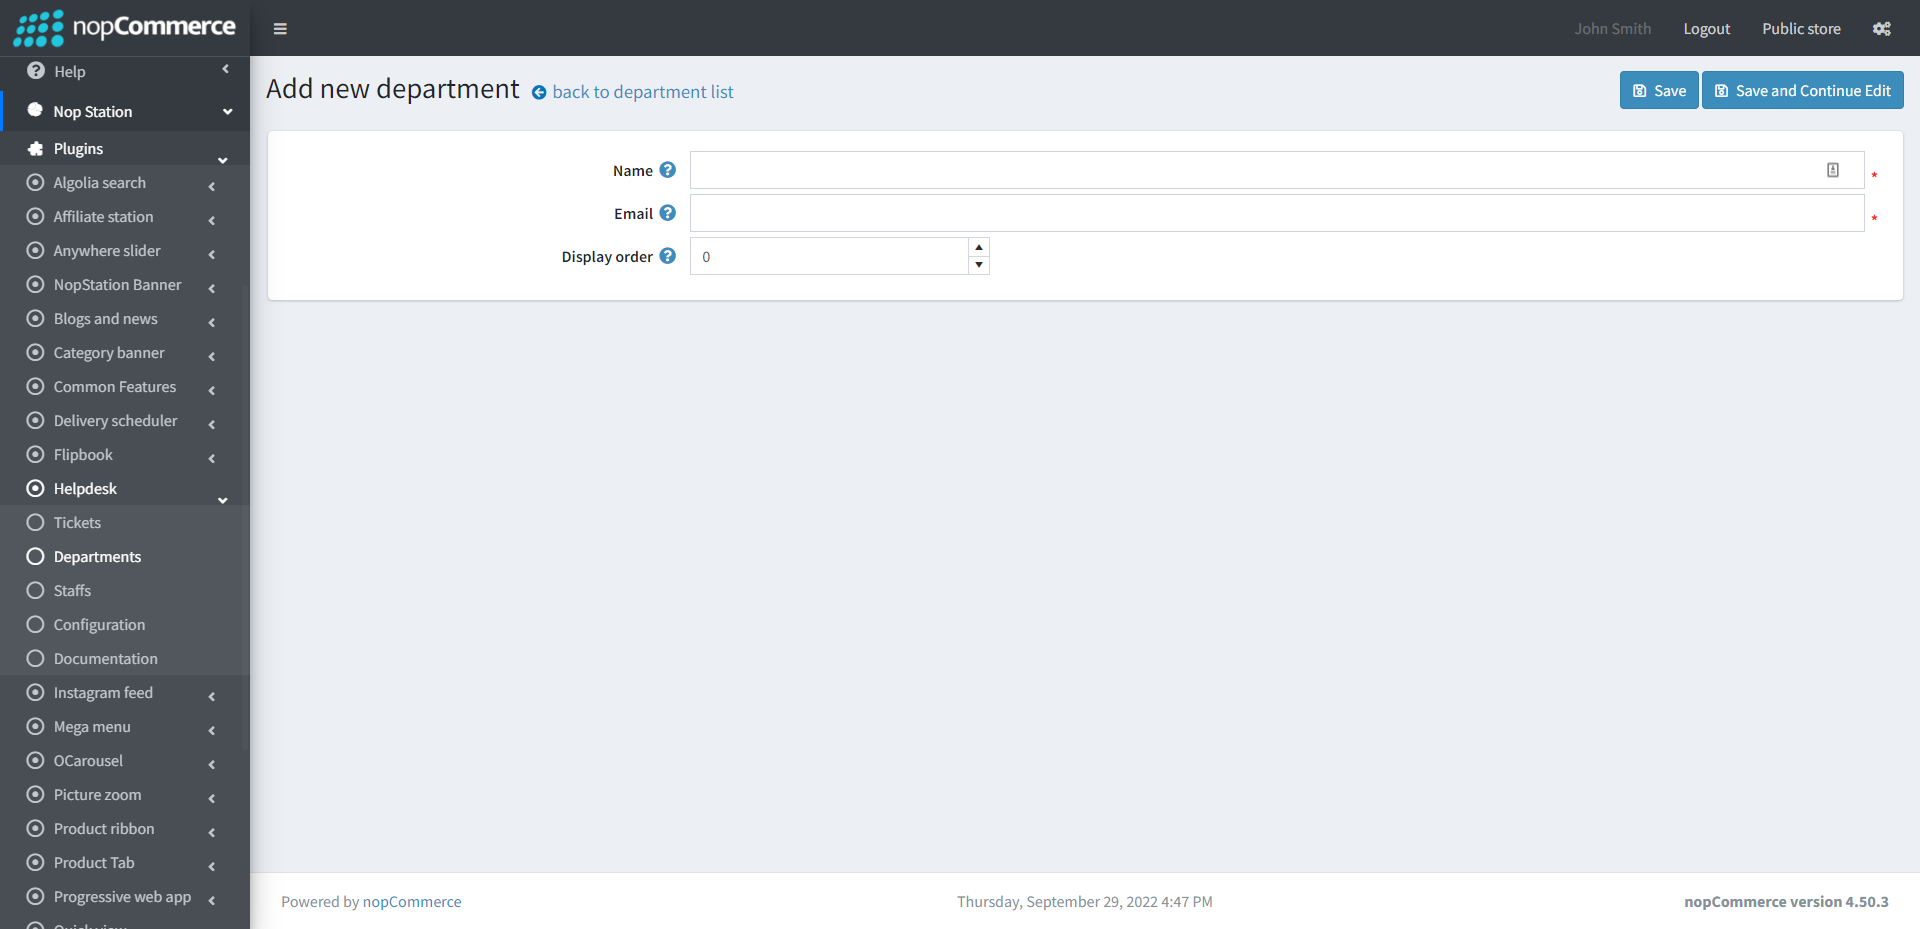
- Go to Nop Station → Plugins → Help desk → Departments
- The Departments option contains a list of departments
STUFFS
- The stuff option contains a list of staff

- You can create as many stuffs you want. In order to create a new stuff go to Nop Station → Plugins → Help desk → Stuff. Click on the Add new button
PUBLIC AREA
- This plugin is integrated as a widget in the MyAccount navigation menu. It provides an option for the help desk My Tickets menu. This option is described below.
PUBLIC AREA - MY TICKET PAGE
- Here customers can see the ticket/s tables which are created at different times with status. From this table customers can view the ticket details information and also create ticket options from here

- To create a ticket click on the Create Ticket button and it will open a form.
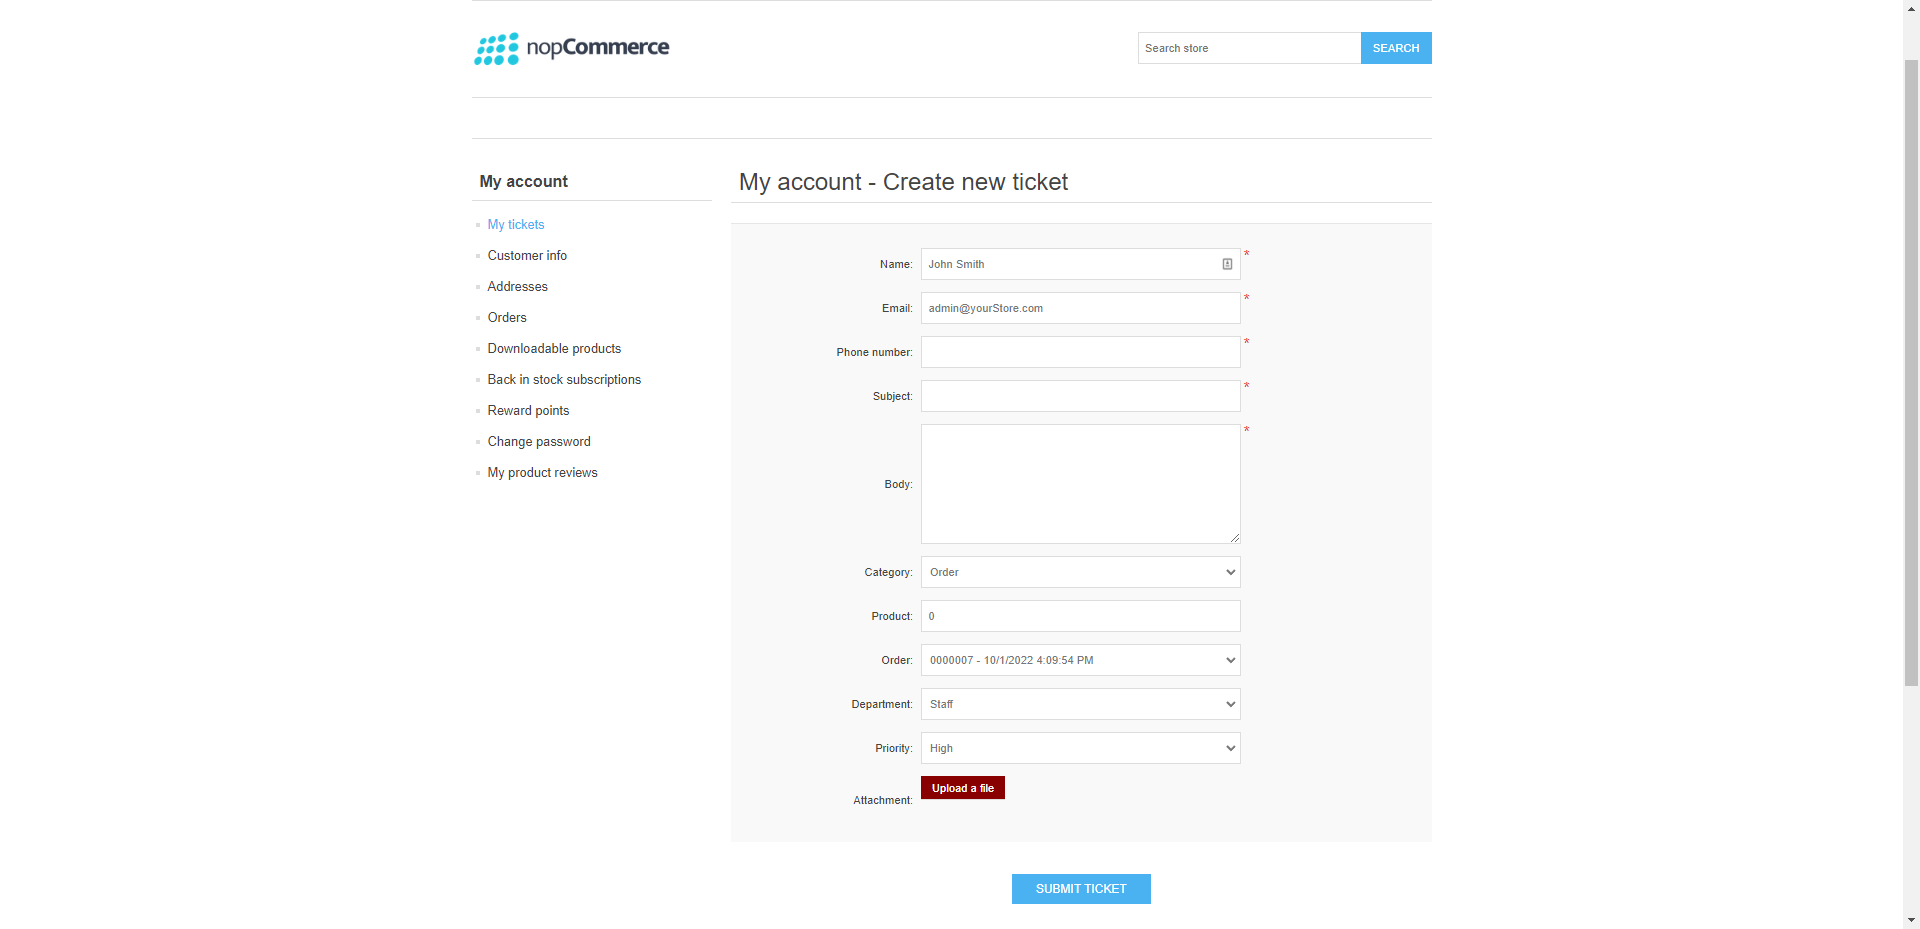
- In this form customer can enter their Name, Email, Phone number, Subject, Description of the ticket, Category of the ticket, Product, Ticket department, Priority and can also attach a file for the ticket.