
Pre-requisites
- The plugin requires you to install the Nop-Station Core plugin first.
- A Solr core is needed and proper credentials.
Installation
- Download the Solr Search Plugin from our store https://nop-station.com/customer/downloadableproducts
- Go to Administration → Configuration → Local plugins
- Upload the NopStation.SolrSearch zip file using the "Upload plugin or theme" button
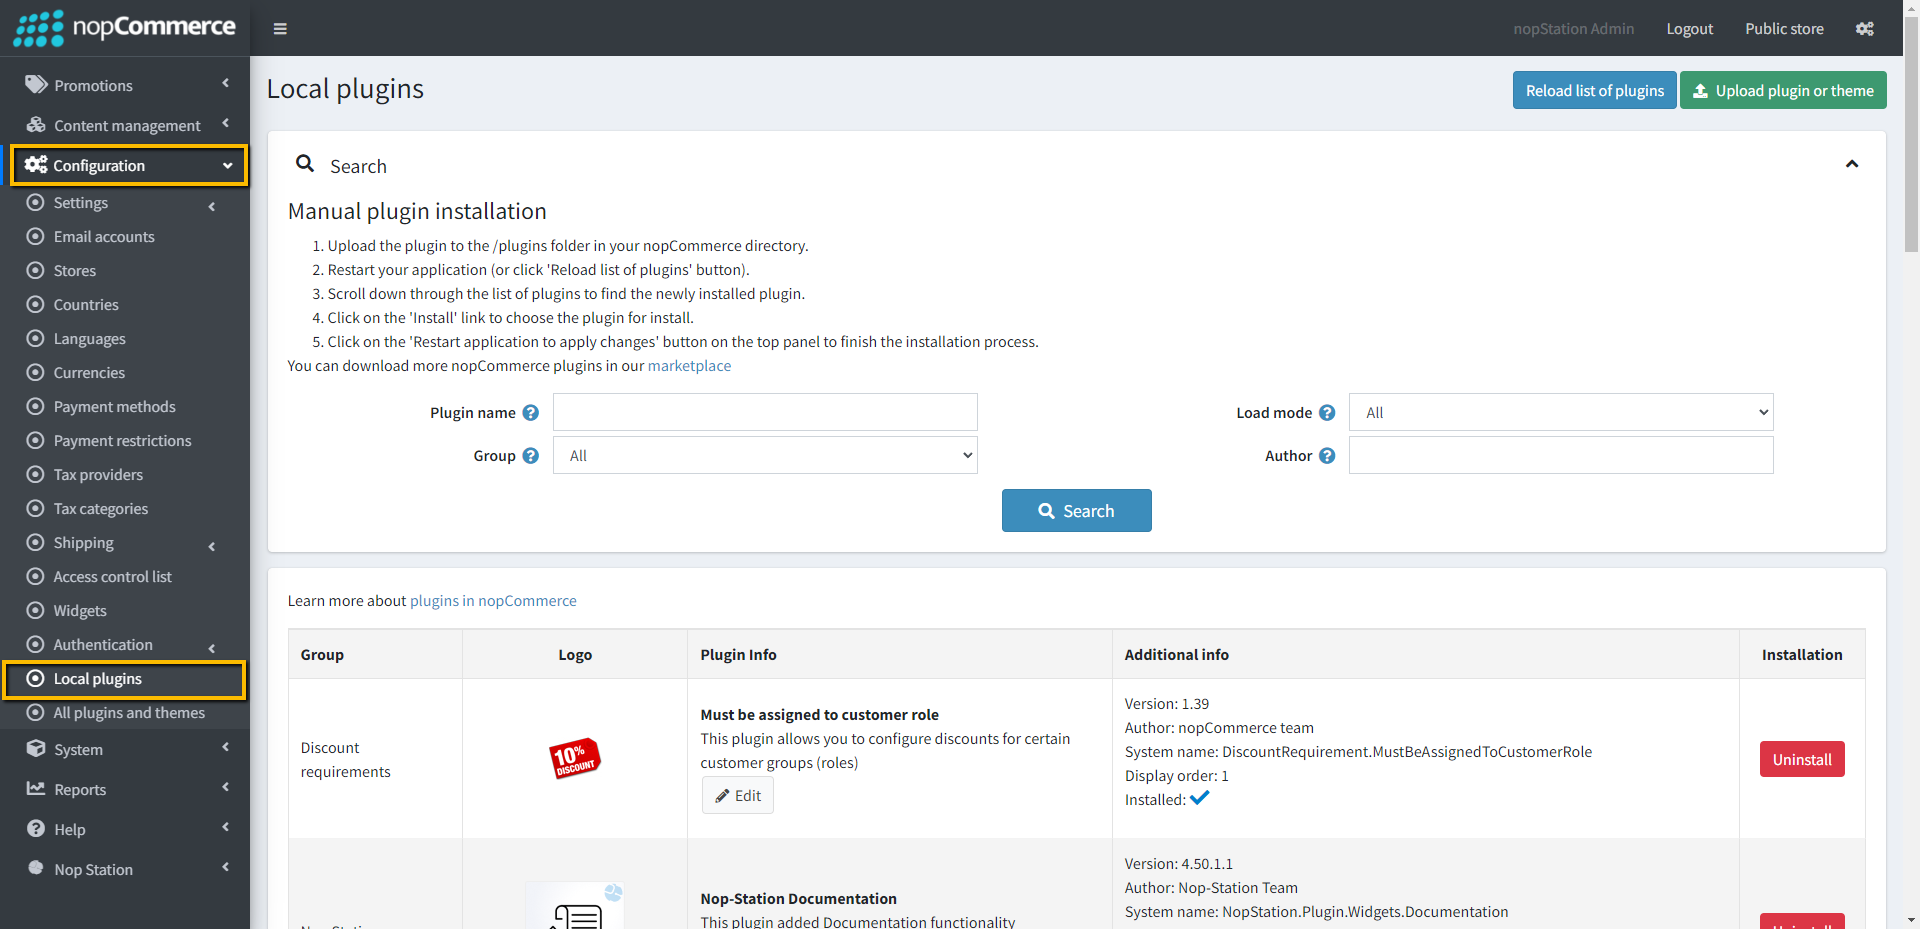
- Go to Administration, and reload the 'list of plugins'. Install 'Nop-Station Core' Plugin first and then install 'Nop-Station Solr Search'
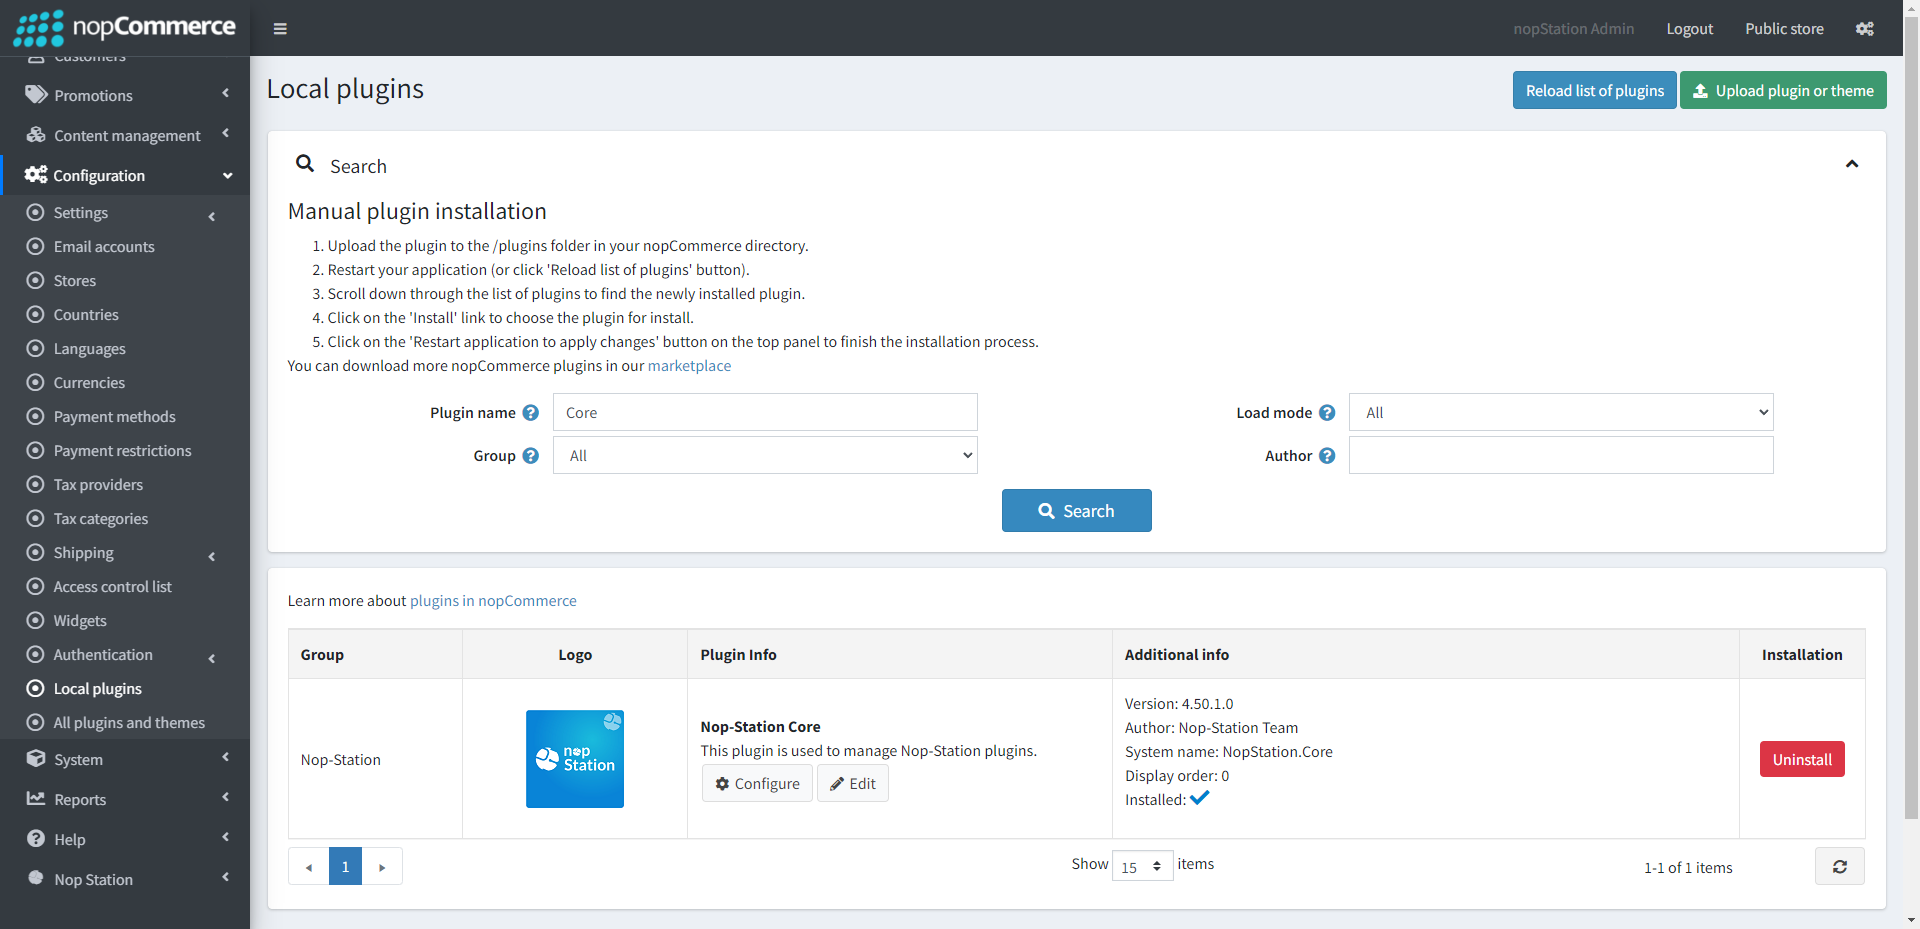
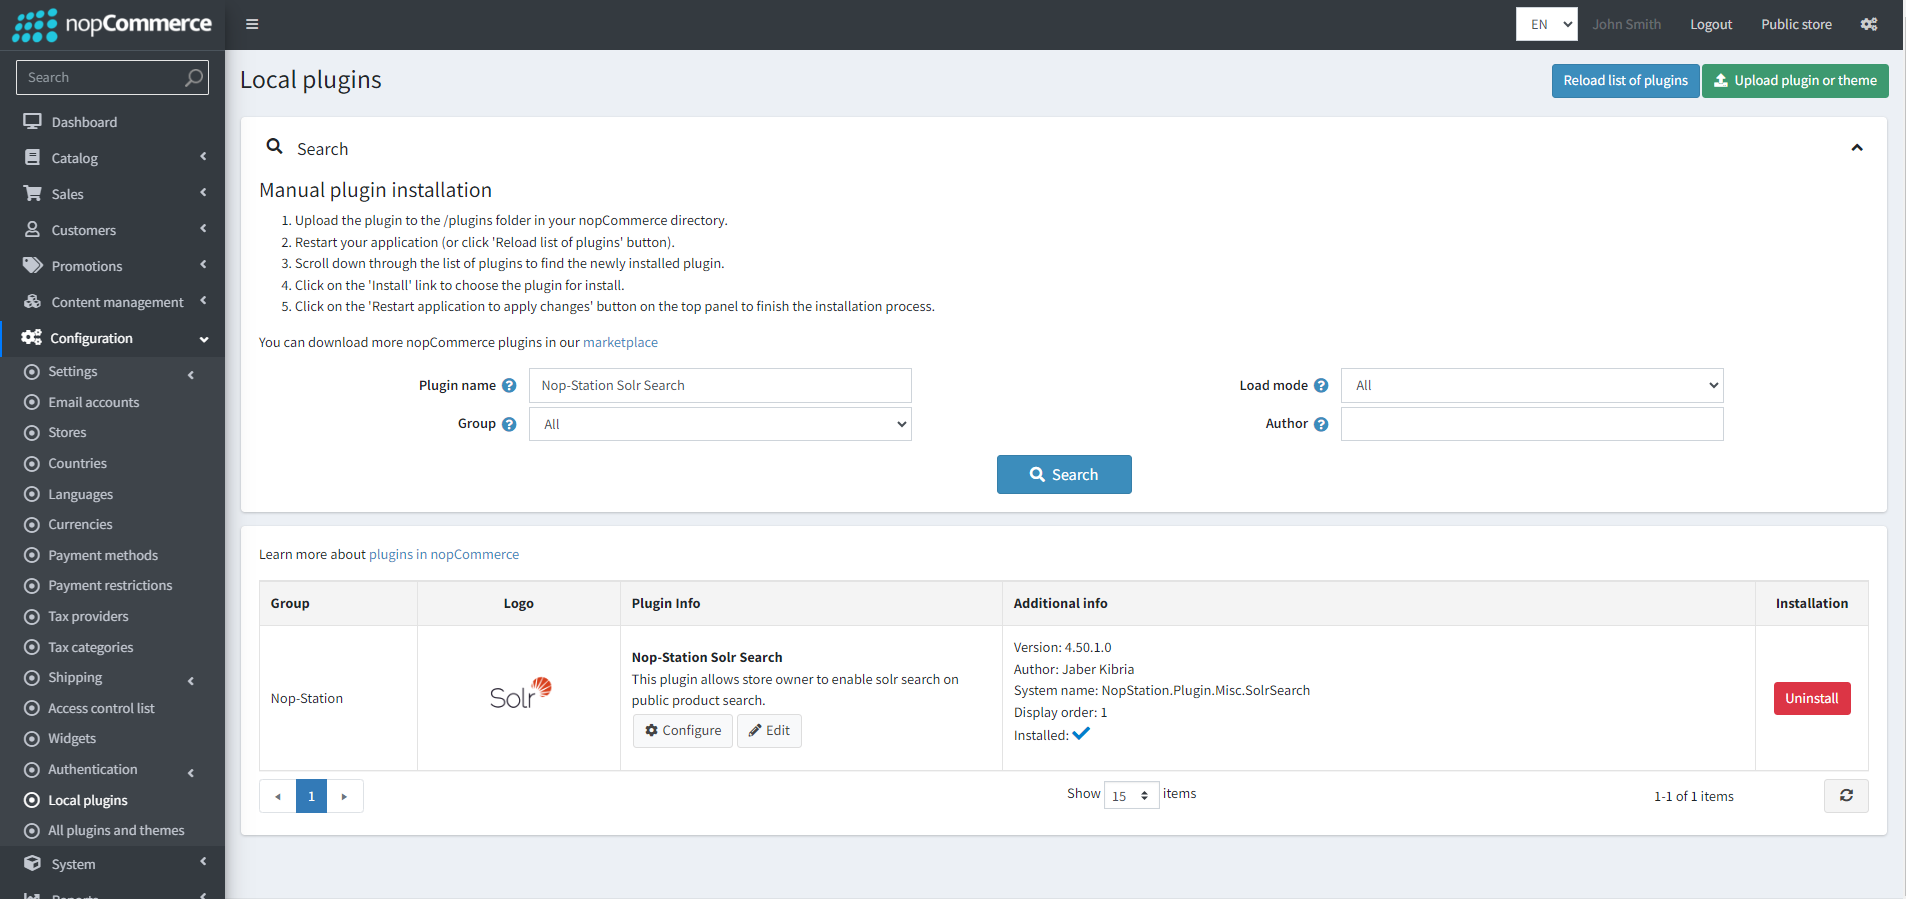
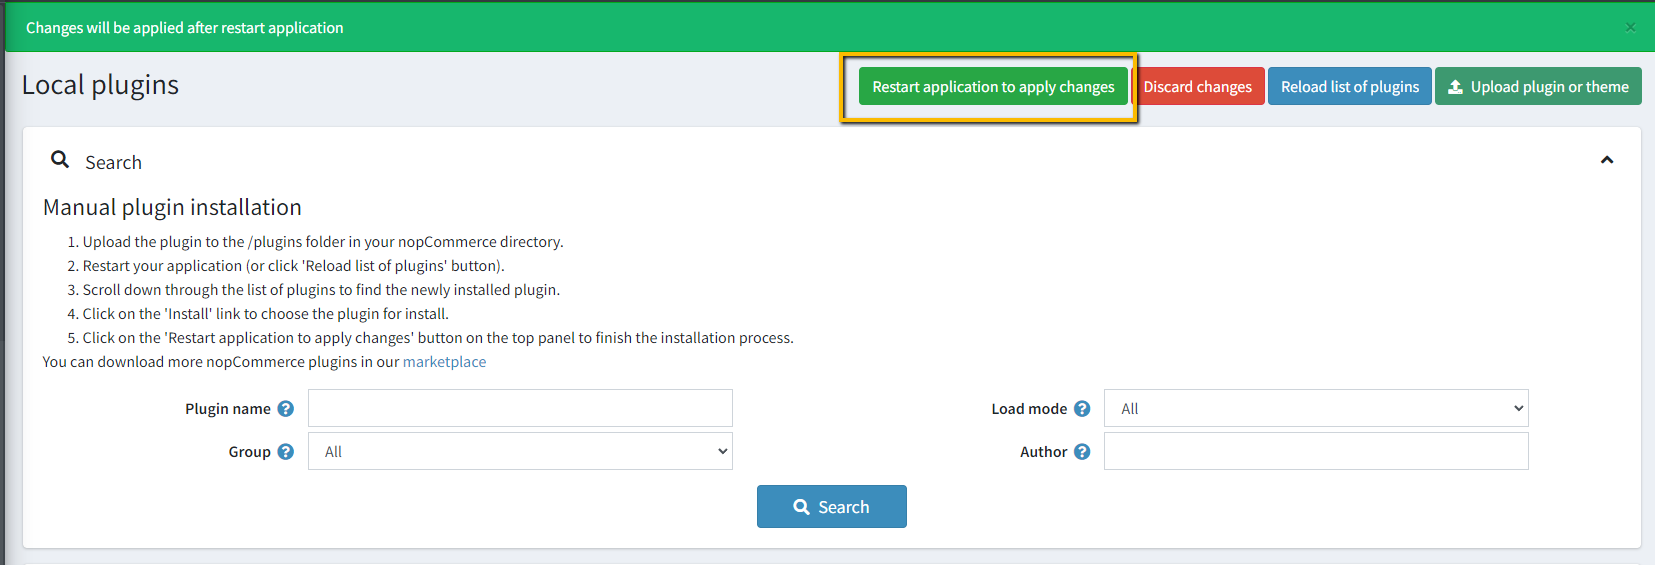
- To make the plugins functional, restart the application
Solr Server Settings
- Go to "File" under the Solr index configuration in the server
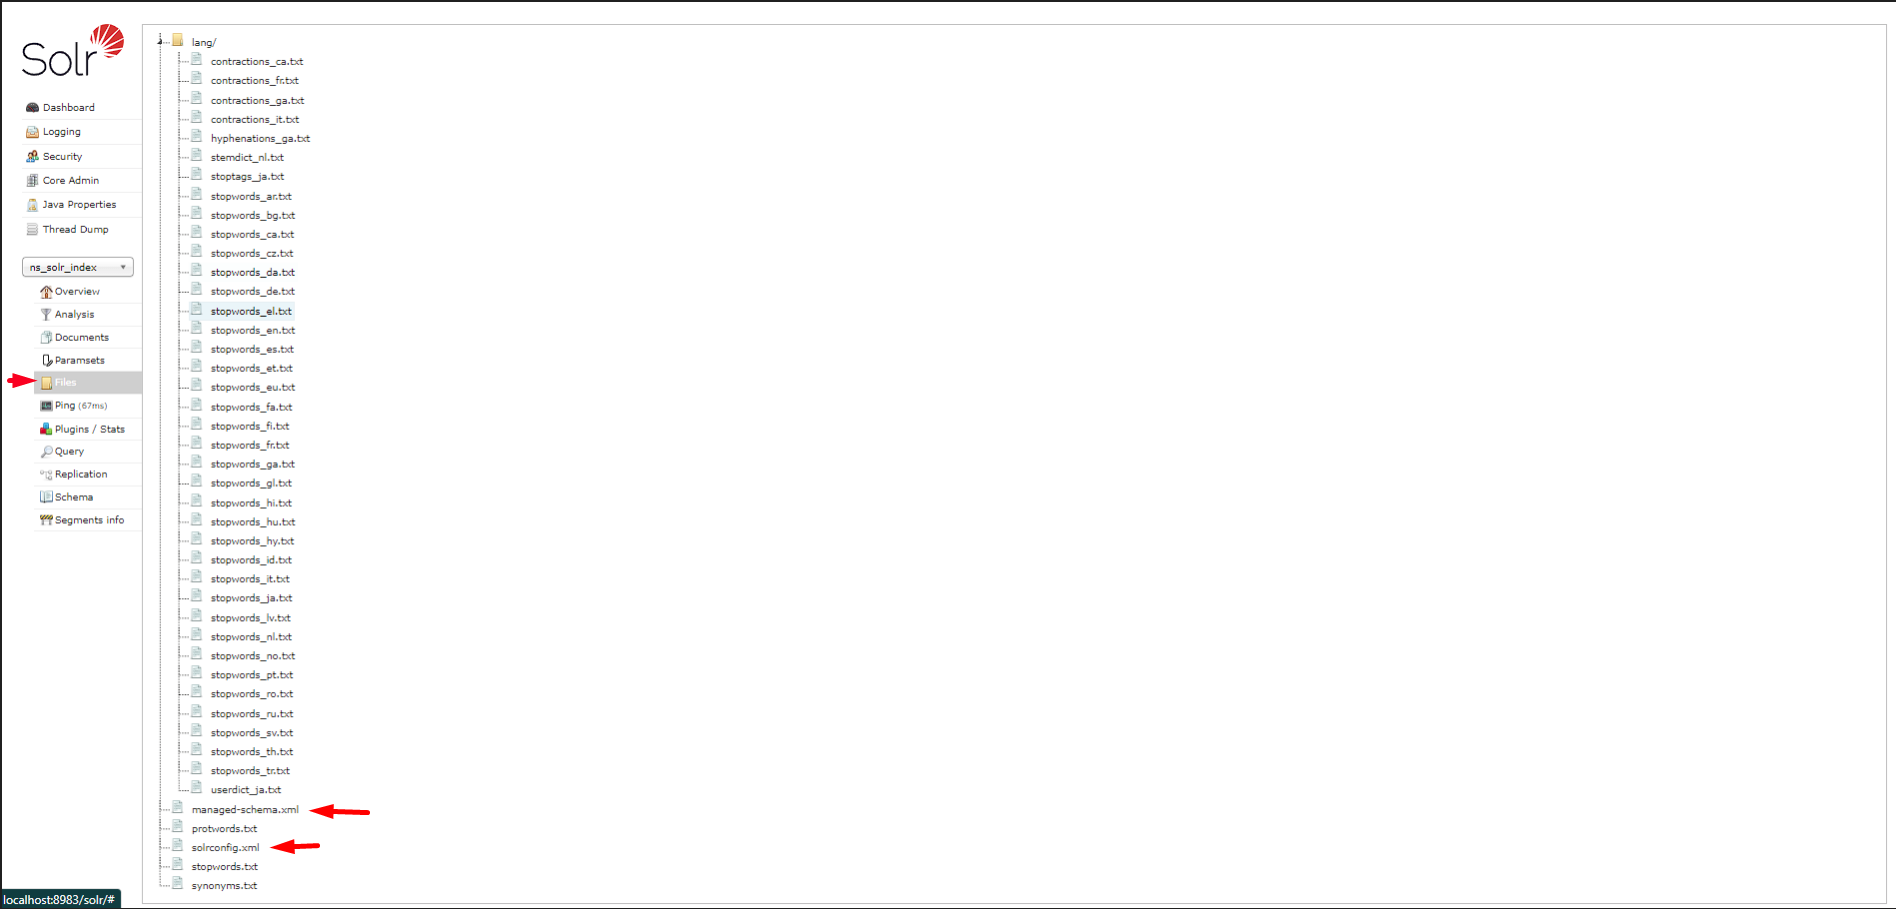
- Here, replace the managed-schema.xml and solrconfig.xml files with the ones provided in the plugin package
Connecting with Solr
- Go to Admin → Nop Station → Plugins → Solr search → Configuration
Solr Credentials:
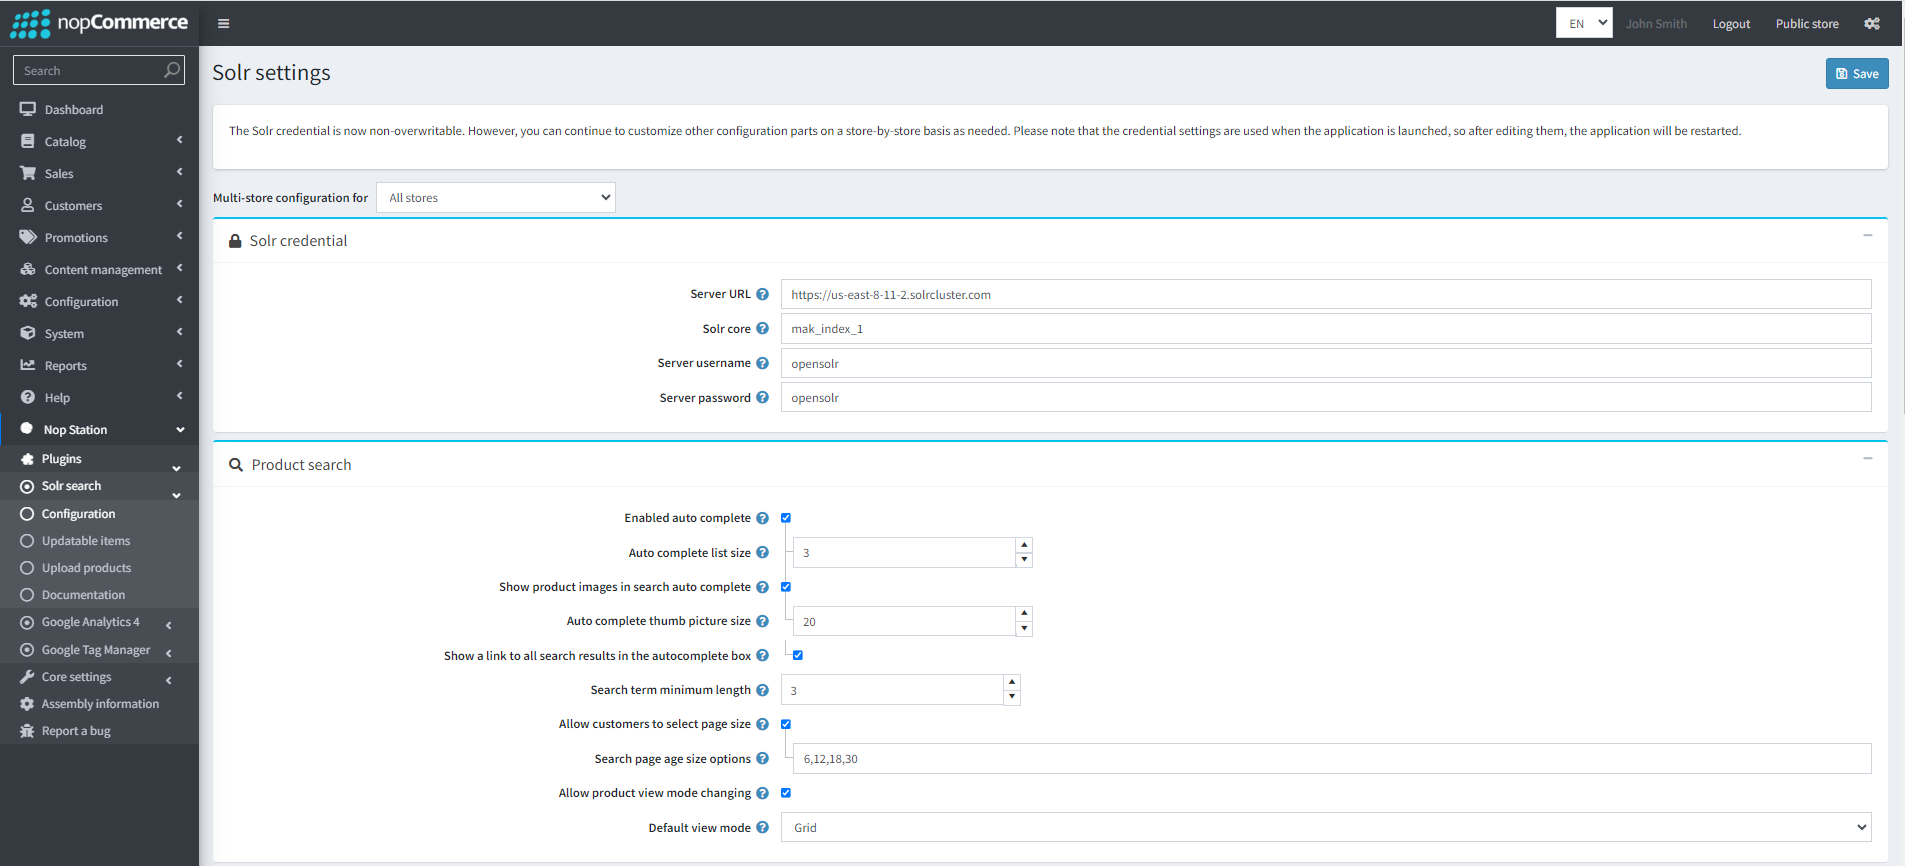
- Server URL: Enter the Solr server URL. The server will be the URL where the Solr application is hosted: Solr port number. You can see this in the Solr yml file in docker like this or through the command line:

- Solr Core: Enter the Solr core name. It can also be found in the docker yml or Command line
- Server username: Enter the Solr server username.
- Server password: Enter the Solr server password.
Creating Index schema, Uploading products
- After installation, Admins must first upload products to create the schema for fields if the Solr index is new or empty.
- Go to Admin → nopStation → Plugins → Solr search → Upload products
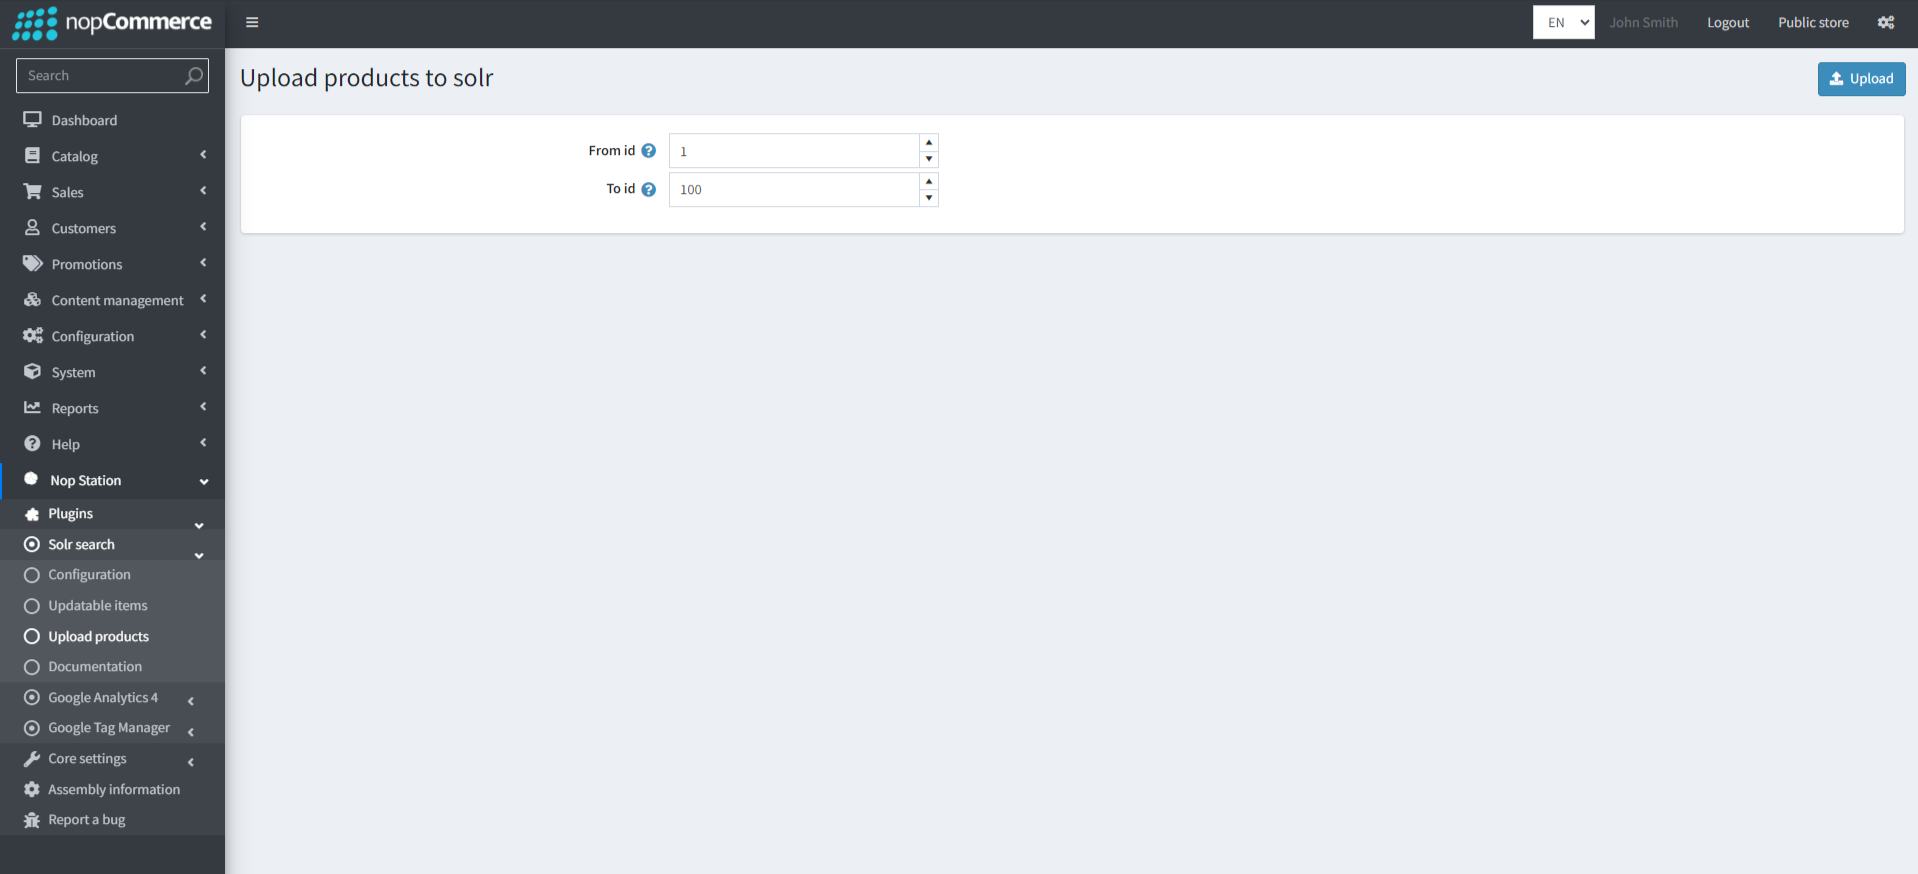
- This creates the Schema for variables and tables at the Solr side as well.
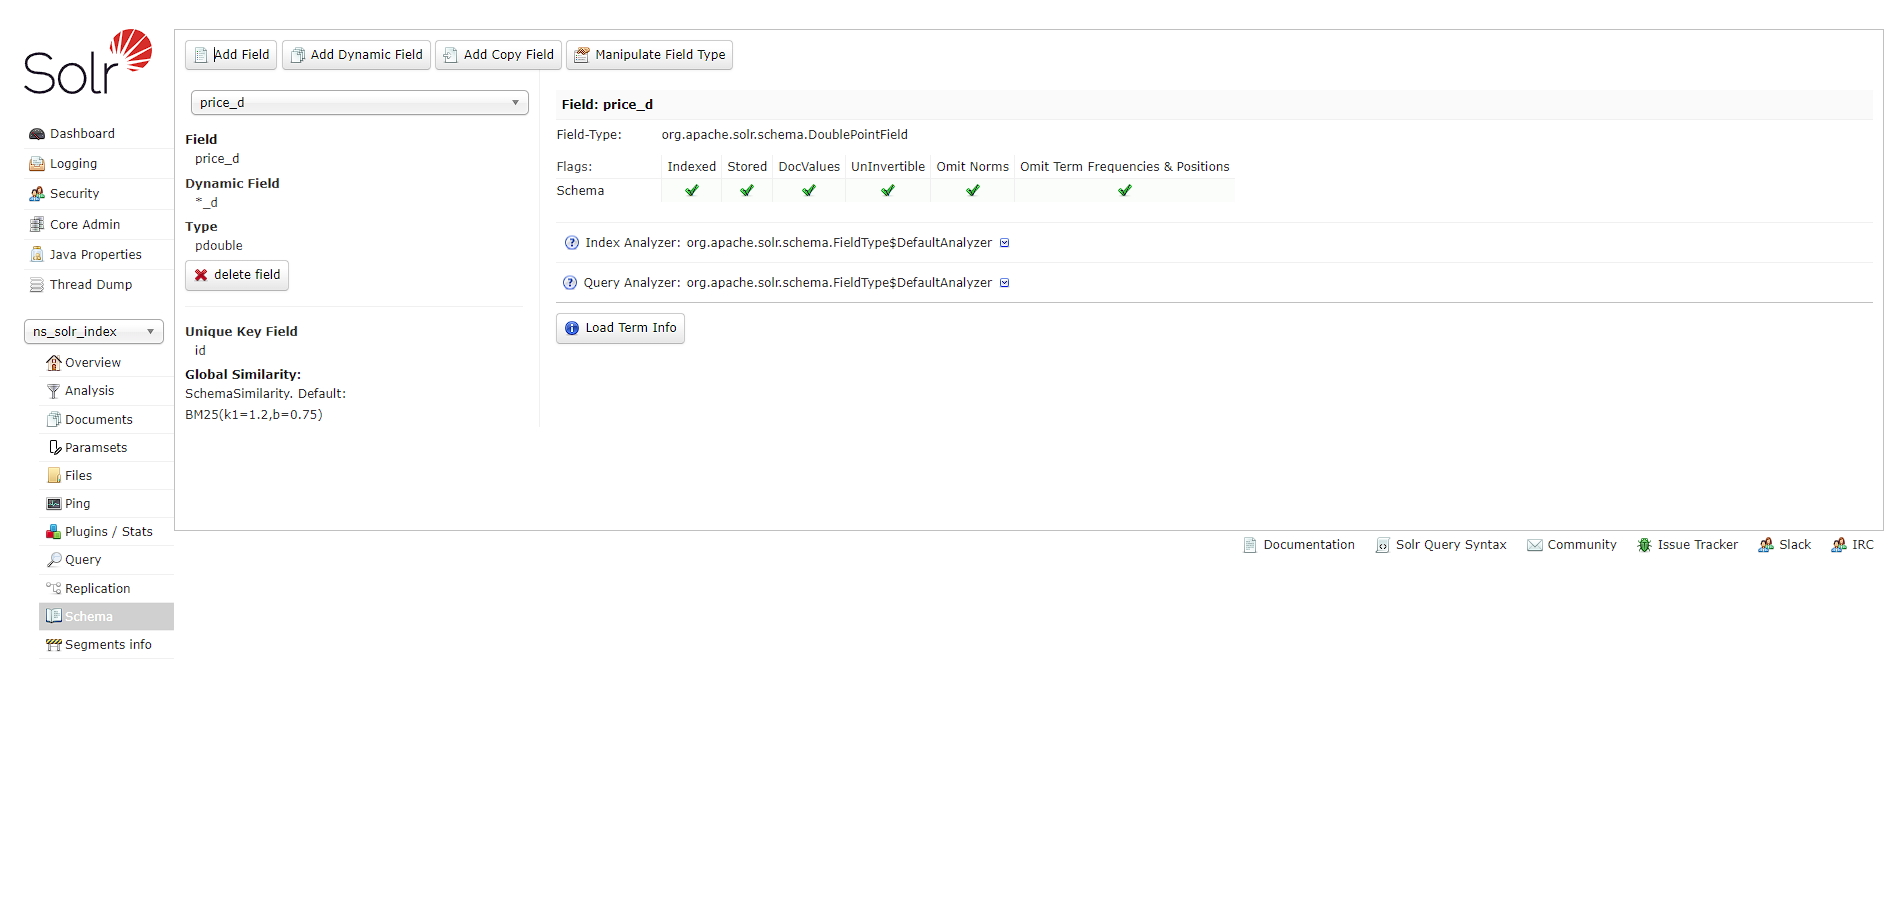
- The schema can be seen in the Solr panel by going to Schema and selecting the field you want to see the schema for:
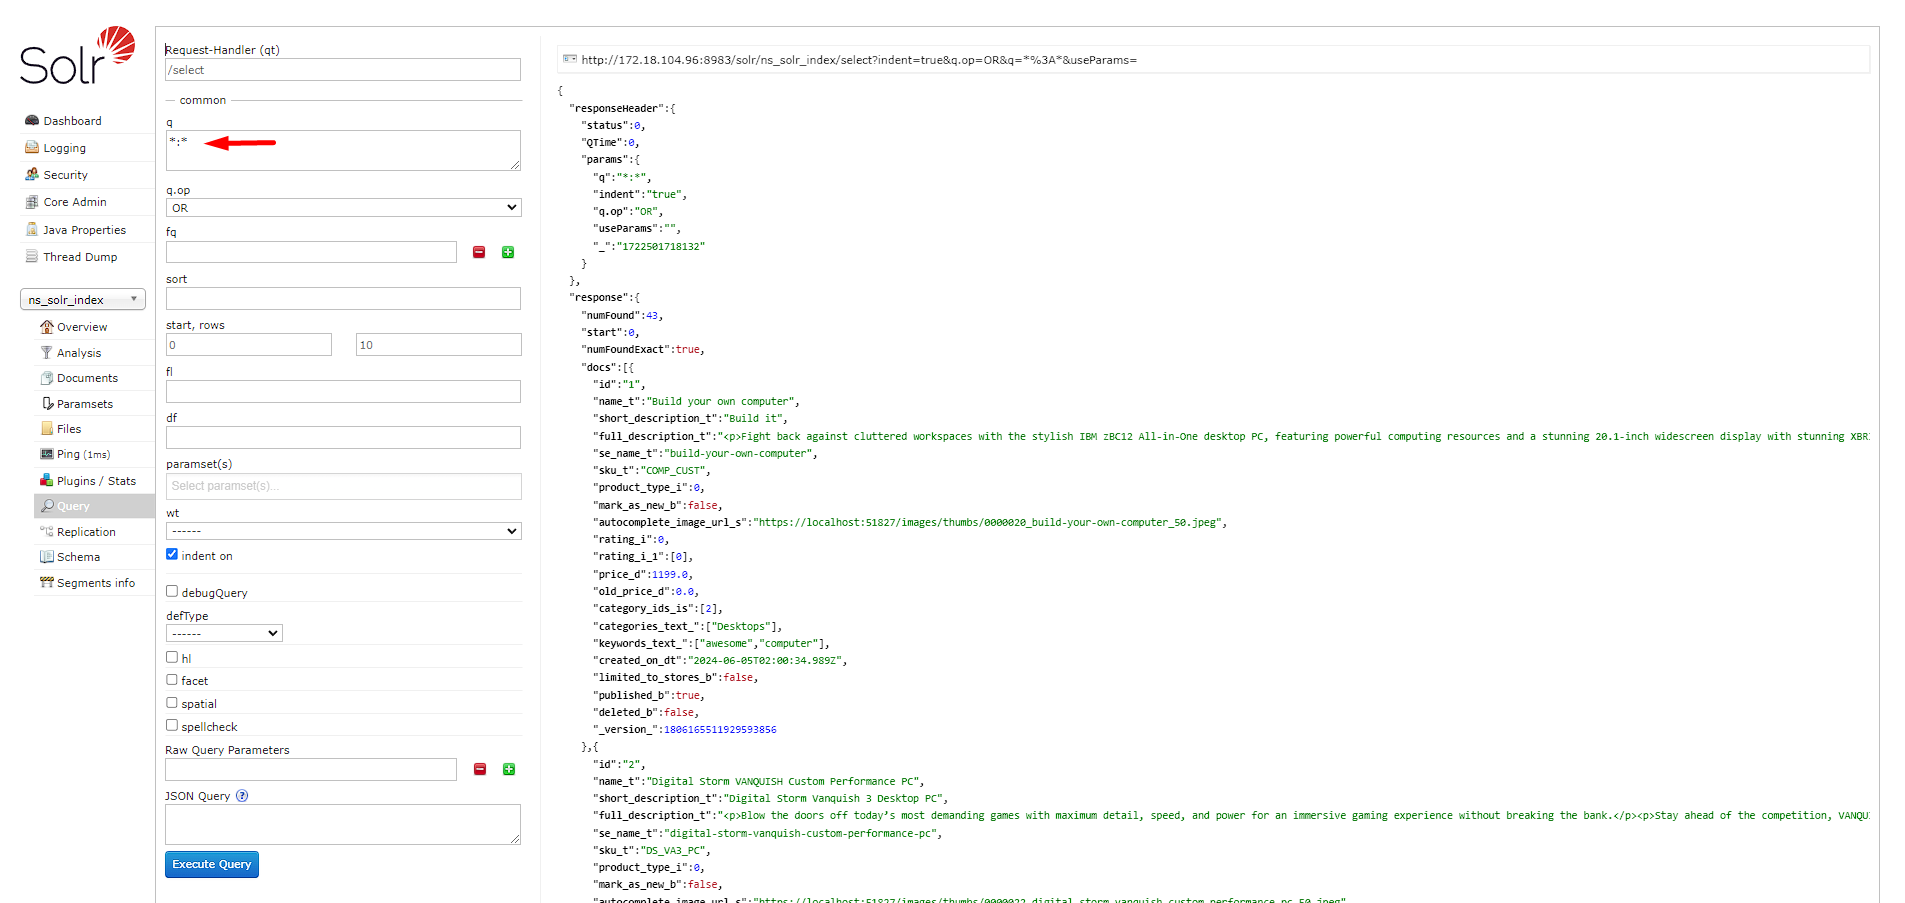
- After upload, product data can be seen in the Solr panel by going to Query executing " *=* " to see all product data:
Product Settings
Configuring Product Search
- Enabled auto-complete: Check to enable auto-complete in the search box.
- Auto-complete list size: Enter the number of products that will be shown in the auto-complete list.
- Show product images in search auto-complete: Check to show product images in search auto-complete.
- Auto-complete thumb picture size: Enter the number of product thumb picture sizes.
- Show a link to all search results in the autocomplete box: Determines whether the link to all results should be displayed in the autocomplete search box. Displayed if the number of items found is greater than the displayed quantity in the autocomplete box.
- Search term minimum length: The search term minimum query length.
- Allow customers to select page size: Check to allow customers to choose page size.
- Search page size options: Set the search page size dropdown options.
- Allow product view mode changing: Check to allow customers to change product view mode.
- Default view mode: Select the search page default product view mode.
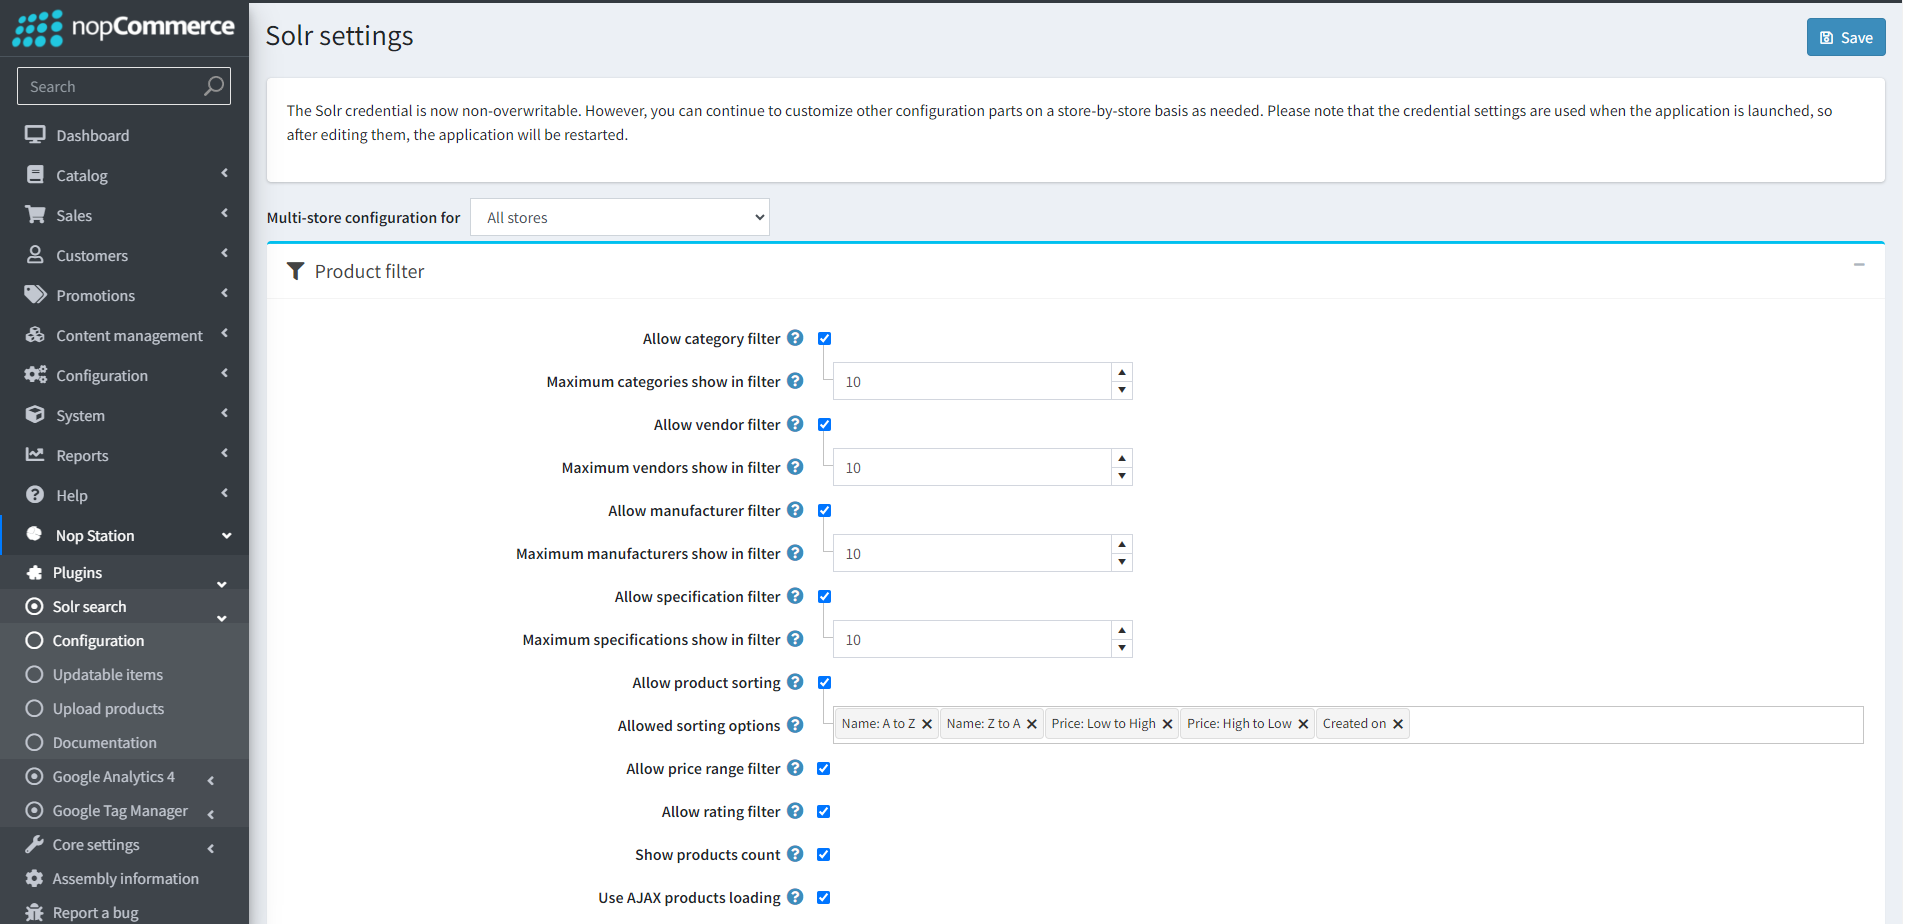
Configuring Product Filters
- Allow category filter: Check to allow customers to filter by product categories.
- Maximum categories are shown in filter: The maximum number of categories shown in filter.
- Allow vendor filter: Check to allow customers to filter by product vendors.
- Maximum vendors shown in filter: Maximum number of vendors shown in filter.
- Allow manufacturer filter: Check to allow customers to filter by product manufacturers.
- Maximum manufacturers shown in filter: Maximum number of manufacturers shown in filter.
- Allow specification filter: Check to allow customers to filter by product specifications.
- Maximum specifications are shown in the filter: The maximum number of specifications shown in the filter.
- Allow product sorting: Check to allow customers to sort products. Click 'Update index' if the value of this property is changed.
- Allowed sorting options: Allowed sorting options. Click 'Update index' if the value of this property is changed.
- Allow price range filter: Check to allow customers to filter by product price range.
- Allow rating filter: Check to allow customers to filter by product rating.
- Show product count: Check to show product count on the product search page.
- Use AJAX products loading: Check to load products asynchronously (applicable to 'paging', 'filtering', and 'view modes') on catalog pages.
Using Search fields and boosting
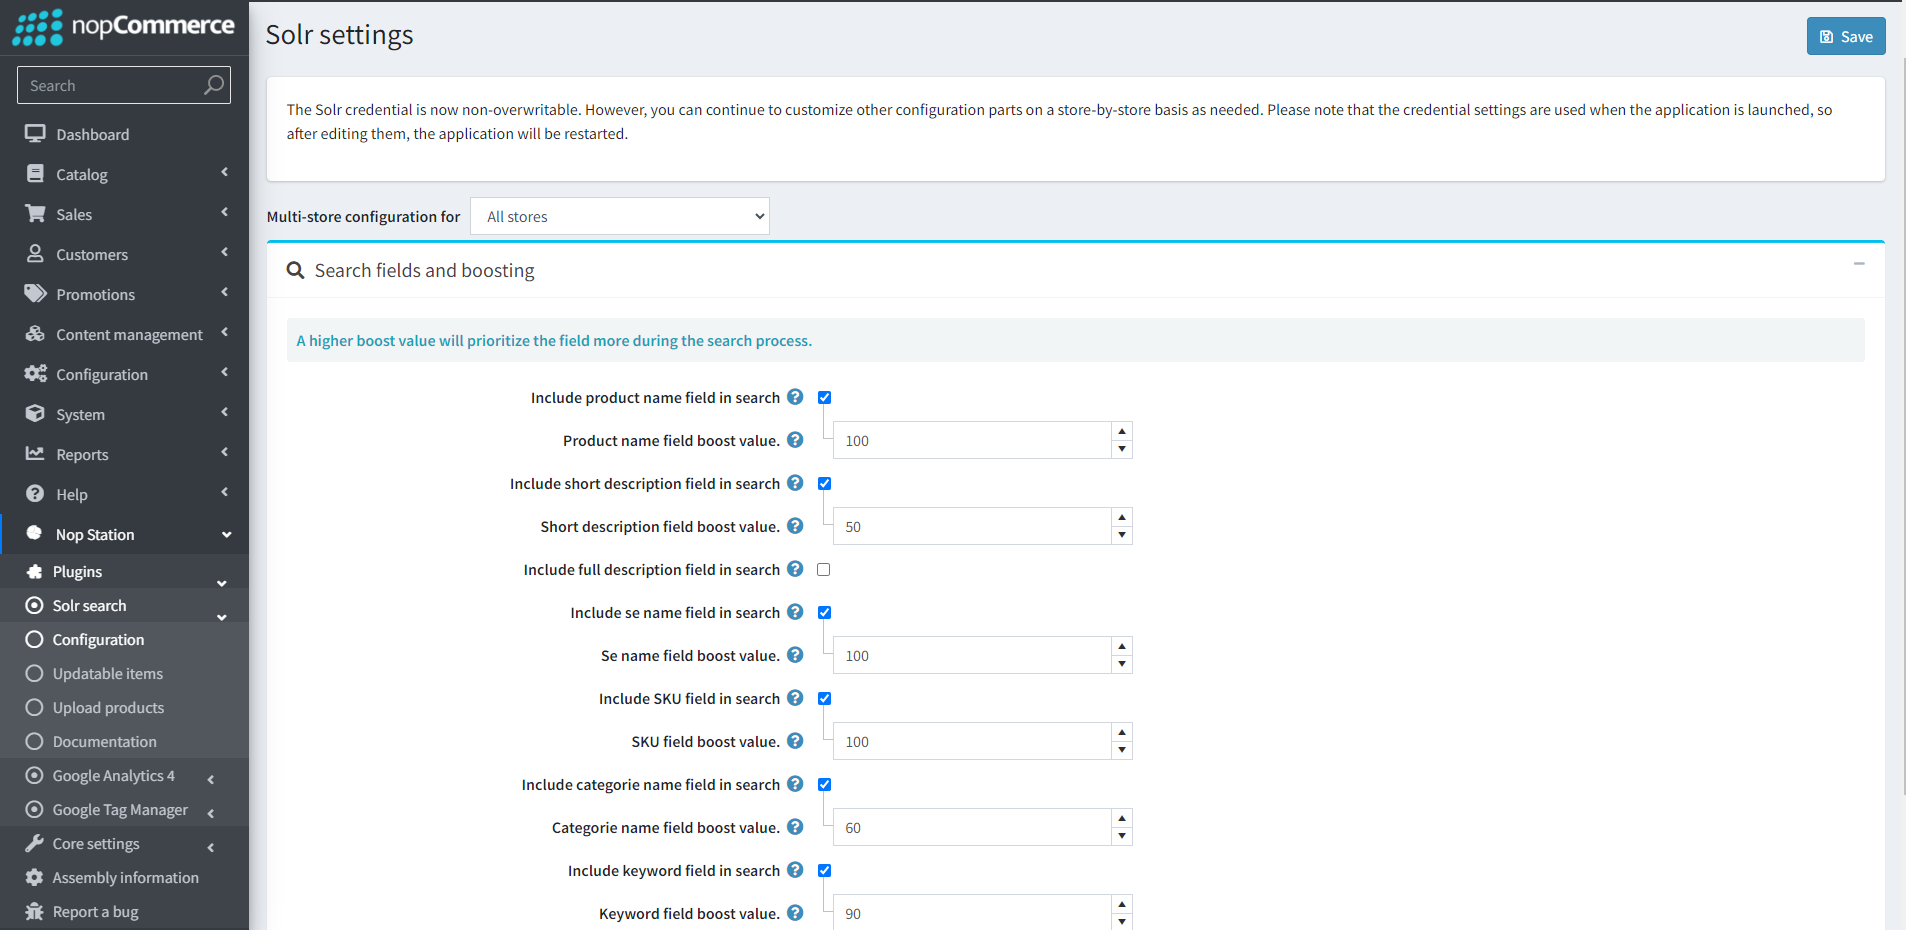
- Include product name field in search: Check to include the product name field in the search.
- Product name field boost value: Enter the boost value for the product name field (Range: 1-100).
- Include a short description field in the search: Check to include a short description field.
- Short description field boost value: Set the boost value for the short description field (Range: 1-100).
- Include full description field in search: Check to include full description field in search.
- Full description field boost value: Enter the boost value for the full description field (Range: 1-100).
- Include the SE name field in the search: Check to include the SE name field.
- SE name field boost value: Enter the boost value for the se name field (Range: 1-100).
- Include SKU field in search: Check to include the SKU field in the search.
- SKU field boost value: Enter the boost value for the SKU field (Range: 1-100).
- Include category name field in search: Check to include the category name field in the search.
- Category name field boost value: Enter the boost value for the category name field (Range: 1-100).
- Include keyword field in search: Check to include keyword field in search.
- Keyword field boost value: Enter the boost value for the keyword field (Range: 1-100).
How Boosting works:
- Suppose you search for products where the name, localized name, full description, localized full description, SE name, or SKU contains the term "laptop".
- The fields are boosted according to the configured boost values, so matches in the "Category" might be considered more important than matches in the "Description", for example.
- Additionally, the search is restricted to products available in the current store, unless they are marked as not limited to specific stores.
Tracking Updatable Items
- Go to Admin → Nop Station → Plugins → Solr search → Updatable items
- Here, you can see all the products, categories, manufacturers, and vendors list which have changes in their data, But are not yet updated with Solr.
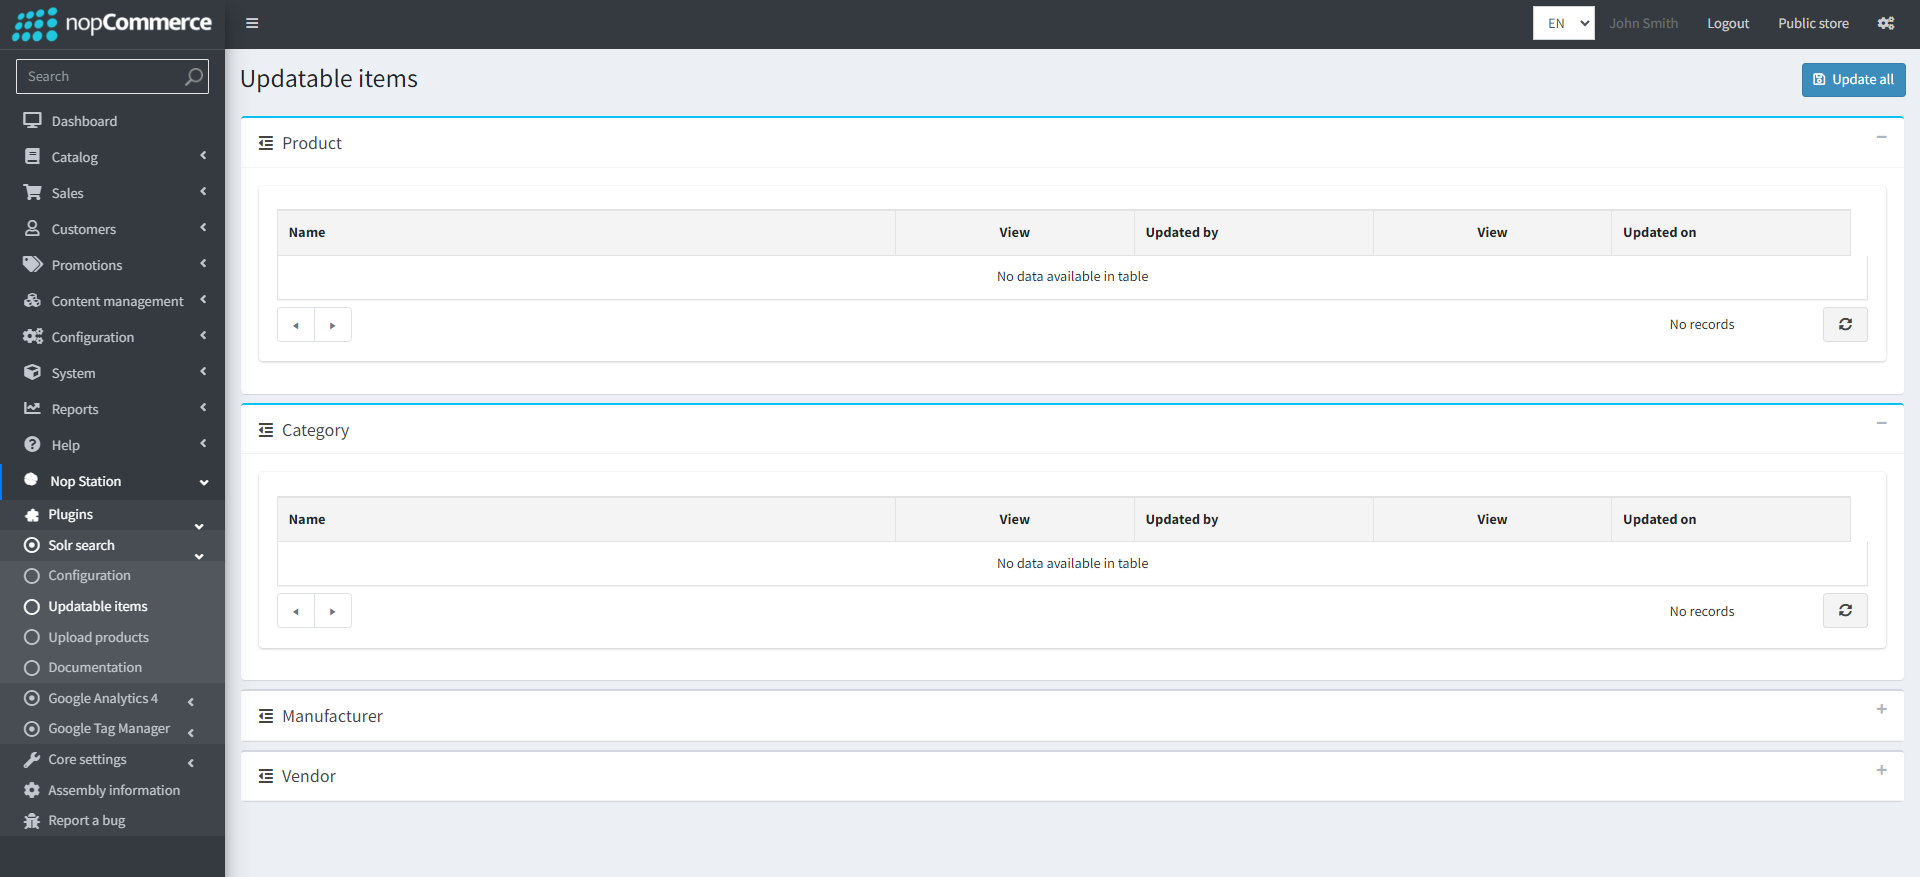
- Click Update All button to update
Uploading Products from Admin
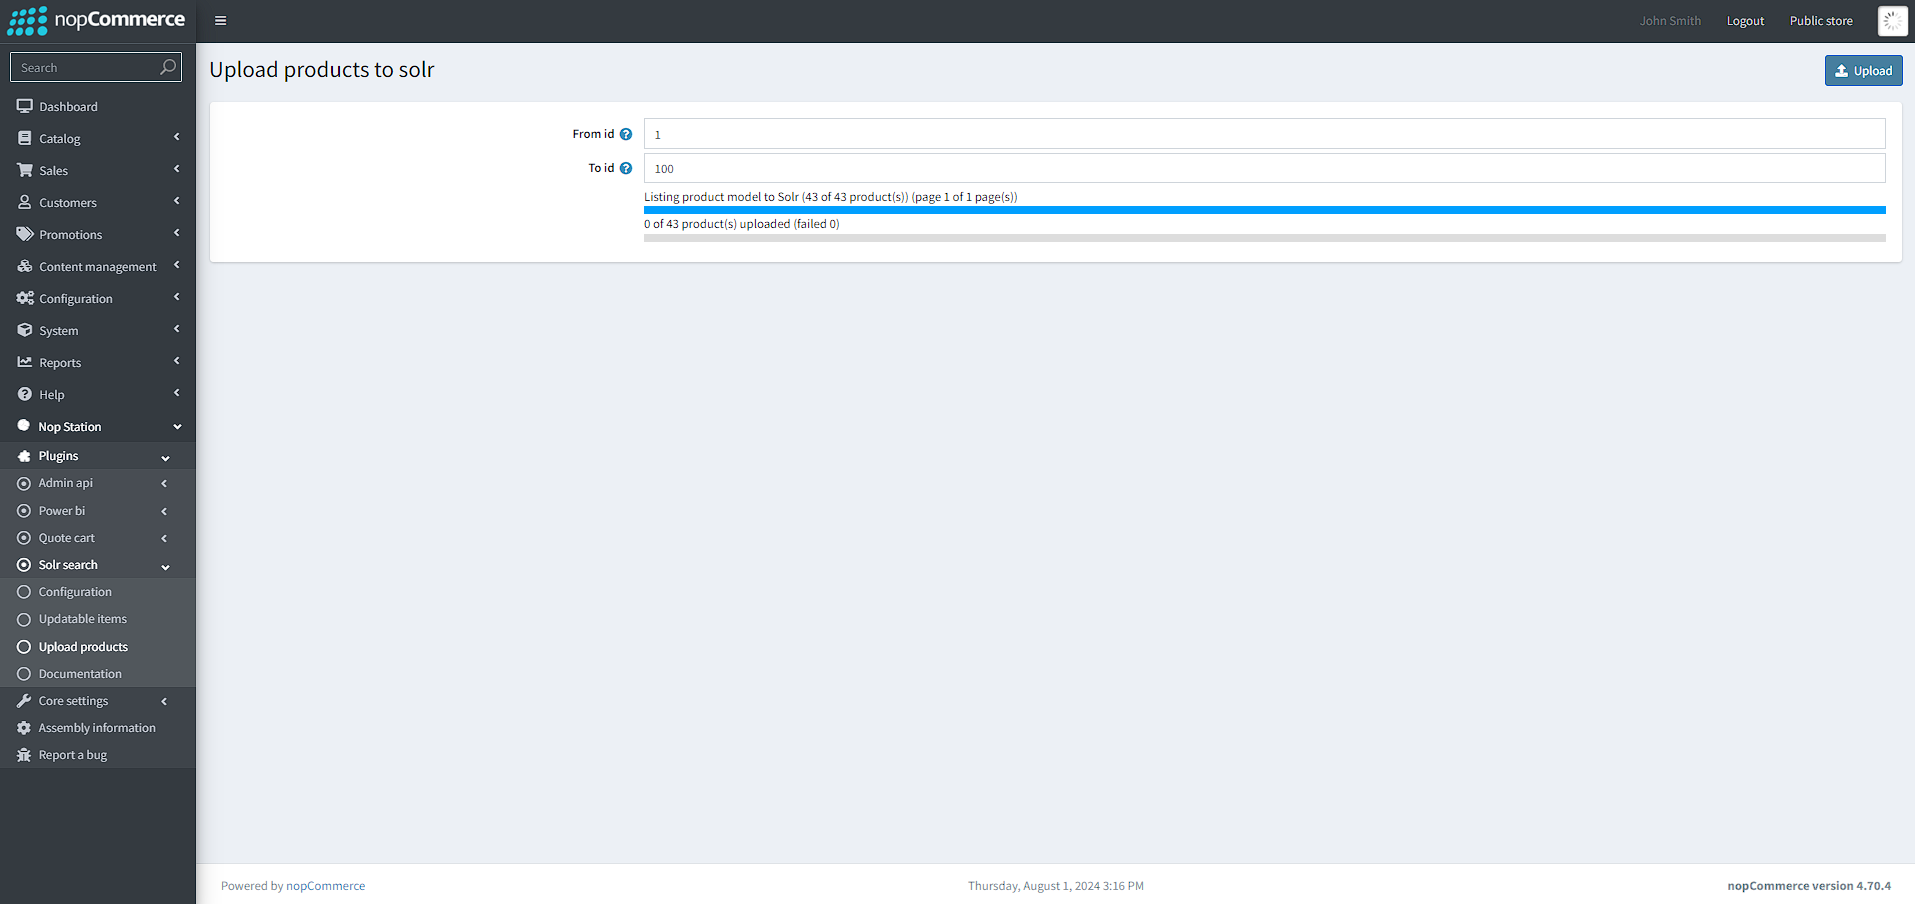
- Go to Admin → Nop Station → Plugins → Solr search → Upload products

- Here, Admins can specify the id range of the products they want to be uploaded. Upload progress can be seen in a progress bar
Scheduled Task
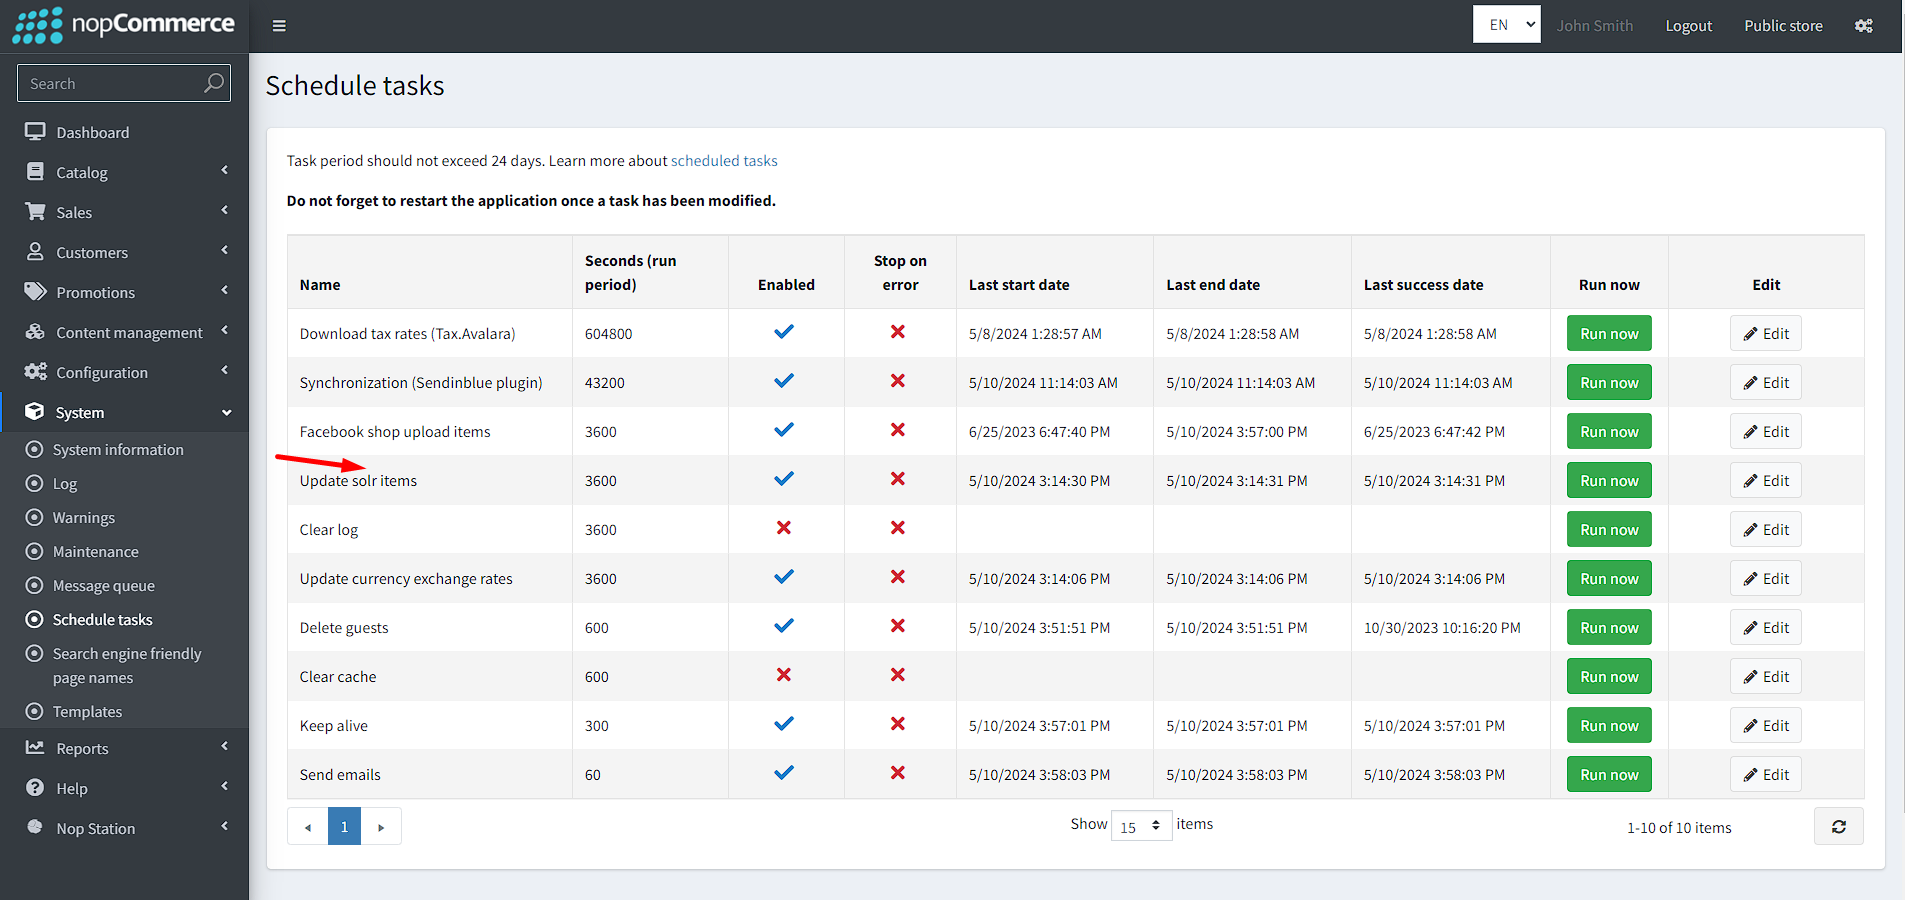
- By default, the Solr plugin syncs products through a scheduled task every 1 hour (3600 seconds)
- You can view, Modify, or run the task manually by going to Admin → System → Scheduled Tasks
Further Configuration in Solr Panel
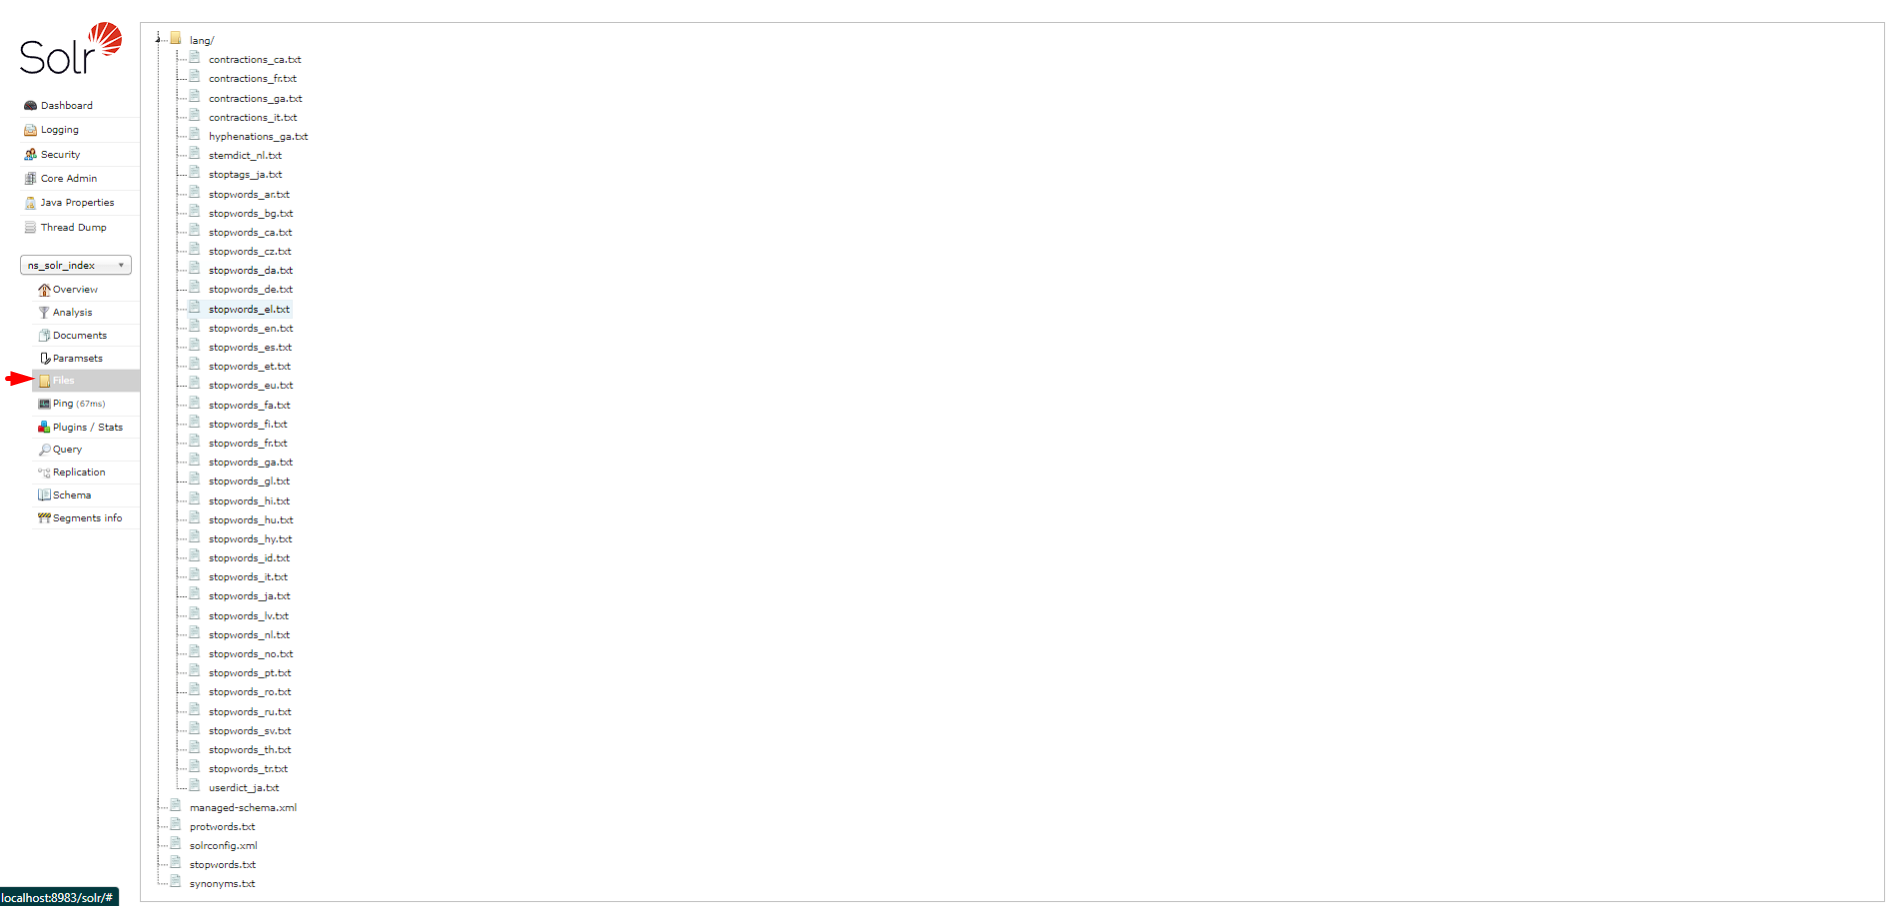
Aside from the plugin configurations mentioned, further settings for things such as Synonyms and Stop words can be configured at Solr Side
- You can find the setting files by going to Files under the Solr panel and modifying the respective files
- Note: The Solr application needs to be restarted in the server after any modification of these files
Configuring these settings requires additional knowledge of Solr management and configuration which can be found here through Solr's official Documentation:


