PRE-REQUISITES
- The plugin requires you to install the Nop-Station Core plugin first.
INSTALLATION
- Download the Quote Cart Plugin from our store https://nop-station.com/customer/downloadableproducts
- Go to Administration → Configuration → Local plugins
- Upload the .zip file using the "Upload plugin or theme" button
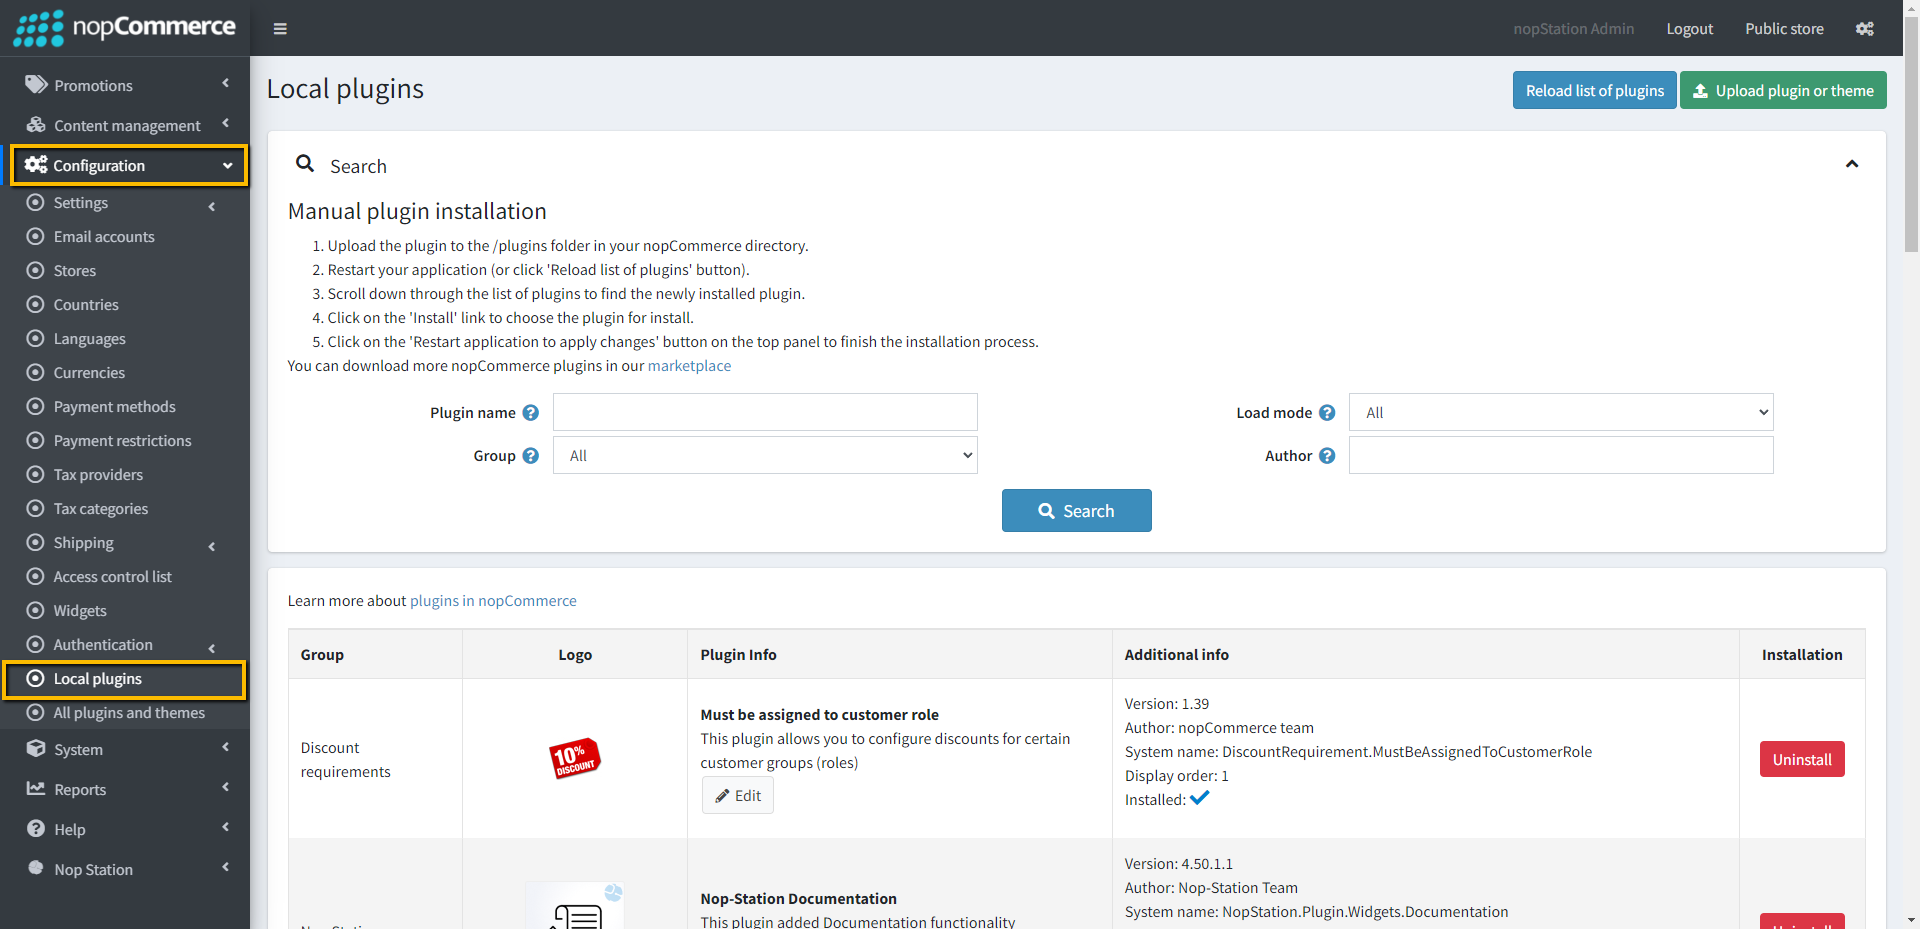
- Go to Administration, and reload the 'list of plugins'. Install the 'Nop-Station Core' Plugin and then install the 'Quote Cart plugin'
- To make the plugins functional, restart the application
- Enable the plugin with the 'Edit' option and Configure it
CONFIGURATION
- Go to Admin → Nop Station → Plugins → Quote Cart → Configuration

- Enable quote cart: By checking this checkbox admins can enable the quote cart on the public store
- Clear cart after submission: Checking this checkbox clears quote cart items after each submission
- Allowed customer roles: Admins can add/remove customer role-based accessibility for quote cart
- Enable whitelist: Checking this checkbox enables the whitelisting functionality
- Item limit per request: Admins can limit max items per quote cart request
Whitelist Products/Categories/Manufacturers/Vendors
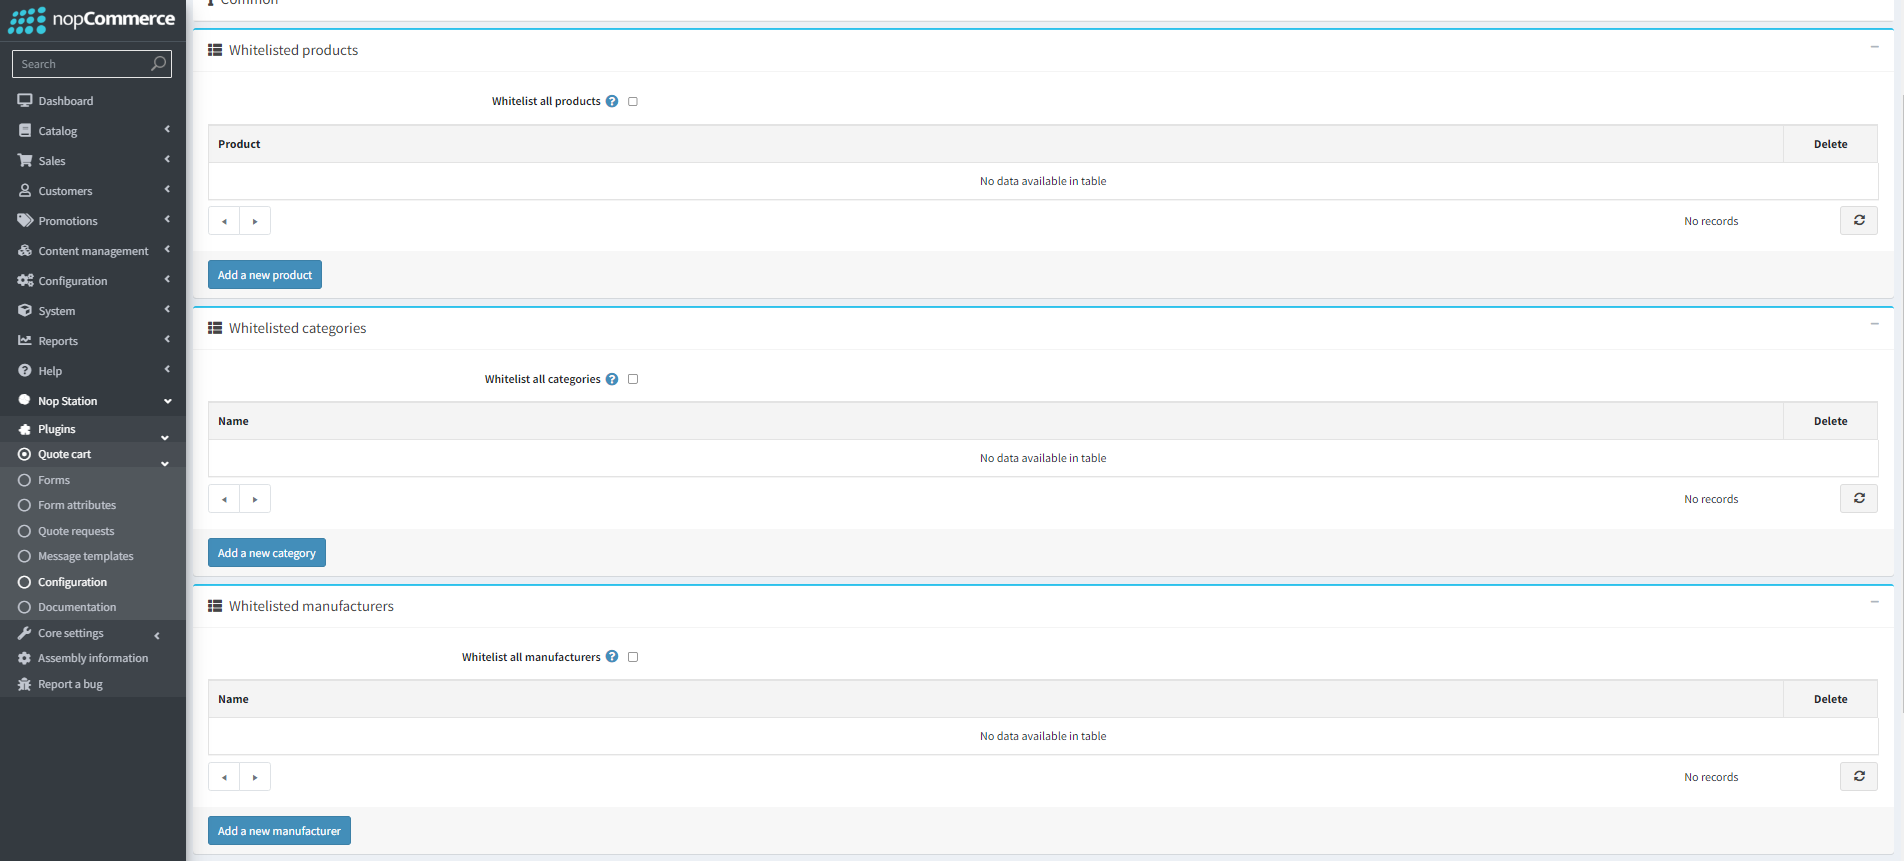
- Whitelist all products: checking this checkbox whitelists all products for the quote cart
- Add a new product: Admins can specific products by clicking the add a new product button and select one or multiple products from the product list
- Whitelist all categories: checking this checkbox whitelists all categories for the quote cart
- Add a new category: Admins can specific products by clicking the add a new category button and select one or multiple categories from the categories list
- Whitelist all manufacturers: checking this checkbox whitelists all manufacturers for the quote cart
- Add a new manufacturer: Admins can specify manufacturers by clicking the add a new manufacturer button and selecting one or multiple manufacturers from the manufacturers' list
- Whitelist all vendors: checking this checkbox whitelists all vendors for the quote cart
- Add a new vendor: Admins can specify vendors by clicking the add a new vendor button and selecting one or multiple vendors from the vendors list
Setting Form Attributes
- Go to Admin → Nop Station → Plugins → Quote Cart → Form attributes

- you can see a list of created attributes here
- You can create attributes by clicking on the Add New button.
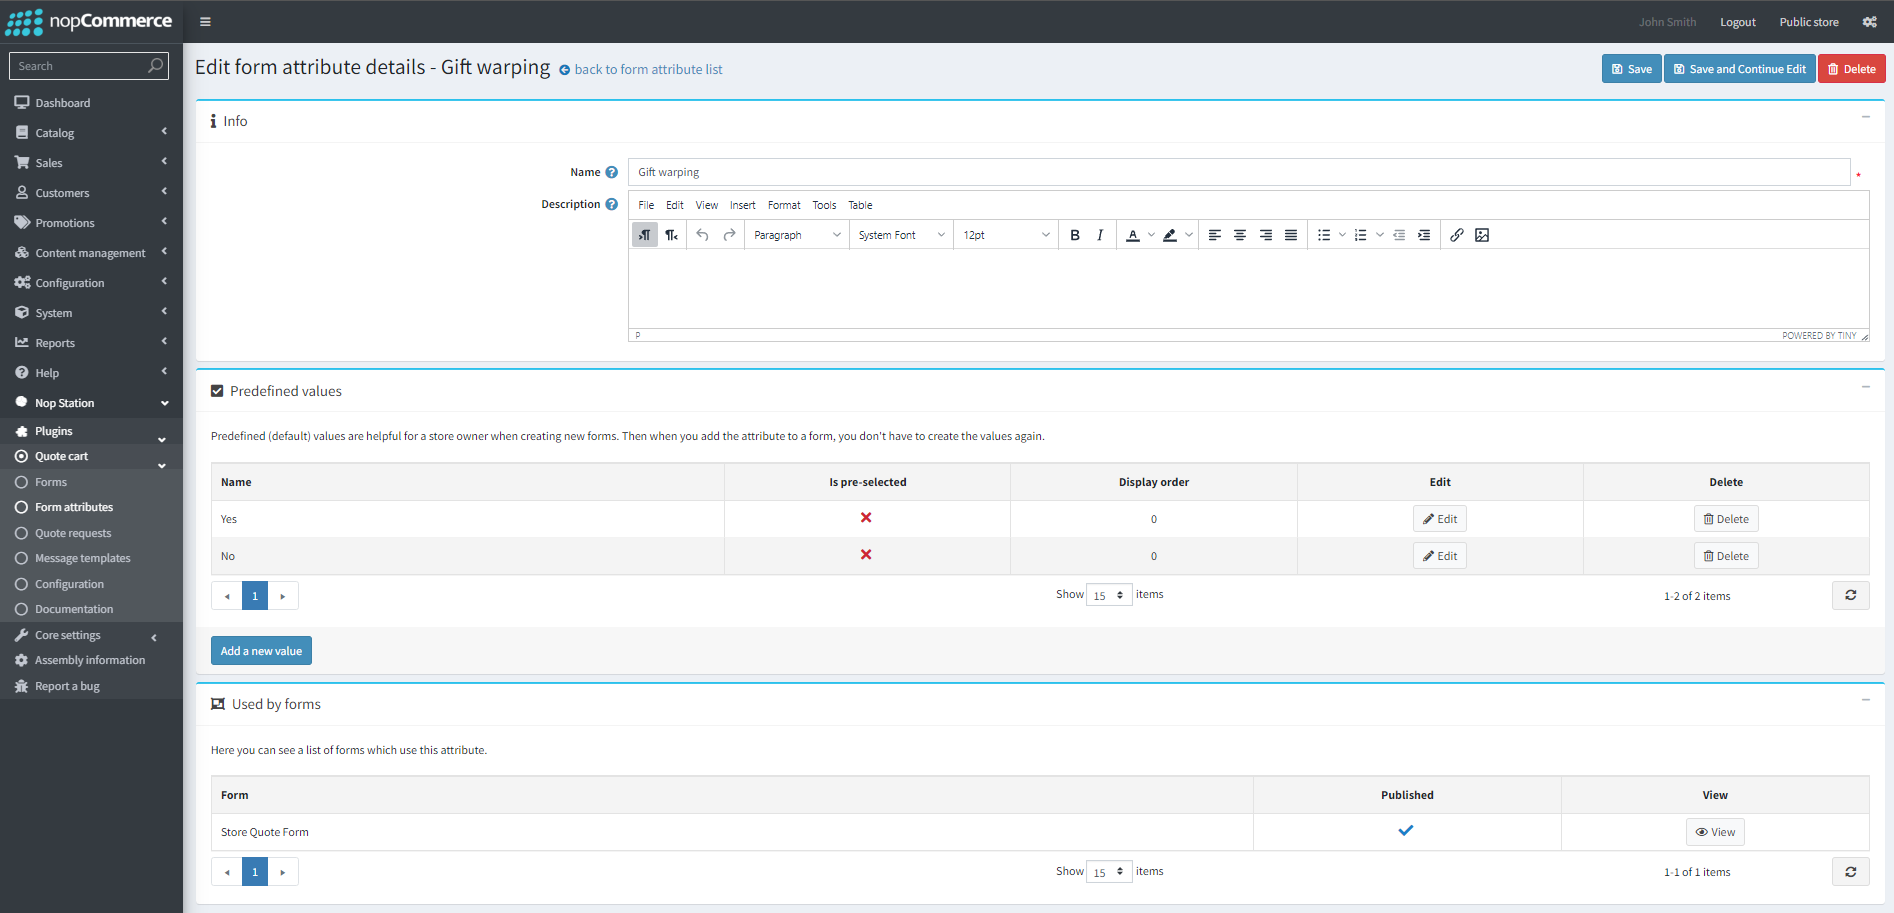
- Name:Admins can define the name for the attribute here
- Description:admins can add a description for the attibute
- Pre-defined values: admins can create some predefined values for attributes if they want
Setting up Quote Forms
- Go to Admin → Nop Station → Plugins → Quote Cart → Forms
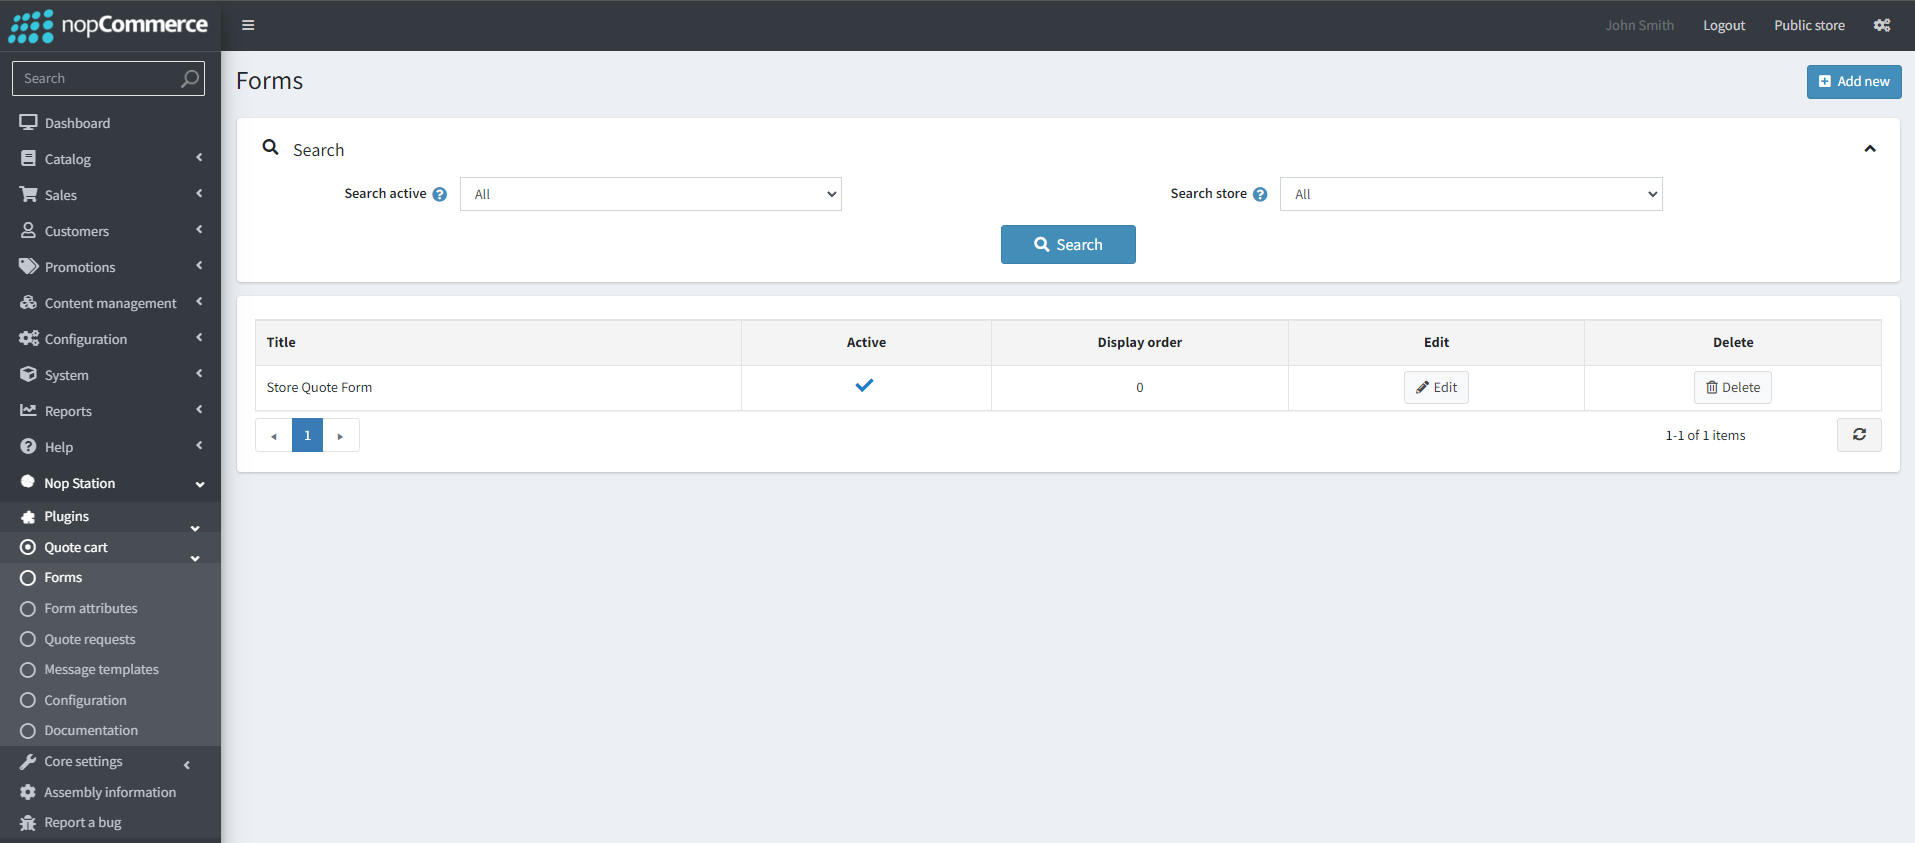
- you can see a list of created Forms here which you can edit by clicking the edit button
- To add a new Quote form, click the add new button . This will take them to the add/Edit details page
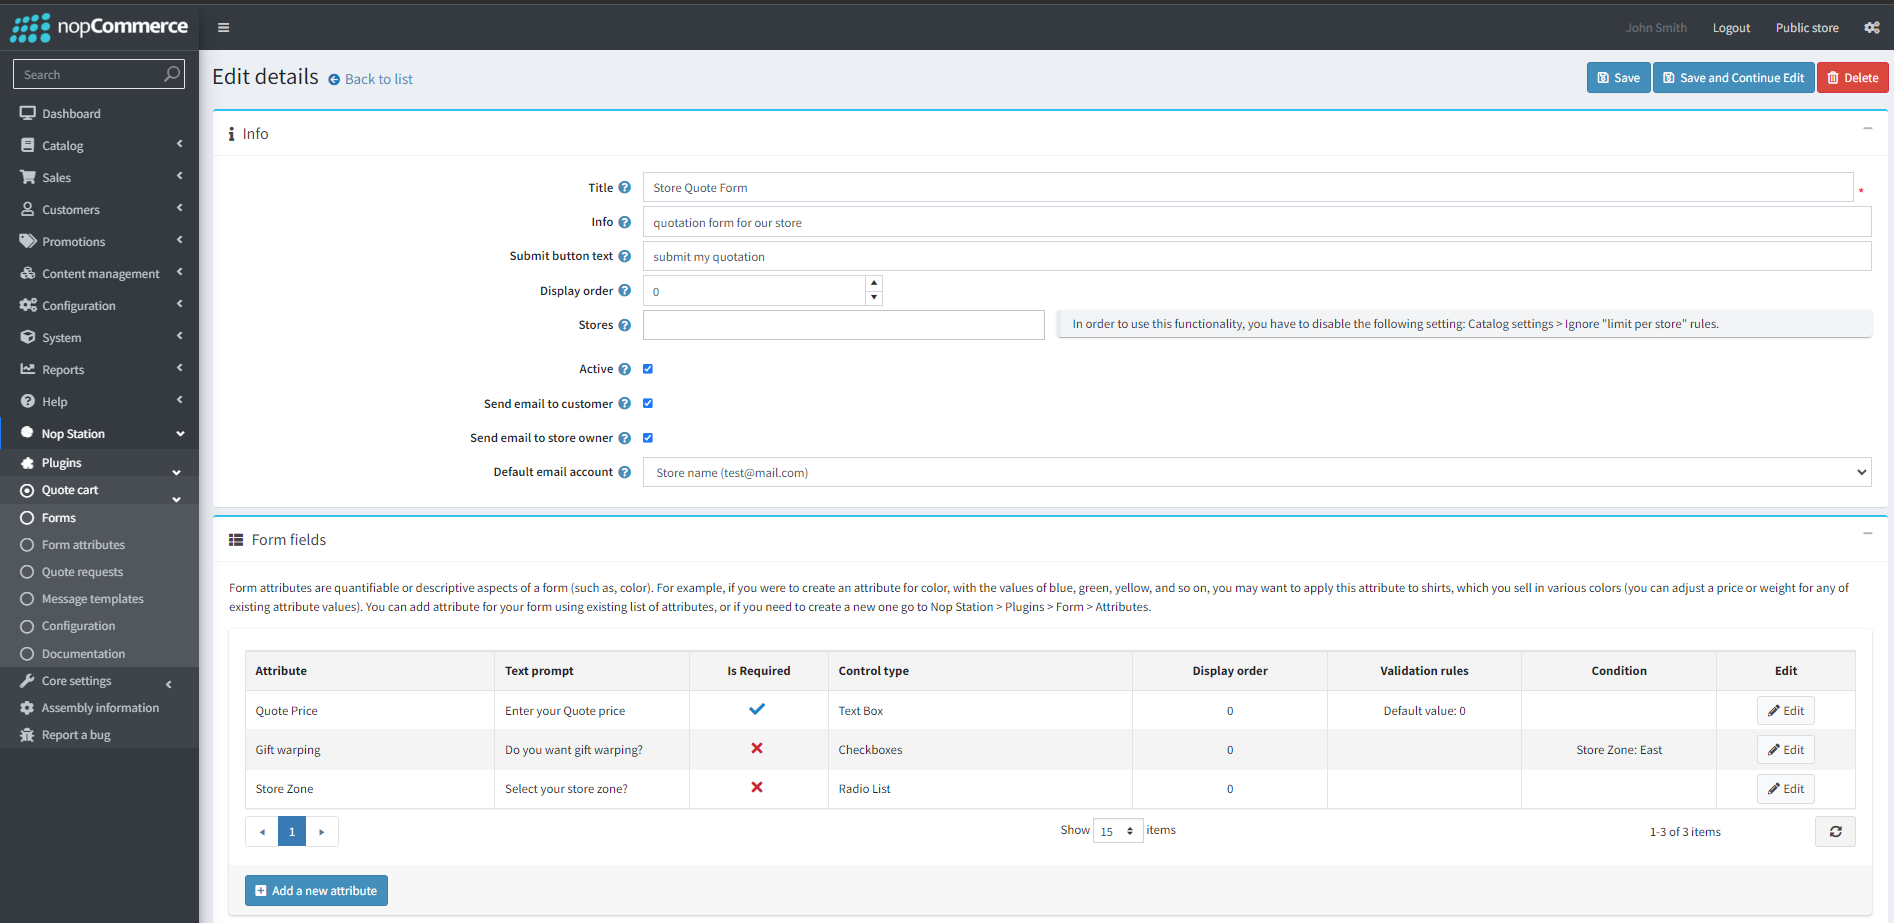
- Title: Admins can add the title of the quote form
- Info: Admins can add additional info or a description about the quote form here
- Submit button text: Admins can add a custom submit button text for the form here
- Display order: Admins can set display order for the quote cart
- Active: admins can activate the quote cart form by checking this
- Send email to customer: Customer will get an email after successful submission of their quote
- Send email to store owner: Store owners will get an email of each quote submission from the form
- Default email account: admins can set default email from the dropdown
- Form Fields:Admins can see a list of form attributes defined for a particular form here, They can Add or edit these attributes
- Add a new attribute/Edit: By clicking on the add new attribute button the admin will be taken to the add a new attribute/ Edit a new attribute page.
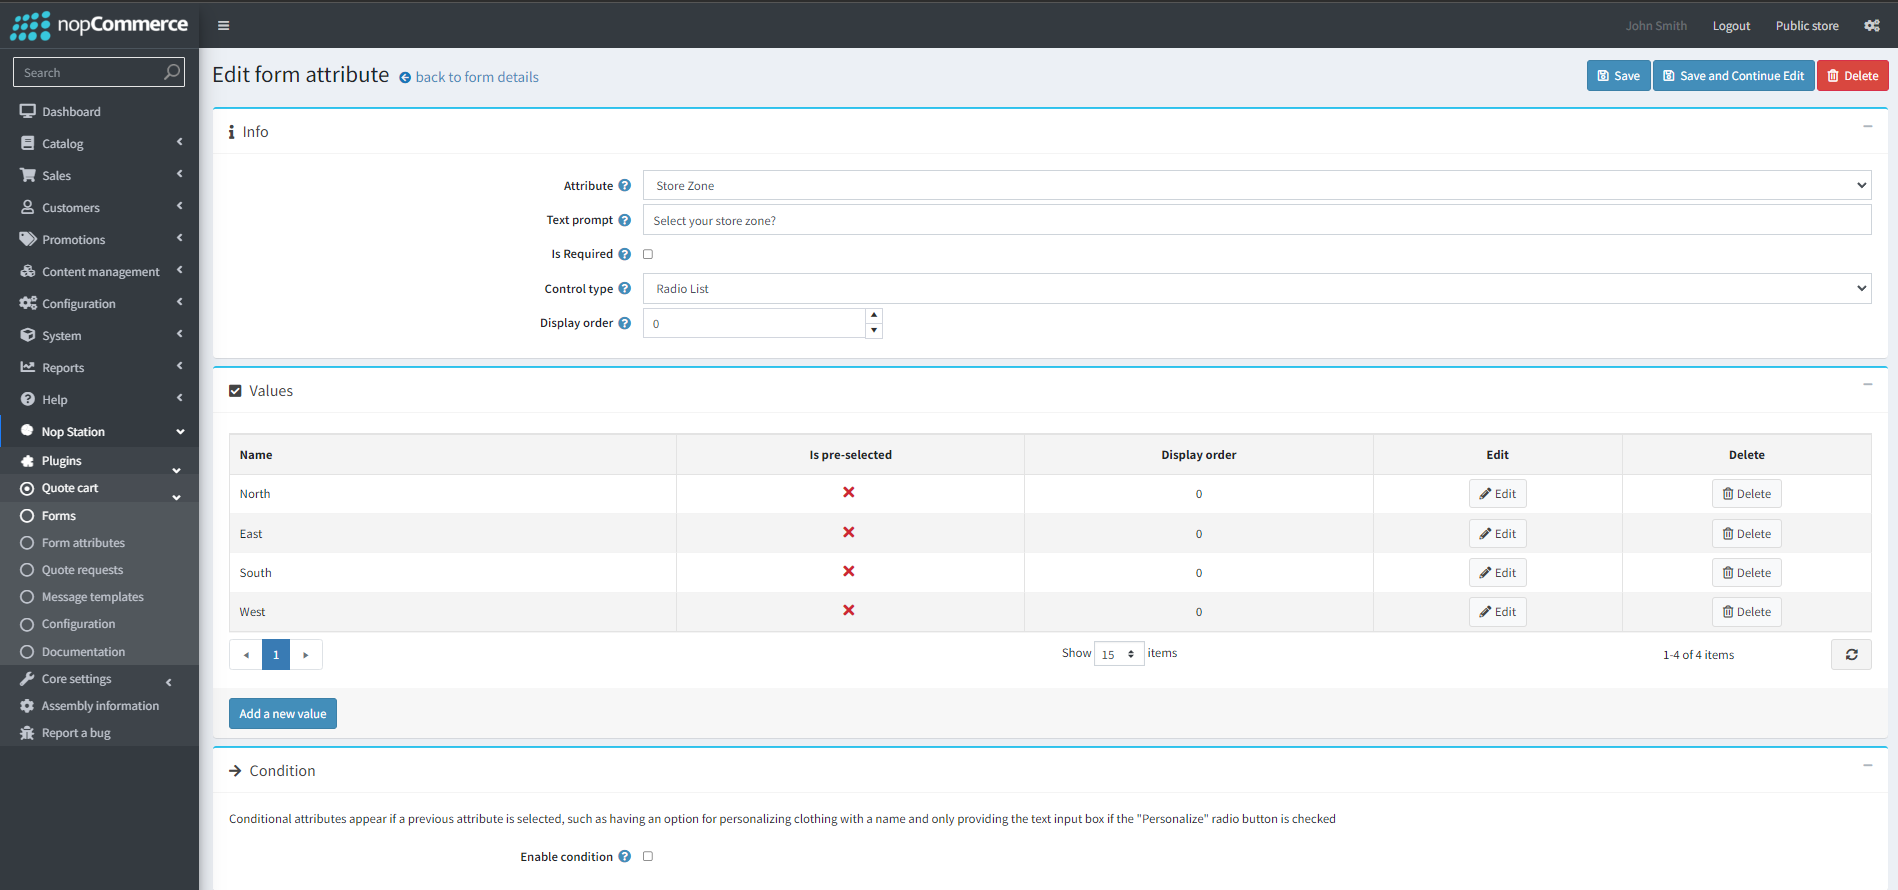
- Attribute:admins can choose the attribute they want to add from this drop-down
- Text prompt:admins can set a text prompt or question for the attribute through this option
- Is Required:By checking this checkbox admins can set the field as a required one
- Content type:By can set the default content type
- Display order:By checking this checkbox, admins can set te default order
- Enable condition:By checking this checkbox admins can enable conditions for attributes. Once enabled for an attribute , it will only be visible when the condition is fulfilled
Managing Quote requests
- Go to Admin → Nop Station → Plugins → Quote Cart → Quote Requests
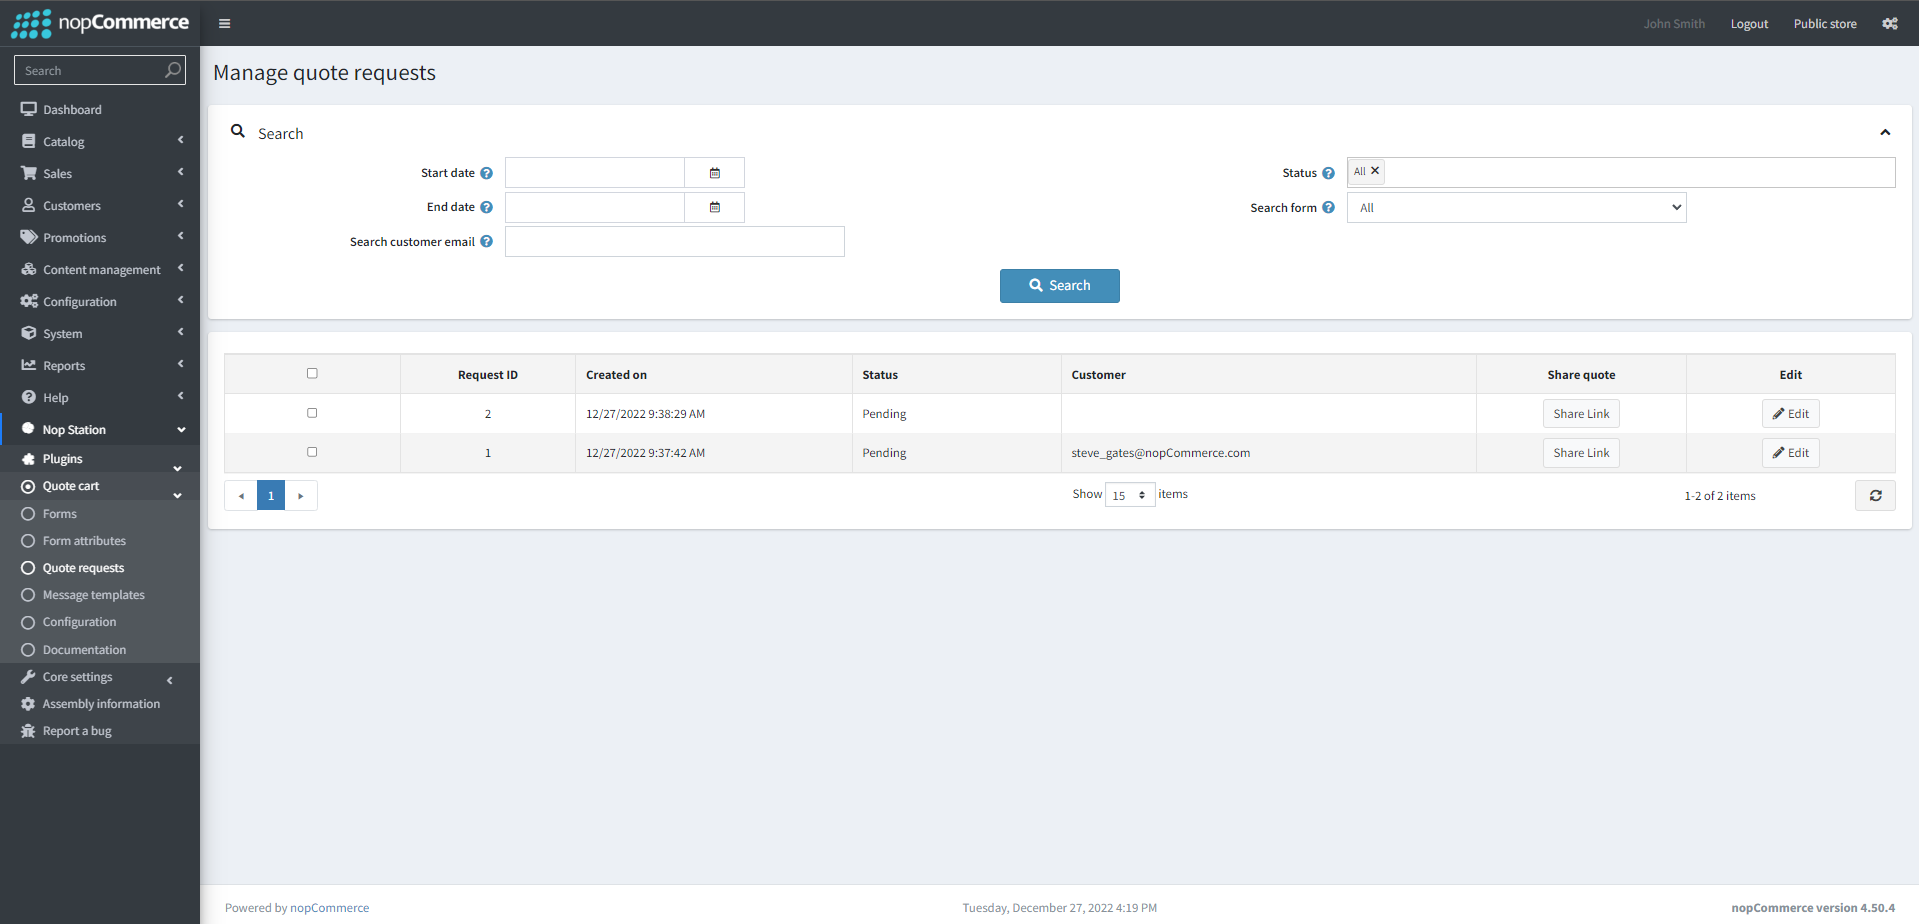
- On the manage Quote requests page, admins can see a list of submitted quotes from customers
- Admins can filter/Search the list through start date, end date, customer email, status, form
- Admins can share a quote link by clinking the Share link button. This will copy the quotation link.
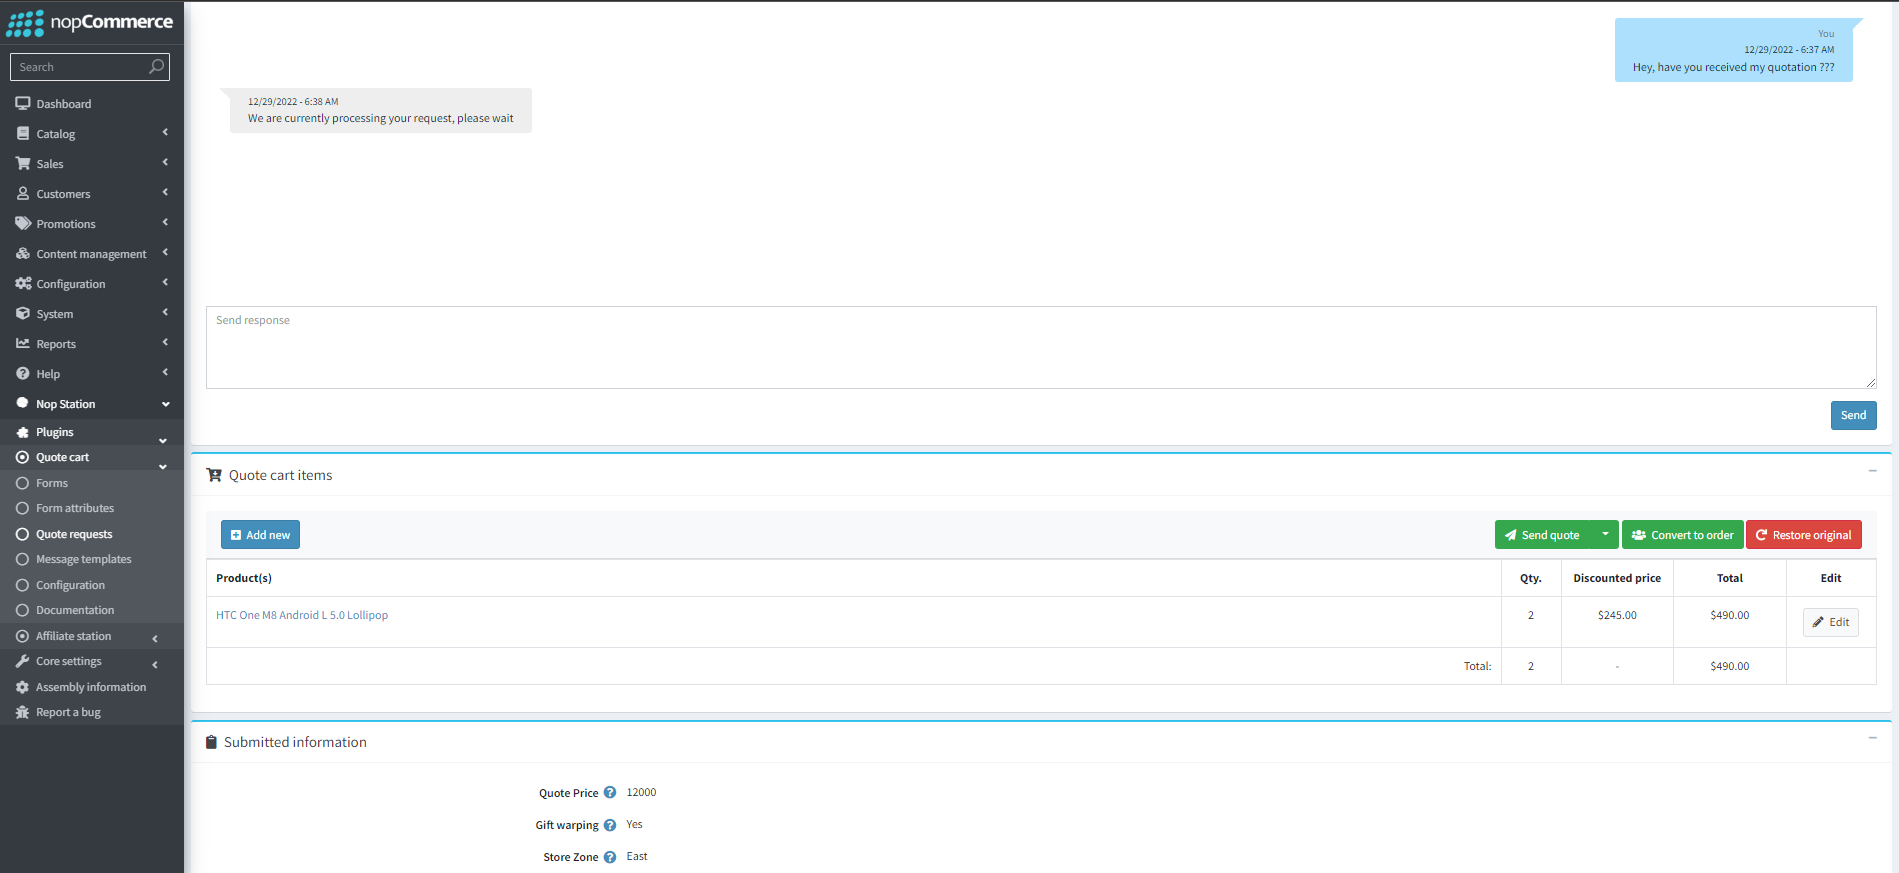
- Admins can manage a quote by clicking the edit button. This will take them to the Manage Quote Request page
- Status: This shows the current status of a quote request. Request status can be Pending/Processing/Complete/Canceled. Should be changed manually by admin
- Request ID: Shows unique quest id for the quote
- Store: Shows the store where the quote was submitted from
- Created on: Shows the creation date for the quote
- Customer name: shows the customer's name
- Customer email: Shows the customer email address
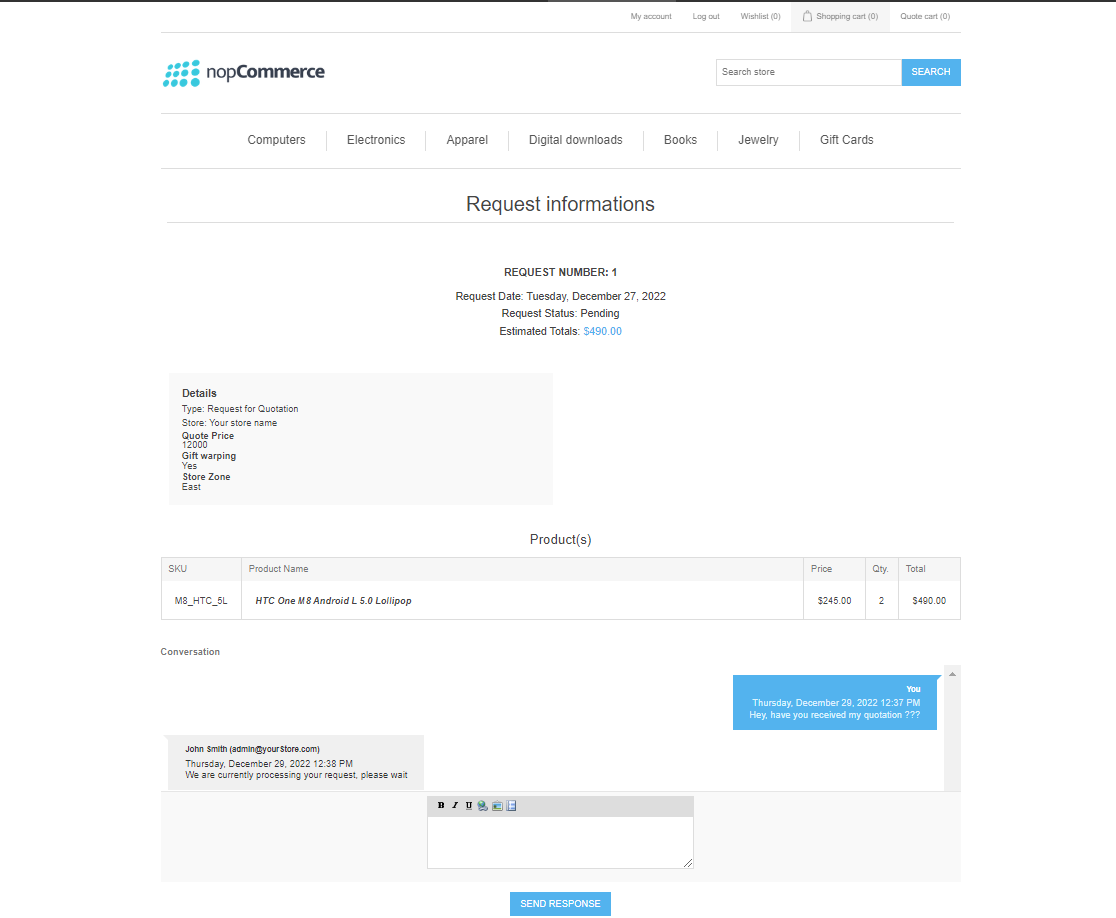
- Message: Contains messages sent by the customers from the Quote details page. Admins can see the message in the chat window here and send replies
- Quote cart items: Admins can see a list of items from the Quotation here. Admins can new items to the request by clicking the add new button or edit the items already in the quote by clicking the edit button
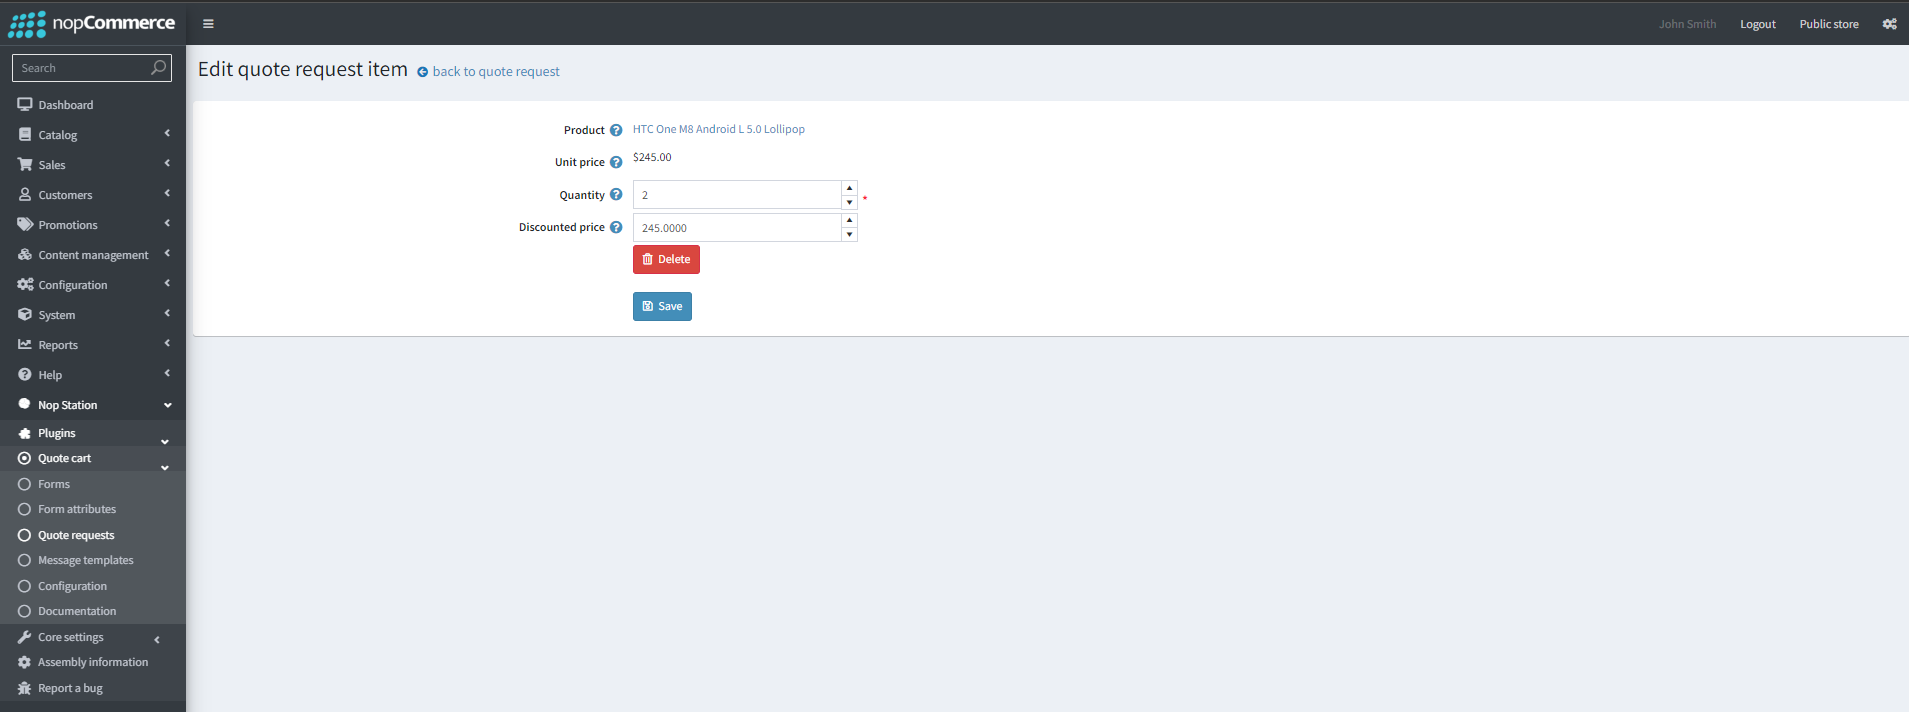
- Clicking the edit button takes the admin to the edit quote request item page. Admins can adjust the quantity or add a discounted price here
- Send quote: Admins can send the quote as an email to the customer/Store owner by clicking the button
Order Conversion
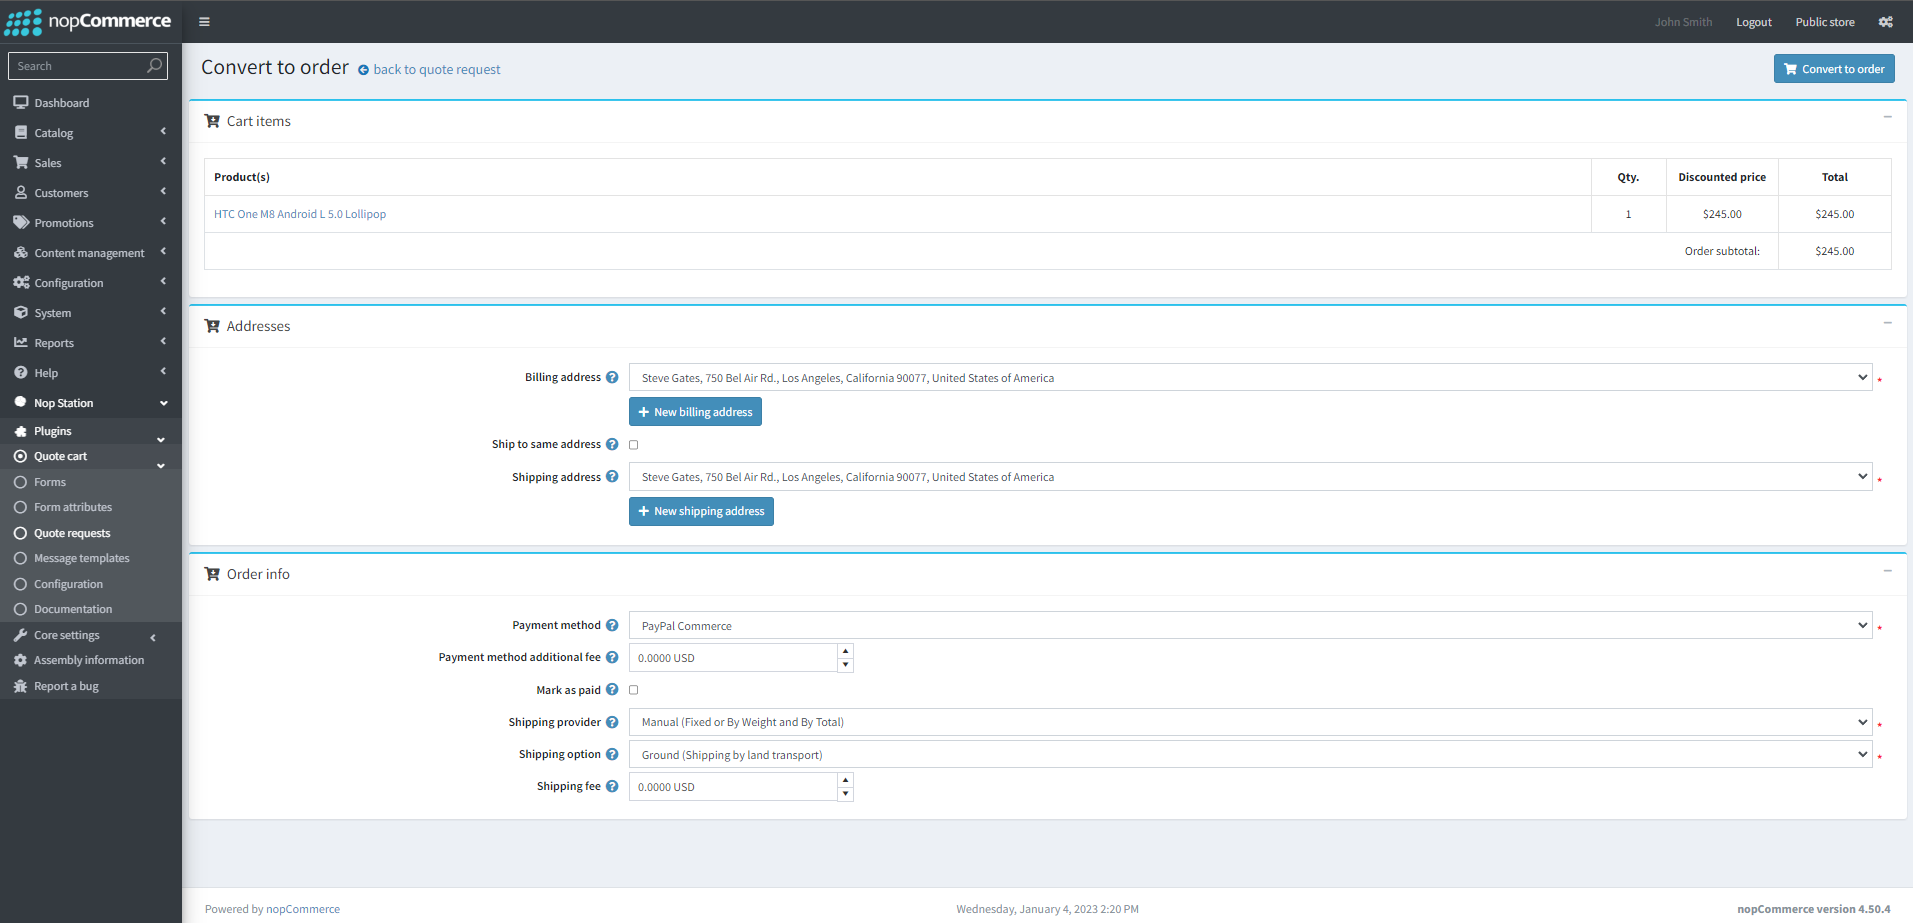
- Convert to order: Admins can convert a quote to order for the customer. Clicking the button takes the admin to the Convert to Order page. Here, admins can turn the quote into a customer order.
- Note: Order converted from a quote will have the Quote request ID as a reference on the order notes
- Restore original: Admins can restore an edited quotation to its original state (As submitted by the customer) by clicking this button
- Submitted information: Admins can see customer responses to the form fields here
Quote Status messages
- Go to Admin → Nop Station → Plugins → Quote Cart → Message templates
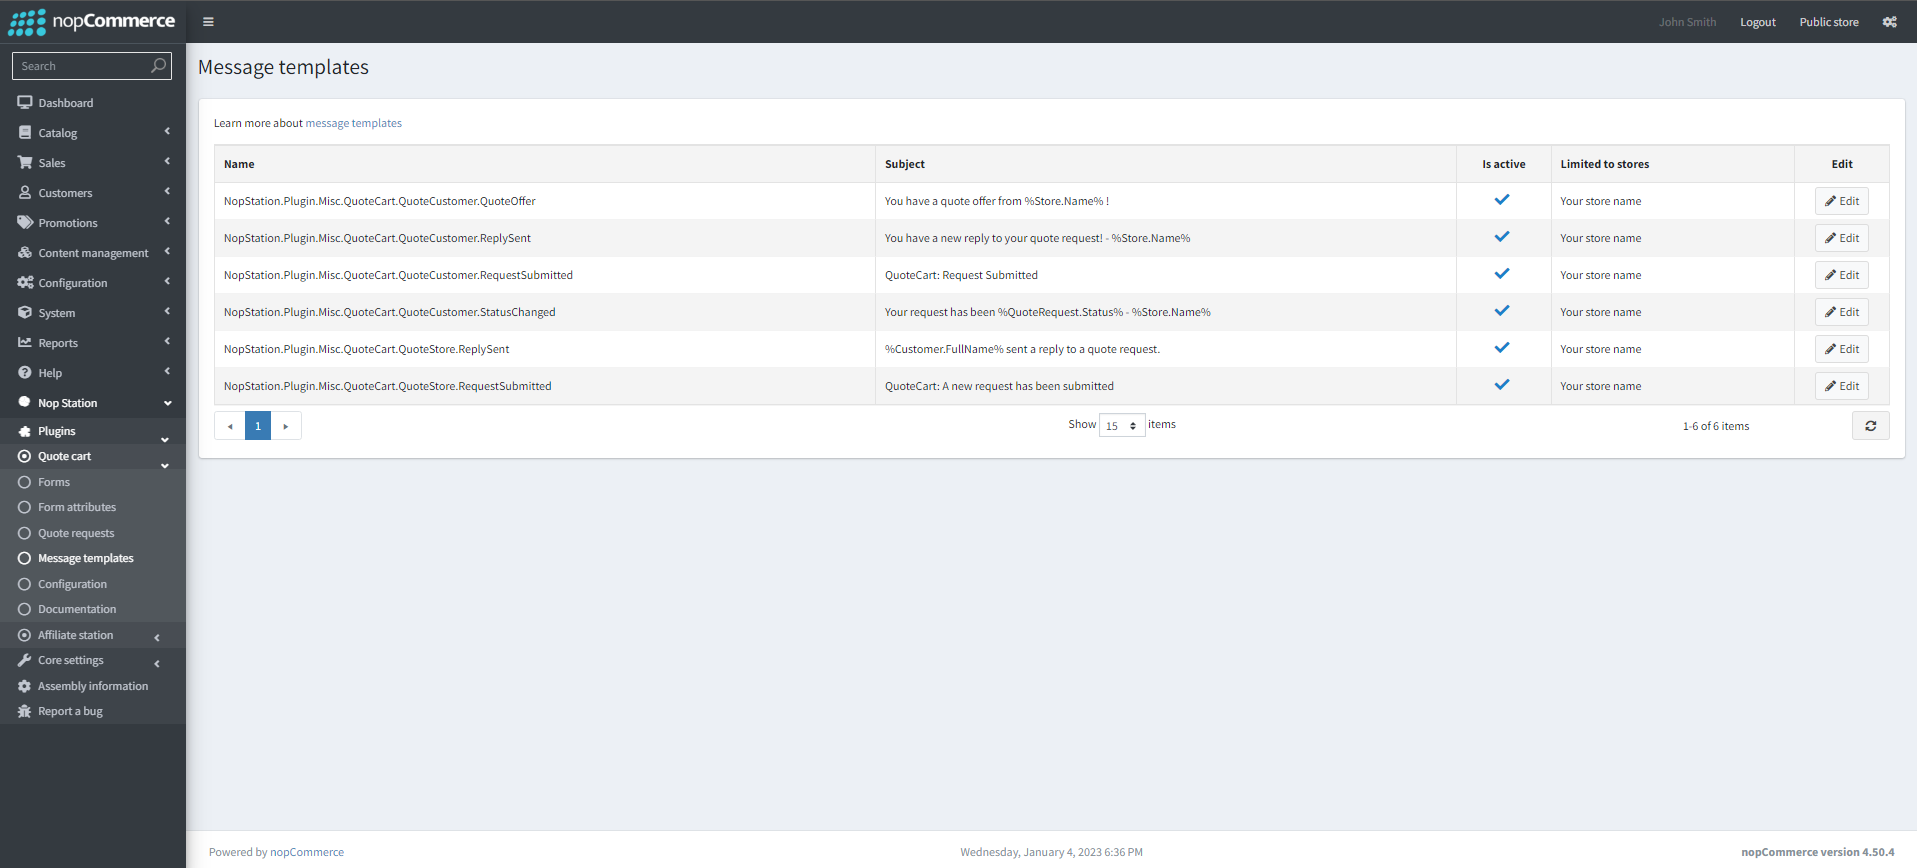
- you can see a list of email message templates here
- These templates can be customized using the edit button.
PUBLIC STORE VIEW
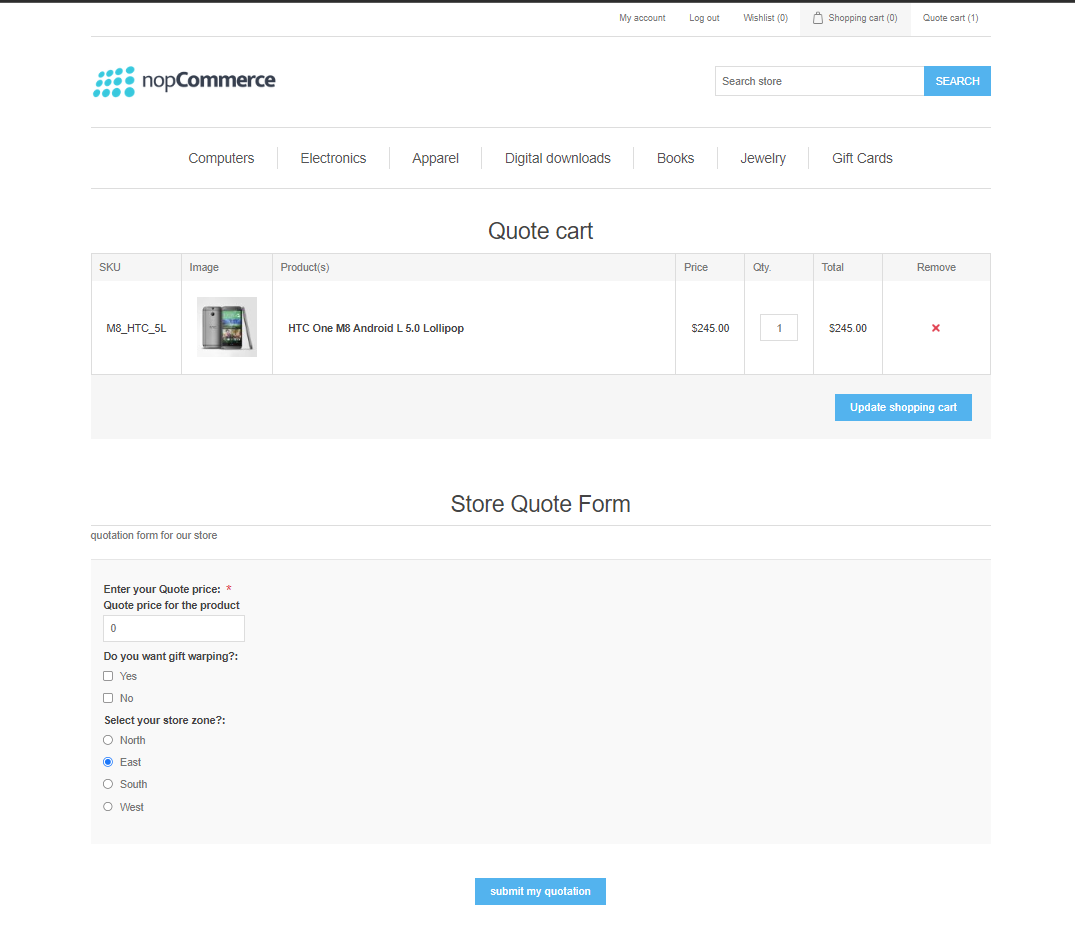
- This is how the quotation form looks on the Quote cart page:
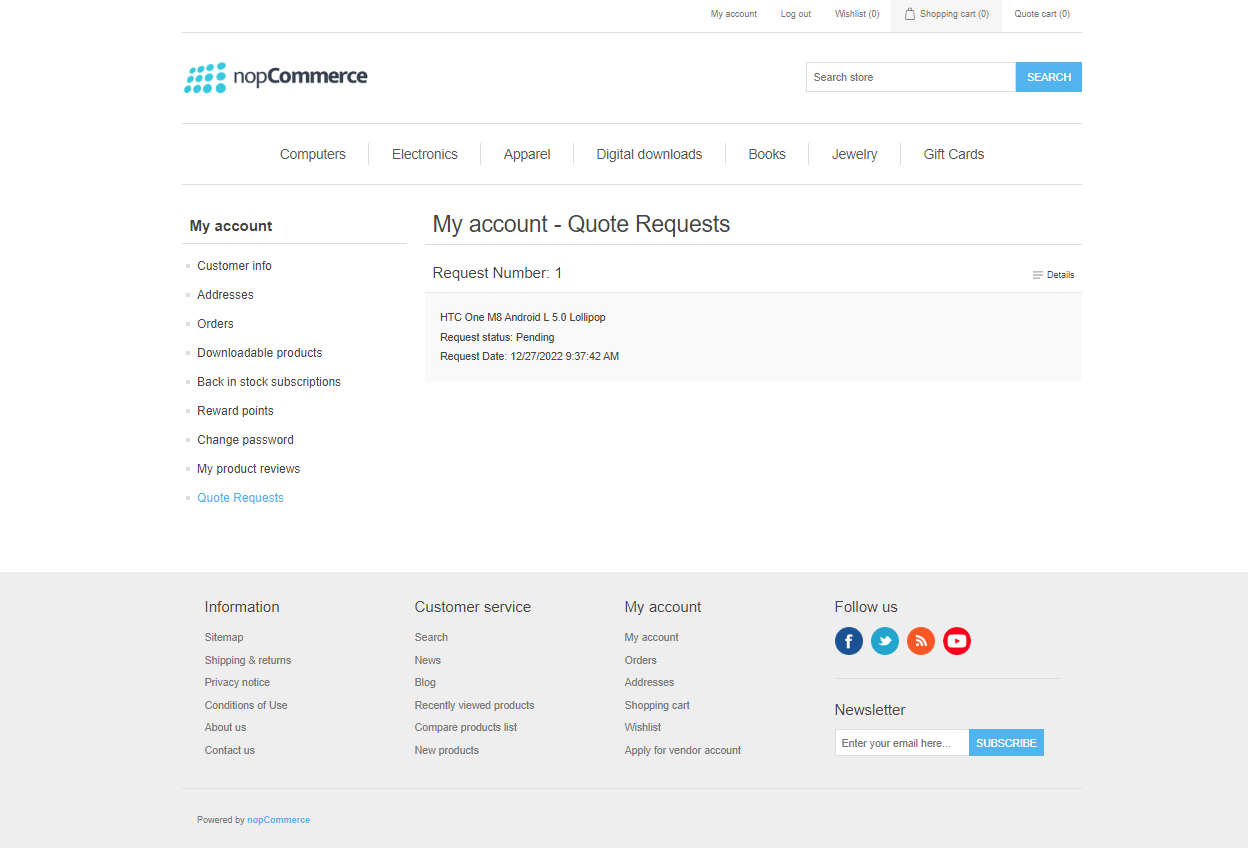
- This is how the quotes page looks for a customer:
- This is how the quote details page looks along with quote messages: