PRE-REQUISITES
- The plugin requires you to install the Nop-Station Core plugin first.
- To use this plugin you need to have a free Facebook account and Facebook Business Account
- You will also need to have a Facebook page for your e-commerce business.
- If you don't have a Facebook page, click here to create a new one.
INSTALLATION
- Download the NopStation Facebook Shop Plugin from our store https://nop-station.com/customer/downloadableproducts
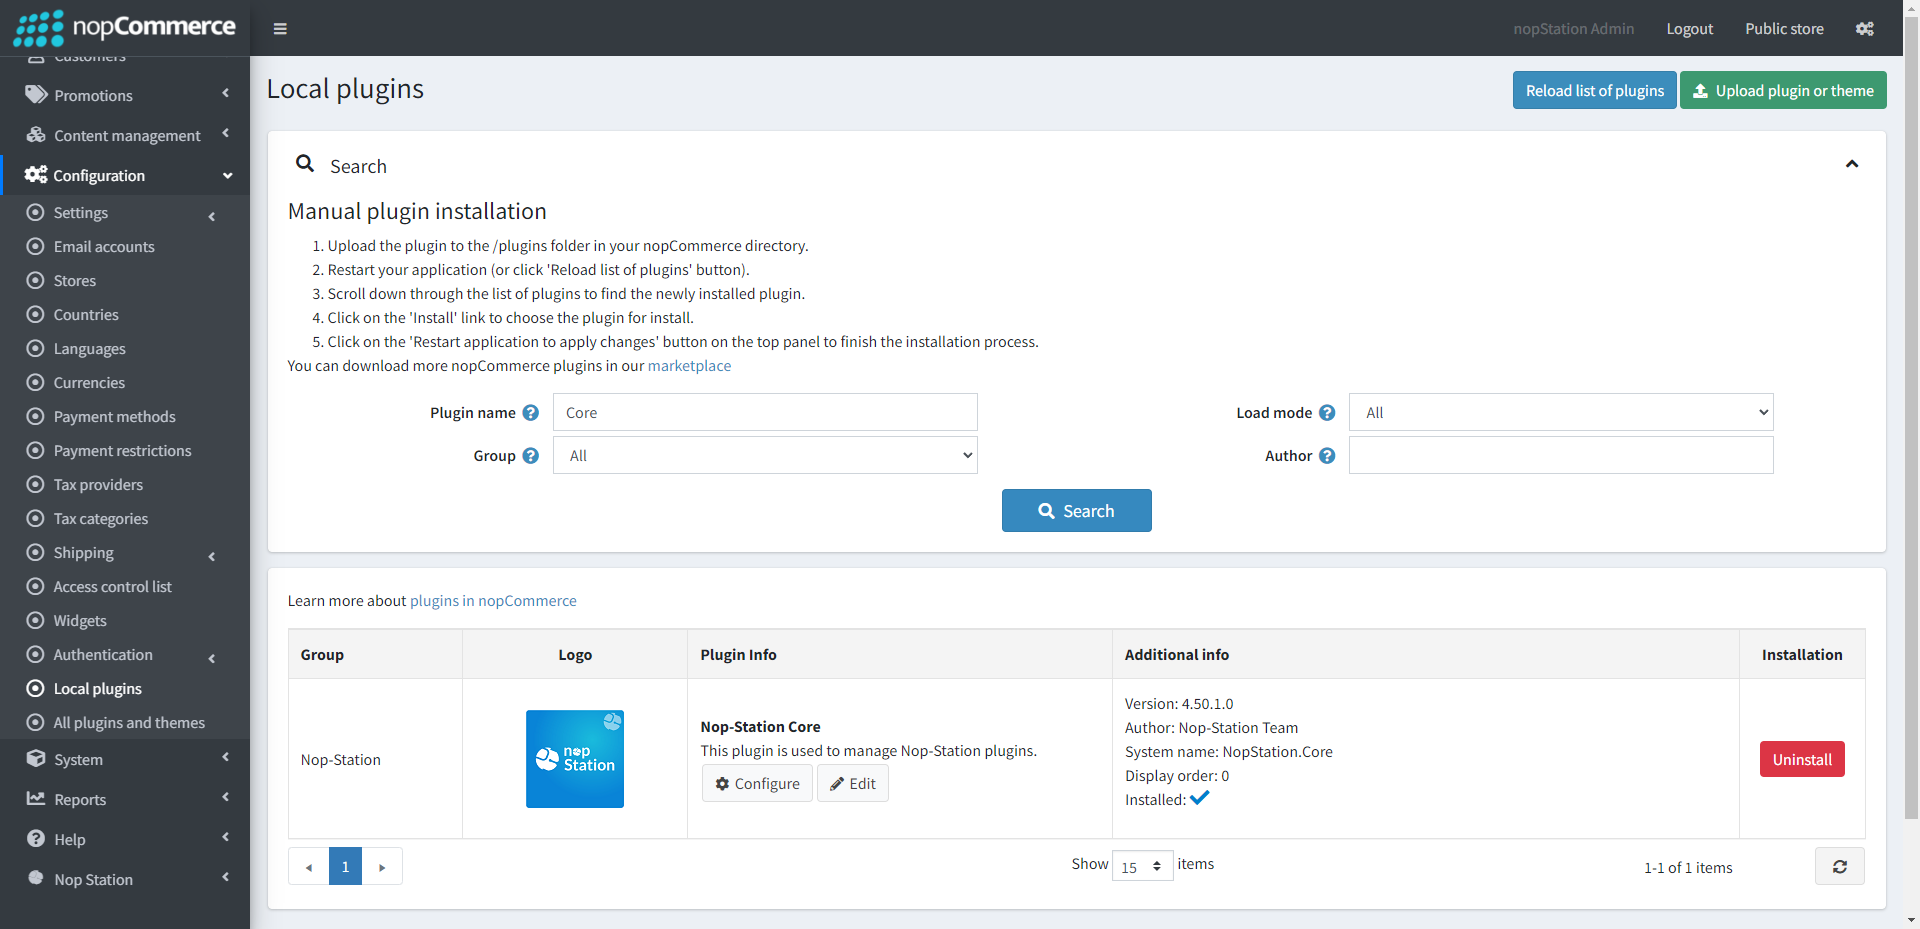
- Go to Administration → Configuration → Local plugins
- Upload the NopStation.FacebookShop zip file using the "Upload plugin or theme" button
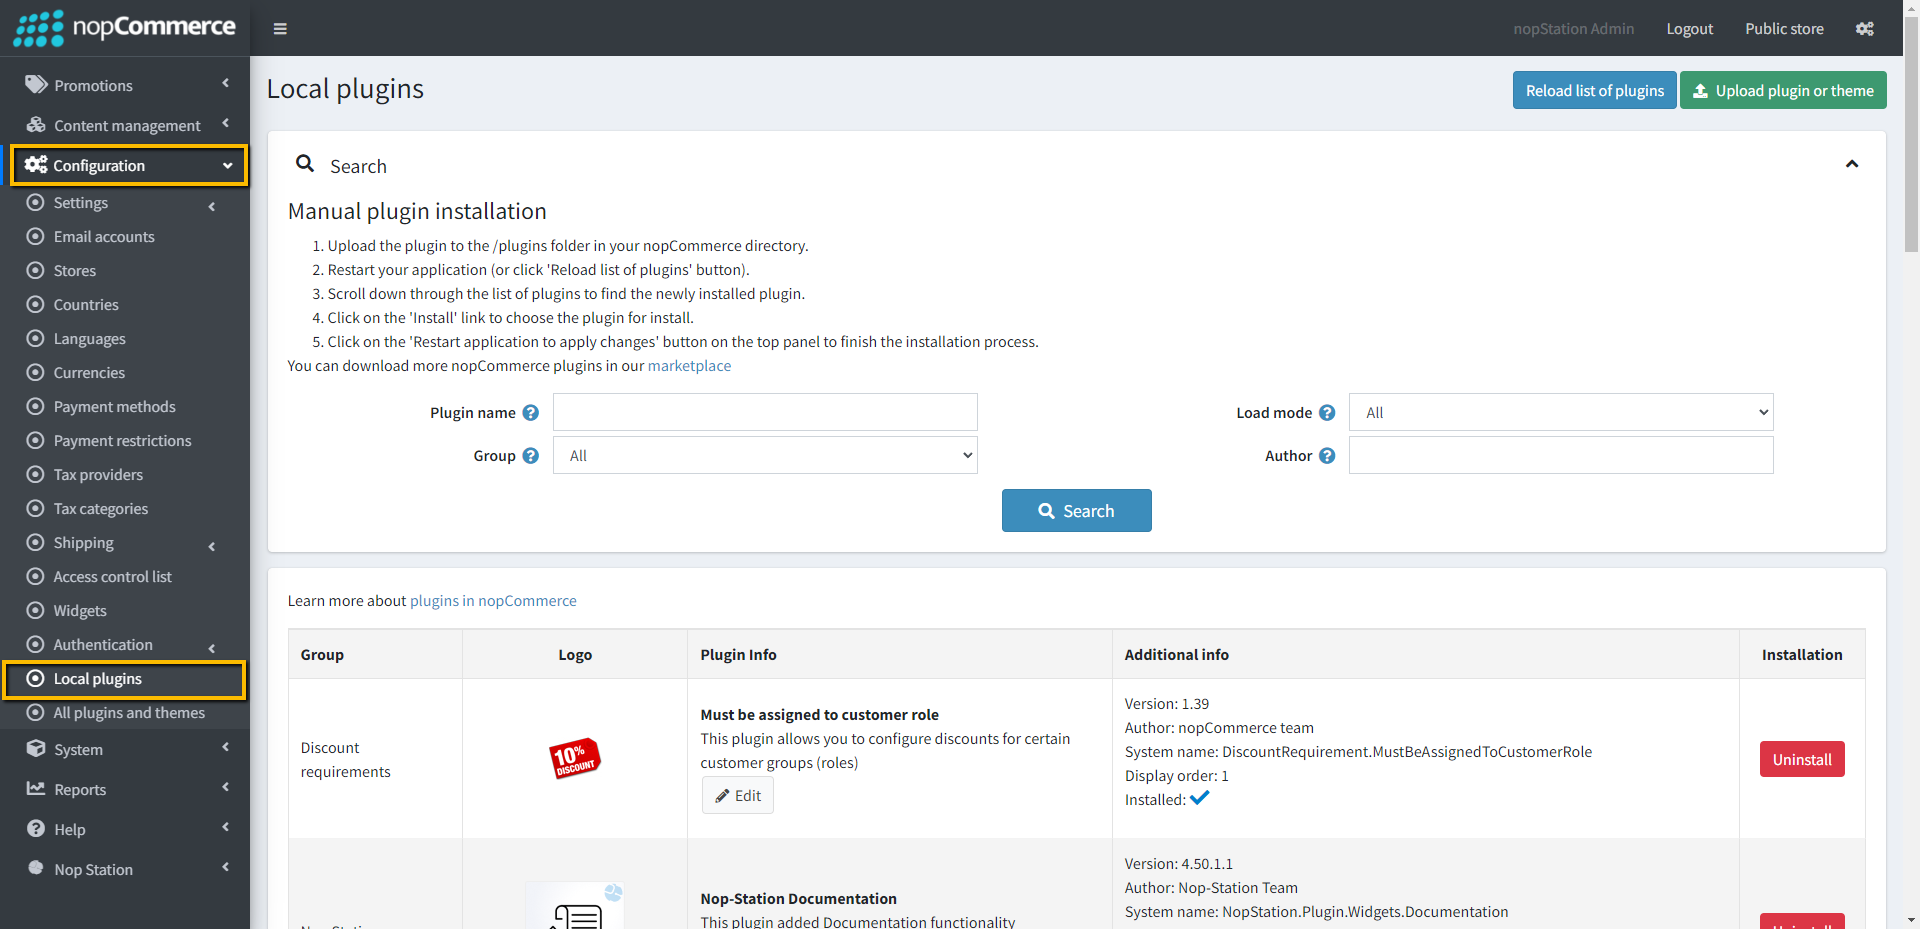
- Go to Administration, reload the 'list of plugins'. Install 'Nop-Station Core' Plugin first and then install the 'Facebook Shop' plugin
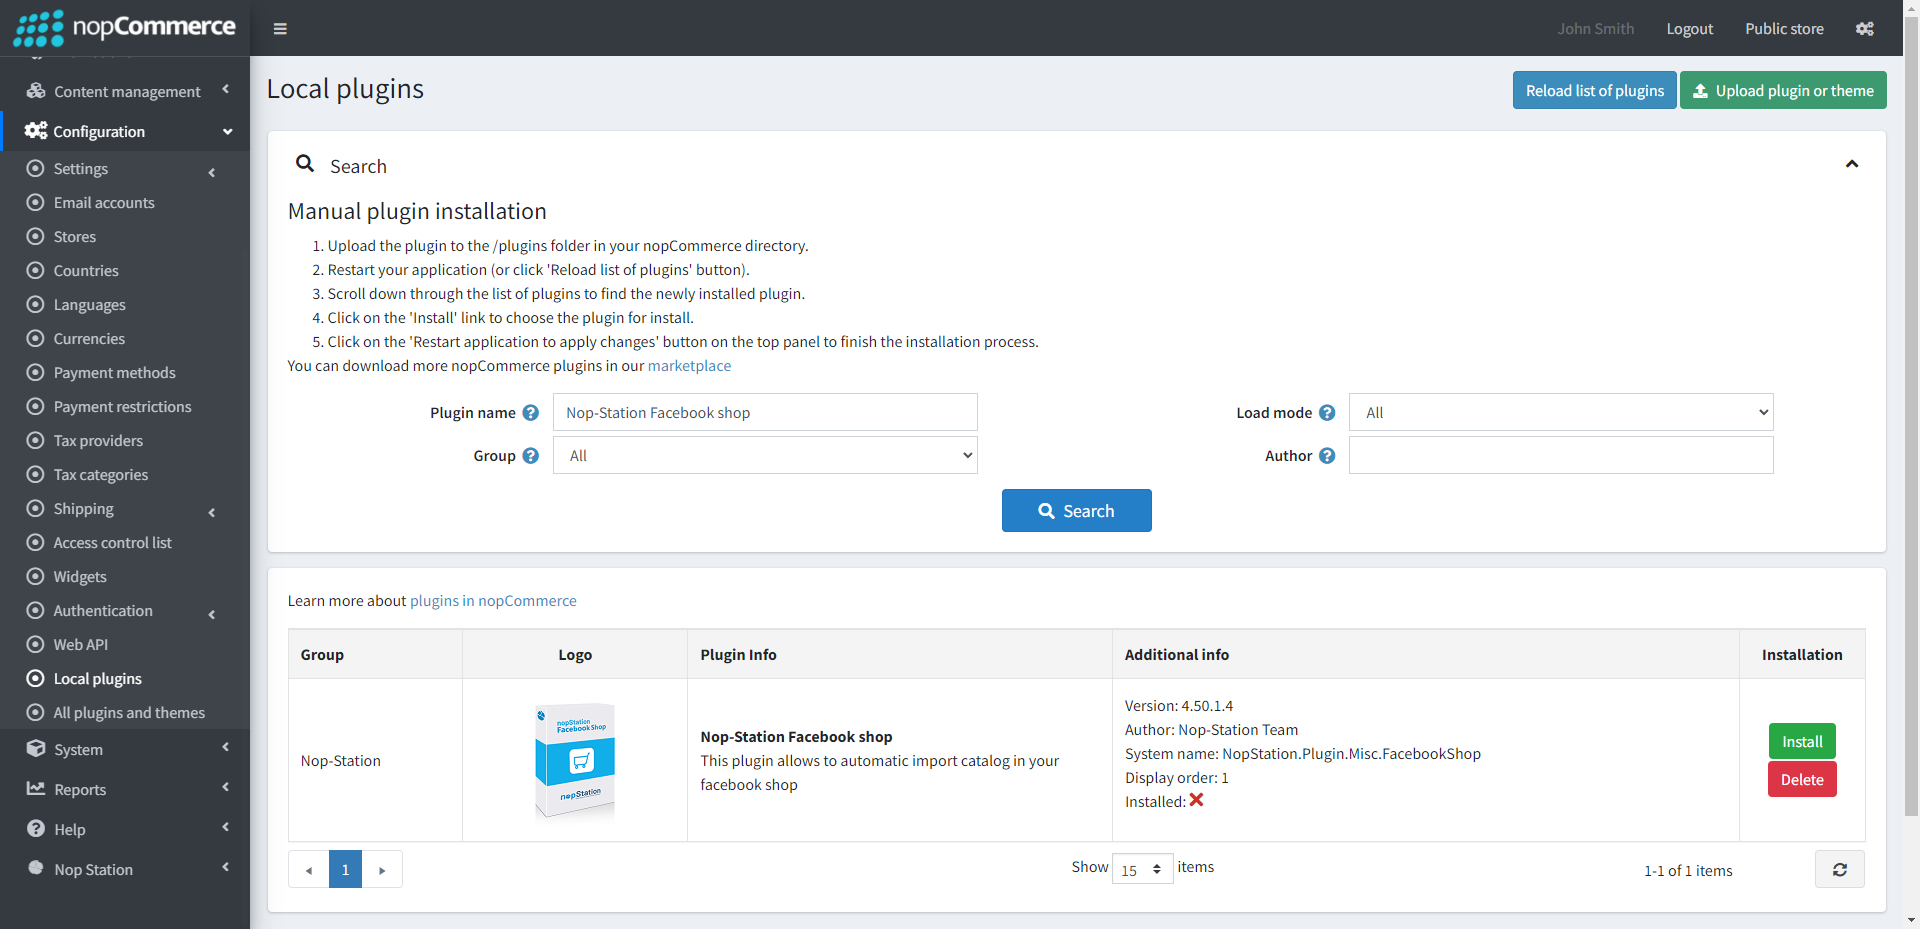
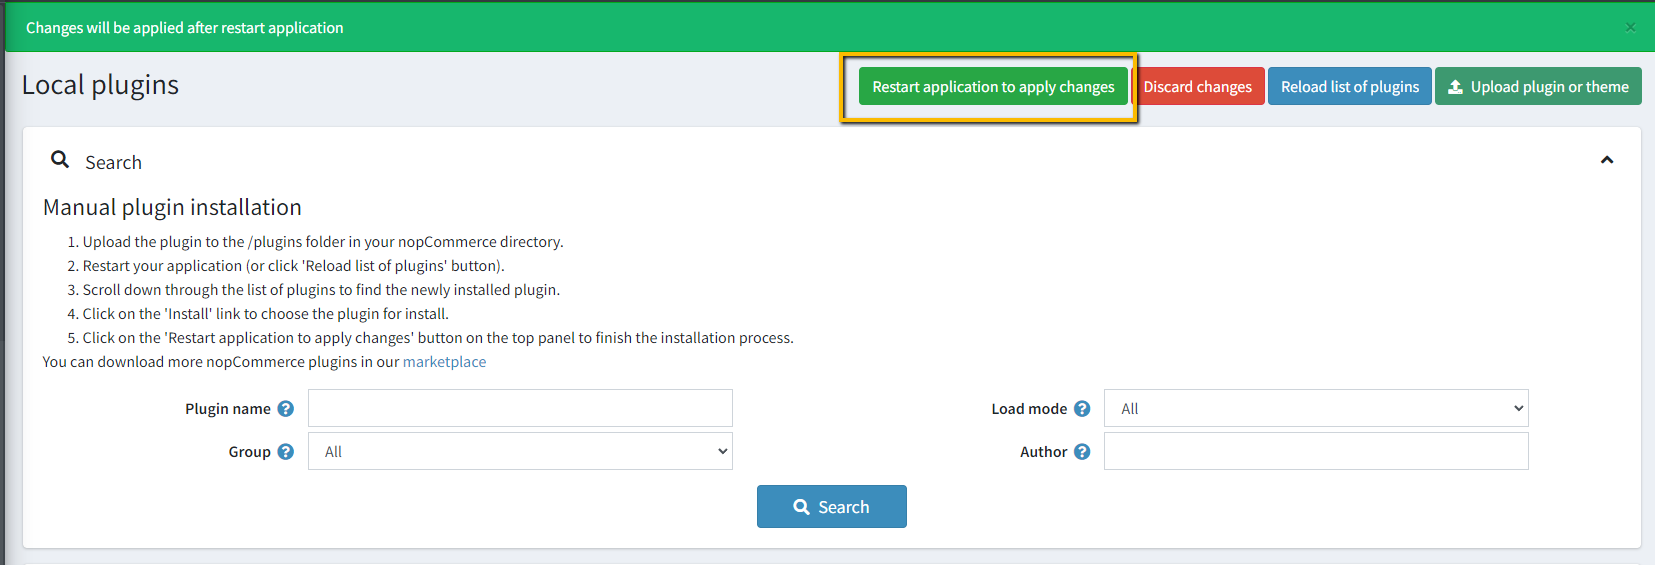
- To make the plugins functional, restart the application
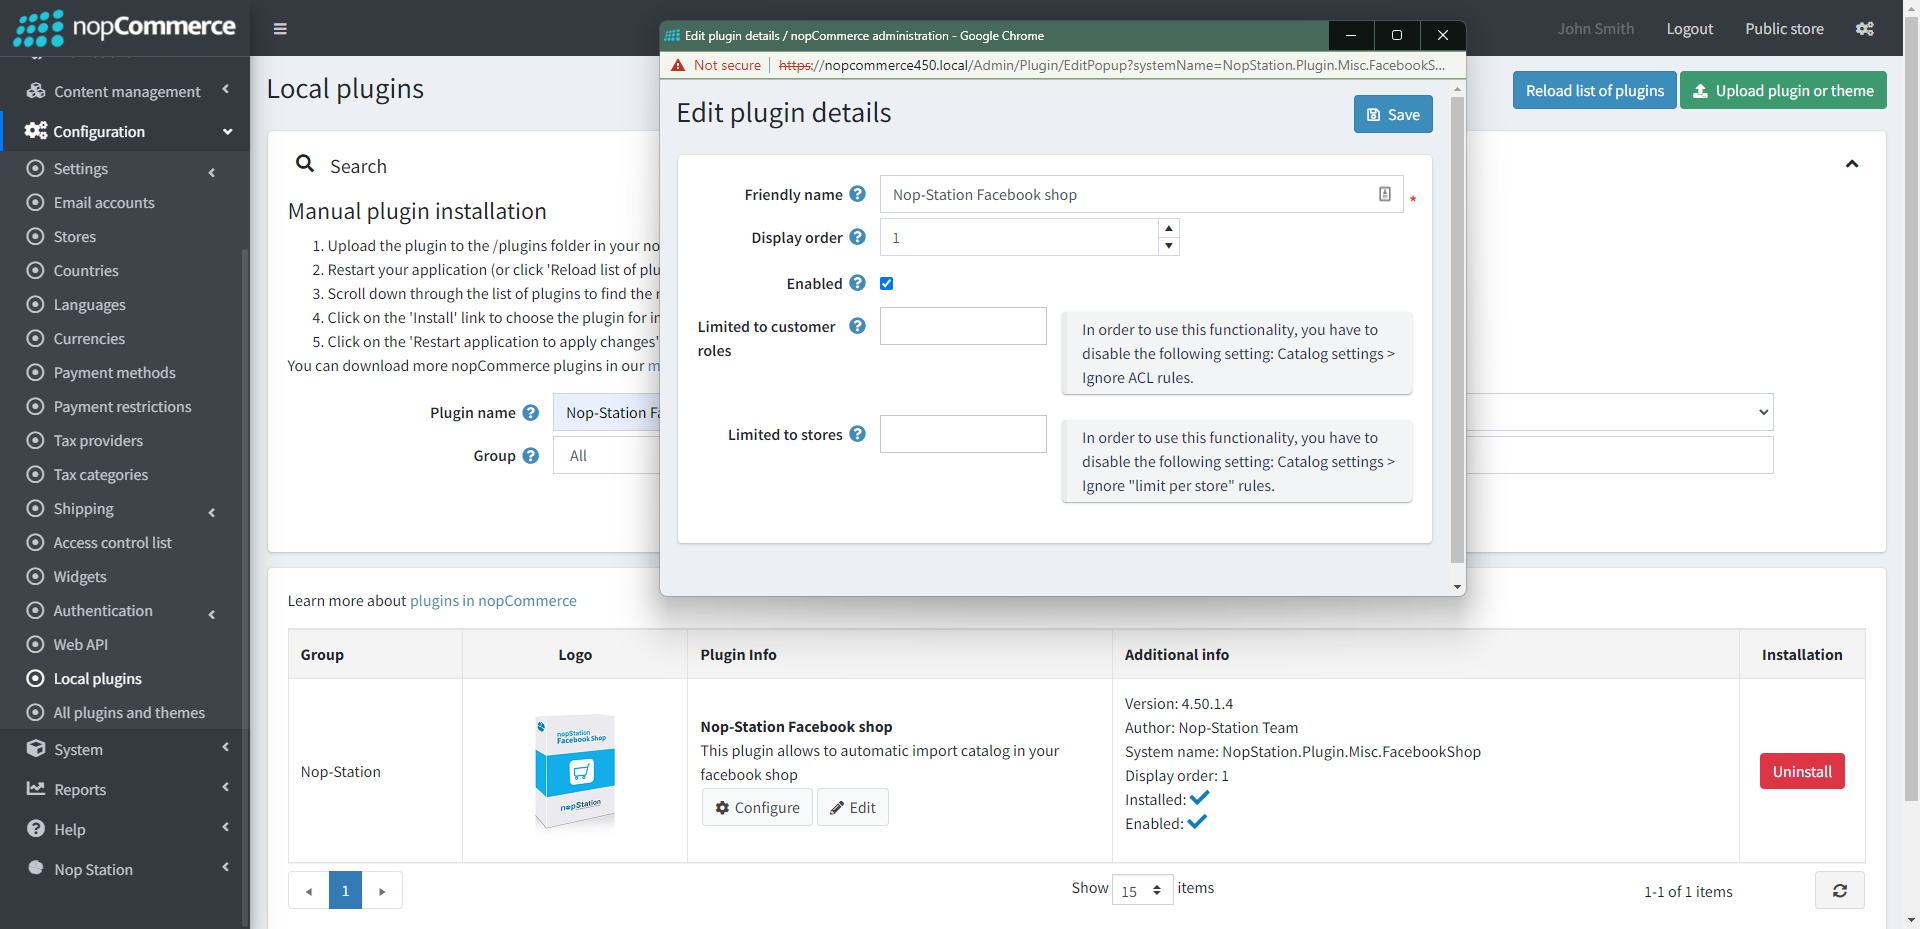
- On installation, the plugin gets enabled. You can click on the 'Edit' button to verify the enabled status.
CONFIGURATION
In the next several steps, we will demonstrate the following how to options
- Configure Language and Currency
- Configure product for the Facebook shop data feed
- Run the scheduled task to generate product feed
- Add data feed source on Facebook commerce manager account, and
- Configure catalog & shop on Facebook commerce manager account
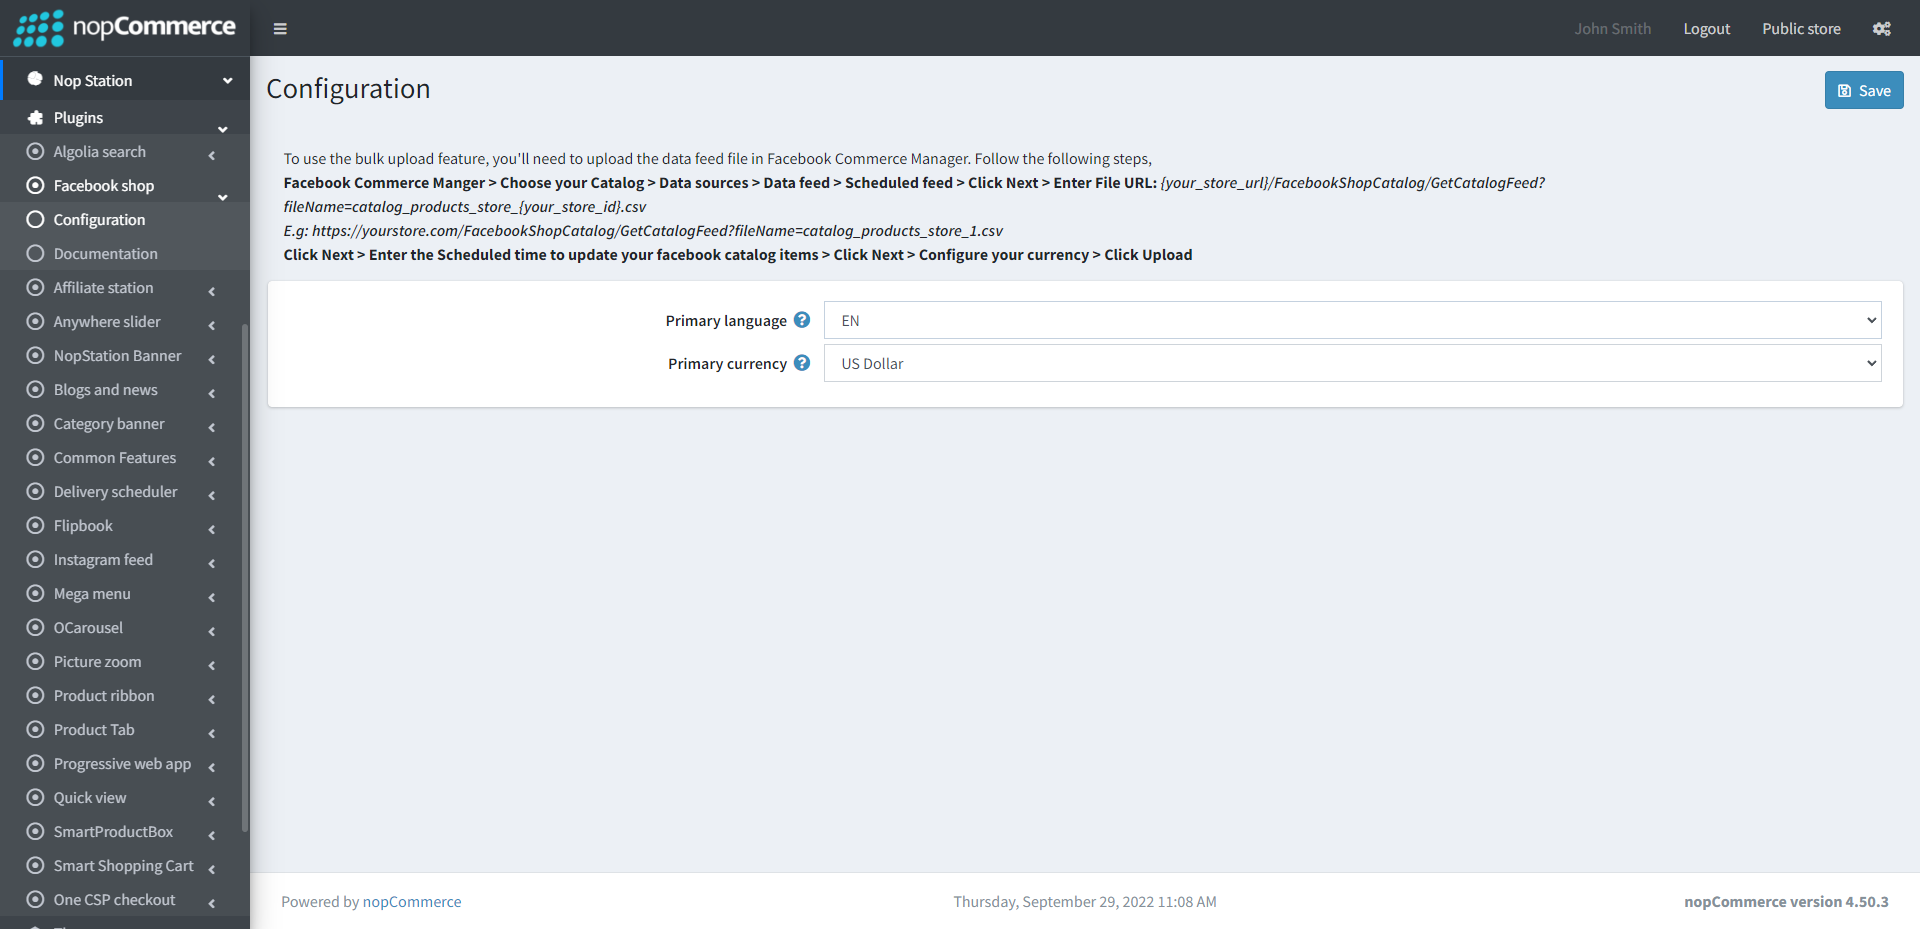
Configure Language and Currency
- Go to Admin → Nop Station → Plugins → Facebook Shop → Configuration
- Select the Primary language and Primary currency and click on the Save button.
Configure Products for the Facebook Shop Data Feed
- Single or multiple products can be added to the Facebook data feed in a single go.
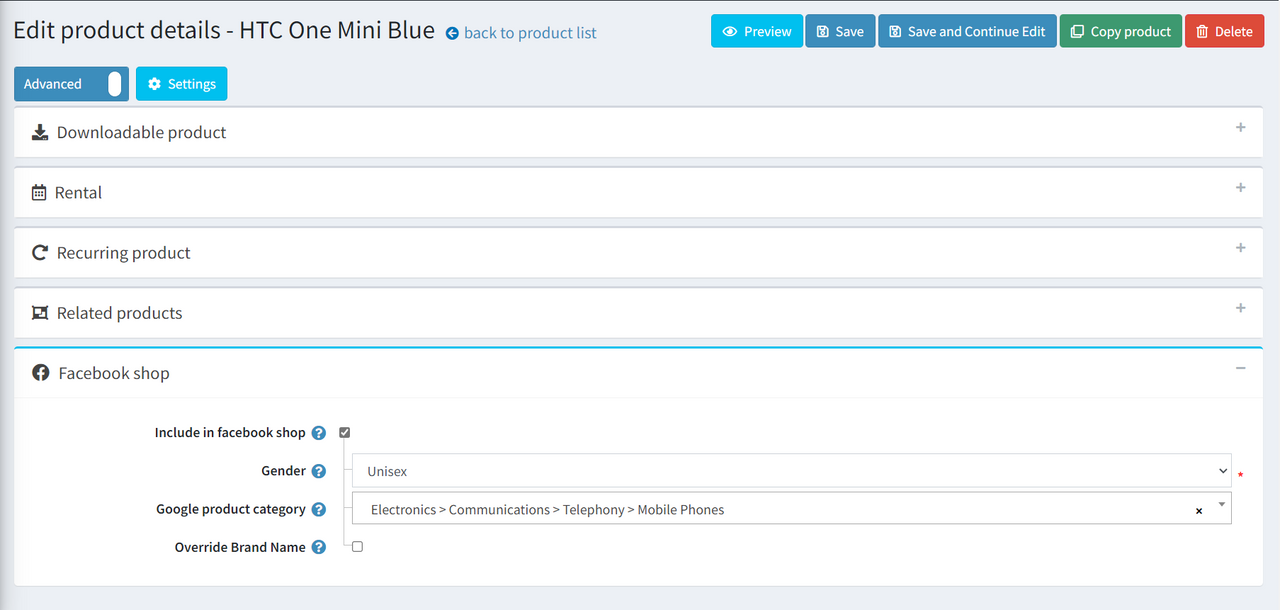
- To add a single product, go to the product edit page from Dashboard → Catalog → Product → Edit menu and find the Facebook Shop section heading.
- Click on the Include in Facebook checkbox, three more input fields will expand
- Select Gender and Google Product category from the dropdown, and
- Click on the Override Brand Name checkbox and input your desired brand name if you prefer to add a different brand name than the one mapped with the product
- Click on the Save button at the right top of the edit page.
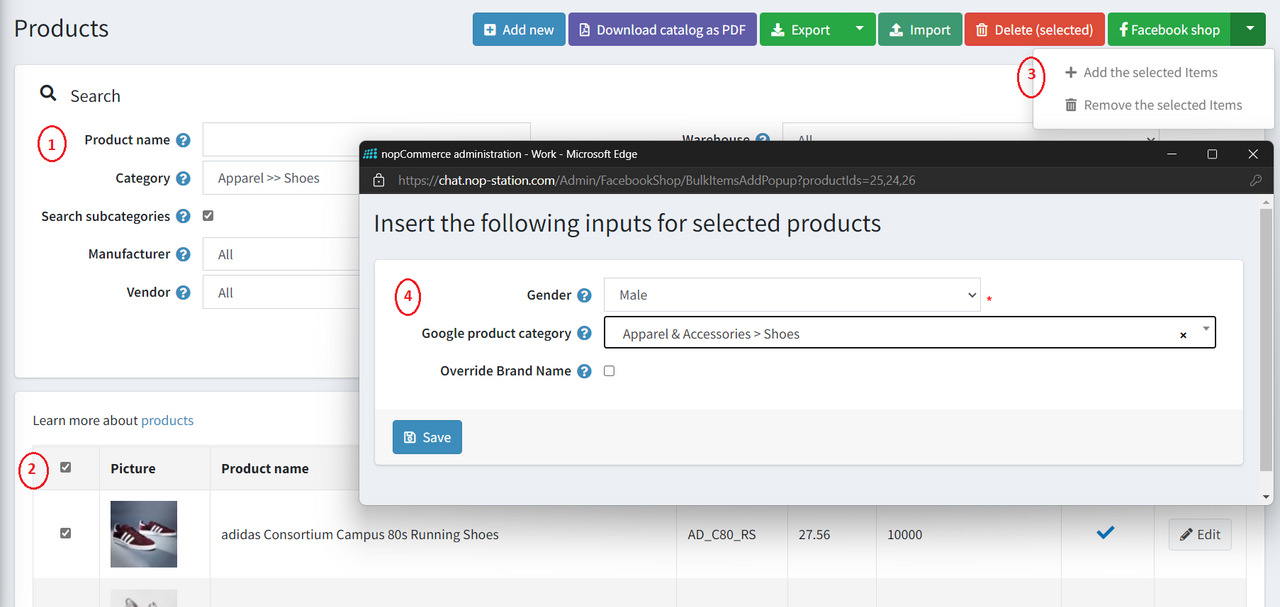
- To add multiple products in the bulk-adding option, go to the manage product grid from Dashboard → Catalog → Product .
- First, list out the desired products by applying filters like category or manufacturer and select products
- Click on the down-arrow button right to the Facebook Shop button, Add the Selected items and Remove selected items buttons will appear
- Select Add the Selected items button, a pop-up window with options to select Gender, Google Product category will appear
- Select Gender and Google Product category from the dropdown list
- Click on the Save button at the right top of the edit page, all the selected products will get updated for the Facebook shop data feed
- Useful note:
- Usually, updating multiple products from the same category or manufacturer is highly useful.
- The gender and Google Product Category are typically the same from the same product category or same manufacturer.
Run Schedule Task to Generate Product Feed
- Go to Dashboard → System → Schedule task list page
- Click on the Run Now button beside Facebook Shop Upload Items schedule task
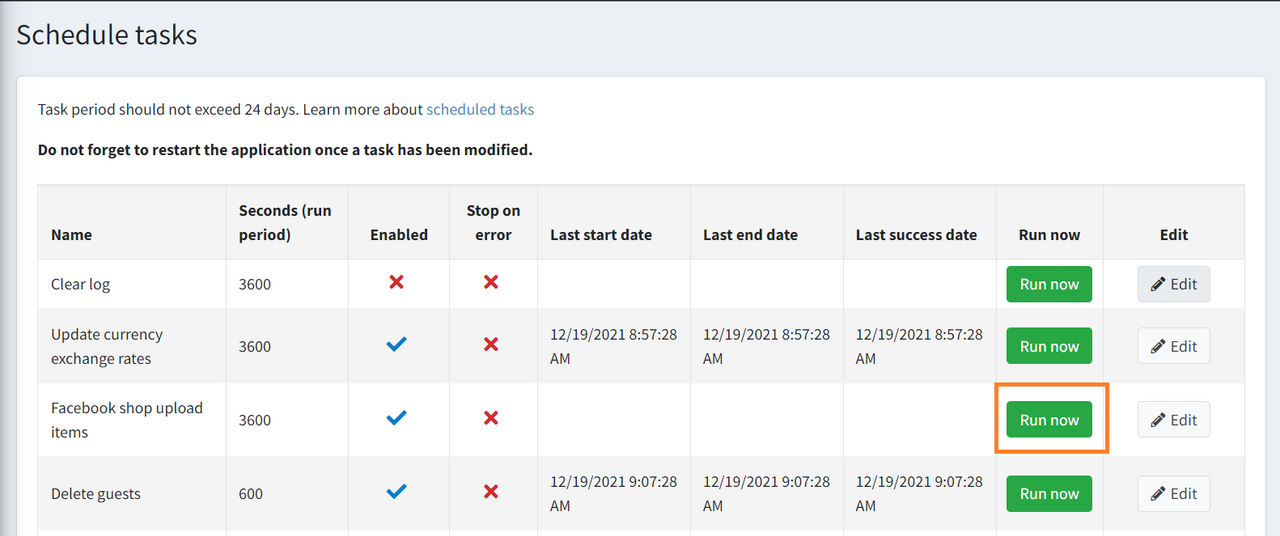
- This will generate a feed containing all the products you have updated for the Facebook data feed at the previous step.
- The generated feed file is stored at the following location: https://yourstore.com/FacebookShopCatalog/GetCatalogFeed?fileName=catalog_products.csv
Add Data Feed Source in the Facebook Commerce Manager
- Go to Facebook Commerce Manager Dashboard → Catalog → Data sources, this will load the Facebook commerce manager Data sources page.
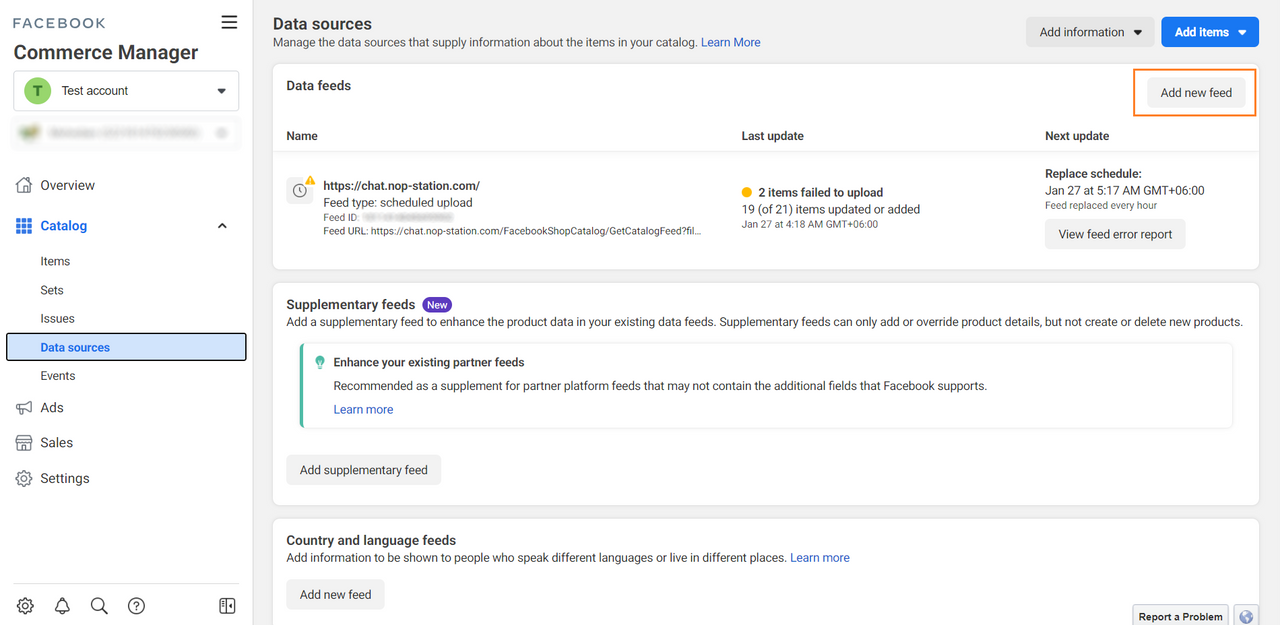
- Click on the Add new feed button under Data feeds heading, this will open the Use bulk upload page.
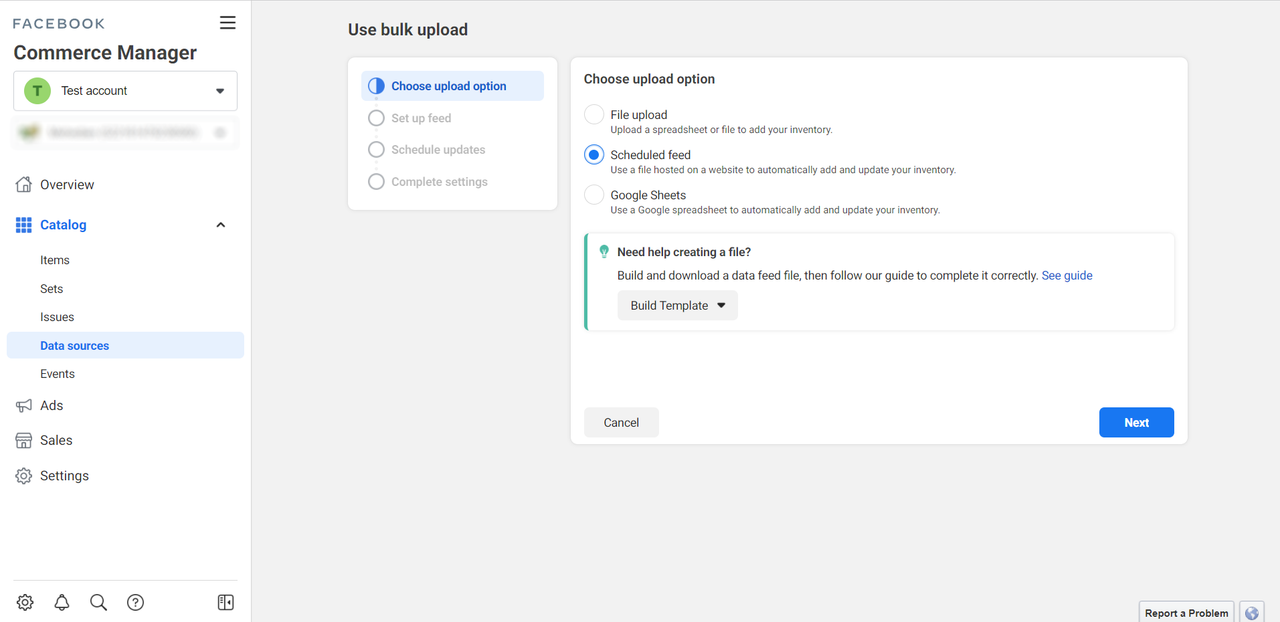
- Here, select Scheduled feed under Choose an upload option, then click next, Set up feed page will open.
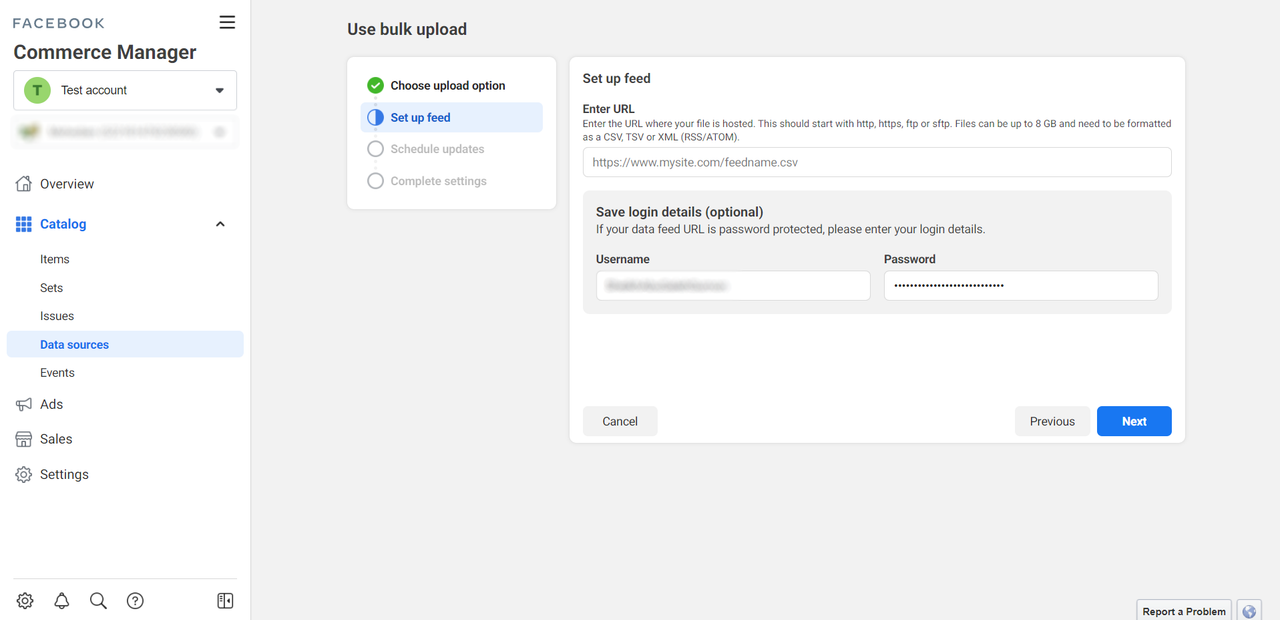
- Copy & paste the feed URL into the Enter URL field, you can find the feed URL on the configuration page, at Dashboard → Nop Station → Plugins → Facebook Shop → Configuration
- Click Next and follow the instructions and Complete settings
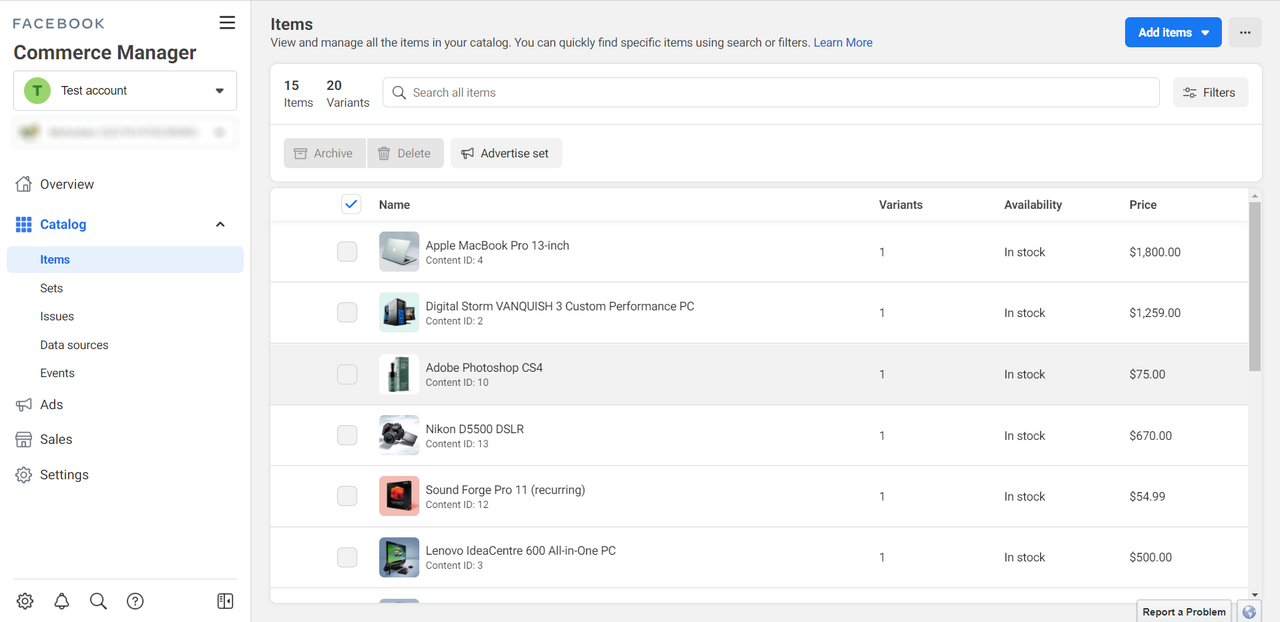
- After successfully adding data feed, go to Facebook Commerce Manager Dashboard → Catalog → Items, and all the items that are synced through the data feed will be shown here.
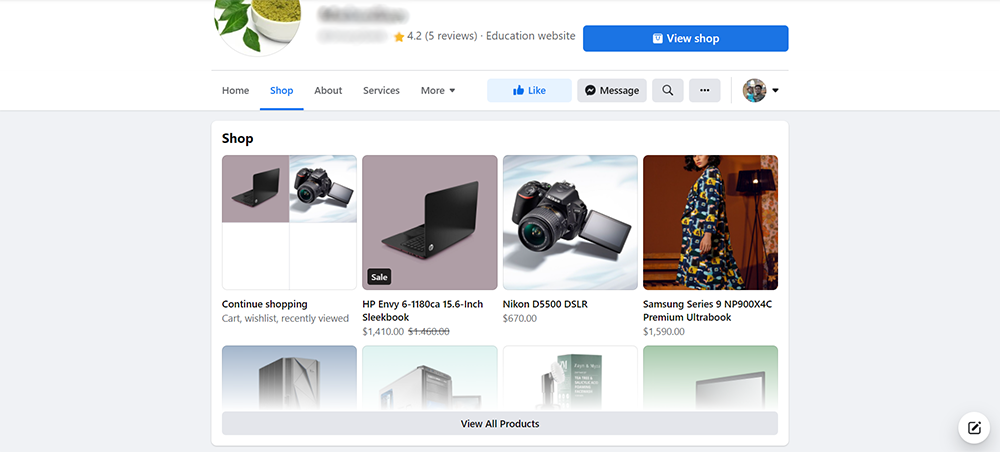
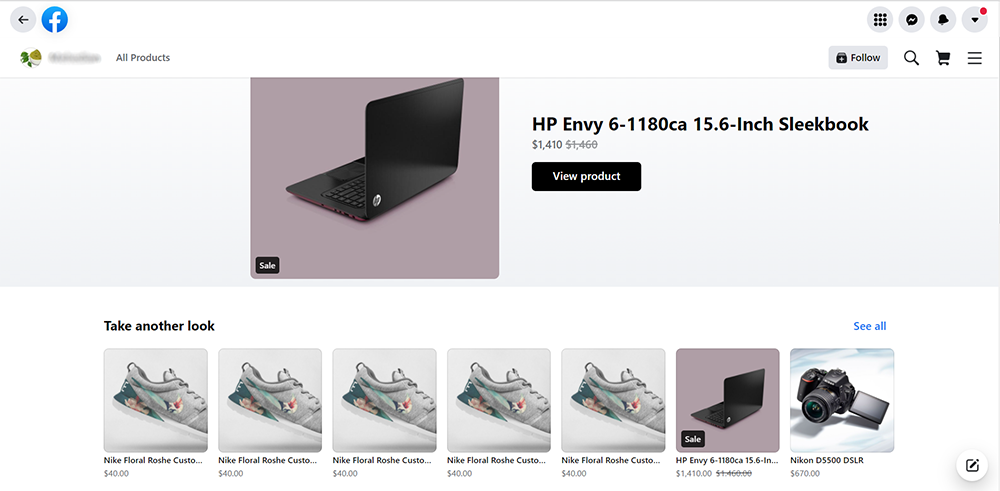
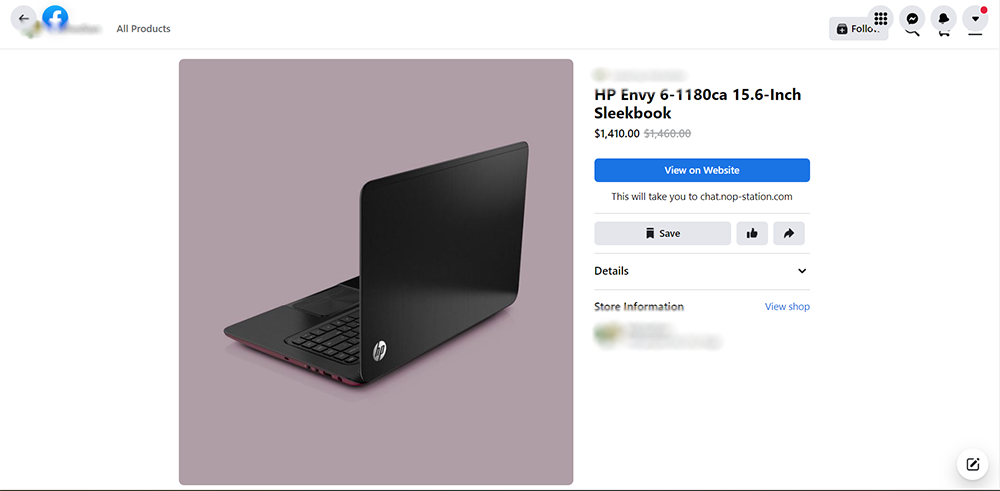
Facebook Shop Public Store View