


PRE-REQUISITES
- The app comes with a bundle of 3 plugins — Nop-Station Core Plugin, Nop-Station Web API Plugin, and Nop-Station Web Push Notification Plugin
- The mobile app requires you to install all three Nop-Station Core Plugin, Nop-Station Web API Plugin, and Nop-Station Web Push Notification Plugin.
- Also, you need a subscription to Google Firebase Service for Push Notification.
INSTALLATION
- Download the Nop-Station-Core, Nop-Station Web API and Nop-Station Web API Push Notification Plugins from our store https://nop-station.com/customer/downloadableproducts
- Upload the Nop-Station Web API and Nop-Station Web API Push Notification zip files using the "Upload plugin or theme" button
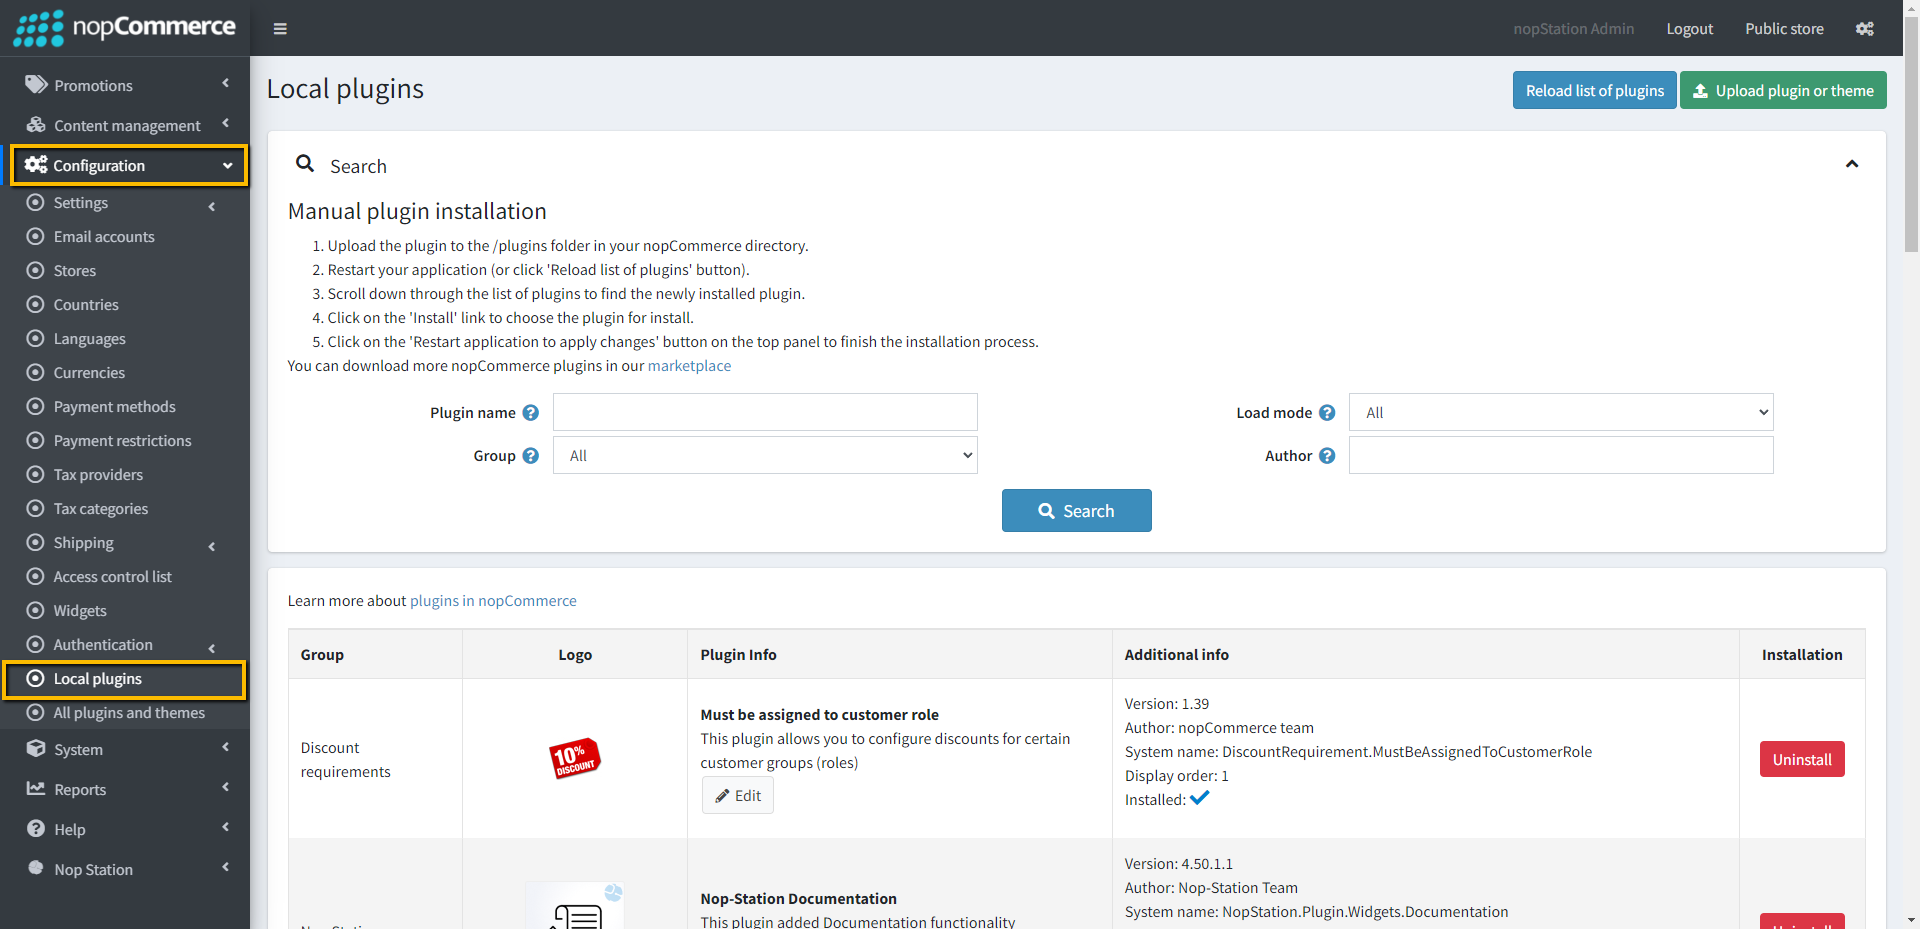
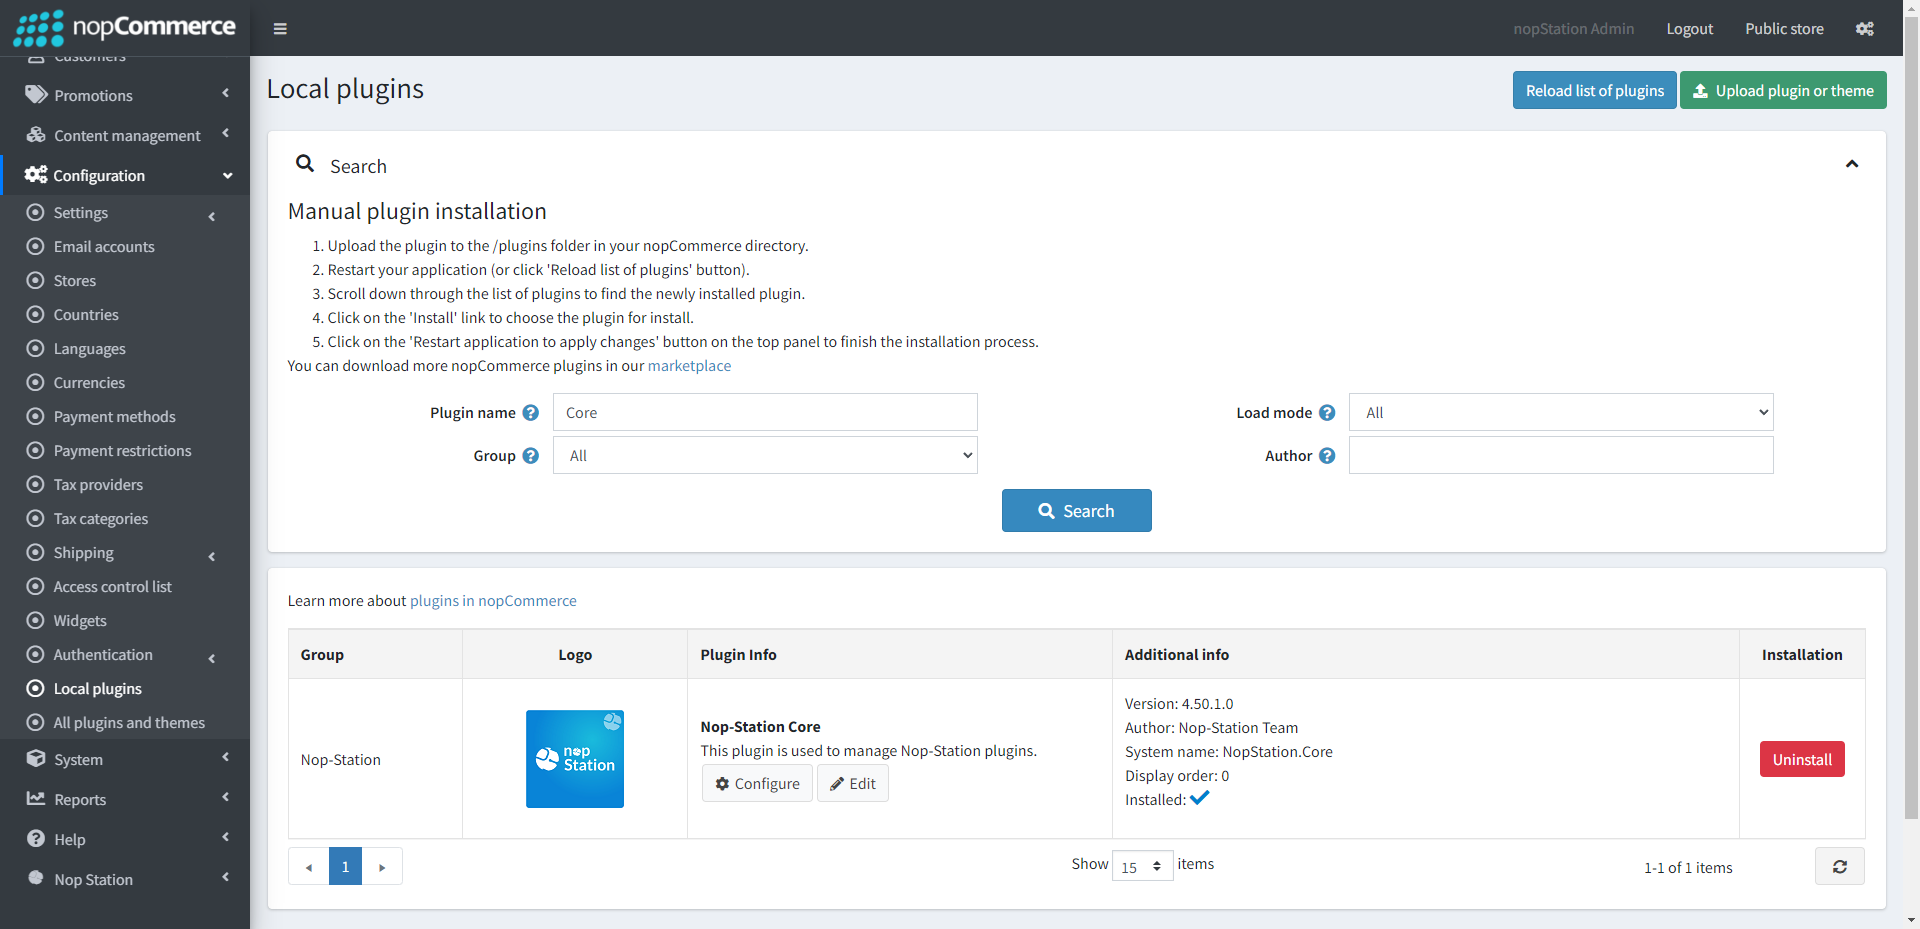
- Go to Admin → Configuration → Local Plugins, reload the 'list of plugins'. Install 'Nop-Station Core' Plugin first and then install Nop-Station Web API and Nop-Station Web API Push Notification plugins


- Check the REST API documentation here
Note:
- Upon no-source version purchase, we will provide you with the Android & iOS App build with your store's base URL.
- Upon source-code version purchase, we will provide you technical documentation on how you can modify the App and publish a build.
ADMIN CONFIGURATION
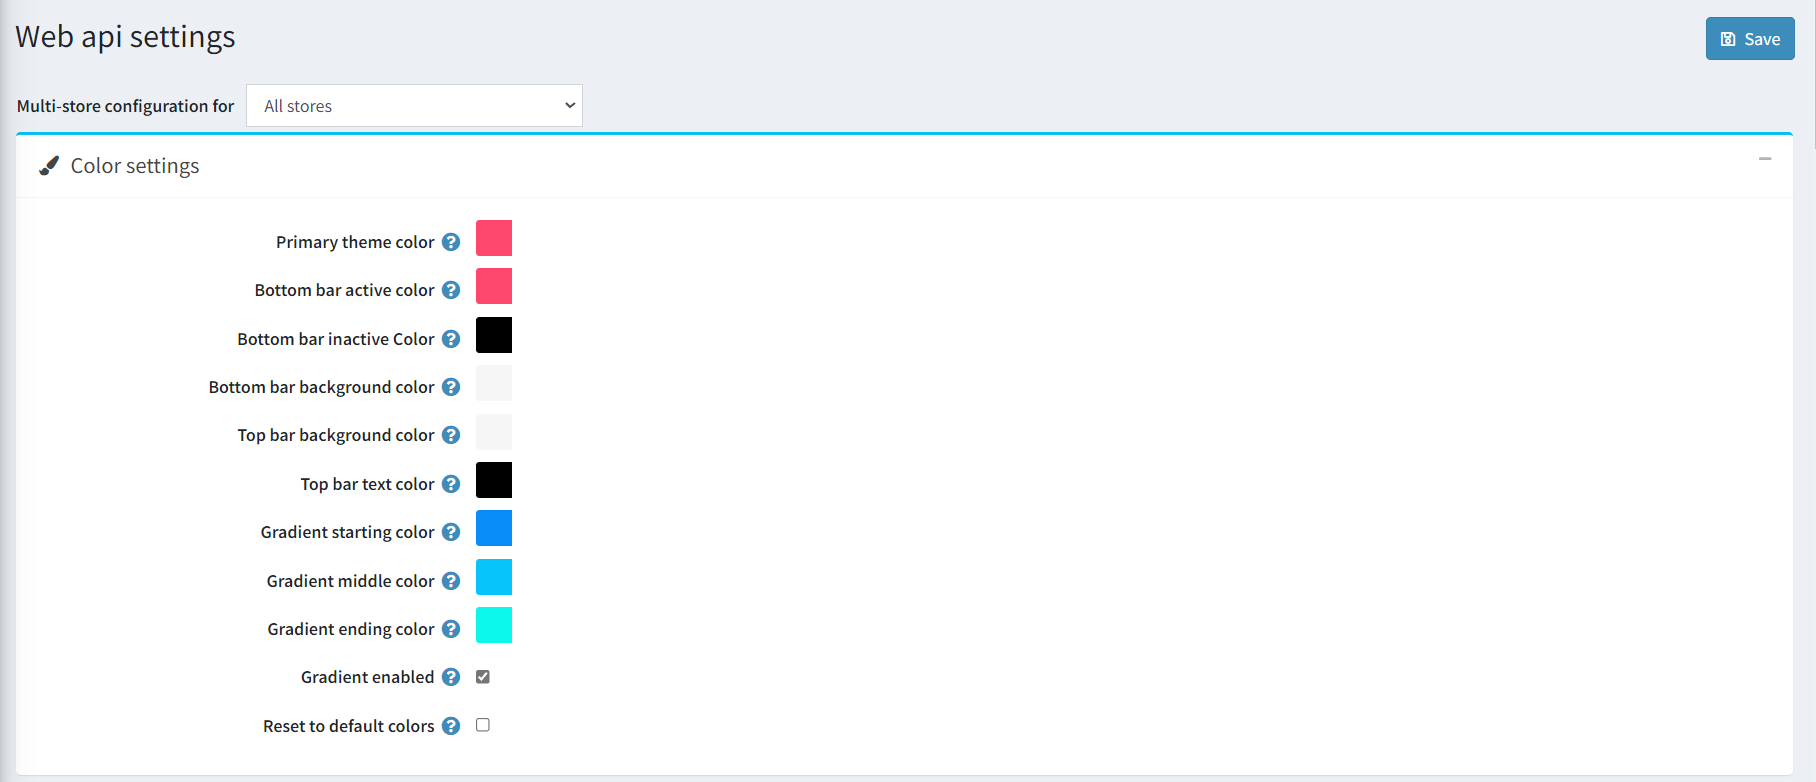
- Mobile Web API Configuration: Go to Dashboard → Configuration → Nop Station → Plugins → Web API → Configuration. You can configure Color settings, Common Settings, Security settings, App Settings, and manage String Resource here.
- Color Settings: You can set Primary theme color, Bottom bar active color, Bottom bar inactive color, Botthom bar background color, Top bar background color, Top bar text color, Gradient starting color, Gradient middle color, Gradient ending color, Gradient Enabled/Disabled and Reset to default color here.
- Common Settings: You can set the following list of common settings here: Enable/disable 'Show homepage slider', set 'Maximum No. of Slider', enable/disable 'Auto play', set 'Auto play timeout' duration. Enable/disable 'Show best sellers on homepage', set 'Number of best sellers on homepage'. Set 'Product barcode scan key', enable/disable 'Show homepage category products', enable/disable 'Show sub-category products', and set 'Maximum number of products'. Enable/disable 'Show manufacturer', set 'Maximum number of Manufacturers'. Show/hide base URL panel, upload 'Default category icon' and set 'Product price text size on product box in app'

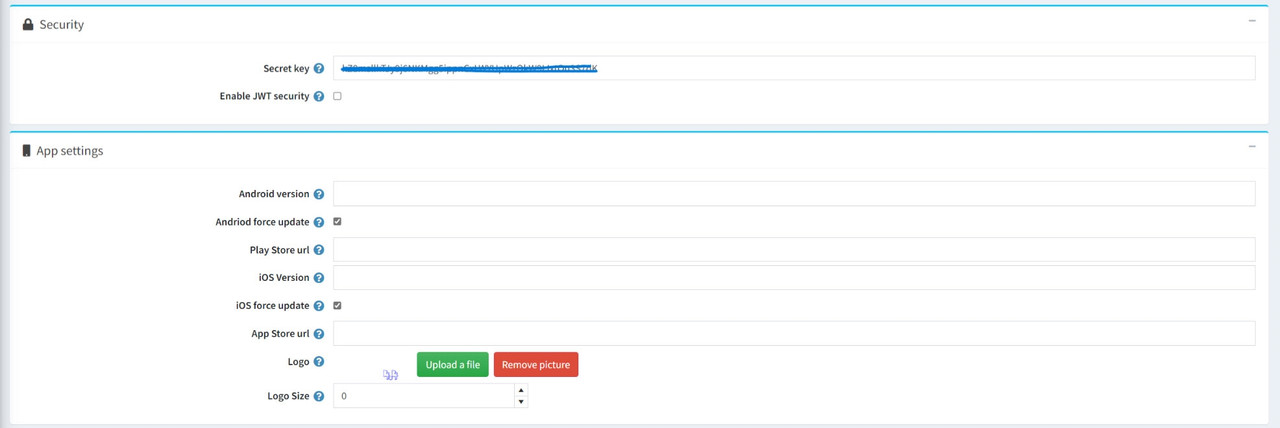
- Security & App Settings:
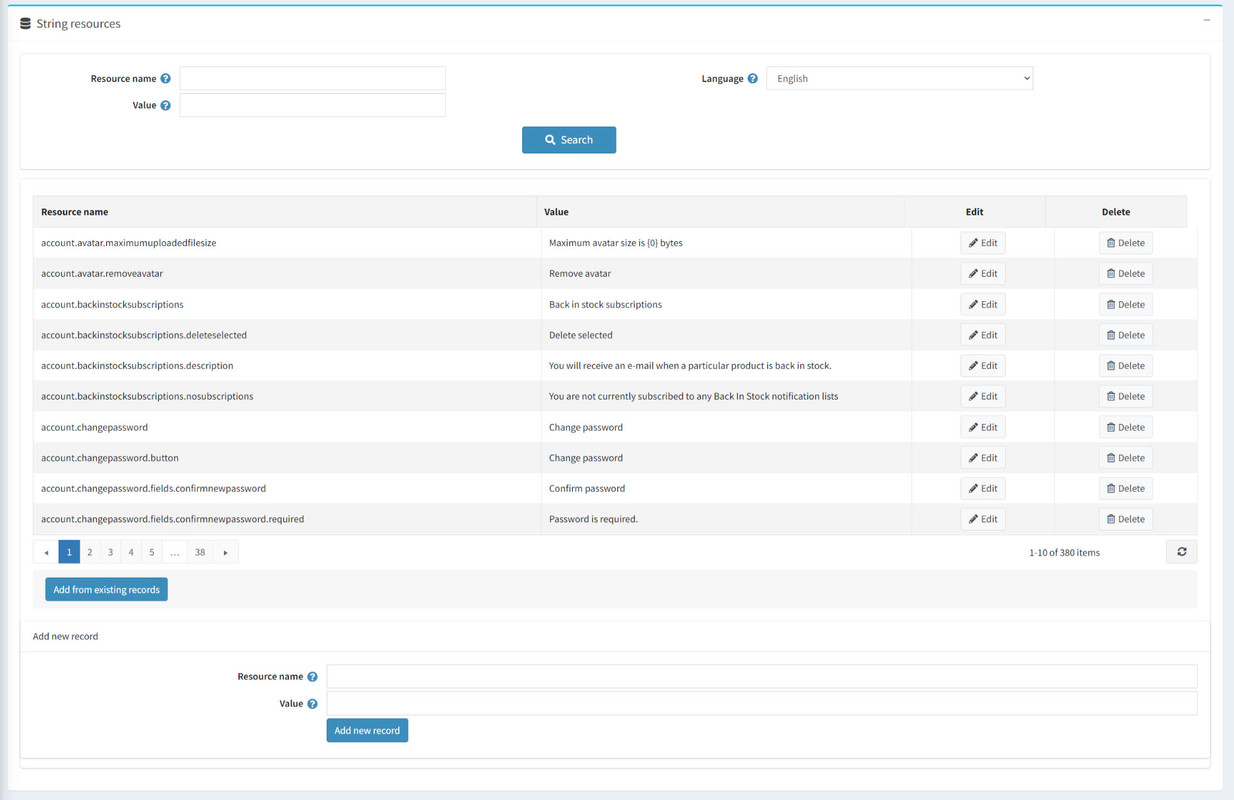
- Manage String Resource:
- Color Settings: You can set Primary theme color, Bottom bar active color, Bottom bar inactive color, Botthom bar background color, Top bar background color, Top bar text color, Gradient starting color, Gradient middle color, Gradient ending color, Gradient Enabled/Disabled and Reset to default color here.
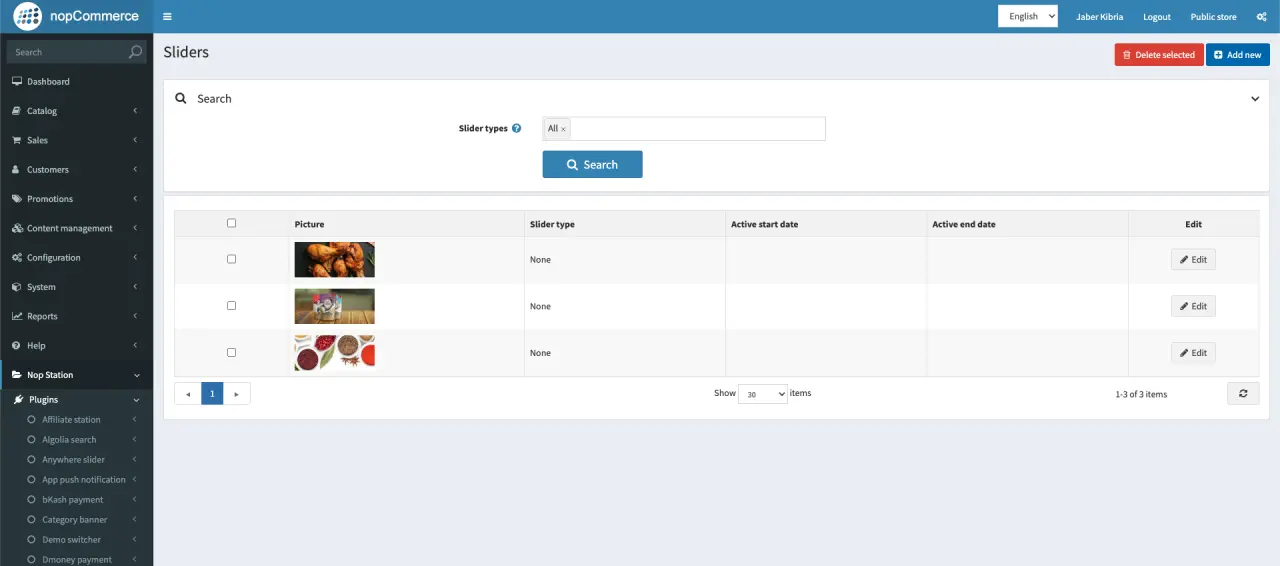
- Manage Web API App Sliders: Go to Dashboard → Configuration → Nop Station → Plugins → Web API → App Sliders. You can View, Add, and Edit the app sliders here.
- View Sliders: You will get the list of already added sliders grid here. In the grid, you will find the slider picture, stilder type, active start and end date and edit button to edit the slider. You will also find the Delete and Add New Slider buttons on the list page.
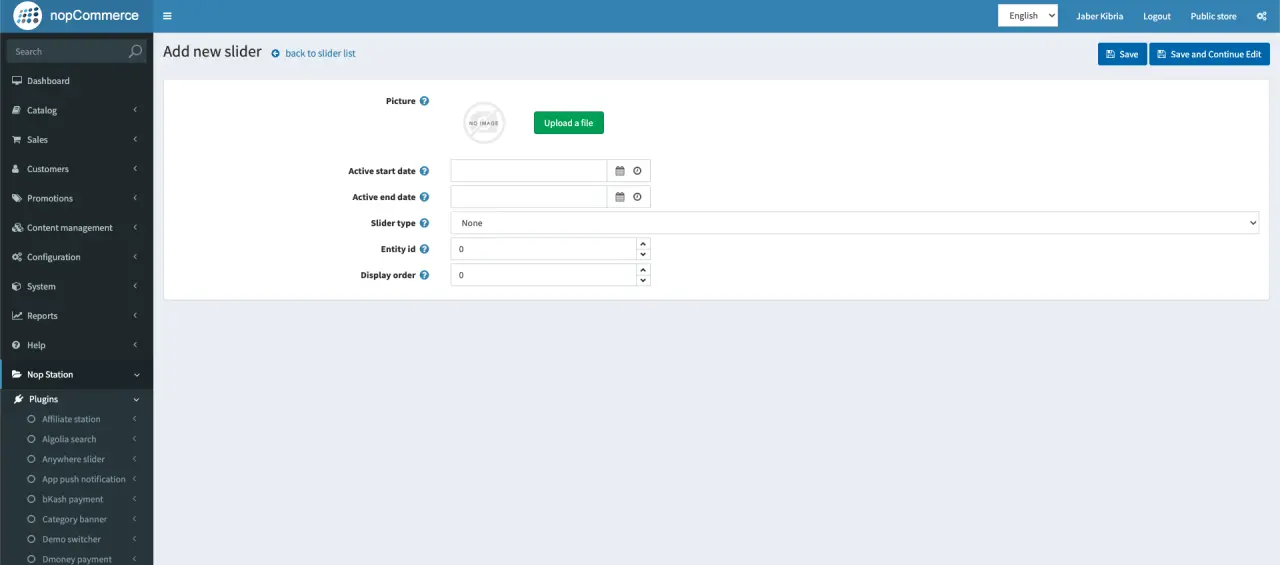
- Add Slider: Click on the Add New Slider button on the slider list page. You will land on the 'Add New Slider' form page. Upload Slider picture, select Active Start Date and End date, select Slider type,entity id and display order. Then click the Save button.
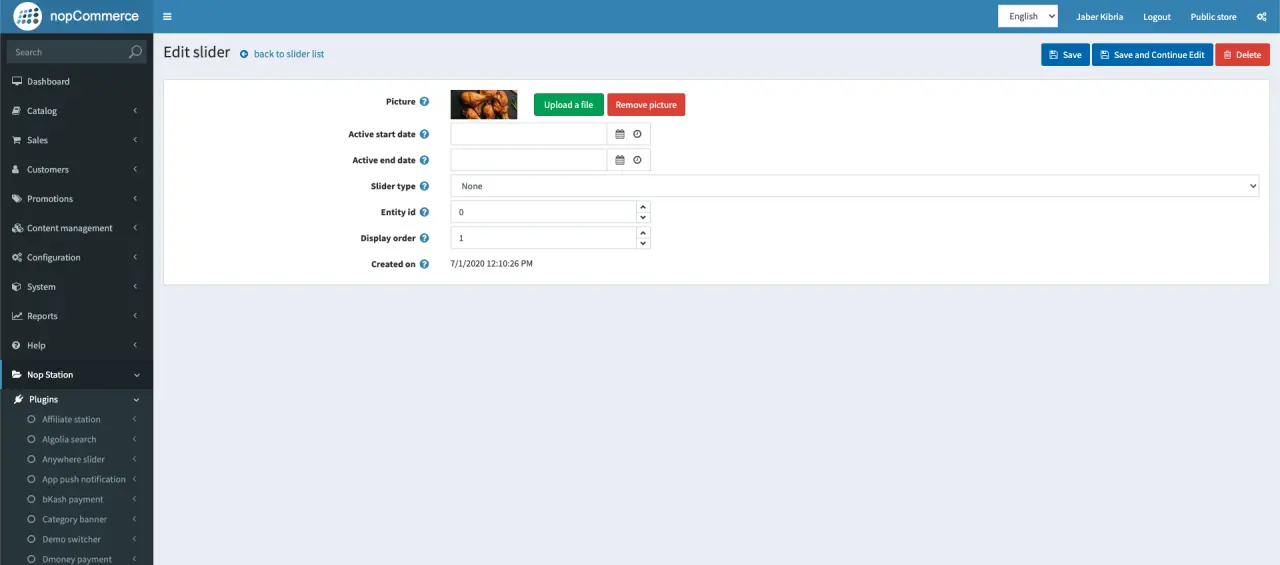
- Edit Slider: You can edit an already added slider. Simply click on the Edit button right beside a the slider from slider list page. Update the fileds you need to update and then click Save button to save the changes.
- View Sliders: You will get the list of already added sliders grid here. In the grid, you will find the slider picture, stilder type, active start and end date and edit button to edit the slider. You will also find the Delete and Add New Slider buttons on the list page.
- Manage Web API Category Icons: Go to Dashboard → Nop Station → Plugins → Web API → Category Icons. You can manage Category icons here.
- View Category: You will find all the categories of your store here.
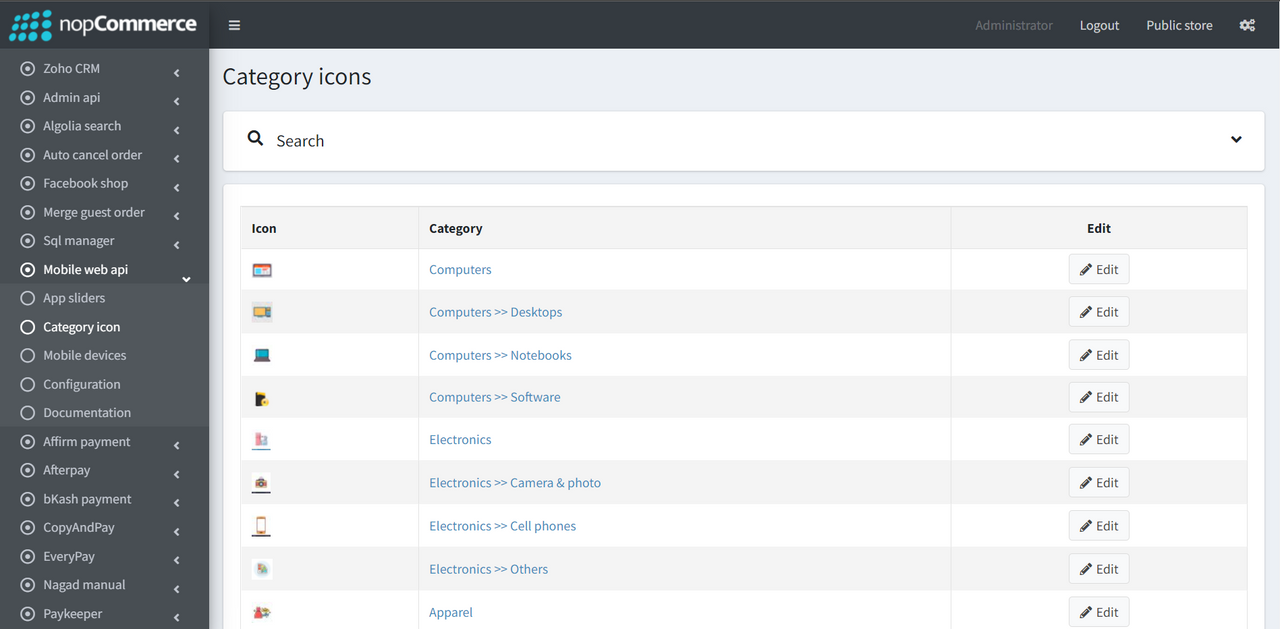
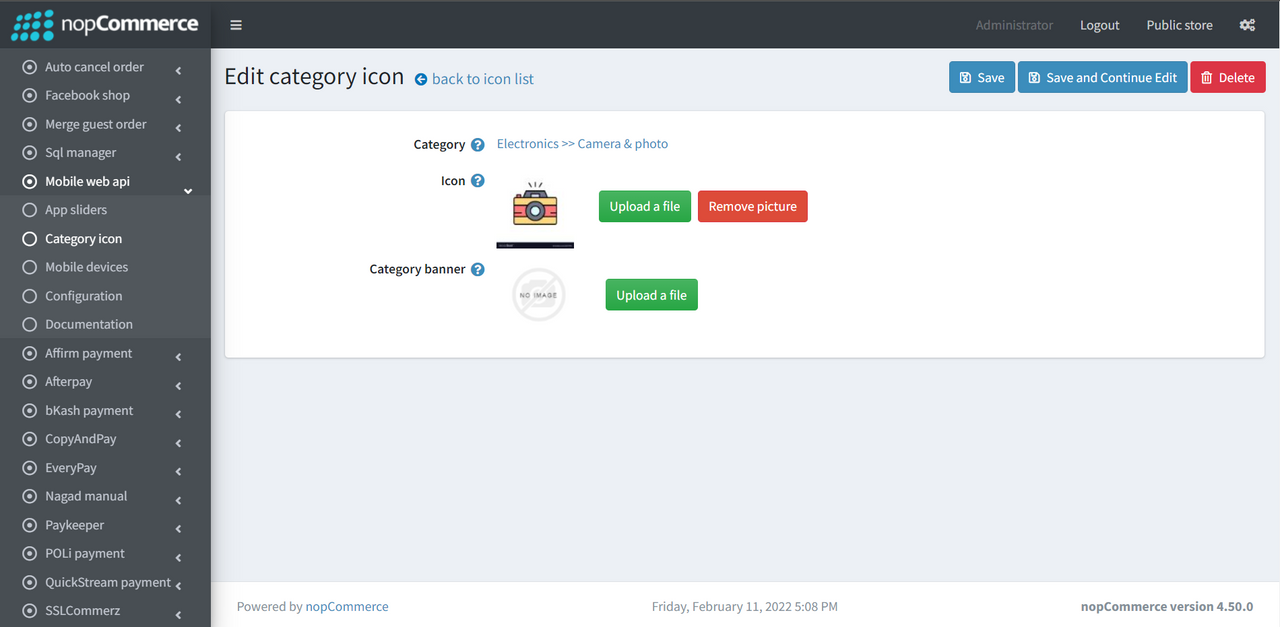
- Edit Category: Just click on the Edit button right beside the Category and will land on the category edit page. Upload category icon and banner and then click on the Save button to save the images.
- View Category: You will find all the categories of your store here.
- Manage Web API Devices: Go to Dashboard → Configuration → Nop Station → Plugins → Web API → Devices. You can view and manage customers' devices here.
- View Devices: You will get the list of devices of the customers accessing the site here.
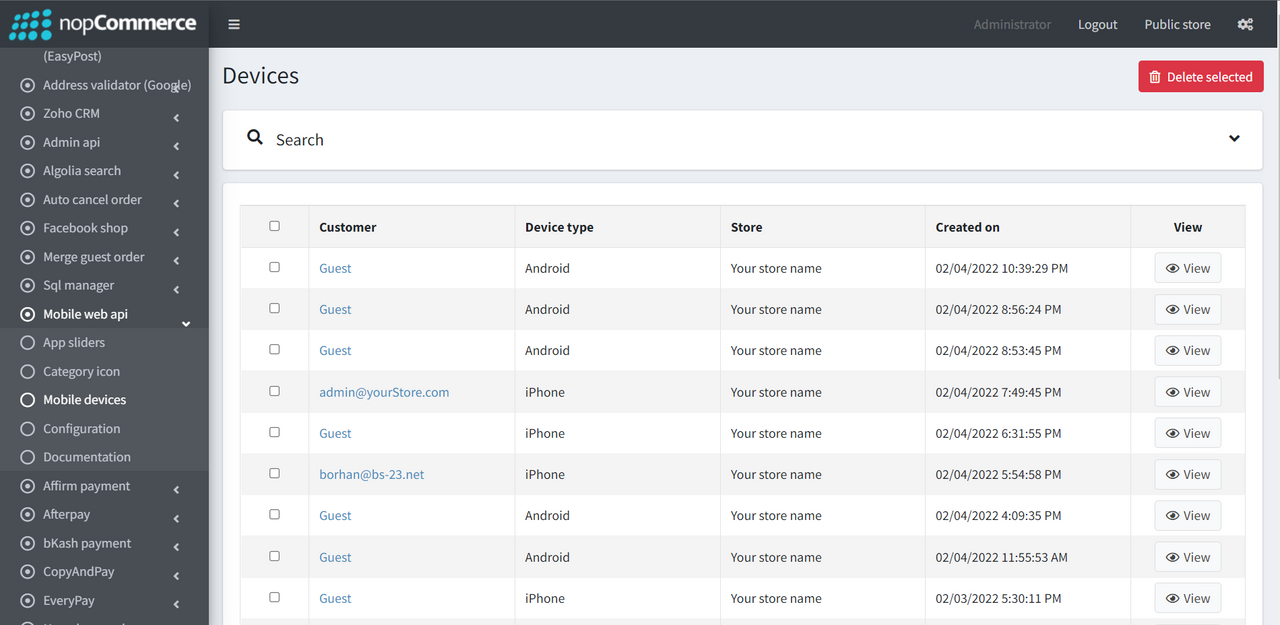
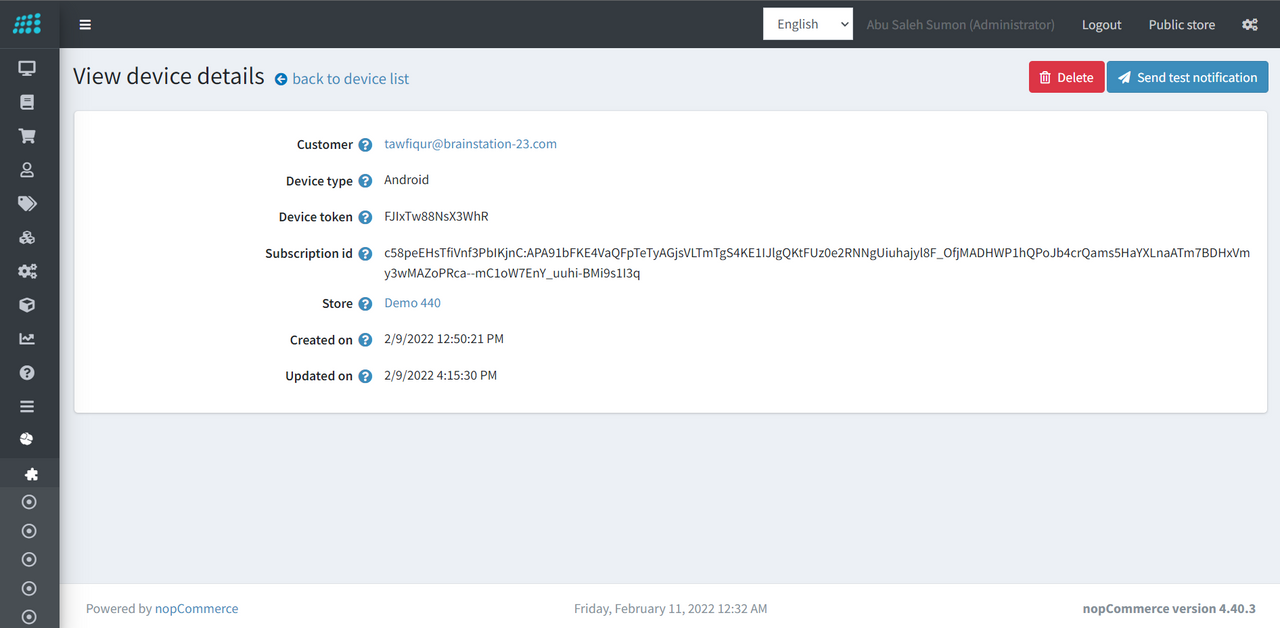
- View Device Details: You can view the device details by clicking on the View button right beside Customer in the device list.
- View Devices: You will get the list of devices of the customers accessing the site here.
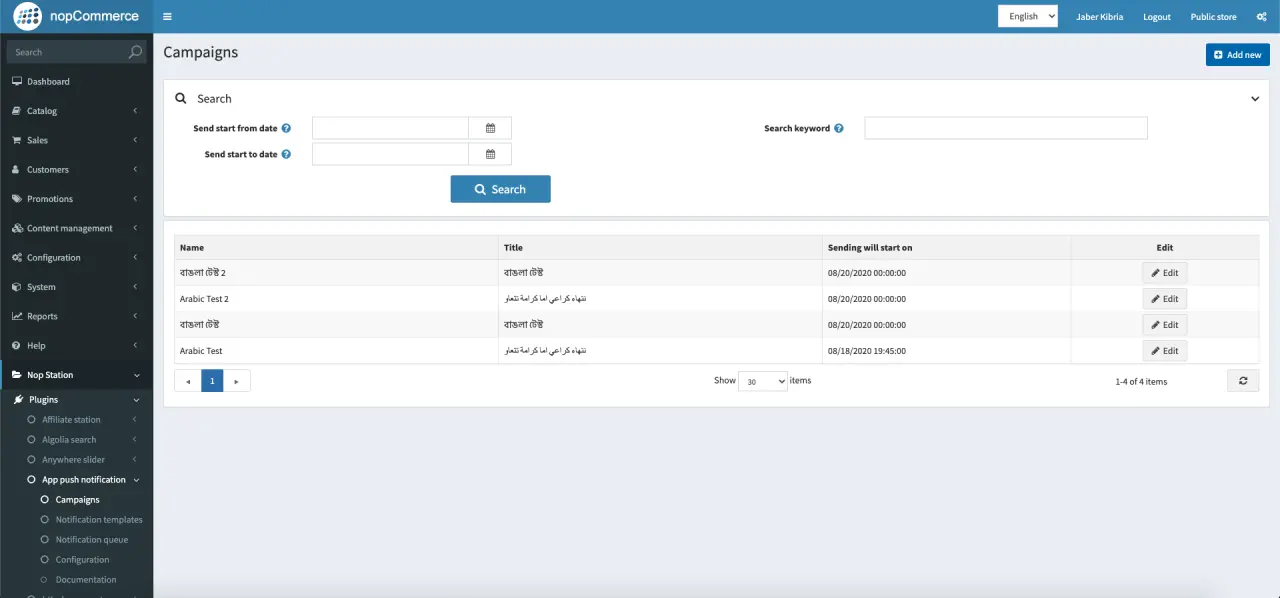
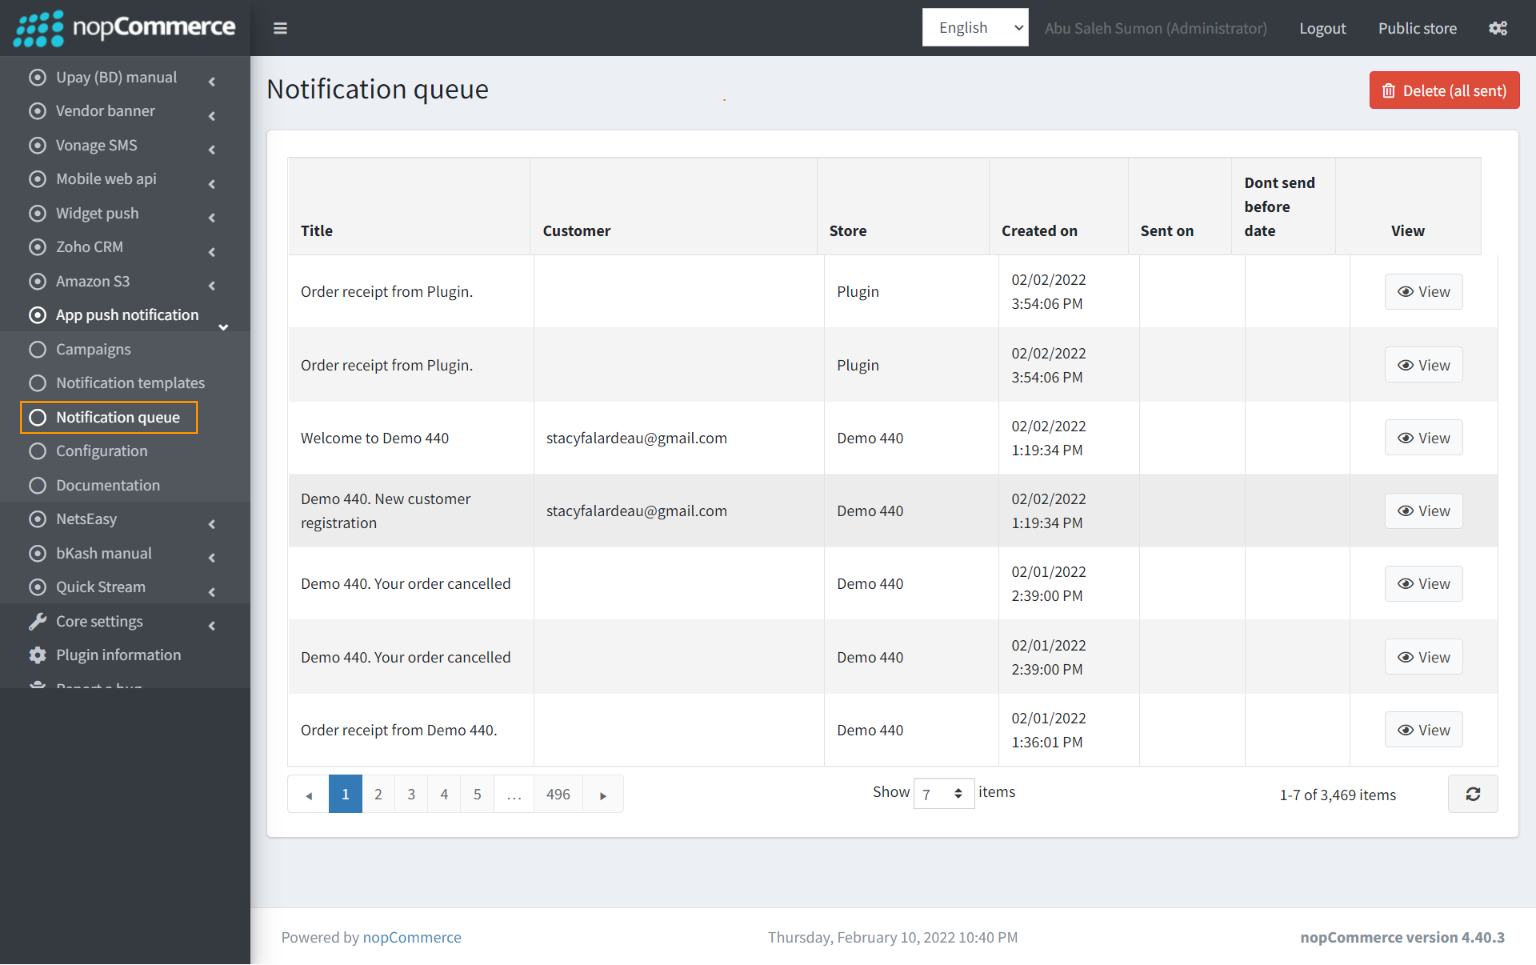
- Manage Web API Push Notification: Go to Dashboard → Configuration → Nop Station → Plugins → Web API Push Notification. You can manage Campaign, Notification Template and Notification Queue under Push Notifications here.
- View Campaign:
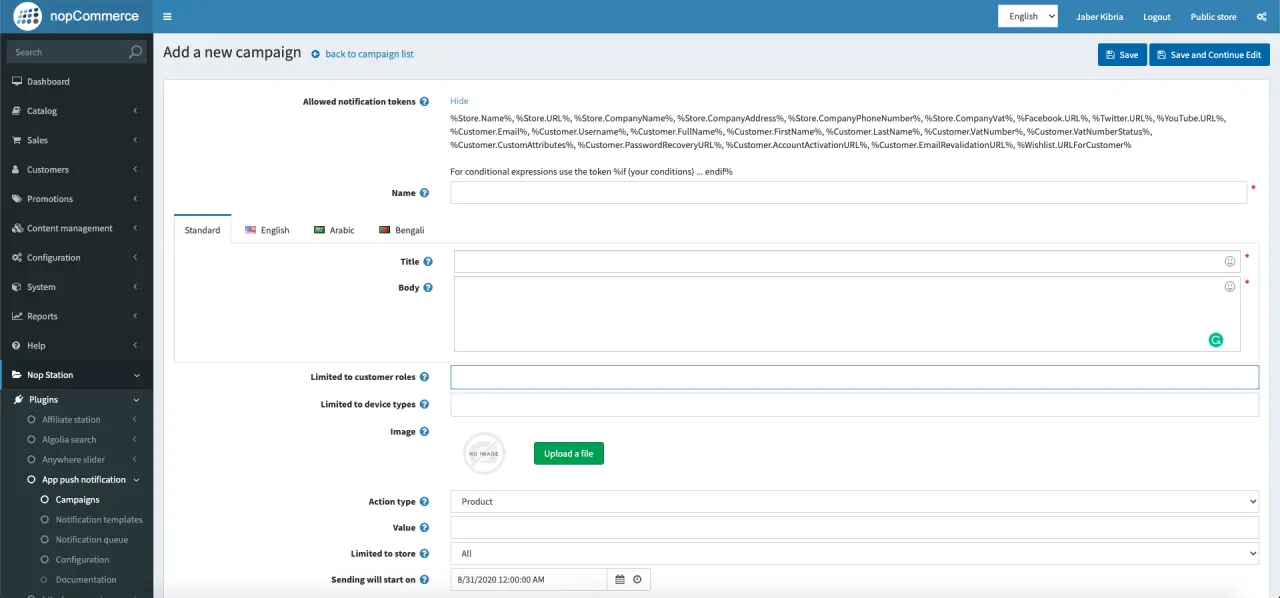
- Add Campaign:
- Edit Campaign:

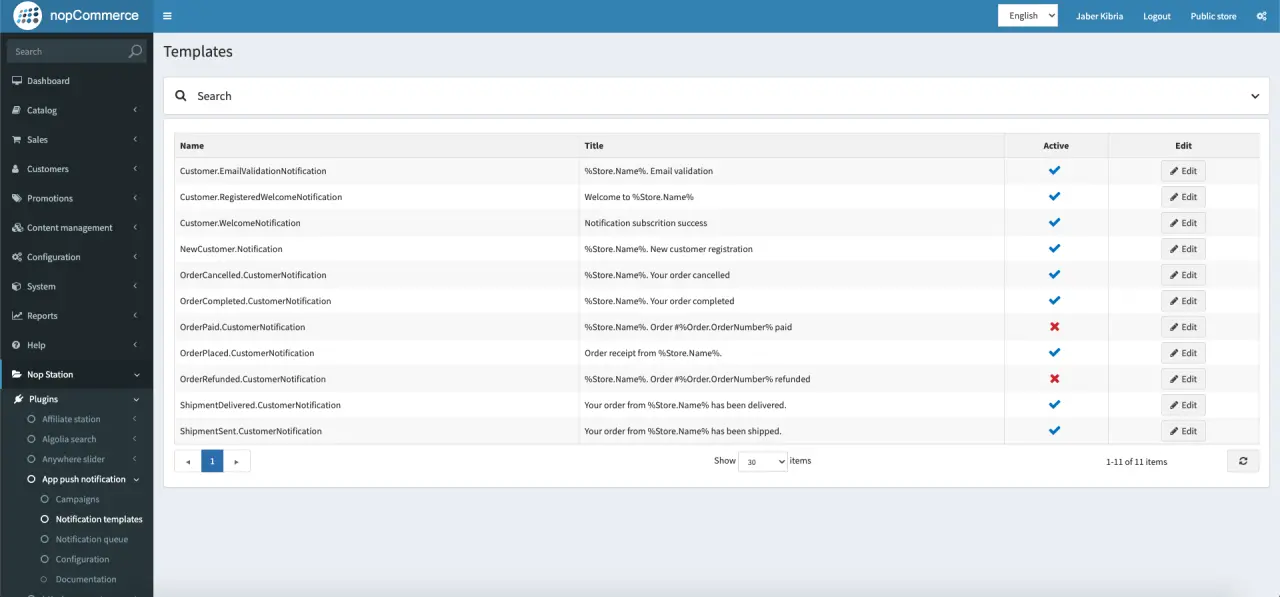
- View Notification Template
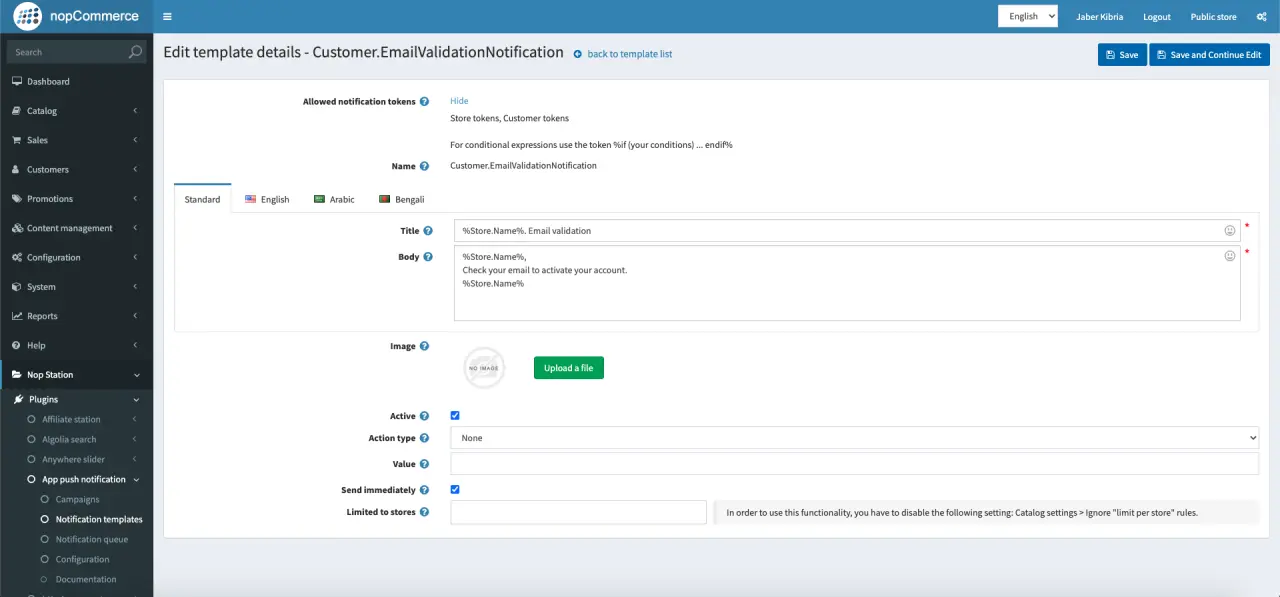
- Edit Notification Template
- View Notification Queue
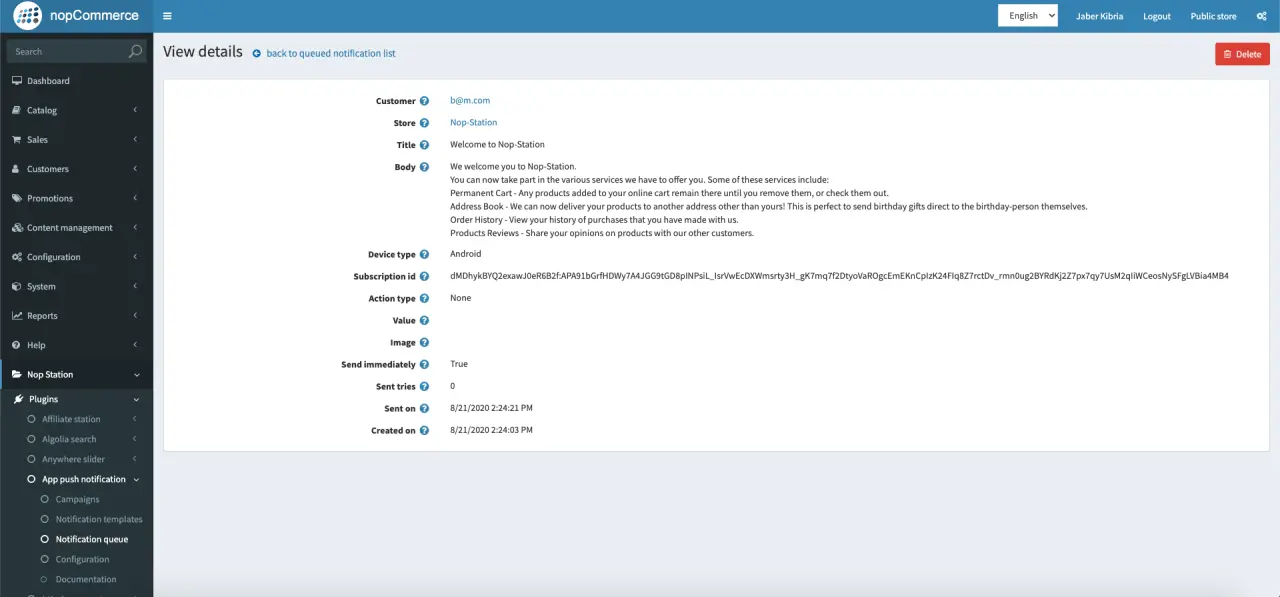
- View Notification Details
- View Campaign: