


PRE-REQUISITES
- The plugin requires you to install the Nop-Station Core plugin first.
INSTALLATION
- Download the Cloudinary Plugin from our store https://nop-station.com/customer/downloadableproducts
- You can learn more about the installation and licensing here
- Go to Administration → Configuration → Local plugins
- Upload the .zip file using the "Upload plugin or theme" button
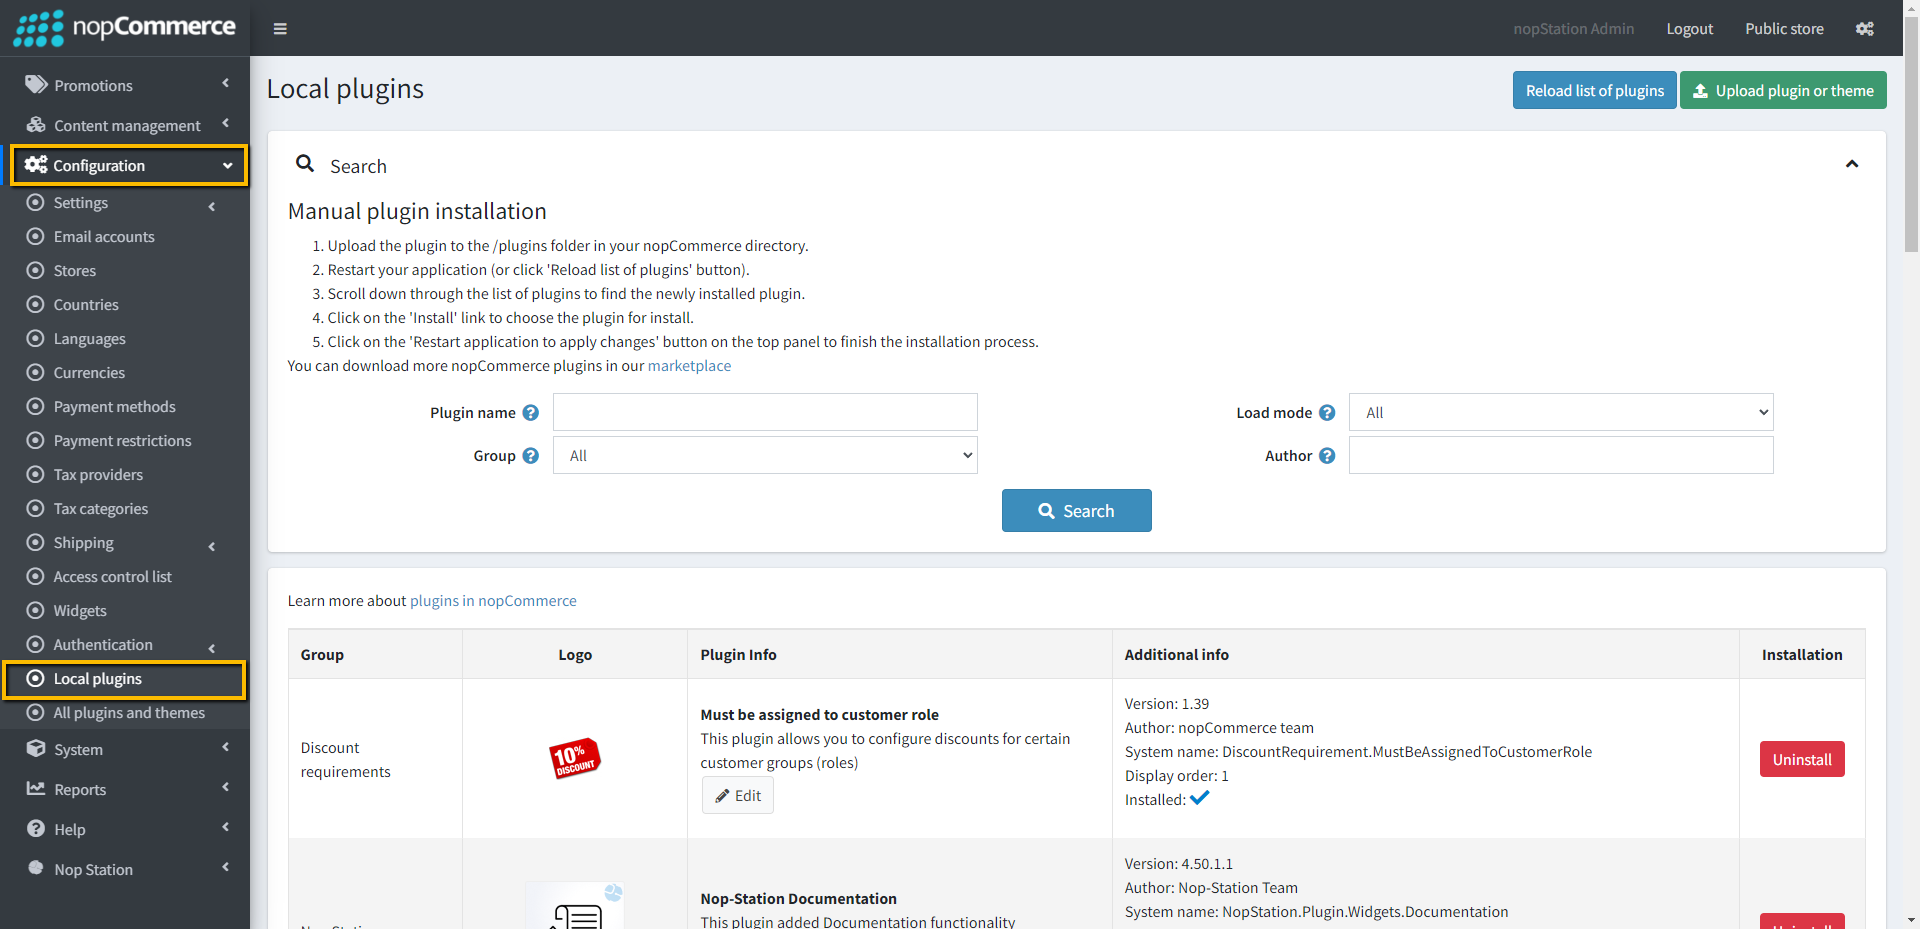
- Go to Administration, and reload the 'list of plugins'. Install 'Nop-Station Core' Plugin and then install 'Cloudinary CDN plugin'
- To make the plugins functional, restart the application
- Enable the plugin with 'Edit' option and Configure it
CONFIGURATION
- Go to Admin → Nop Station → Plugins → Cloudinary CDN → Configuration
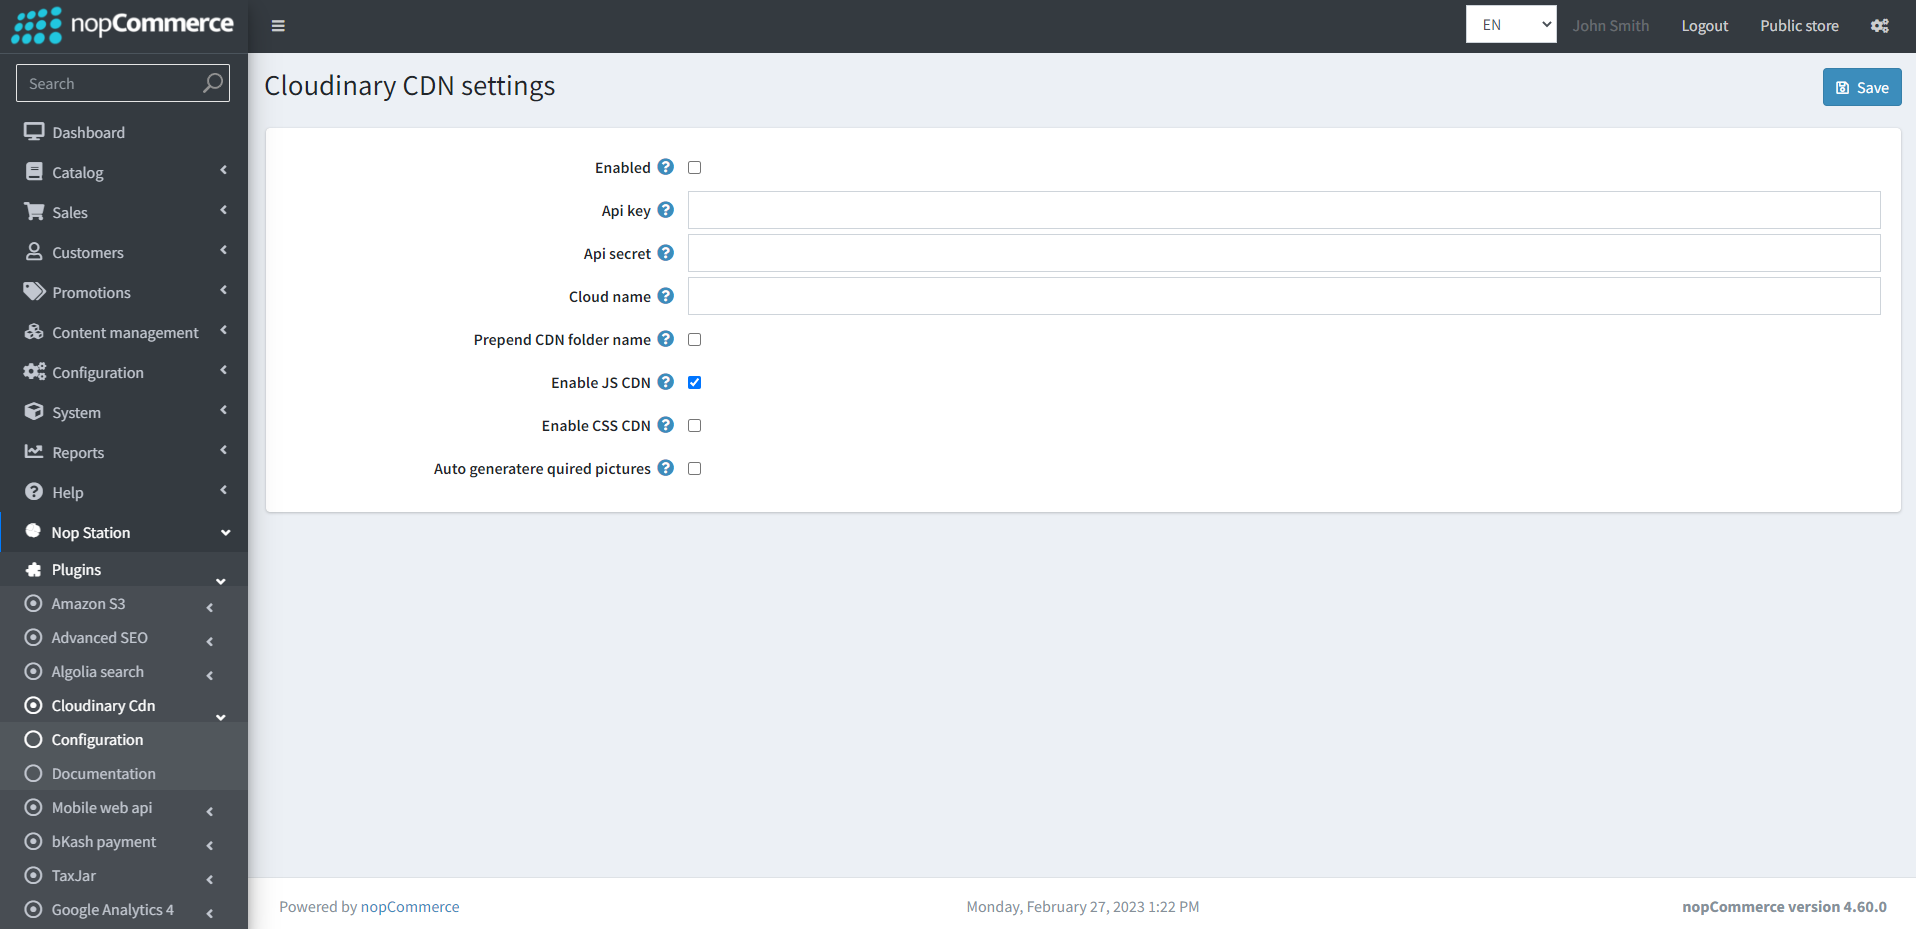
- Enabled: By checking this checkbox admins can enable the CDN plugin
- API key: Admins must enter the API key associated with their cloudinary account here
- Api secret: Admins must enter the Api secret associated with their cloudinary account here
- Cloudinary name: admins can define the cloud name here
- Prepend CDN folder name: admins can choose whether to prepend the CDN folder name. Note: We strongly advise against doing this in the production environment
- CDN Folder name: admins can define the cdn folder name here. Note: We strongly advise against doing this in the production environment
- Enable JS CDN: Admins can enable JS for CDN here
- Enable CSS CDN: Admins can enable CSS for CDN here
- Auto generated quired pictures: Admins can choose to generate quired pictures here