PRE-REQUISITES
- The plugin requires you to install the Nop-Station Core plugin and nopStation Widget Manager plugin first.
INSTALLATION
- Download the Dynamic Survey Plugin from our store https://nop-station.com/customer/downloadableproducts
- Go to Administration → Configuration → Local plugins
- Upload the .zip file using the "Upload plugin or theme" button
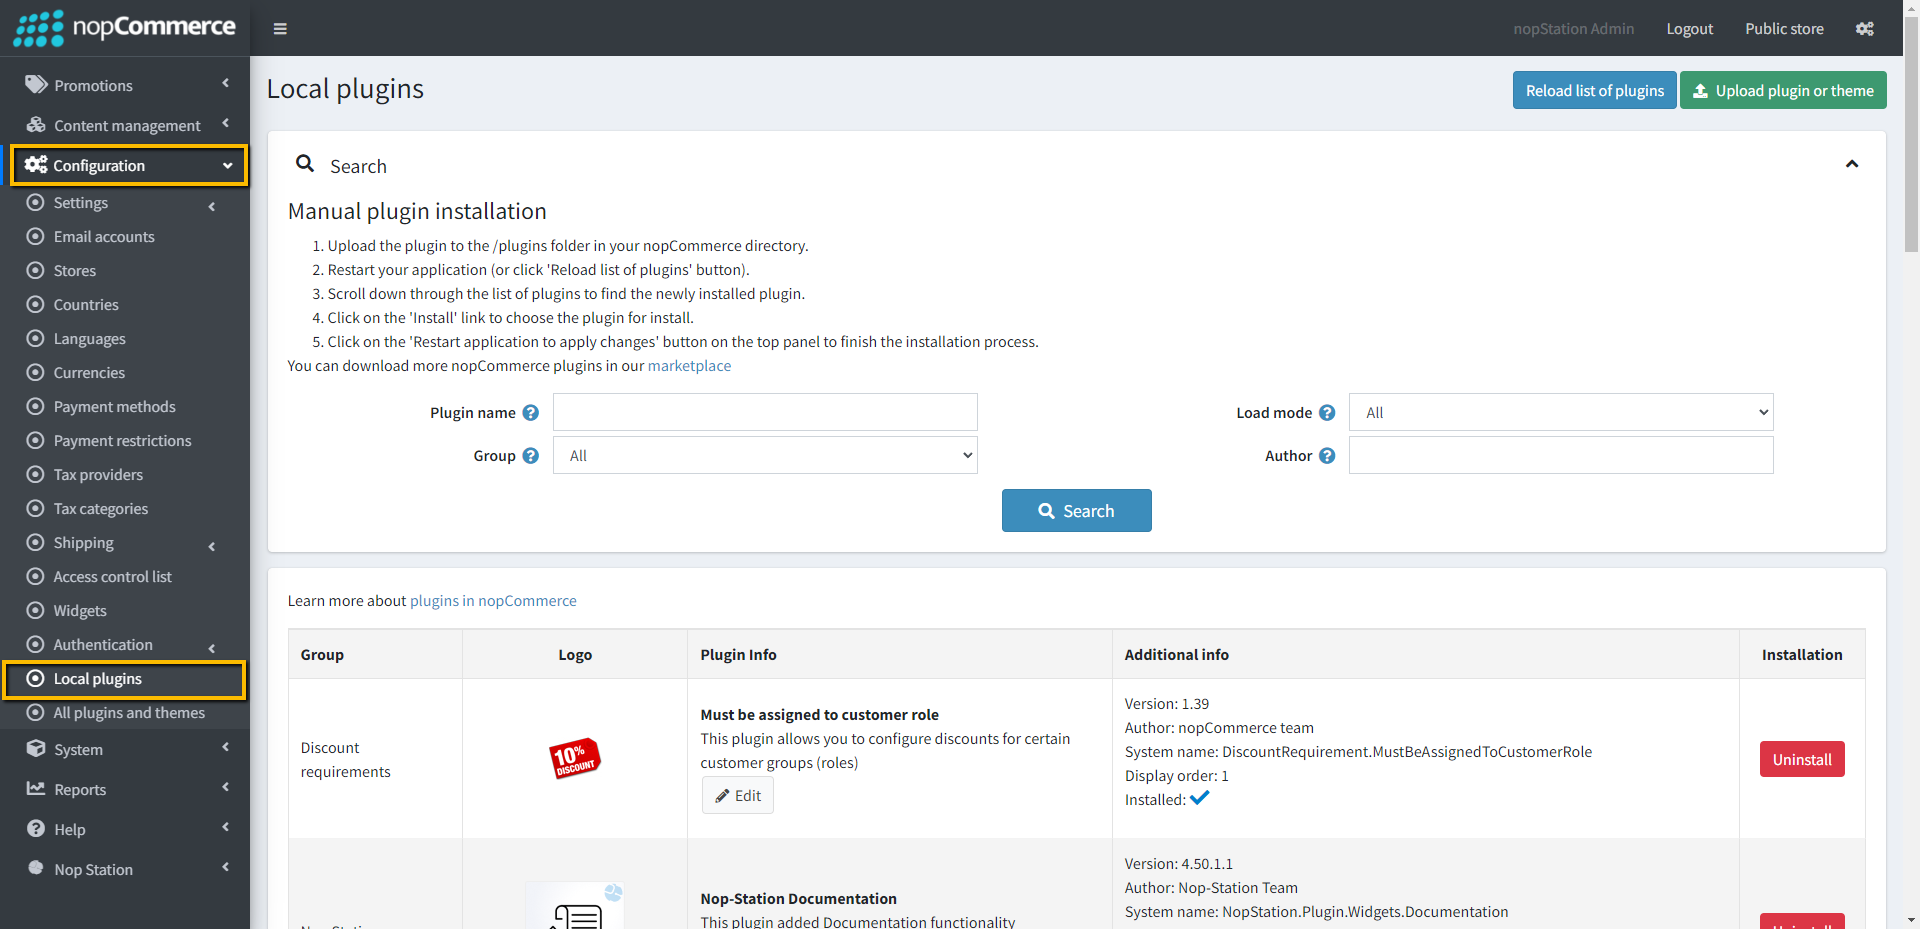
- Go to Administration, and reload the 'list of plugins'. Install 'Nop-Station Core' Plugin and 'Widget Manager' plugin first and then install 'Nop-Station Dynamic Survey plugin'
- To make the plugins functional, restart the application
- Enable the plugin with 'Edit' option and Configure it
CONFIGURATION
- Go to Admin → Nop Station → Plugins → Survey → Configuration
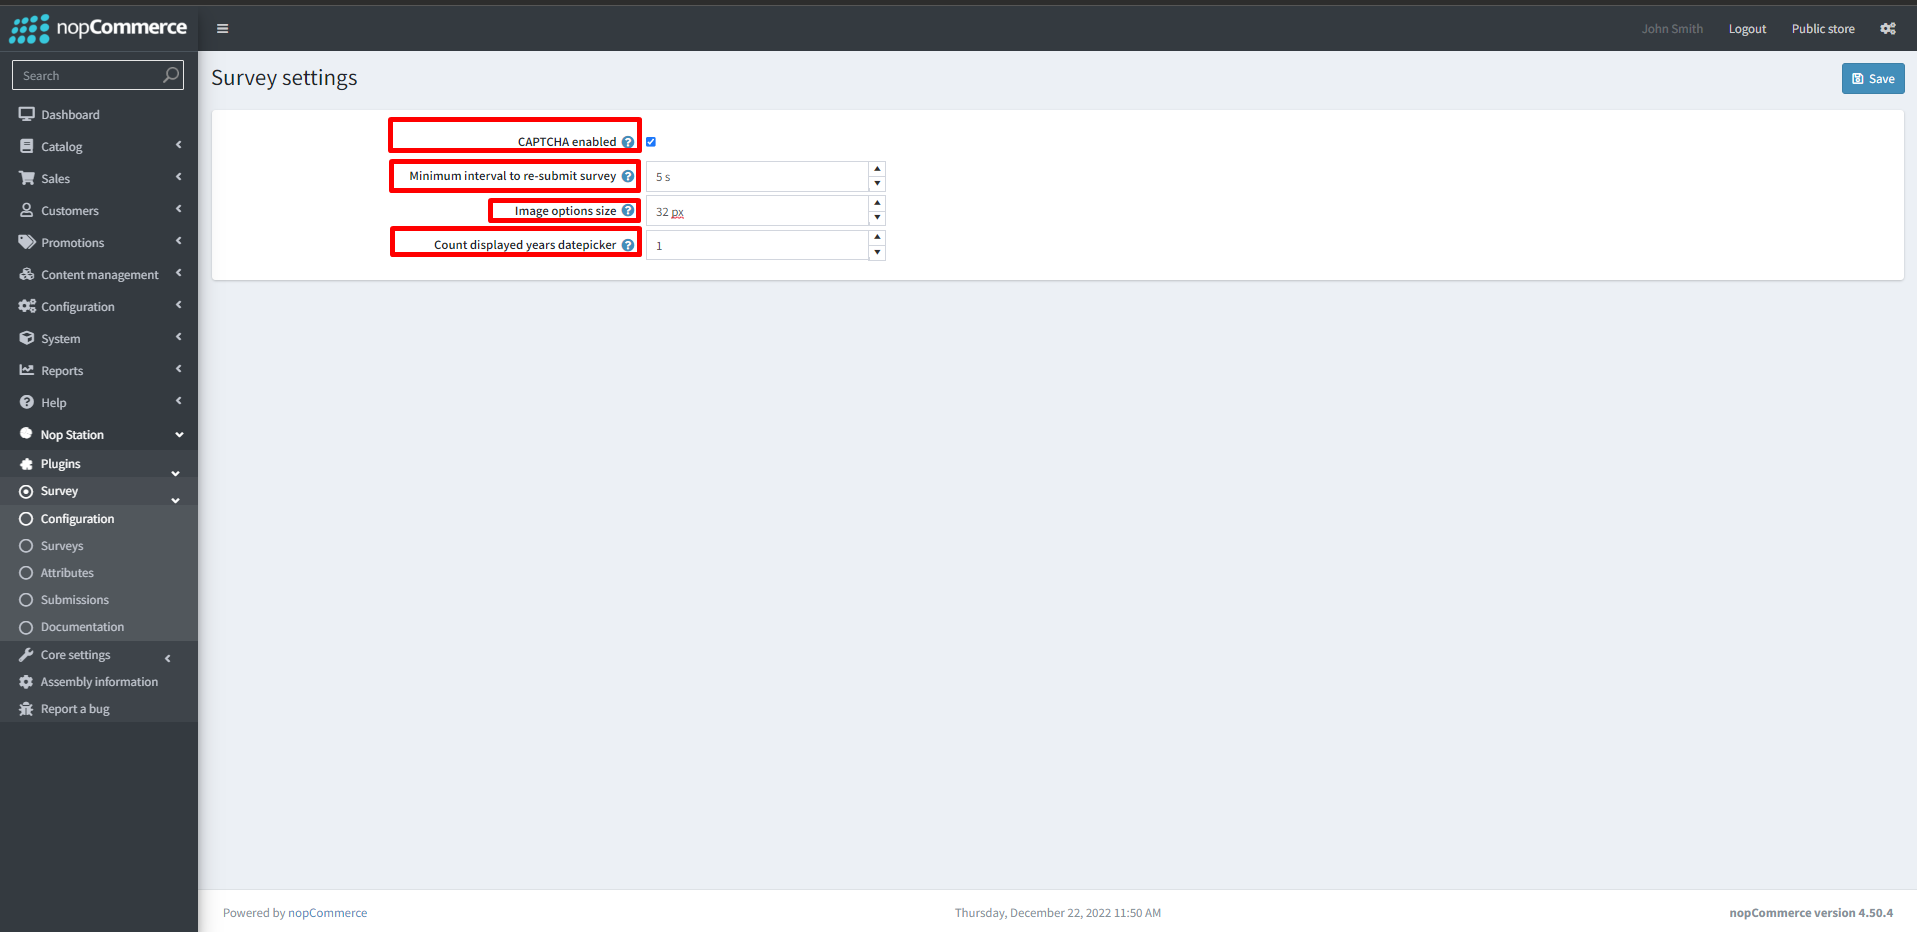
- CAPTHA enable: By checking this checkbox admins can enable CAPTCHA for surveys
- Minimum interval to resubmit survey: Admins can configure the minimum time gap between resubmissions in seconds
- Image options size: admins can configure the image size in pixels for survey image boxes.
- Count displayed years date picker: admins can configure the minimum year to browse from the current year in the admin.
Setting Attributes
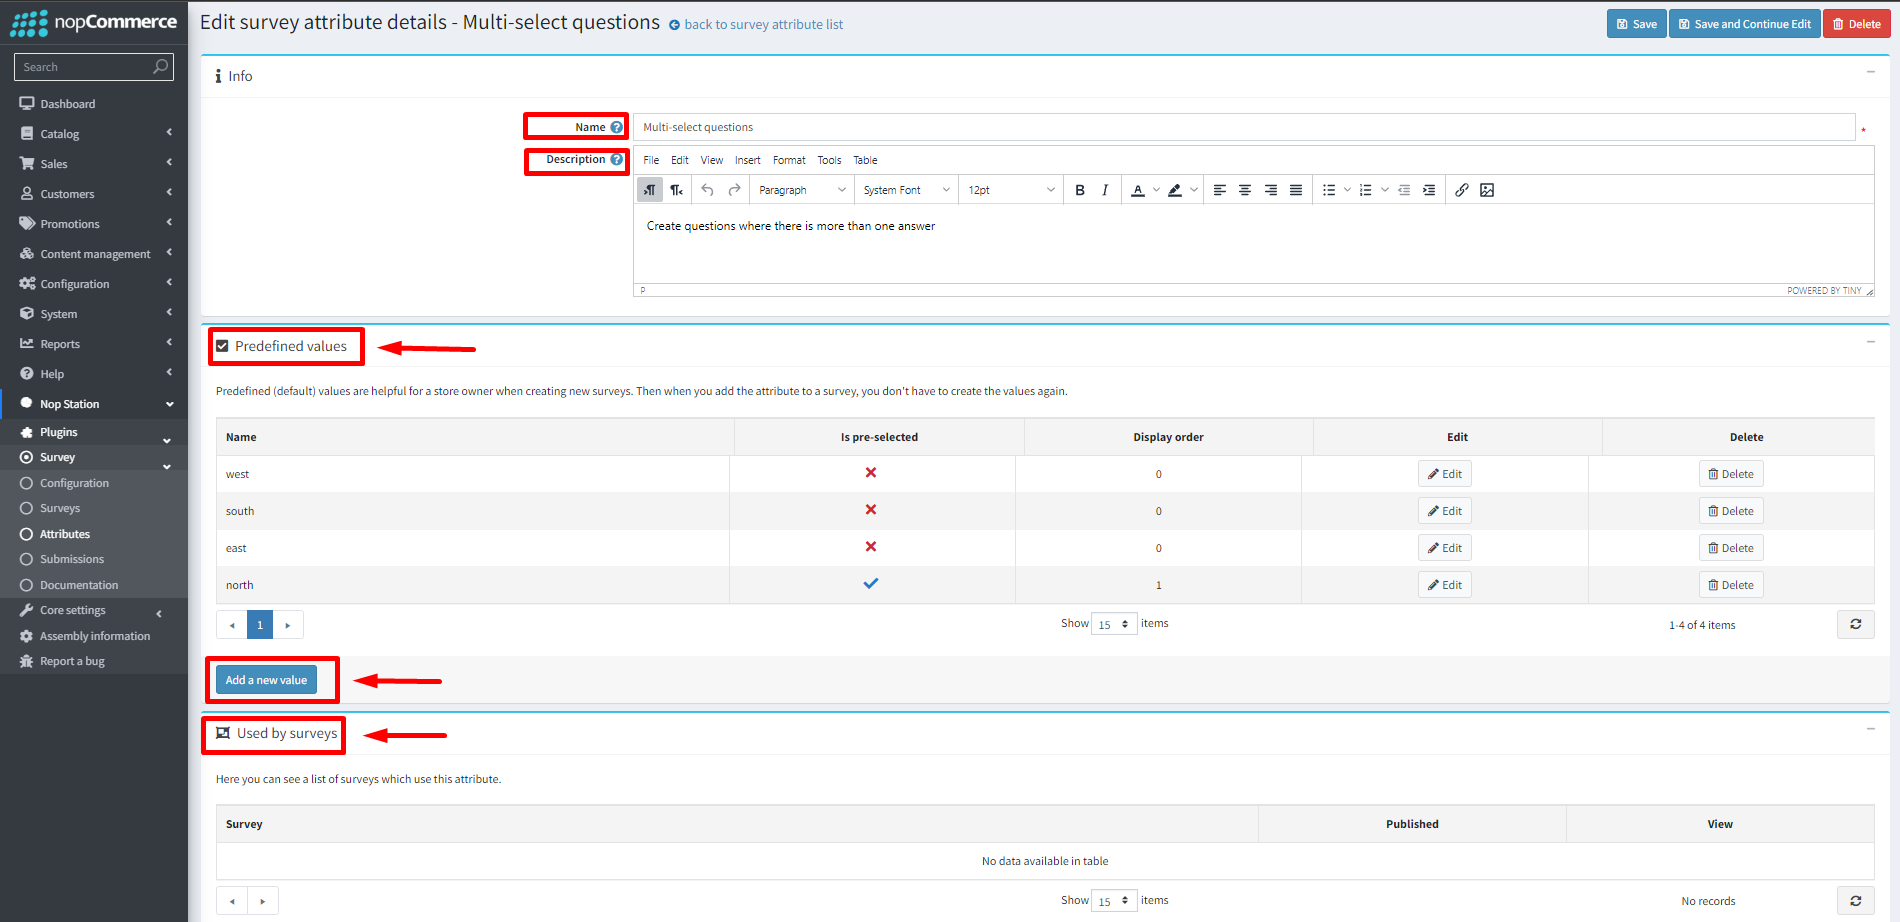
- Go to Admin → Nop Station → Plugins → Survey →attributes
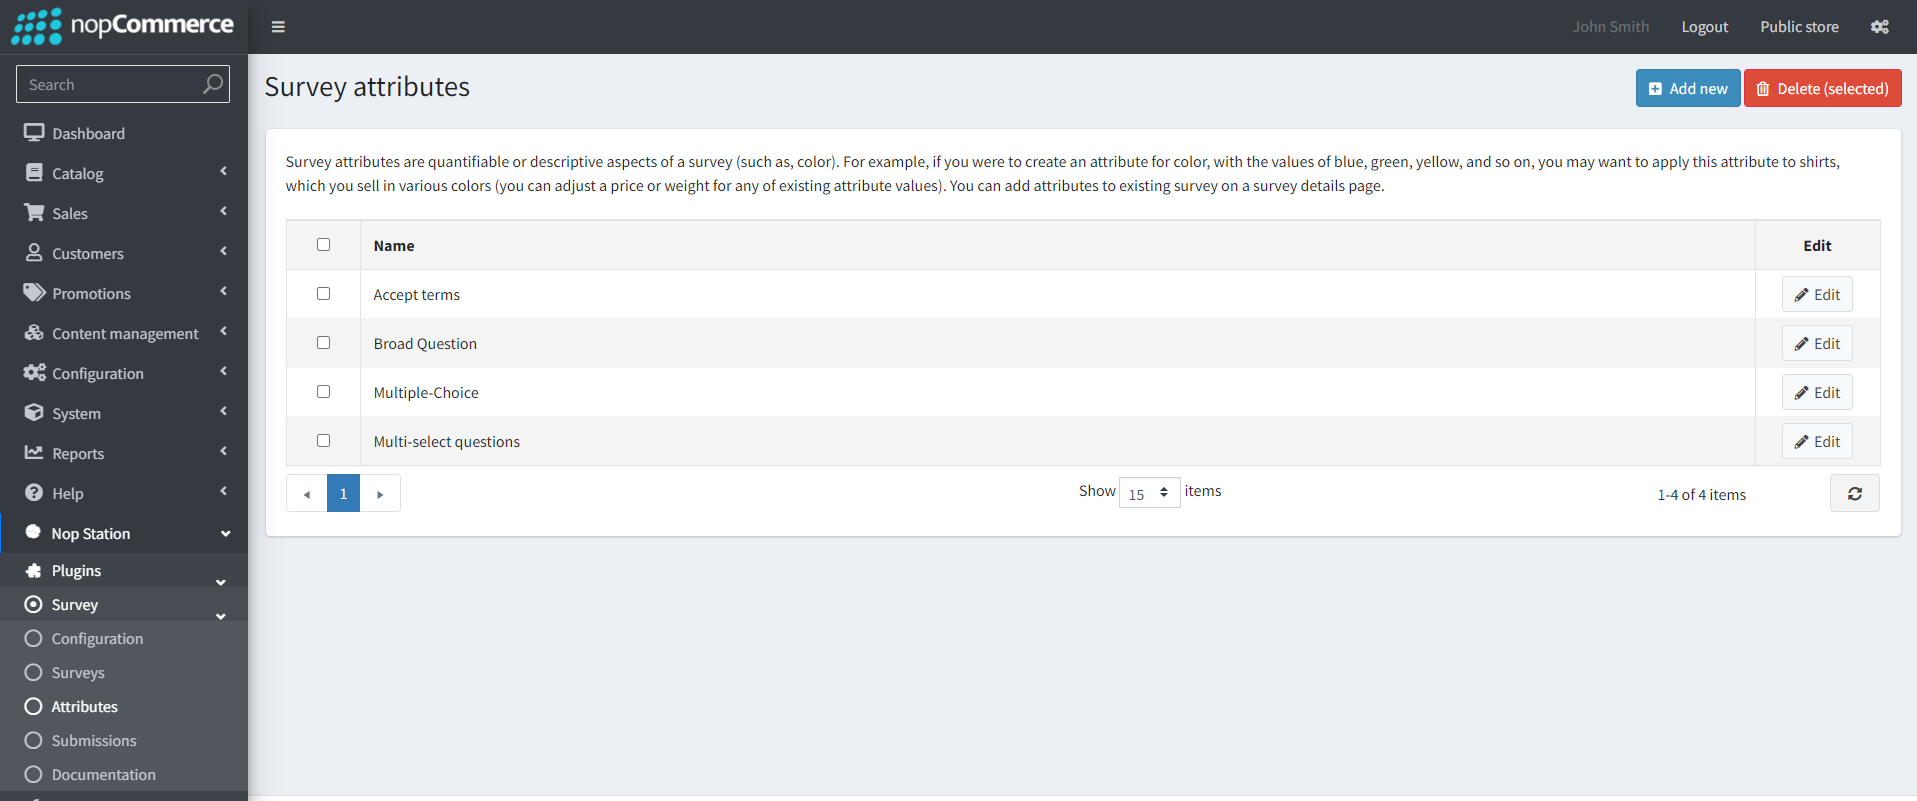
- you can see a list of created attributes here
- You can create attributes by clicking on the Add New button.
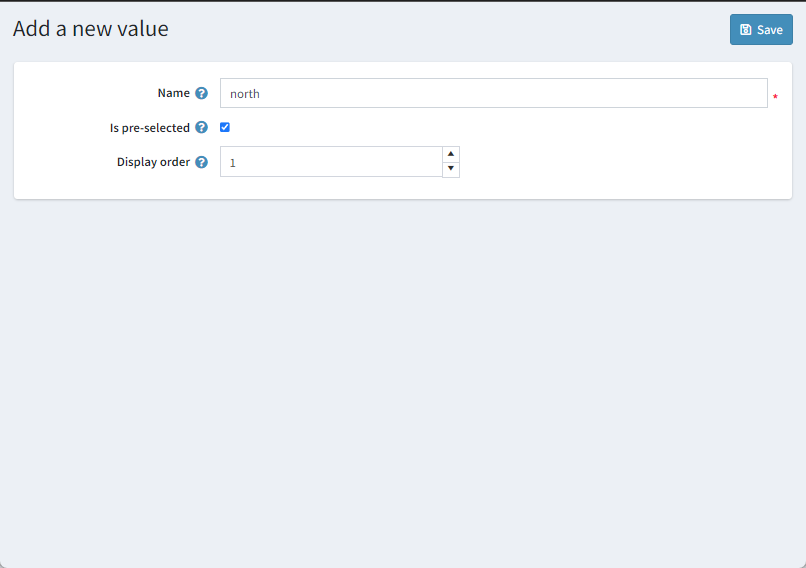
- Name: Admins can define the name for the attribute here
- Description: admins can add a description for the attribute
- Pre-defined values: admins can create some predefined values for attributes if they want
Setting up Surveys
- Go to Admin → Nop Station → Plugins → Survey → Surveys
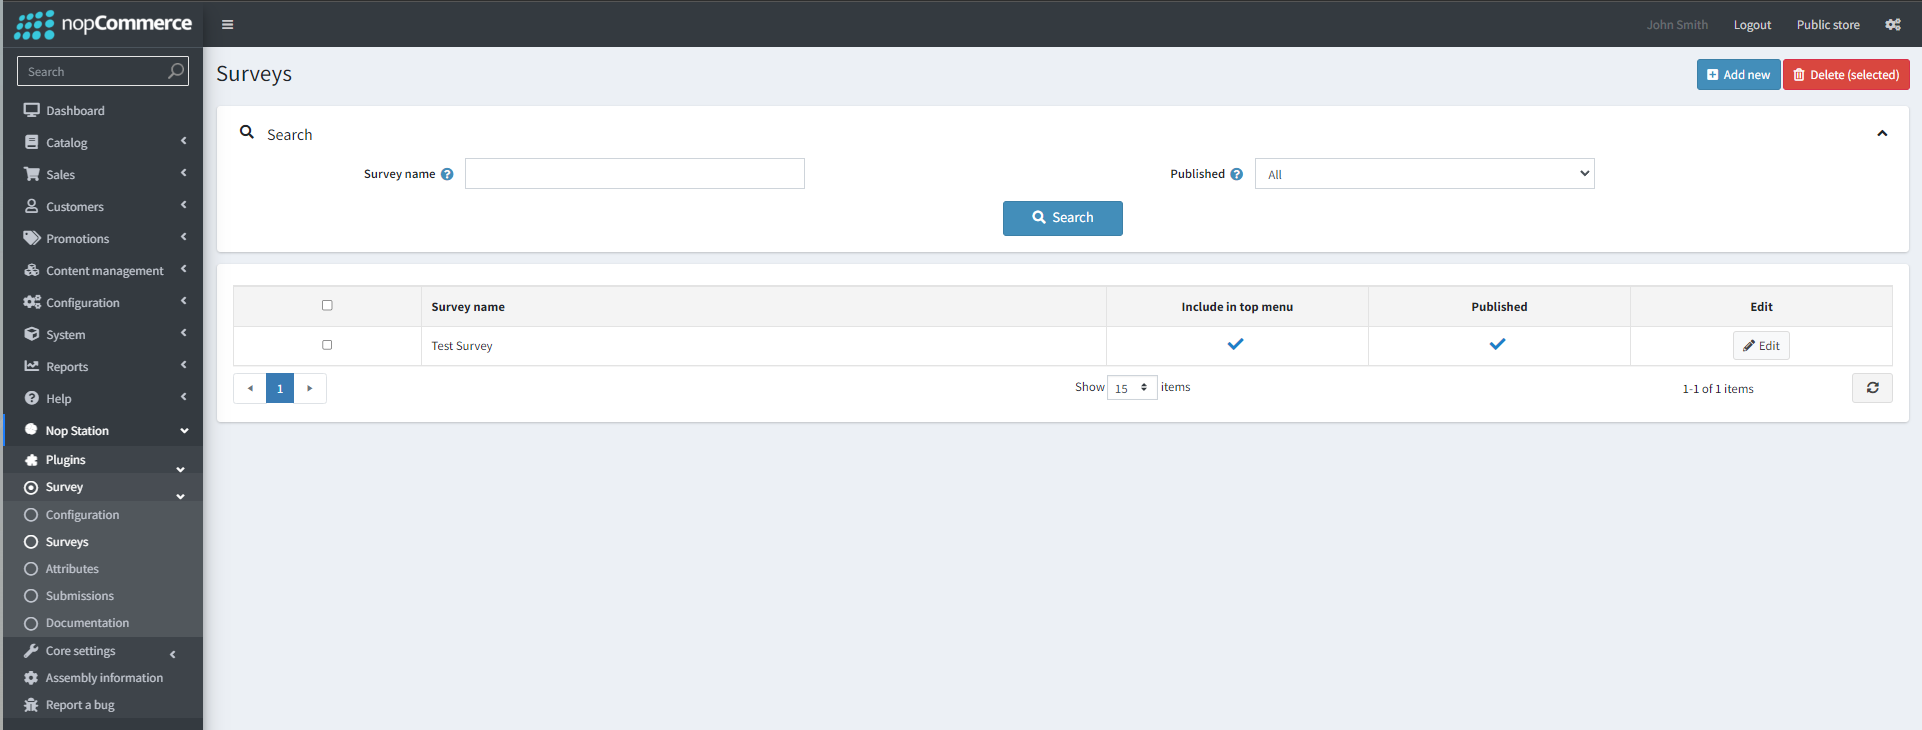
- you can see a list of created surveys here which you can edit by clicking the edit button
- You can create a new survey by clicking on the Add New button. This will take you to the Add a new Survey page
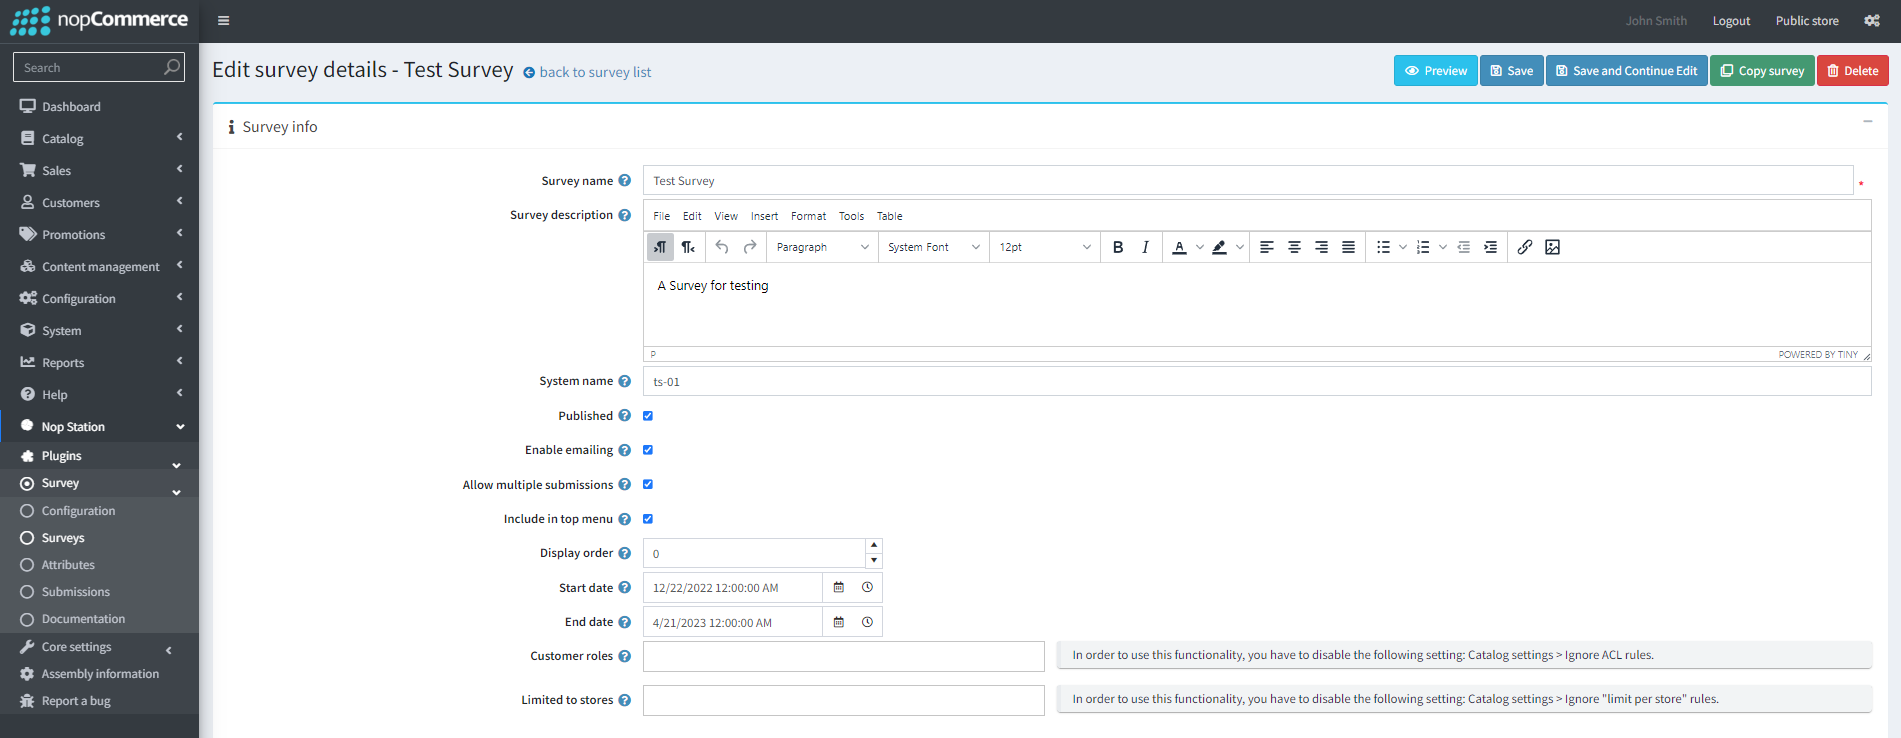
- Survey name: Admins can define the name for the survey here
- Survey description: admins can add a description for the Survey here. This supports a rich text editor and HTML as well.
- System name: Admins can add a system name for the survey here
- Published: By checking this checkbox admins can choose whether the Survey is published or not
- Enable emailing: By checking this checkbox admins can enable sending Survey links through email
- Allow multiple submissions: By checking this checkbox admins can enable multiple submissions
- Include in top menu: By checking this checkbox admins can include the Survey link in the top menu
- Display order: Admins can set the display order for the Survey in the top menu
- Start date: Admins can set the start date for the Survey using the date picker
- End date: Admins can set the end date for the Survey using the date picker
- Customer roles: Admins can limit the accessibility of the Survey based on customer roles
- Limited to stores: Admins can limit the survey's accessibility based on store
- Email Account: Admins can add an email account from which emails from the survey will be sent

- To: Admins can define the name for the survey here
- BCC: admins can add a description for the Survey here. This supports a rich text editor and HTML as well.
- Send immediately By checking this checkbox, admins can send the survey immediately after creation through emails
- Attributes: Admins can see a list of survey attributes defined for a particular survey here, They can Add or edit these attributes
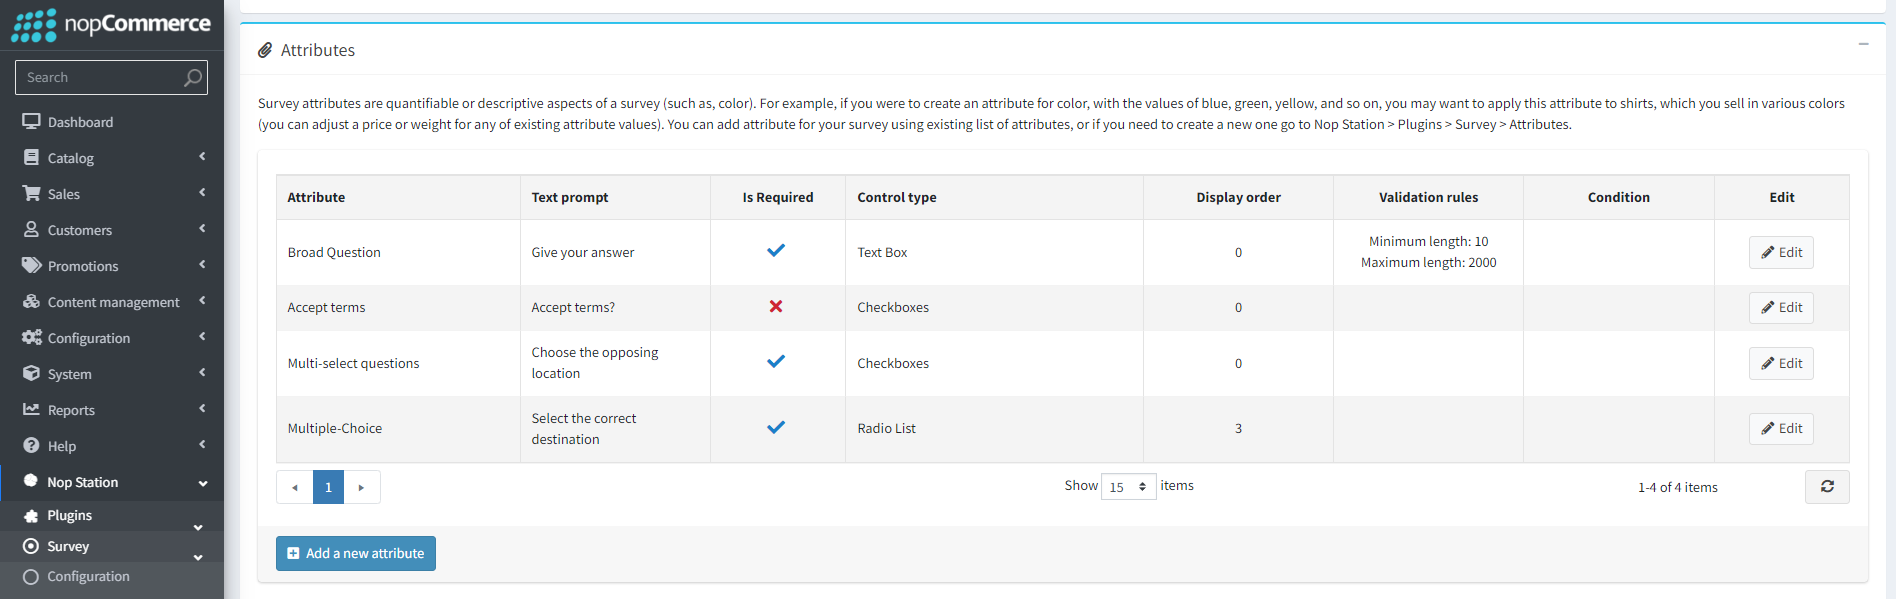
- Add a new attribute/Edit: By clicking on the add new attribute button the admin will be taken to the add a new attribute/ Edit a new attribute page.

- Attribute: admins can choose the attribute they want to add from this drop-down
- Text prompt: admins can set a text prompt or question for the attribute through this option
- Is Required: By checking this checkbox admins can set the field as a required one
- Content type: By checking this checkbox, admins can send the survey immediately after creation through emails
- Display order: By checking this checkbox, admins can send the survey immediately after creation through emails
- Enable condition: By checking this checkbox, admins can enable conditions for attributes\. Once enabled for an attribute, it will only be visible when the condition is fulfilled
- Search engine friendly page name: By clicking on the add new attribute button the admin will be taken to the add a new attribute/ Edit a new attribute page.
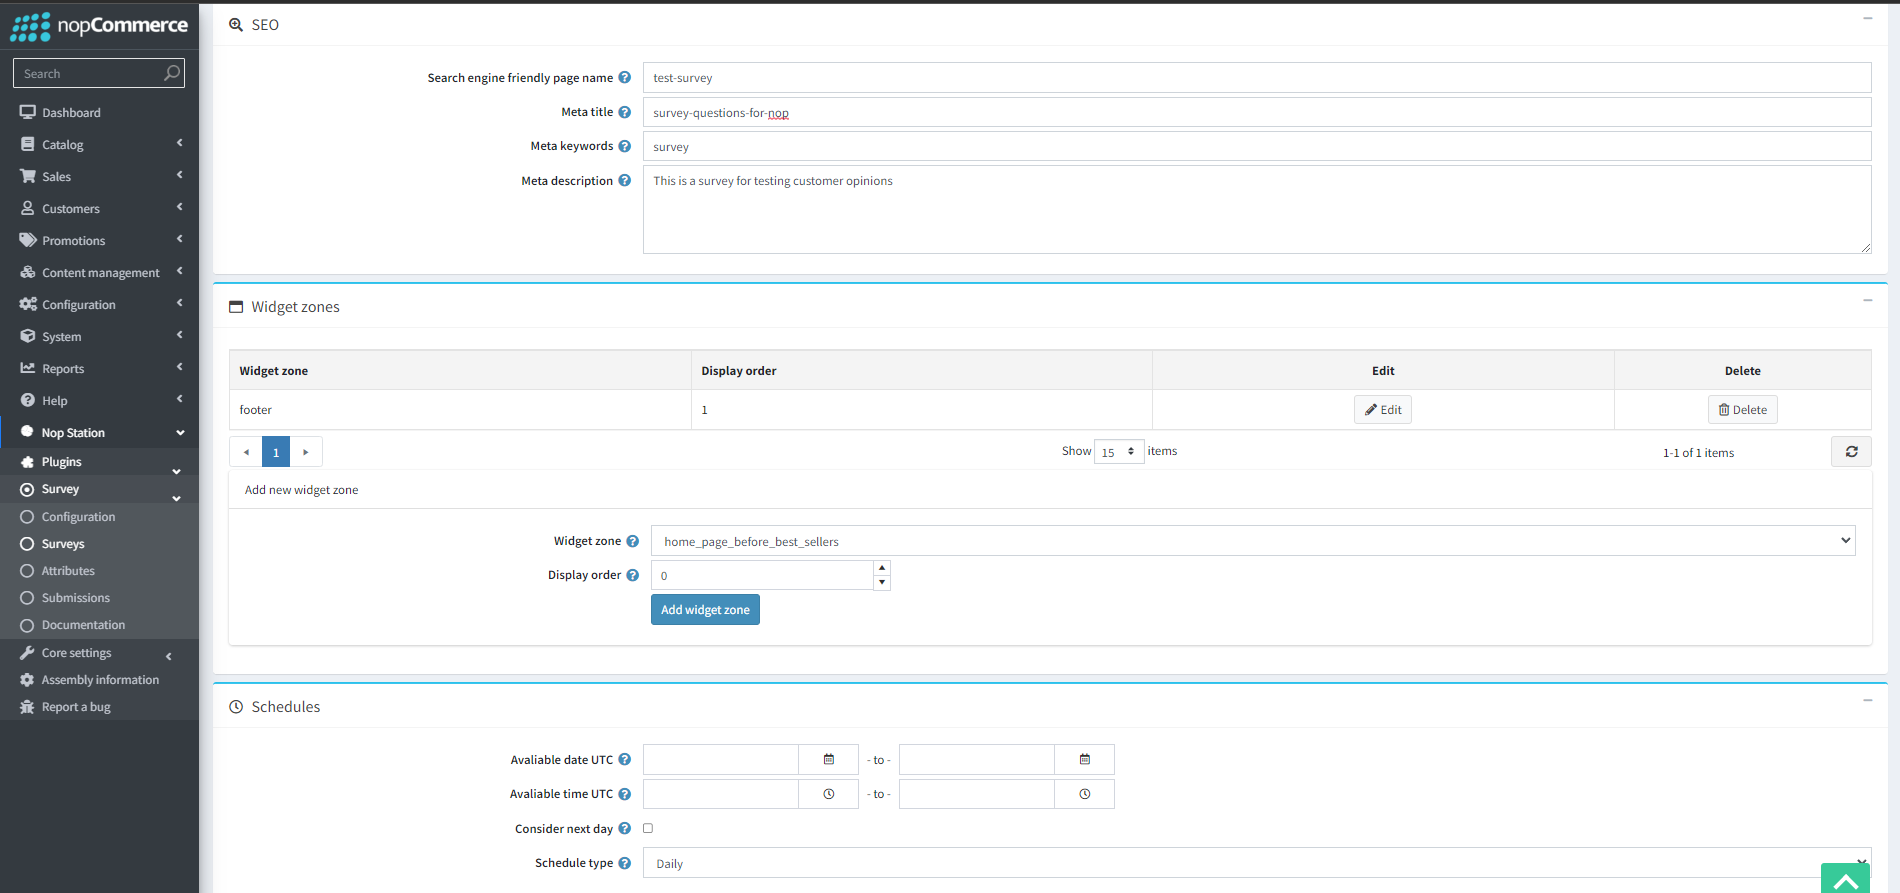
- Meta title: admins can choose the attribute they want to add from this drop-down
- Meta keywords: admins can set a text prompt or question for the attribute through this option
- Meta description: By checking this checkbox admins can set the field as a required one
- Widget zone: Admins can add widget zones where the survey will be displayed. Admins can choose the widget zone from this drop-down
- Display order: admins can set the display order for the survey in the widget zone
- Available date UTC: Admins can set survey availability dates based on UTC
- Available time UTC: admins can set survey available time of day based on UTC
- Consider next day: admins can consider the next day for time calculations
- Schedule type: admins can set the schedule type as either: Daily/Weekly/Monthly
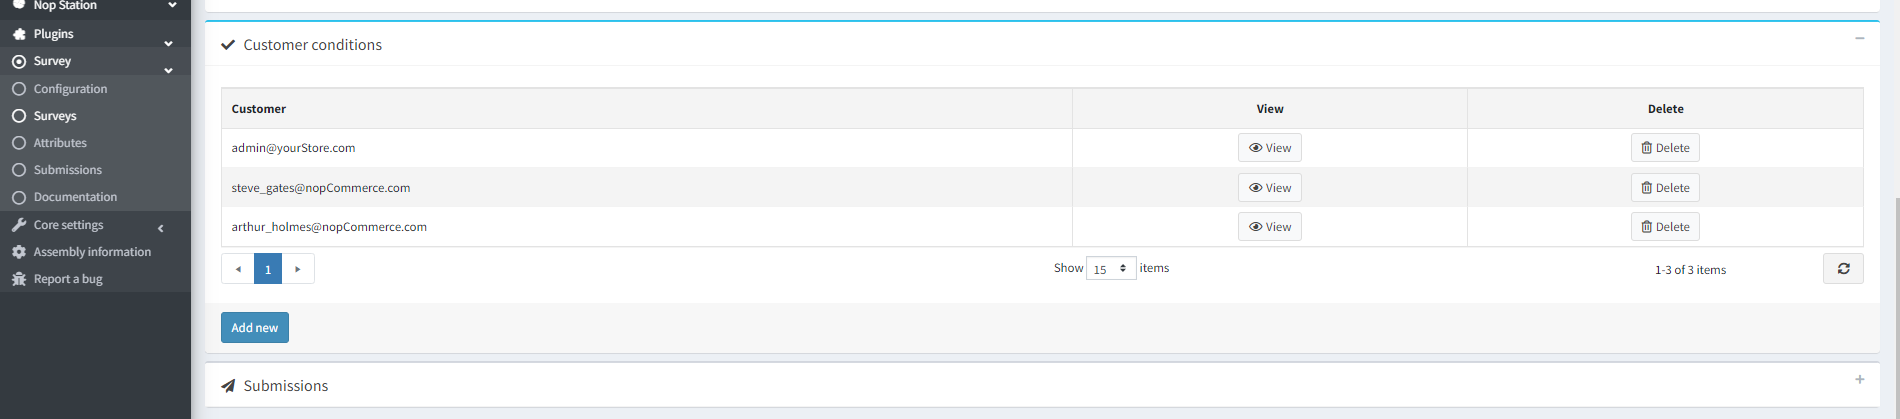
- Customer conditions: admins can limit the survey to customers through customer conditions
- Submissions: admins can see survey responses here
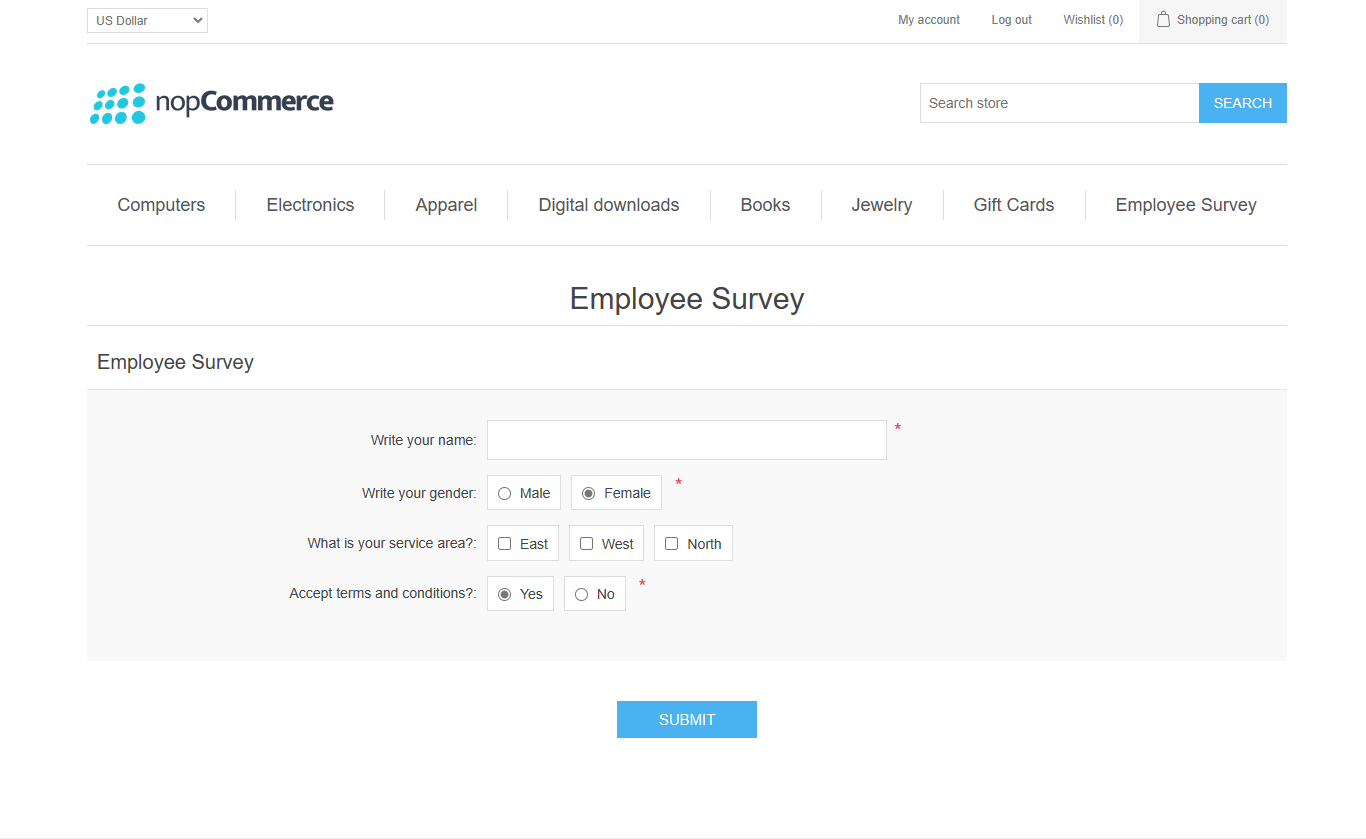
PUBLIC VIEW
- This is how the survey will look once enabled in the Public Store: