INSTALLATION
- Download the Vendor Shop plugin from our store https://nop-station.com/customer/downloadableproducts
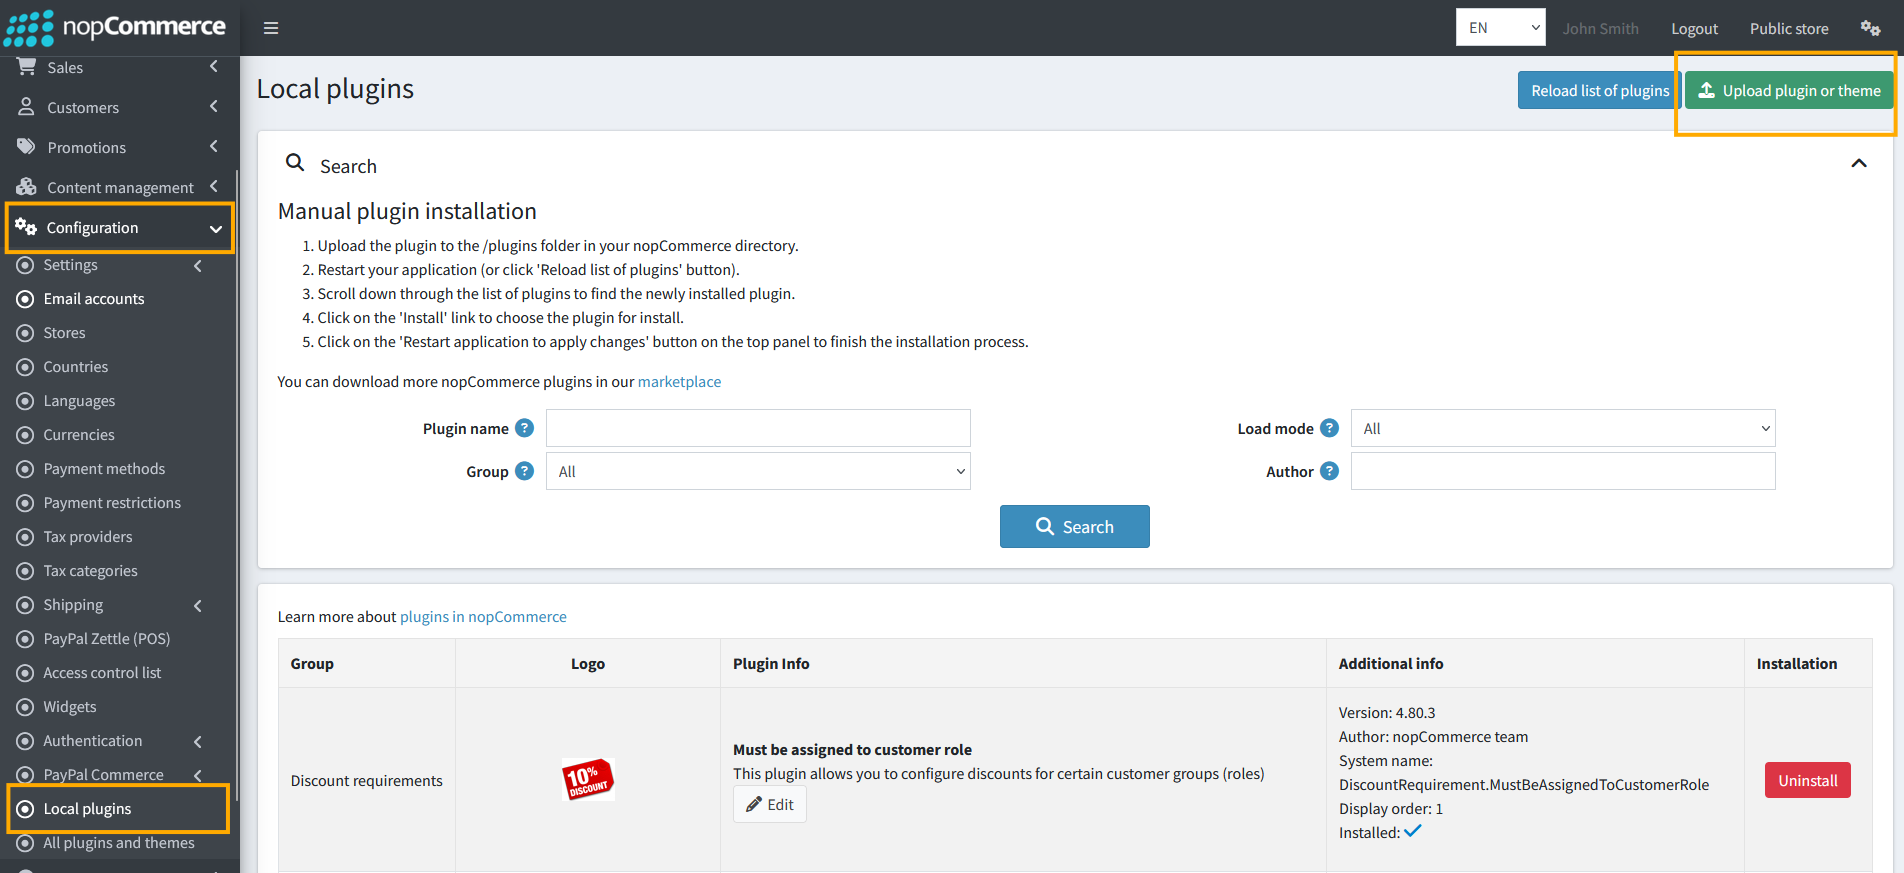
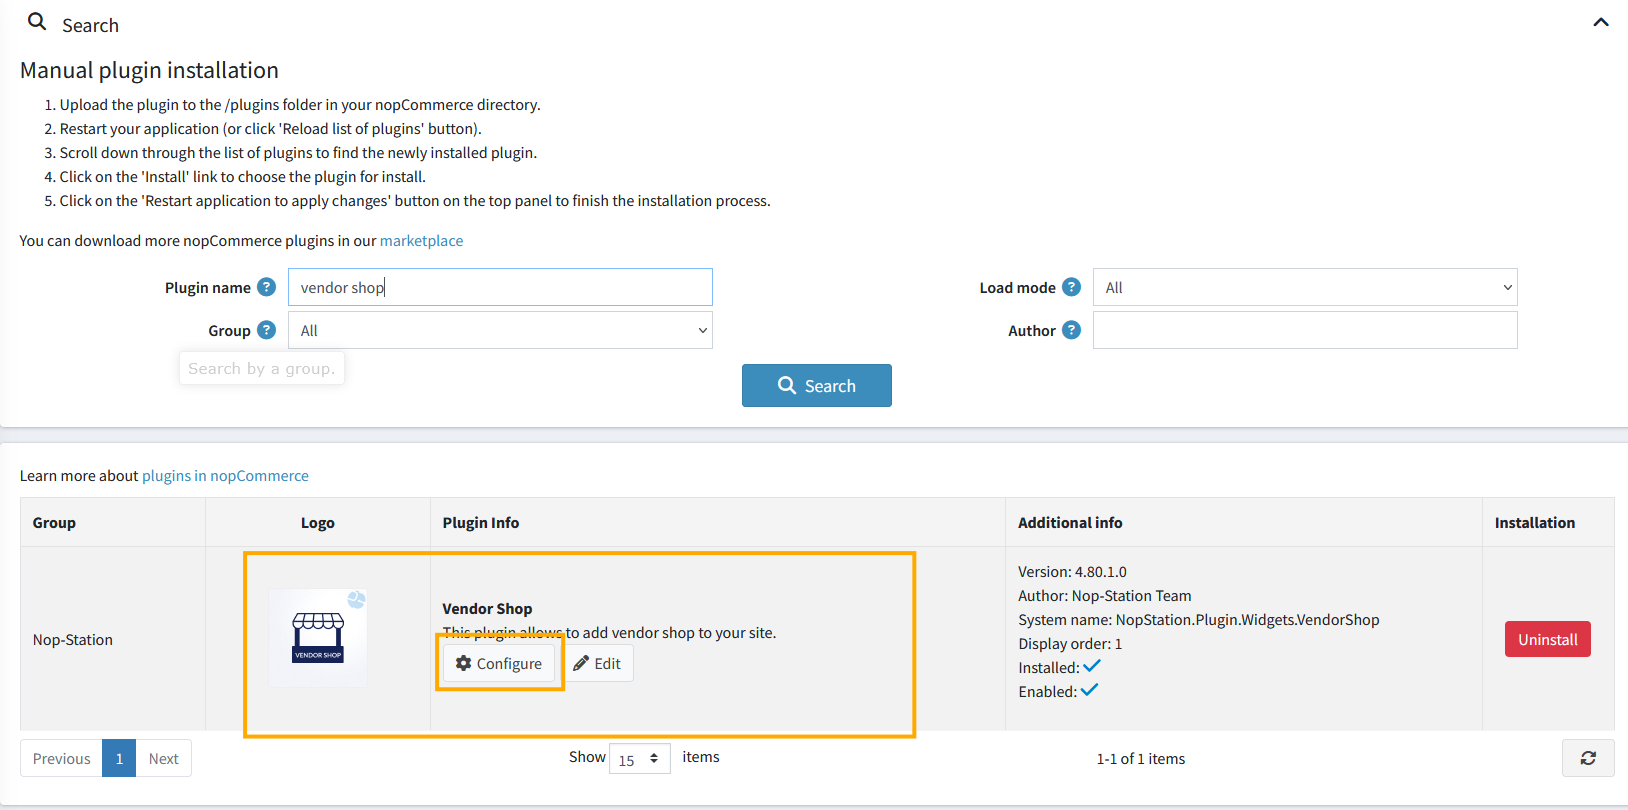
- Go to Administration > Configuration > Local plugins.
- Upload the .zip file using the "Upload plugin or theme" button on the top right corner of the screen
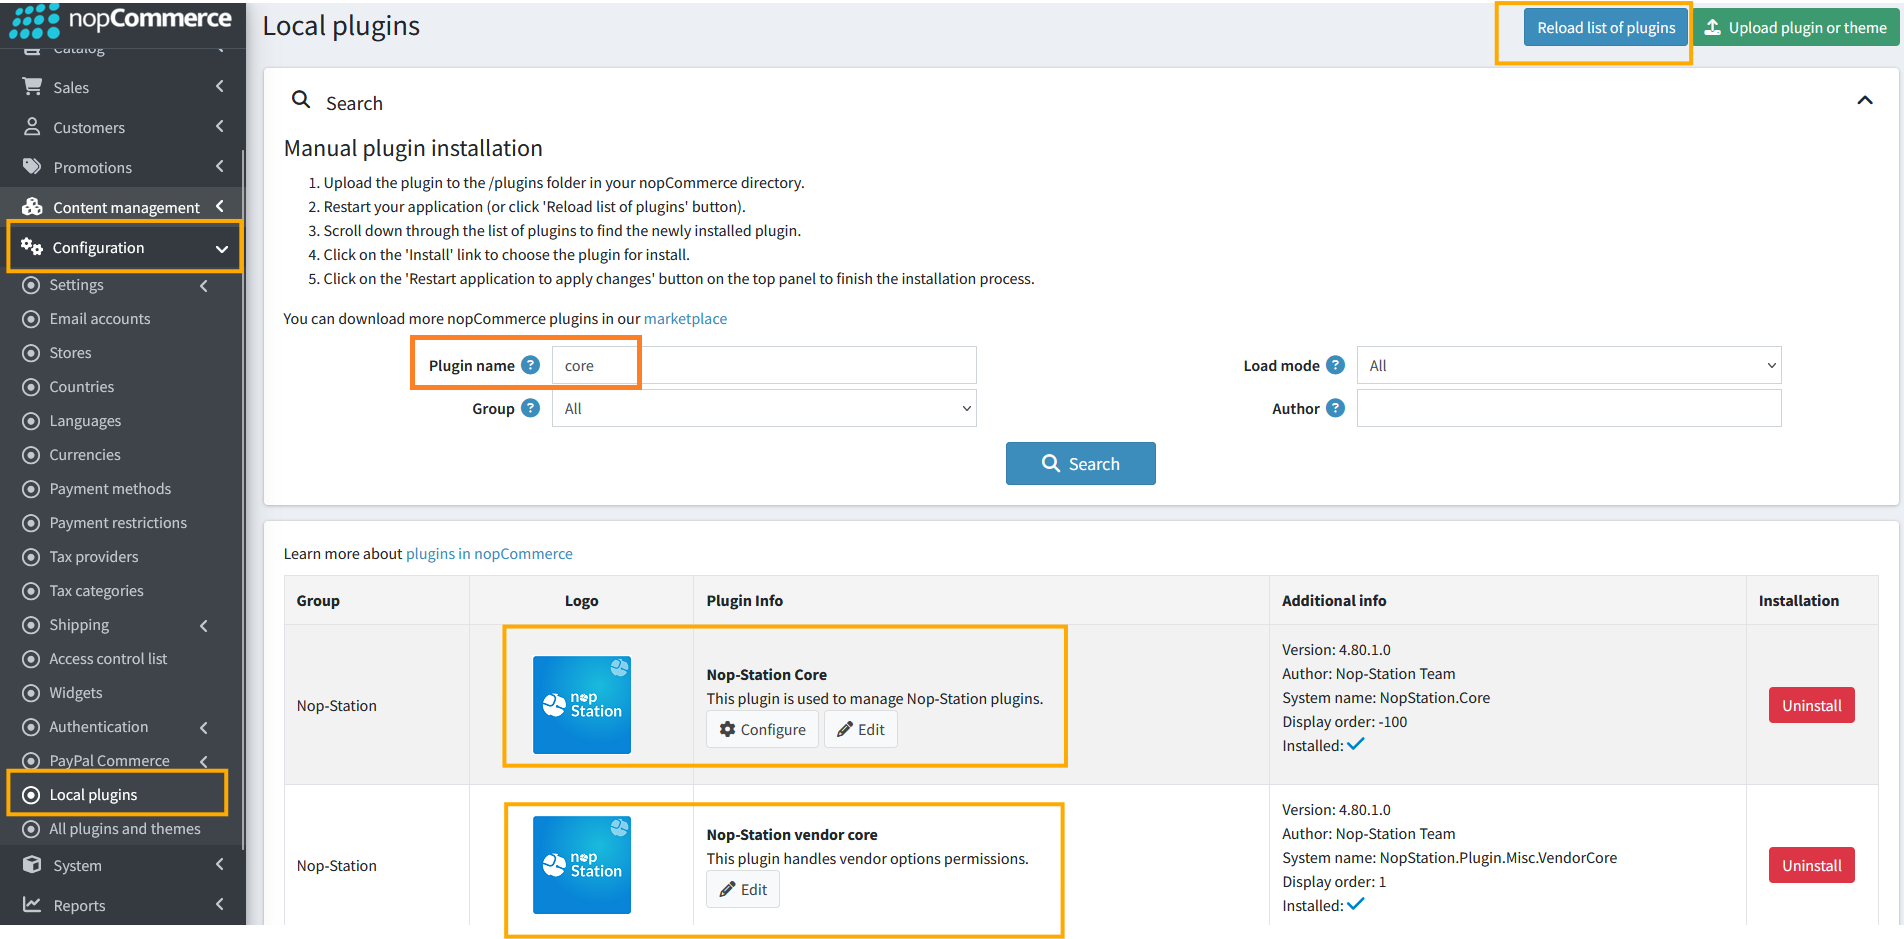
- Go to Administration, reload the 'list of plugins'. Then Install 'Nop-Station Core' plugin first. Then install 'Nop-Station Vendor Core' & 'Vendor Shop' plugin plugin first

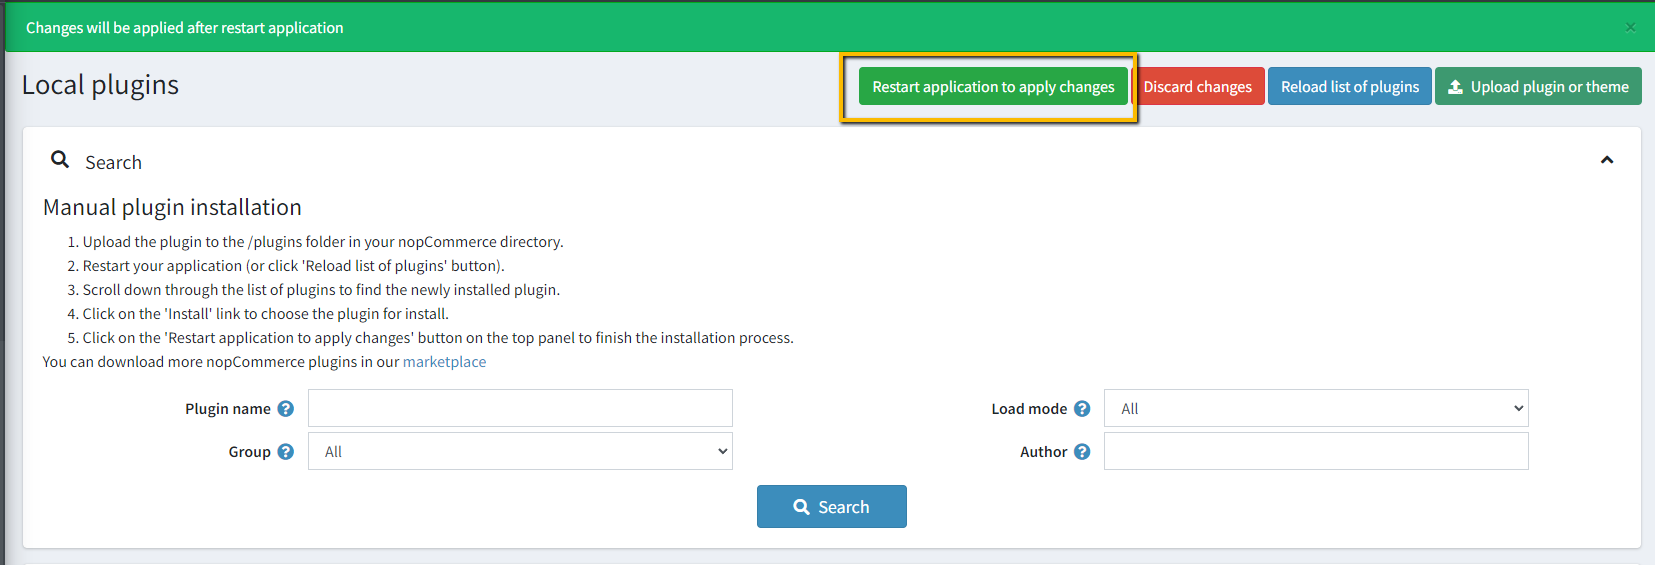
- To make the plugins functional, restart the application.
Configuration
- Then Click on Configure and Enable all the functionalities
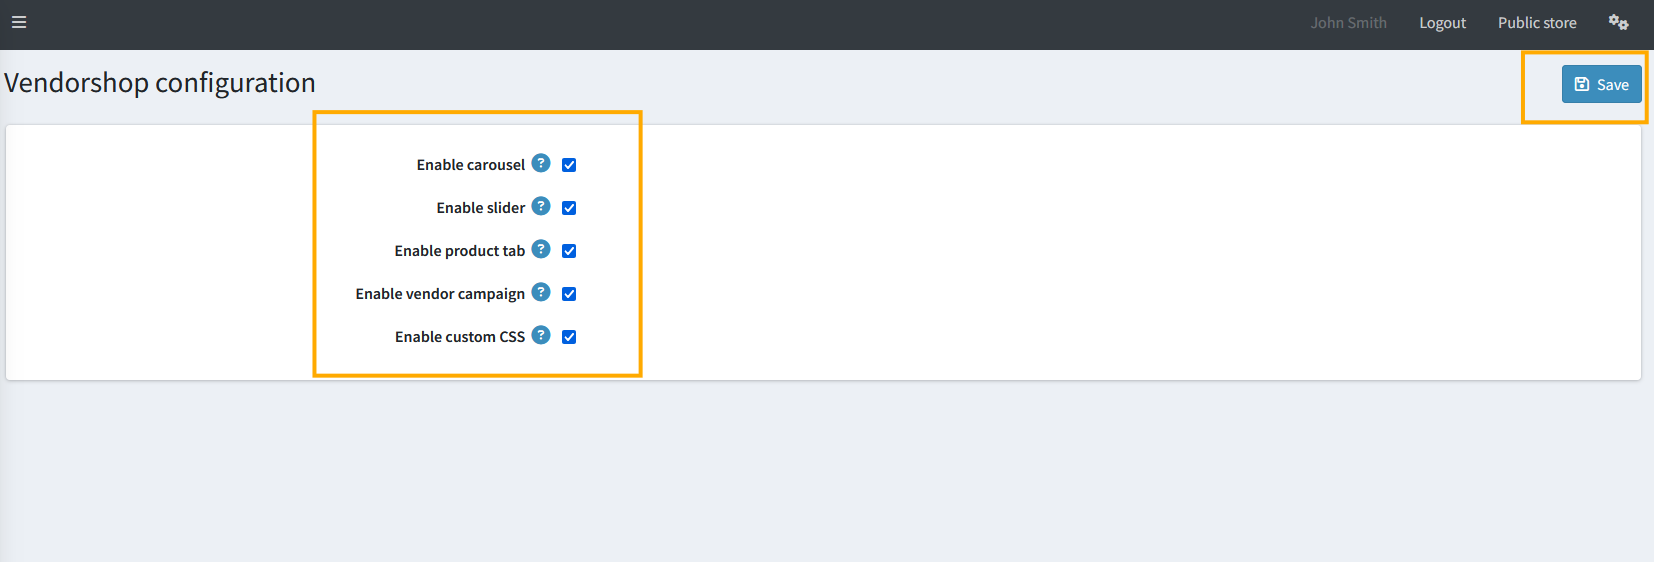
- Admins can now check the following options to enable/disable features Vendors:
- Enable carousel: Enable/Disable carousel access for vendors
- Enable Slider: Enable/Disable slider for vendors
- Enable product tab: Enable/Disable product tab for vendors
- Enable vendor campaign: Enables/Disable vendor campaigns for vendors
- Enable custom CSS: Enable/Disable custom CSS for vendors
Enabling access for Vendors
- Go to Admin > NopStation > Core Settings > Access Control List
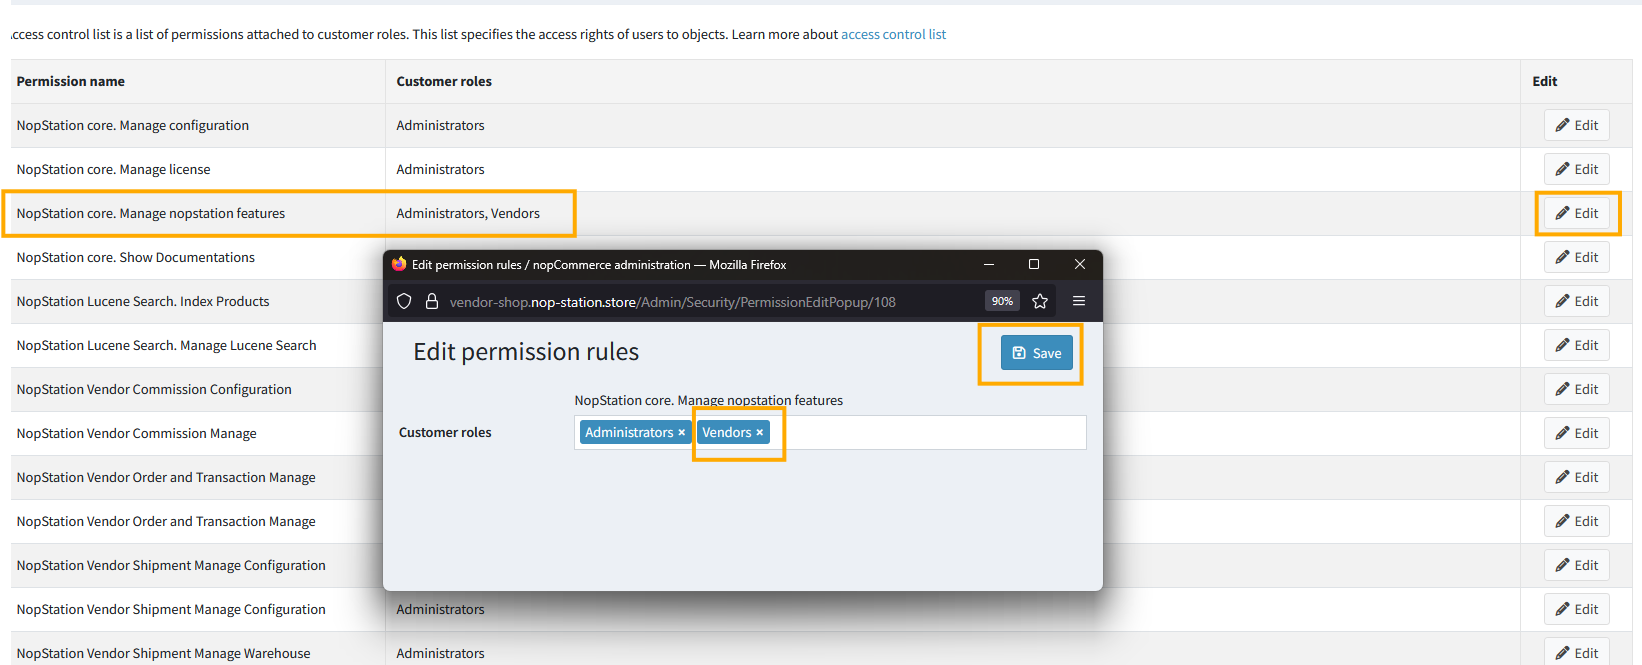
- Admins must add Vendor in NopStation core. Manage nopStation features
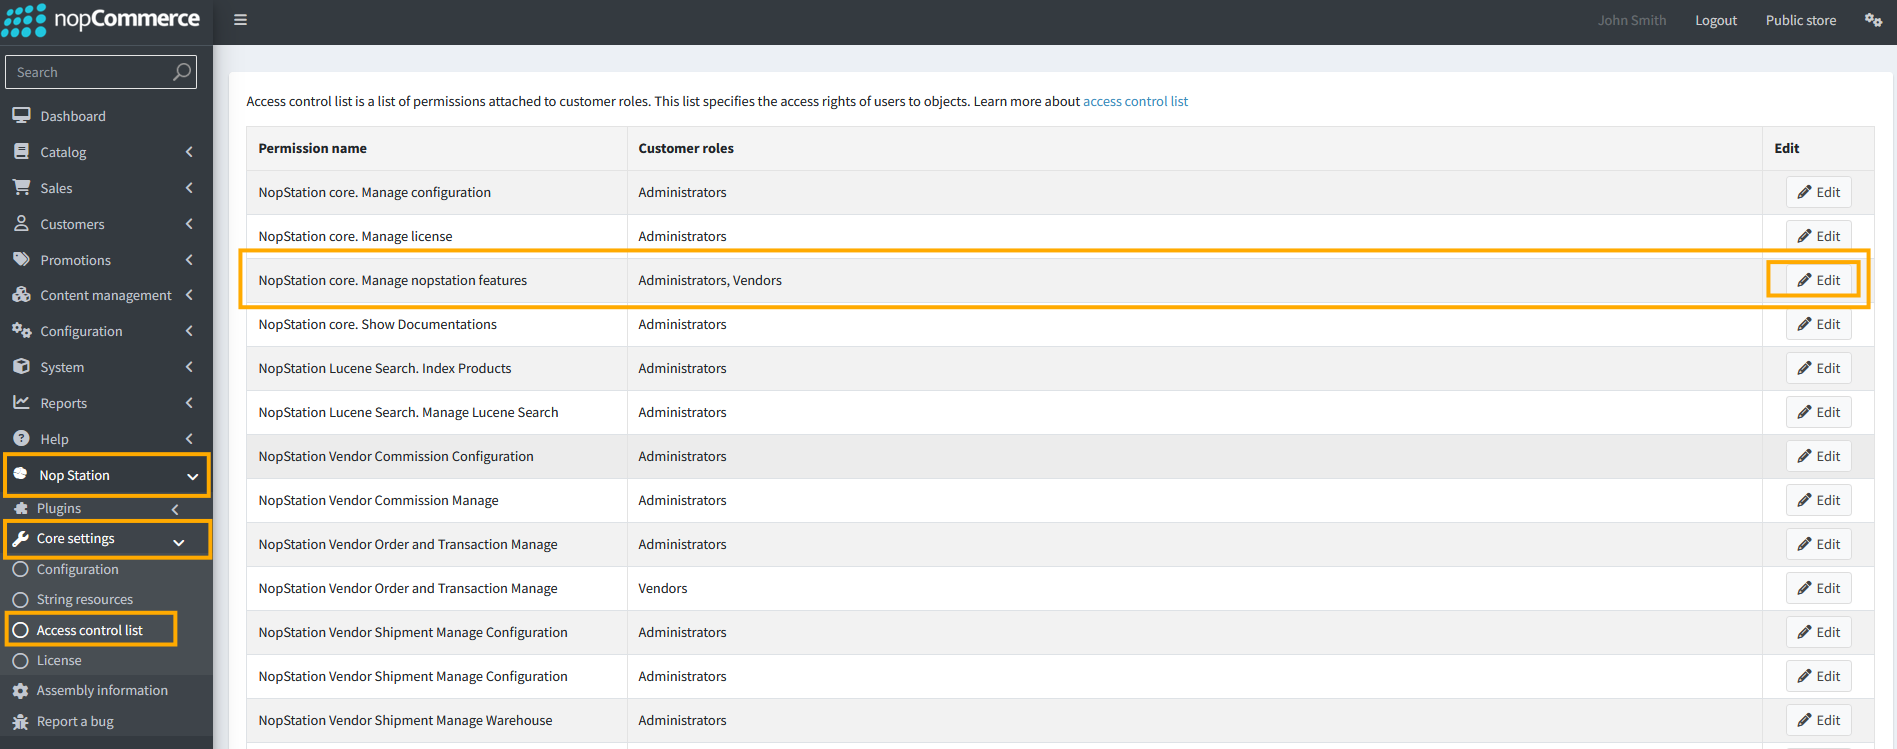
- Now click on Edit and add Vendor in the specific box and Save
Enabling Vendor Shop for specific Vendors:
- Go to Admin > Customers > Vendors. Here Admins can see list of Vendors and also can Add vendors by Clicking on Add New Button
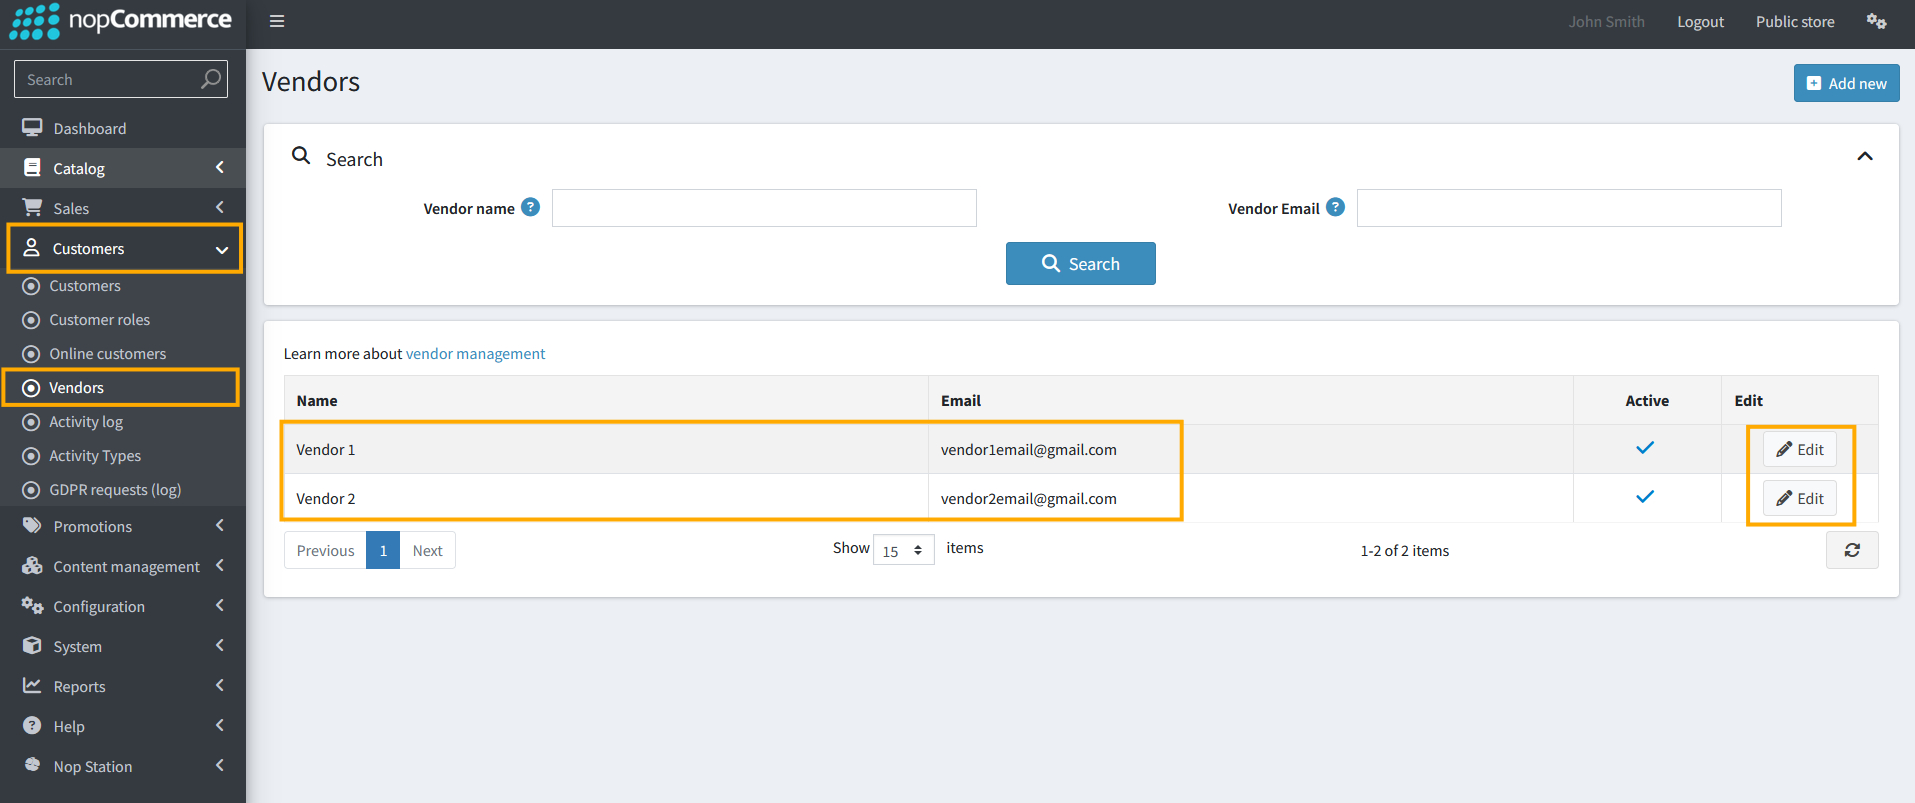
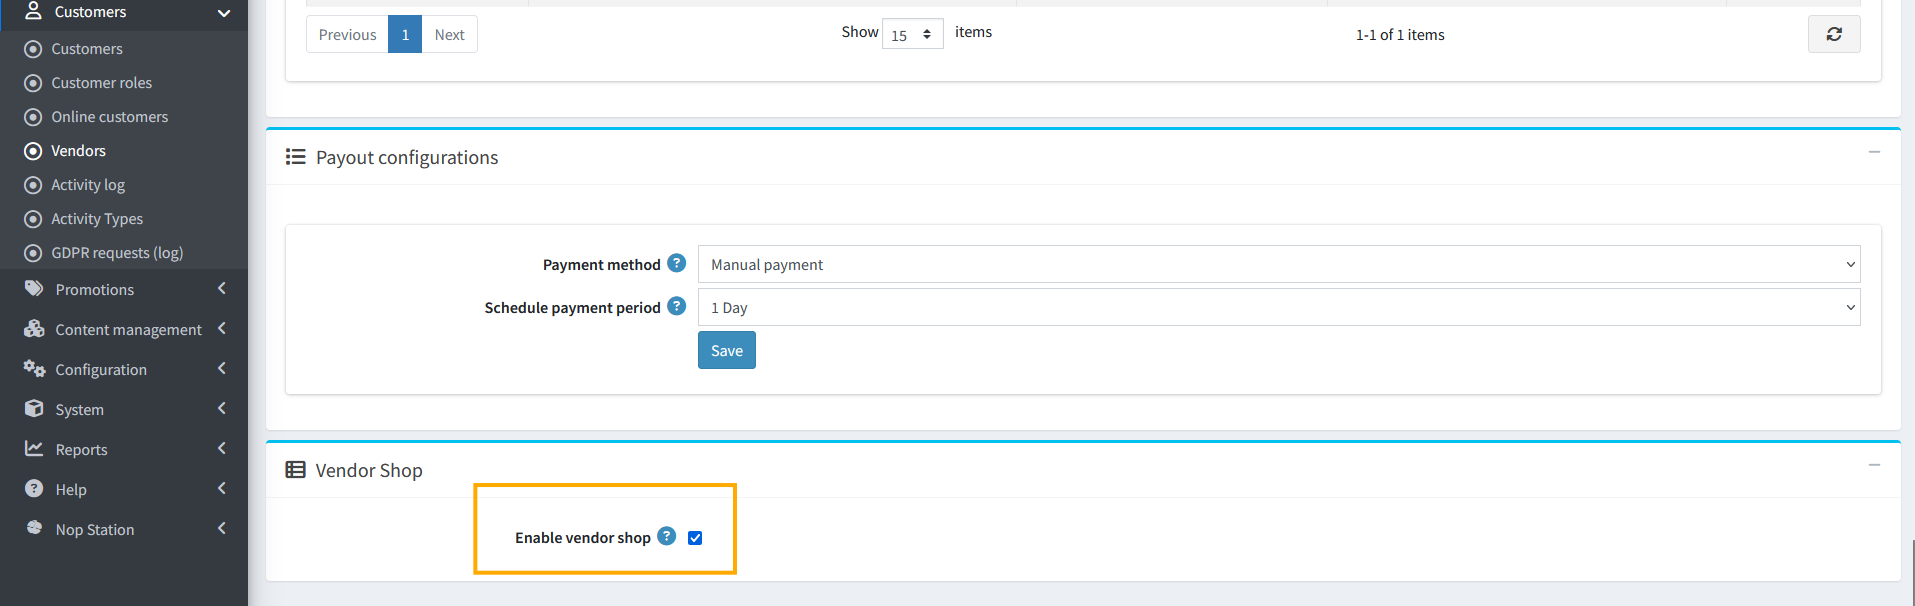
- Enable vendor shop: Admins can enable/disable vendor shop for a specific vendor
Setting up Vendor Shop for vendors
- After logging in Vendor Account, Vendors can customize the vendor shop
- Go to Nop Station > Plugins > Nop-Station Vendor > Vendor Shop > Vendor Profile
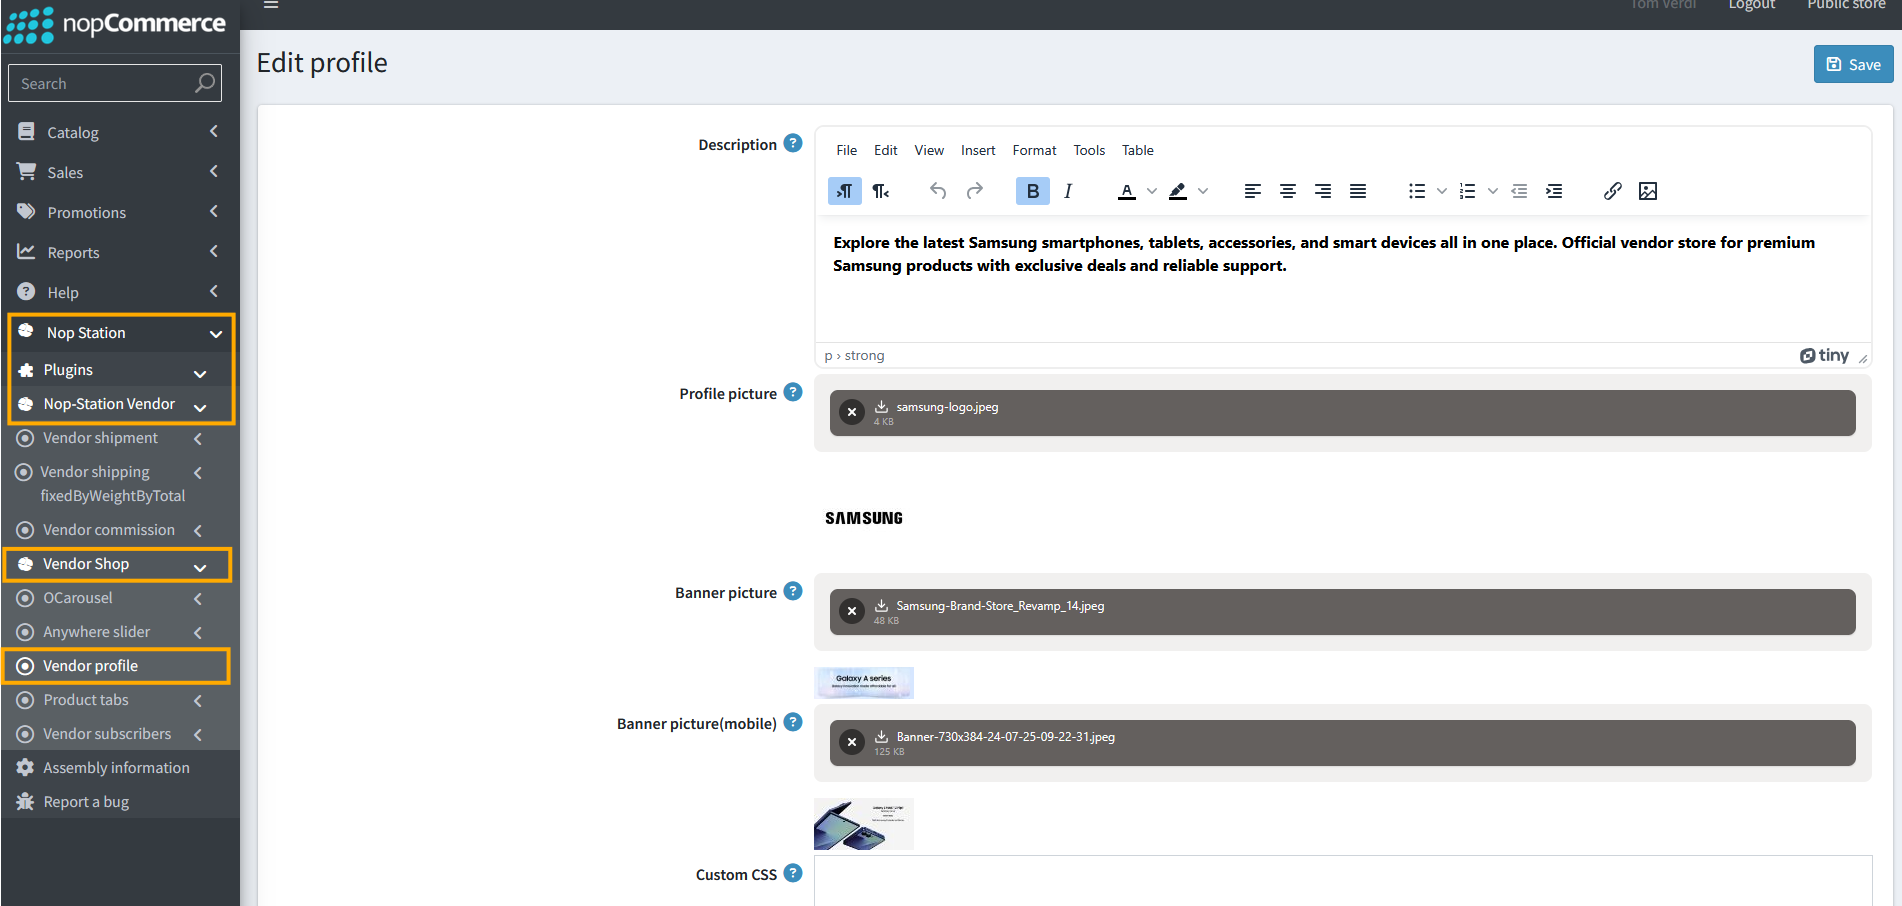
- Description: Vendors can add a description for the vendor shop
- Profile picture: Vendors can add a profile picture
- Banner Picture: Vendors can add a banner picture
- Banner picture (Mobile): Vendors can add a picture for mobile responsive banner
- Custom CSS: Vendors can add custom CSS for the profile page
Adding Carousels
- Go to Nop Station > Plugins > Nop-Station Vendor > Vendor Shop > O Carousel > Carousels
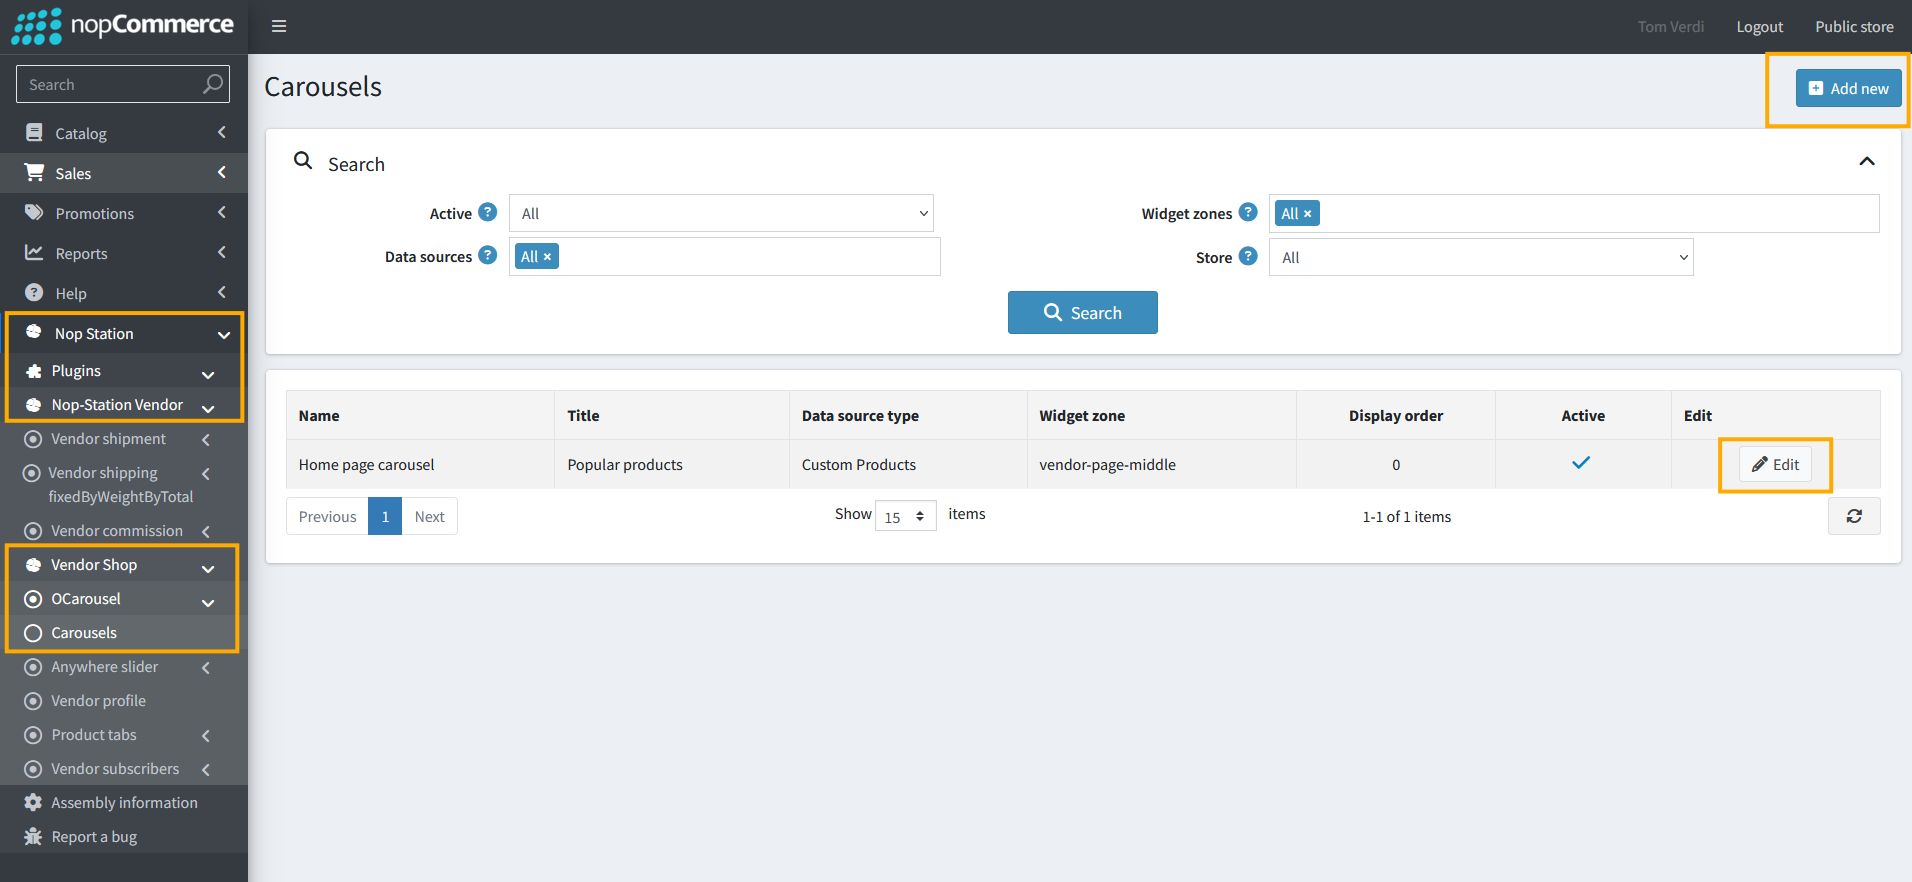
- Vendors can see a list of created carousels here
- Vendors can create a New Carousel by clicking the Add New button
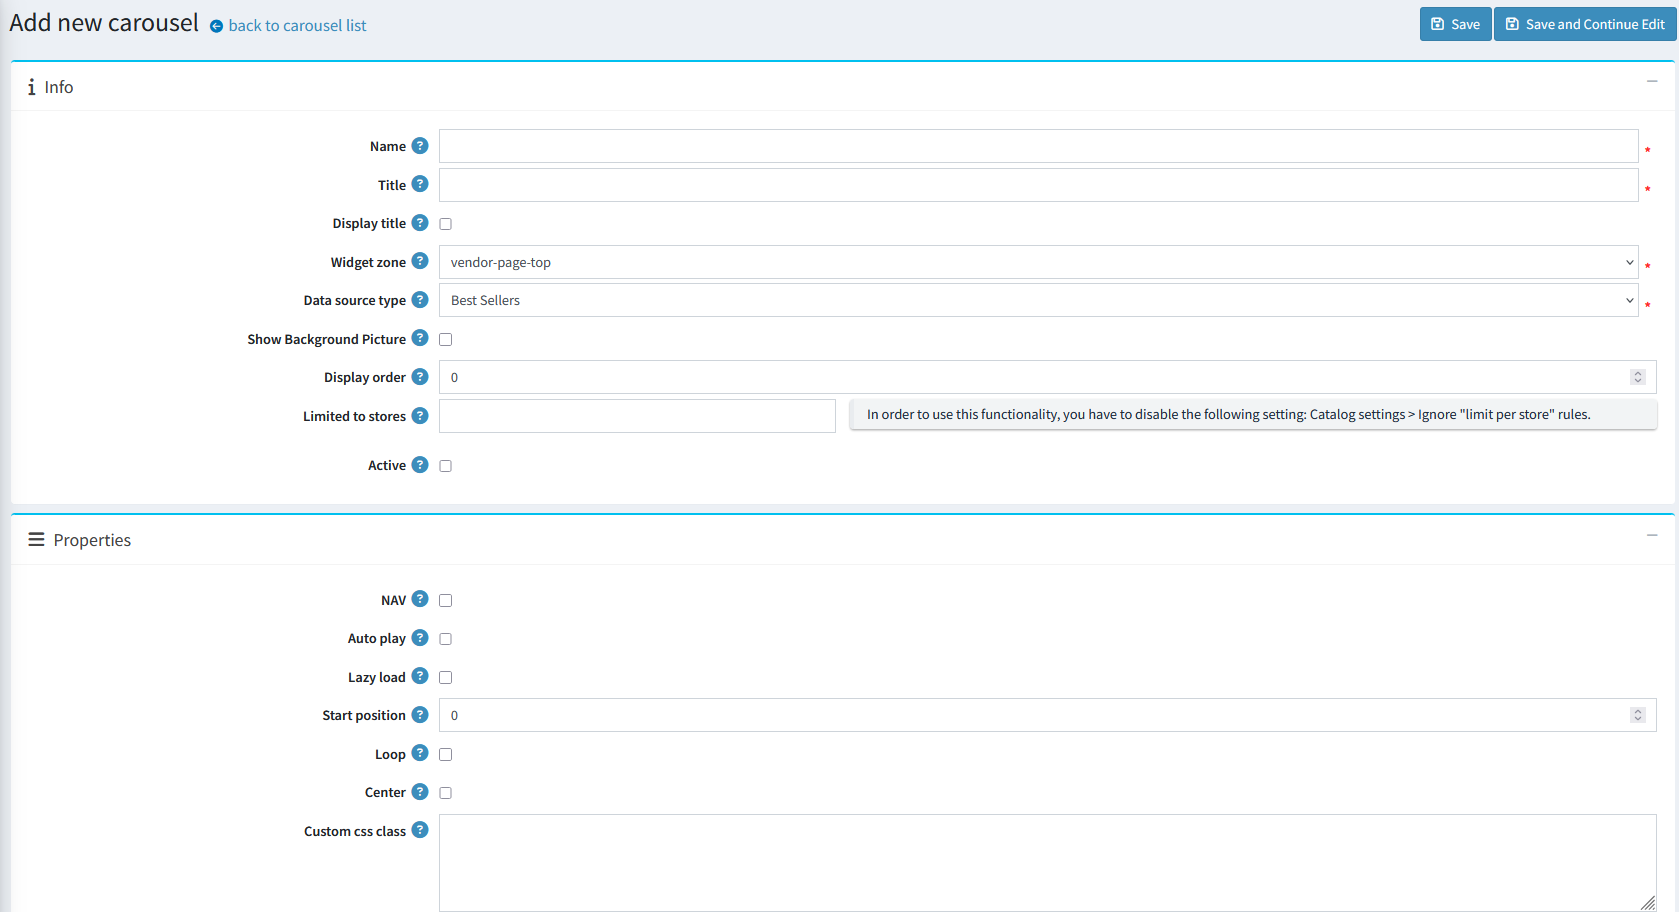
- Name: Vendors can add a name for the Carousel
- Title: Vendors can set the title for the carousel that is displayed on the storefront
- Display Title: Enable/Disable showing the carousel title
- Widget zone: Vendors can select the Widget zone where it is displayed
- Data Source: Vendors can select the data source for the plugin
- Show Background picture: Vendors can enable/disable showing a background picture for the carousel
- Display order: Vendors can set the display order for the Carousel
- Limited to store: Vendors can limit the visibility of the carousels to certain stores
- Active: Vendors can make the carousel Active/Inactive
- Created On: Created date
- Updated On: Last updated date
- Nav: Vendors can enable/disable prev/next buttons on the carousel
- Auto play: Vendors can enable auto play for the carousel
- Auto play timeout: Vendors can set auto play timeout duration
- Auto play hover mouse: Vendors can enable/Disable auto play hover mouse
- Lazy load: Vendors can enable/disable lazy load
- Lazy load eager: Vendors can set lazy load eager time
- Start position: Vendors can set start position for carousel
- Loop: Vendors can enable/disable looping
- Center: Vendors can enable/disable the center position item for the carousel
Adding Sliders
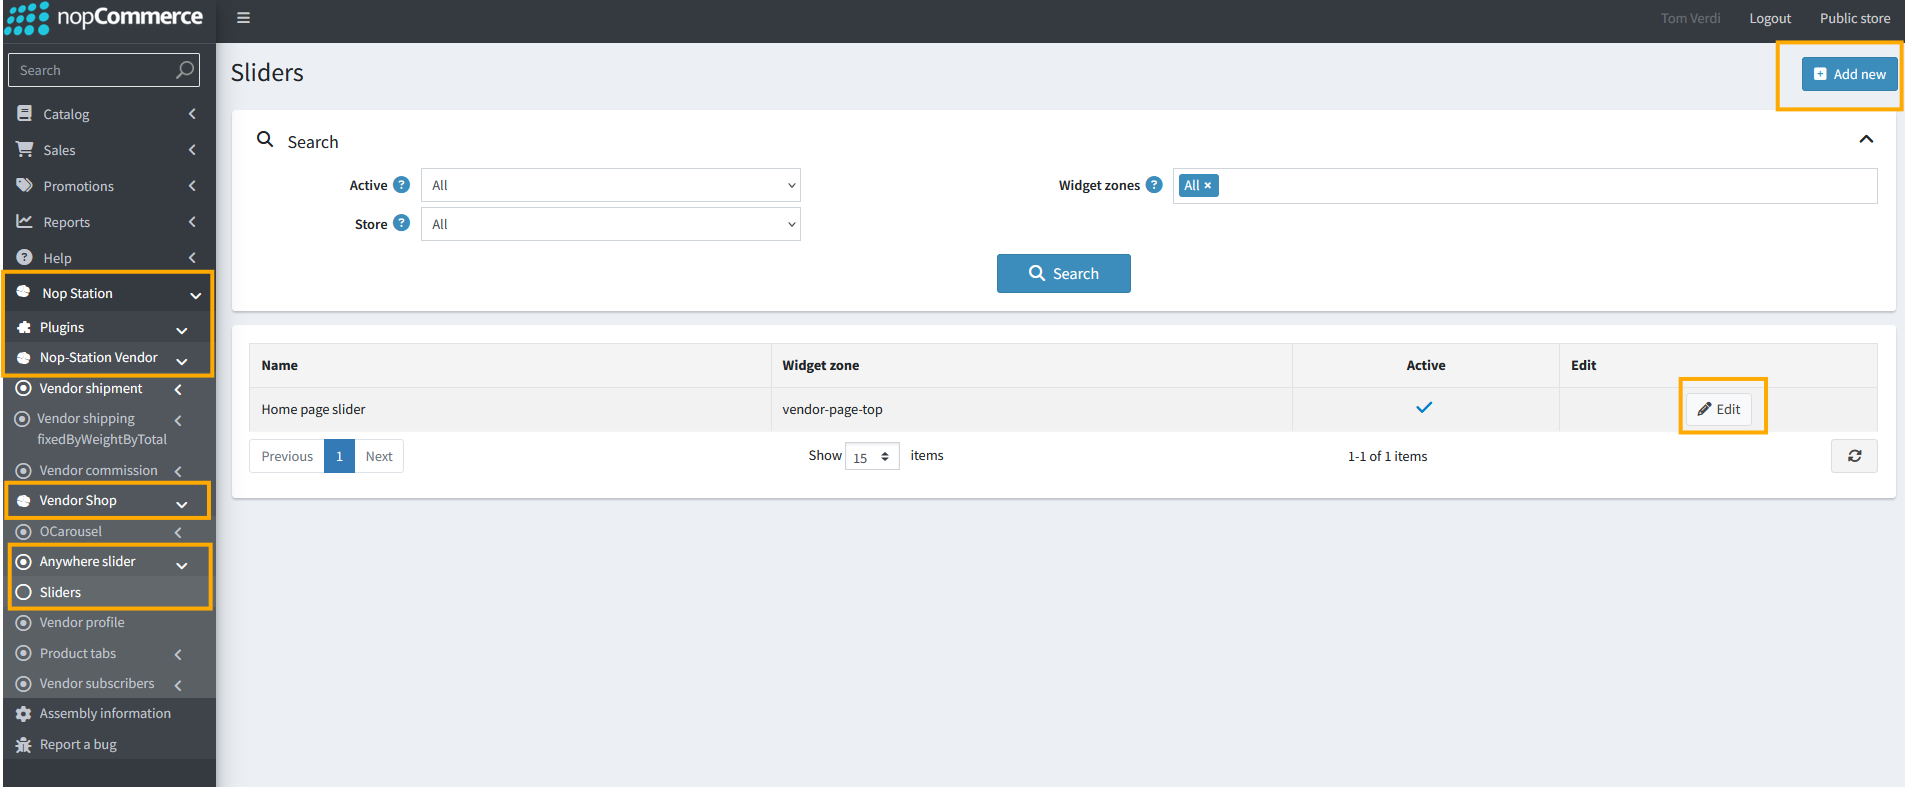
- Go to Nop Station > Plugins > Nop-Station Vendor > Vendor Shop > Anywhere Slider > Sliders
- Vendors can see a list for created Sliders here
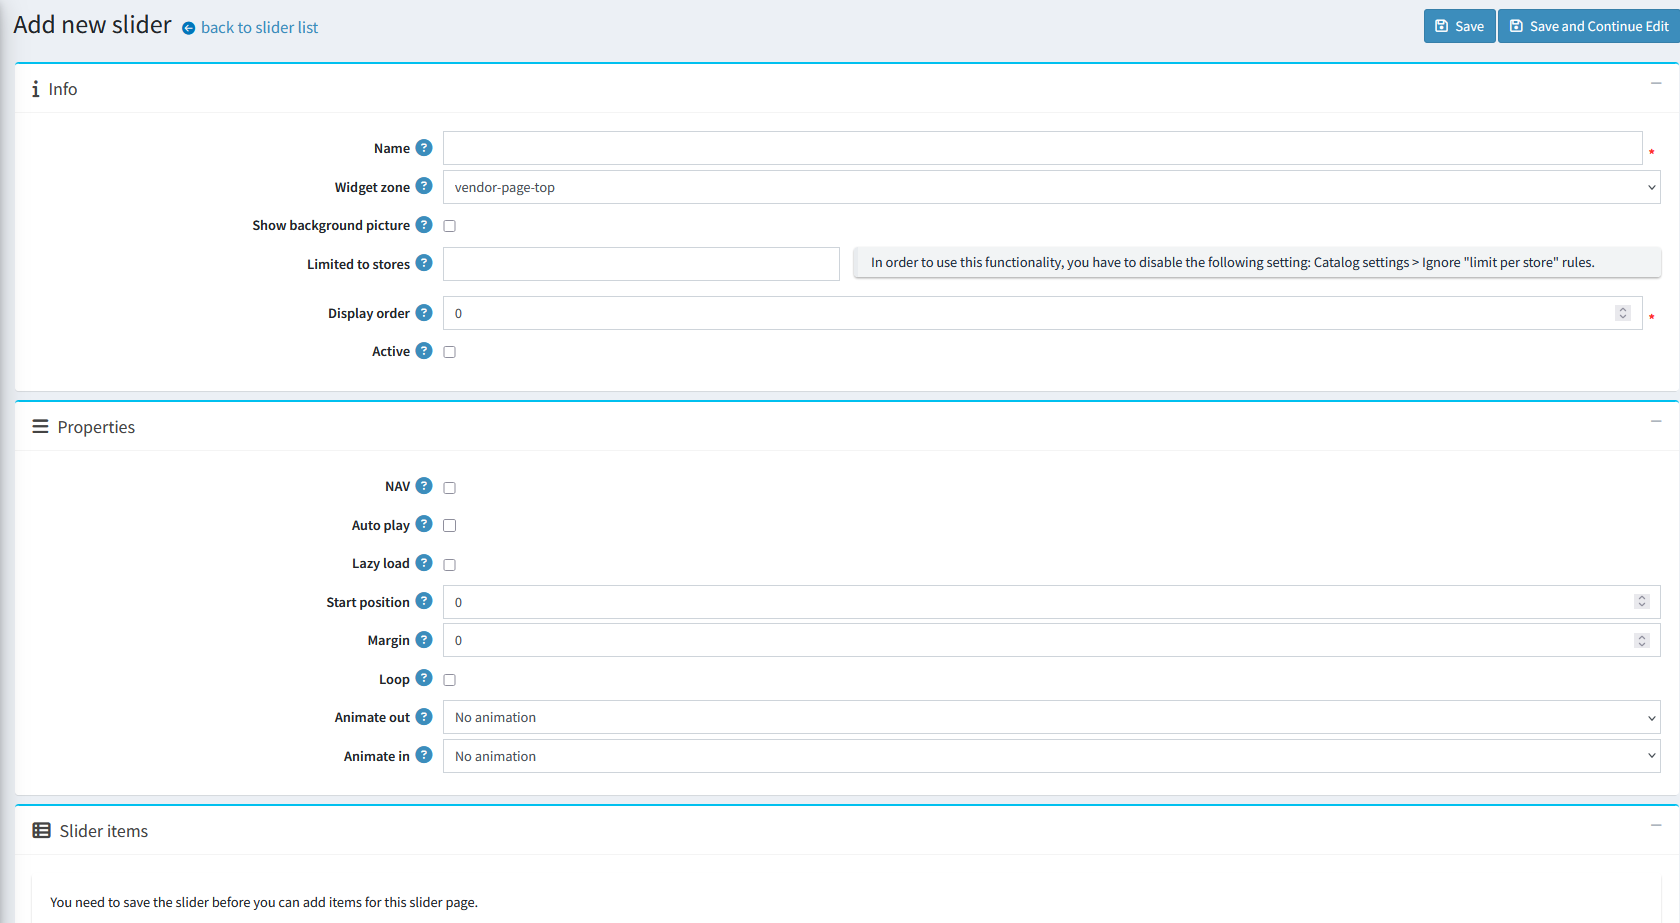
- Vendors can create new slider by clicking on Add New button
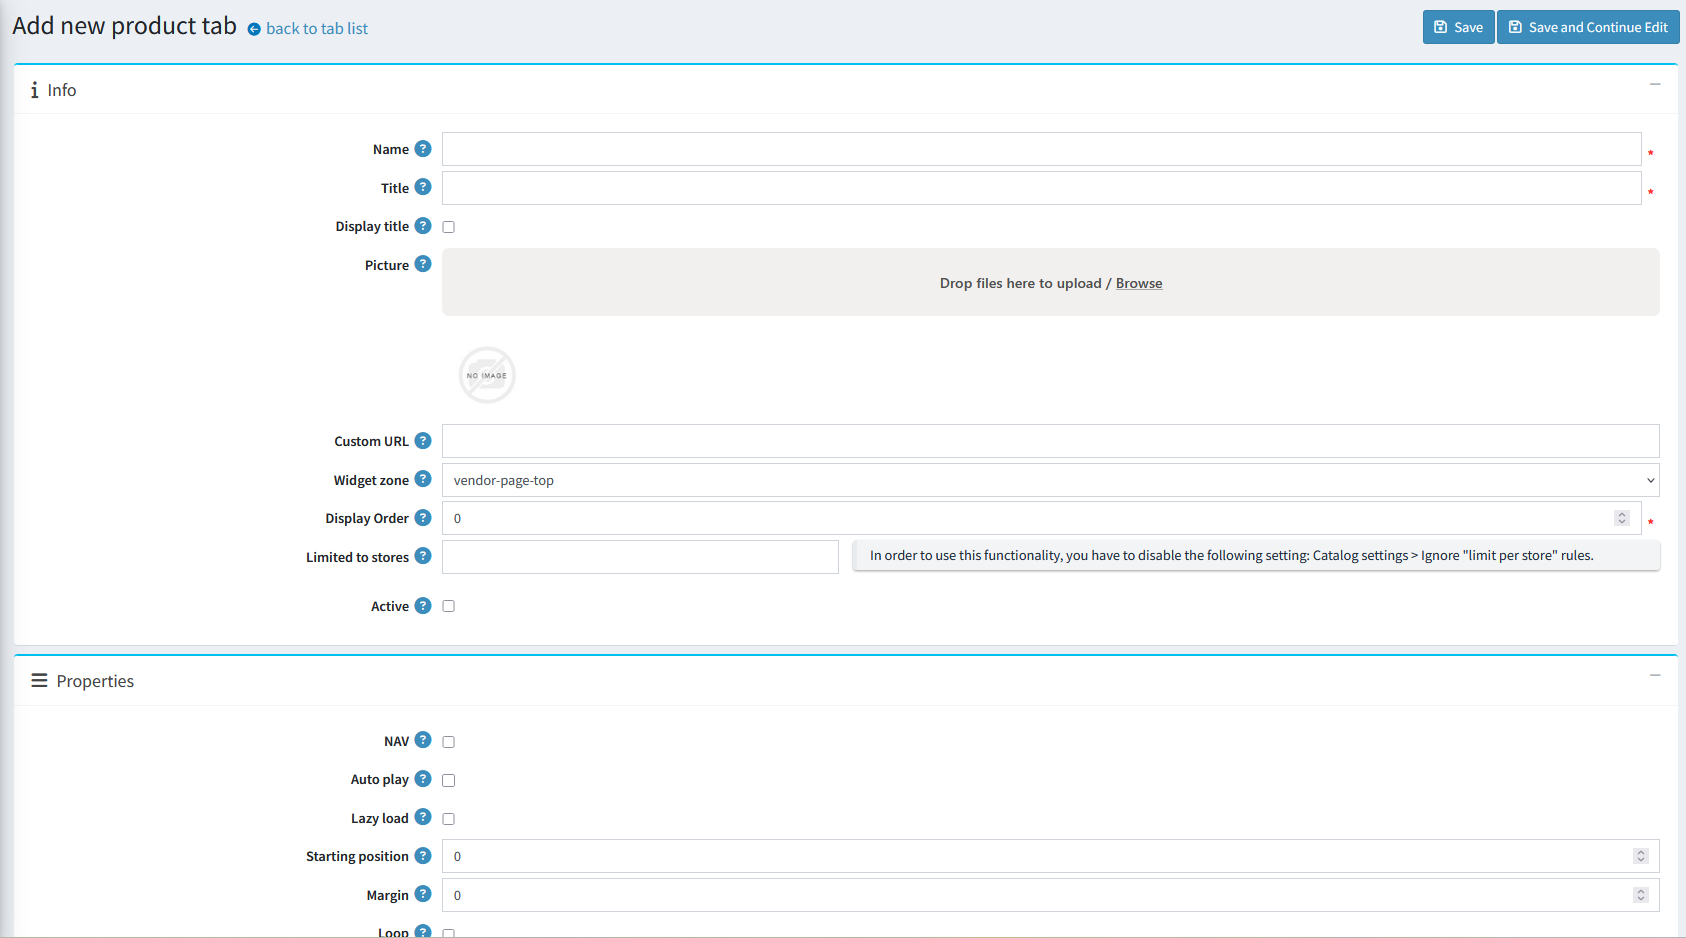
Adding Product Tabs
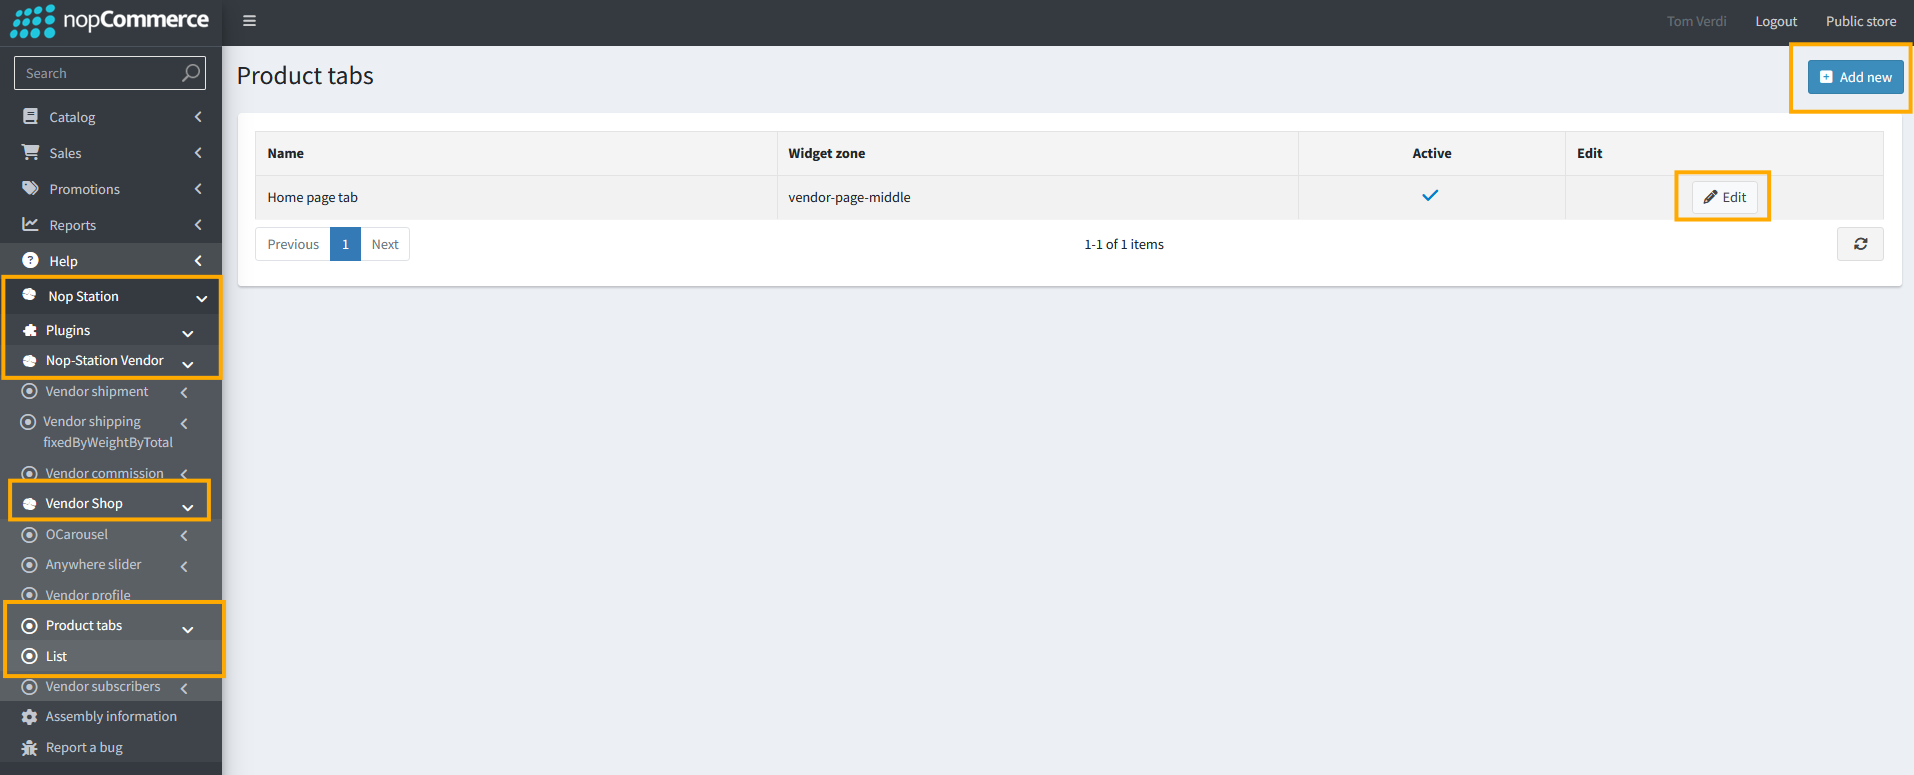
- Go to Nop Station > Plugins > Nop-Station Vendor > Vendor Shop Product Tabs > List
- Vendors can see a list for created Product tabs here
- Vendors can create a new product tab by clicking the add new button:
Vendor subscribers
- Go to Nop Station > Plugins > Nop-Station Vendor > Vendor Shop > Vendor Subscribers > Subscribers
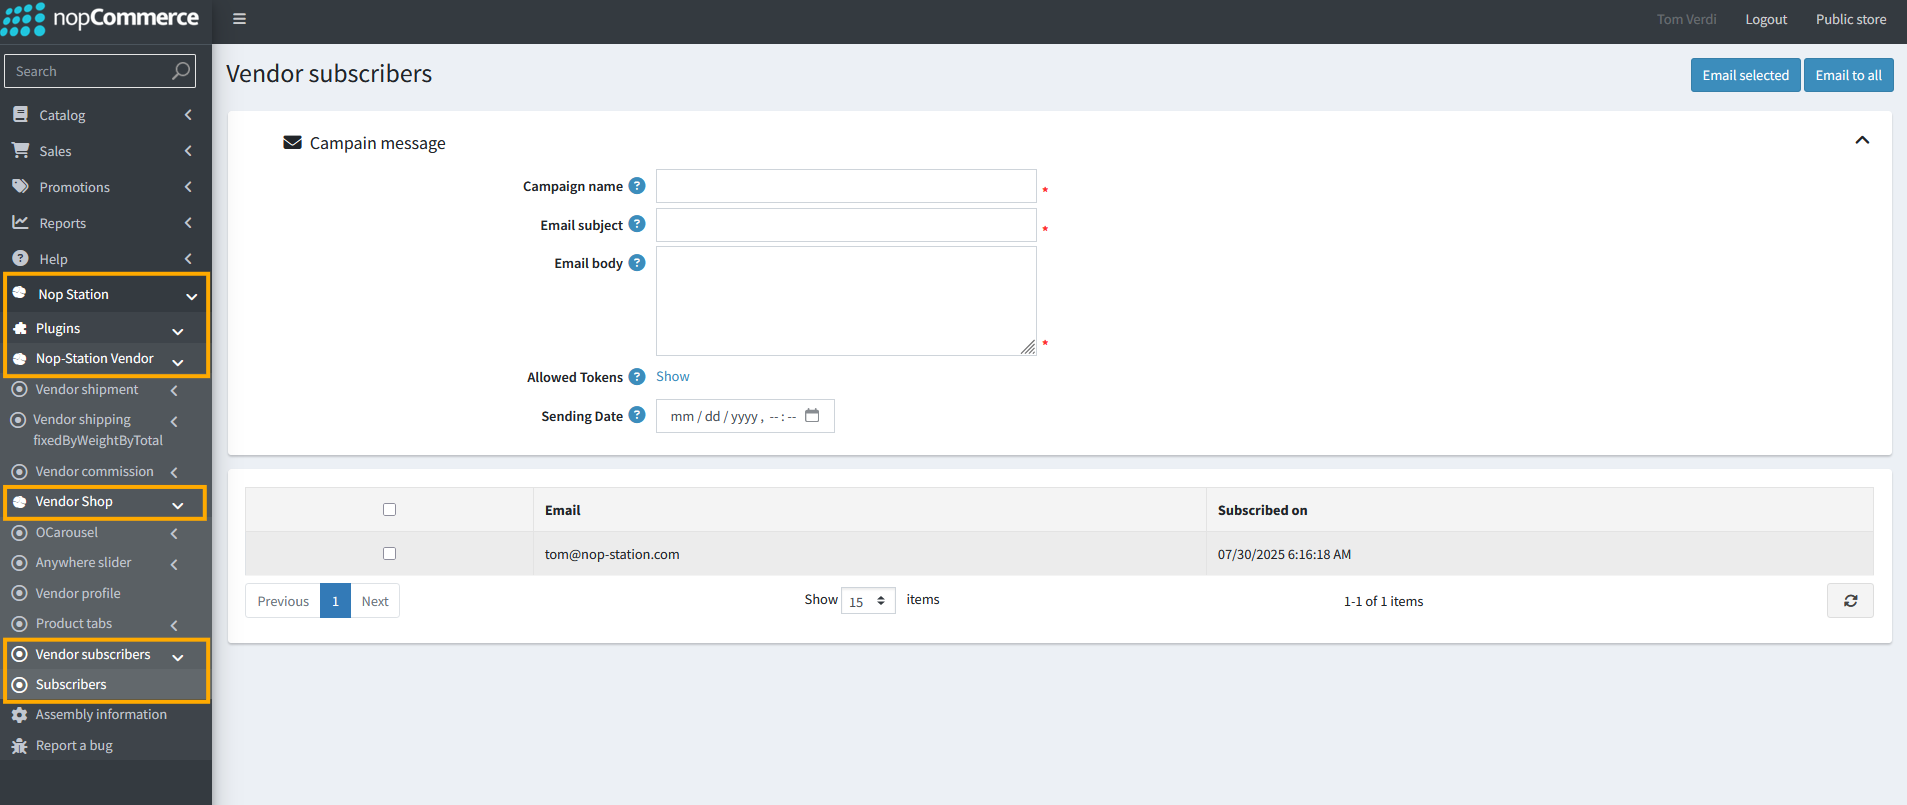
- Vendors can see a list of subscribed customers here
- Vendors can send email campaigns to selected customers or all subscribed customers
- Campaign name: Vendors can add a campaign name
- Email Subject: Vendors can add the email subject line
- Email body: Vendors can add the email boy here
- Allowed token: Vendors can see a list of available message tokens here
- Sending date: Vendors can set the sending date here
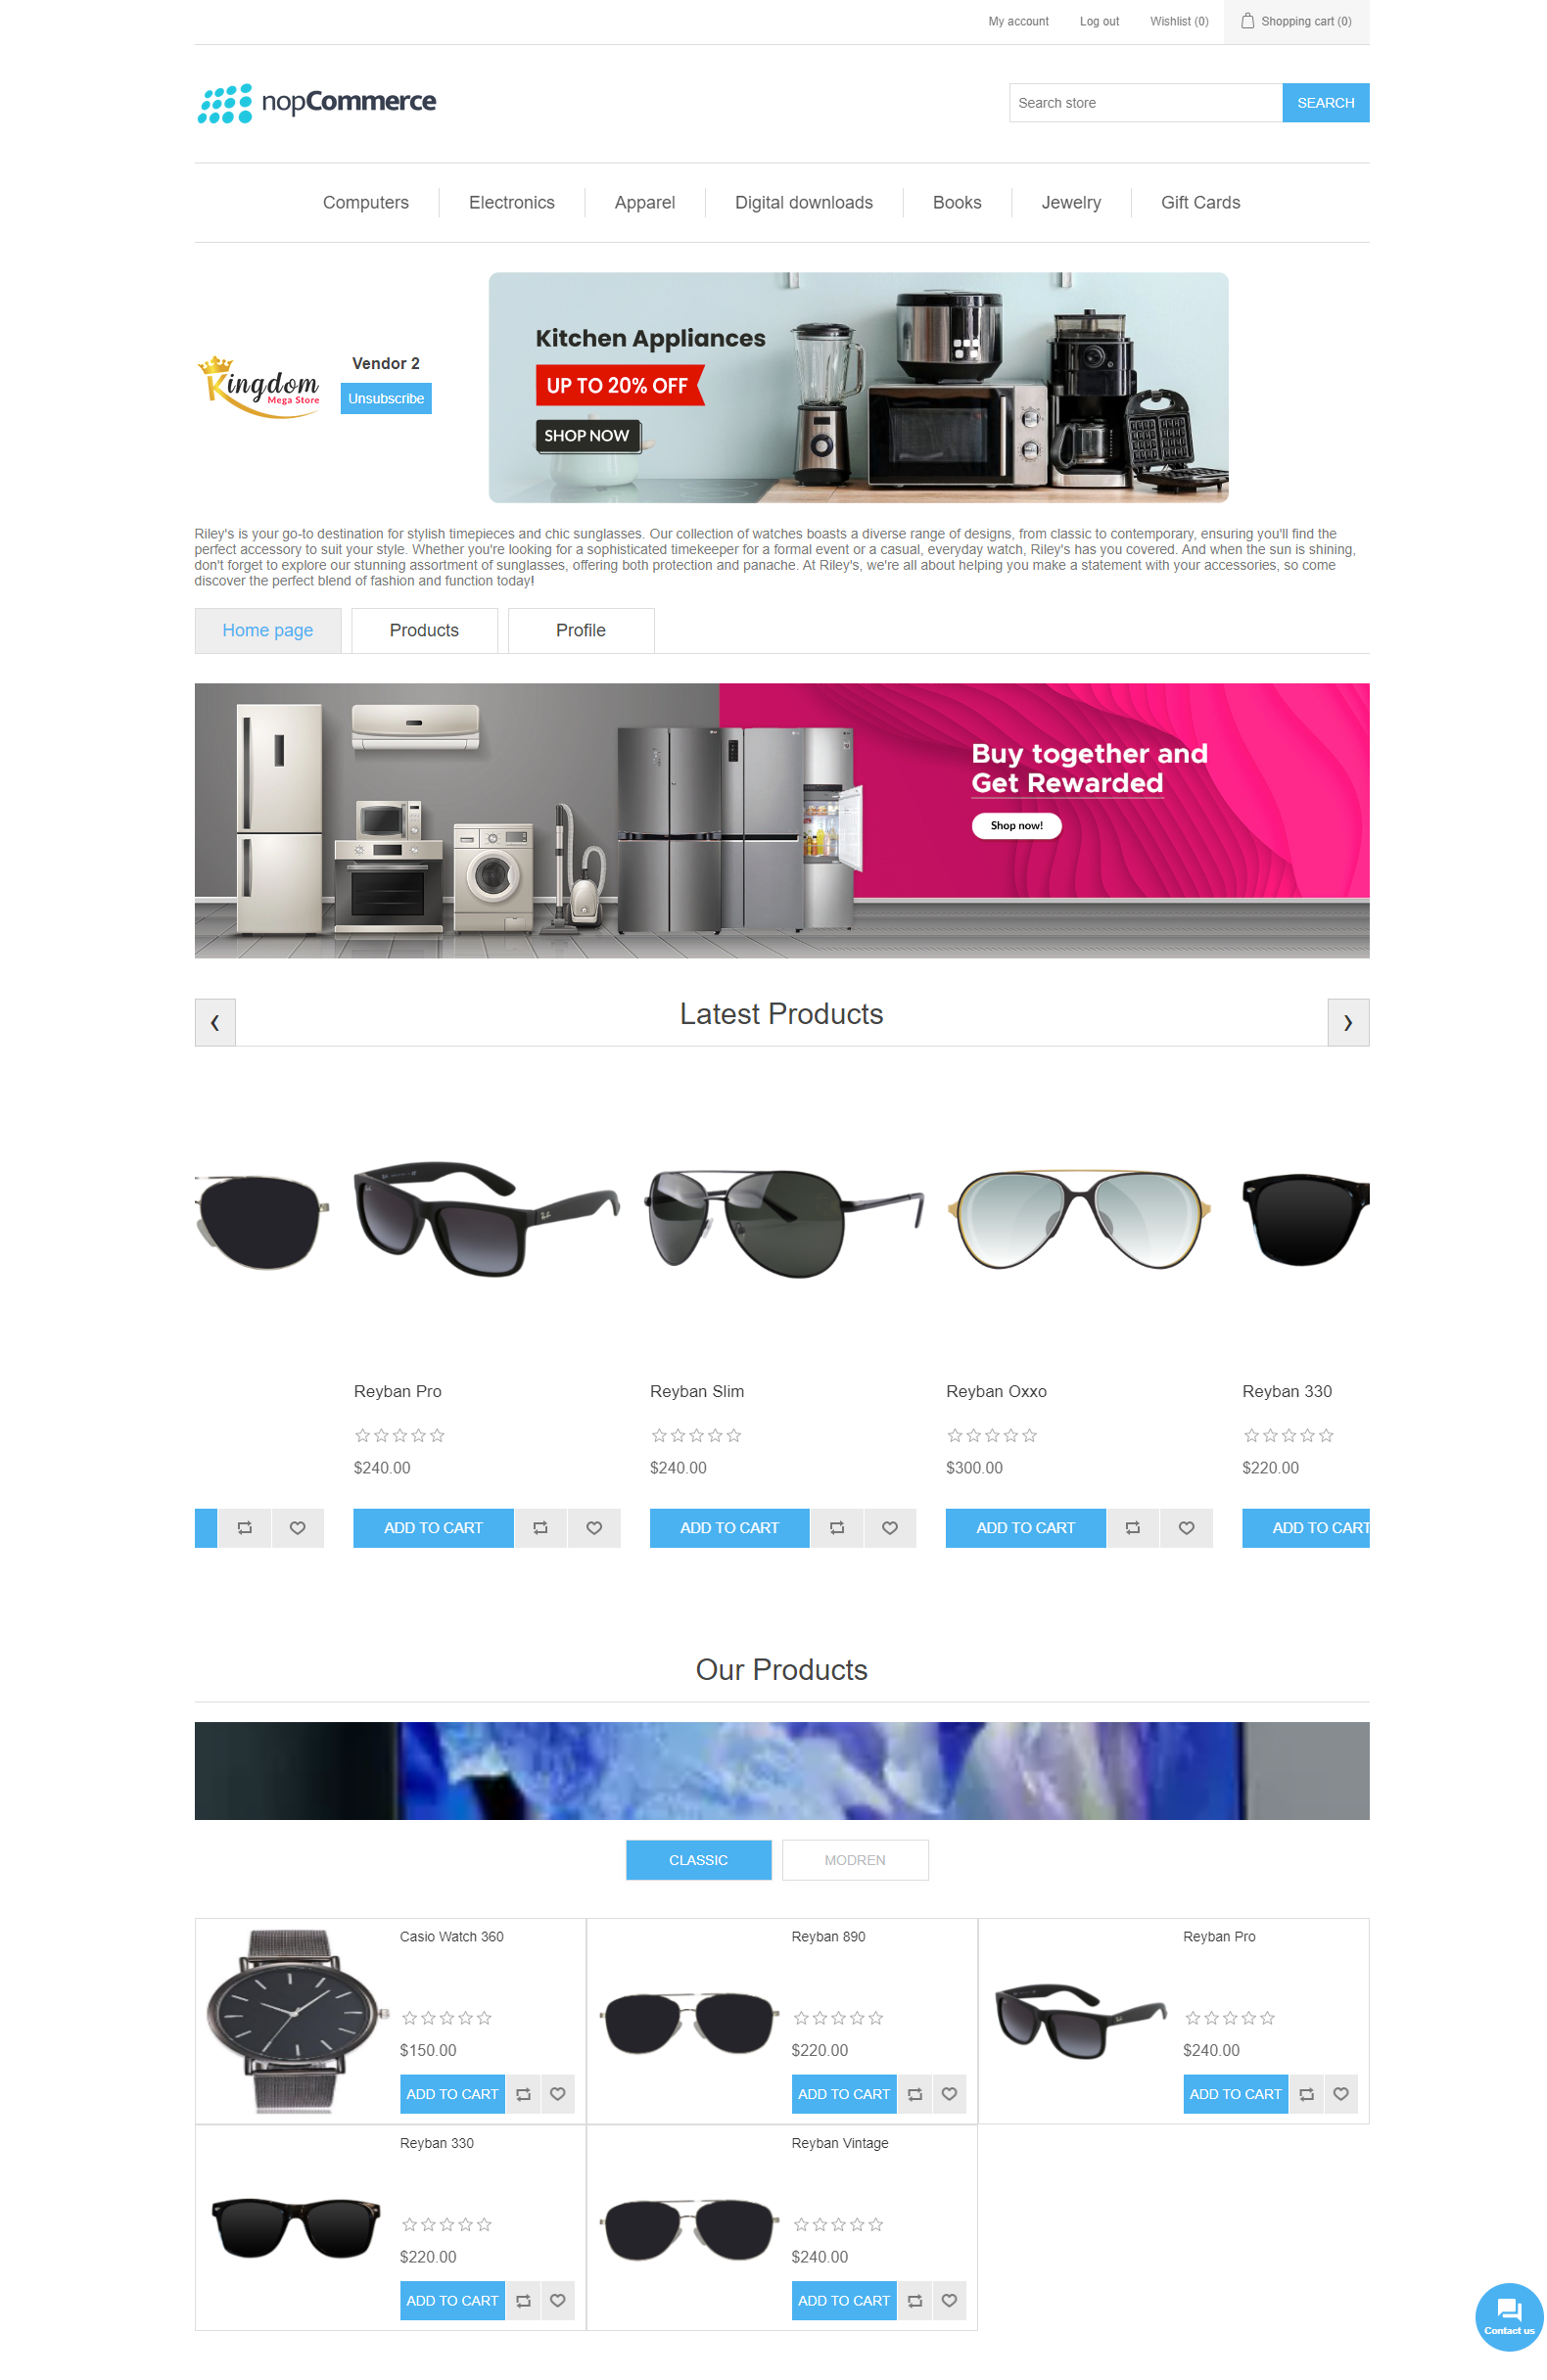
Vendshop on storefront
- Here is how the vendor shop will look on the storefront: